Push your Code to Azure DevOps Repository from Microsoft Visual Studio
Azure Repos is a set of version control tools that you can use to manage your code. Whether your software project is large or small, using version control as soon as possible is a good idea. Version control systems are software that help you track changes you make in your code over time.
Introduction
Azure Repos is a set of version control tools that you can use to manage your code. Whether your software project is large or small, using version control as soon as possible is a good idea. Version control systems are software that help you track changes you make in your code over time.
Things we will cover in this post:
- Create a Project in Azure DevOps
- Push our Code to the Azure Repo
Things we will not cover:
- Azure DevOps Services features and Pricing - It is free to use for Individuals. To know more about the services and pricing, visit here.
- Features of Azure Repo - To learn more about its features, visit here. The most important thing is, it provides unlimited private git repositories.
Prerequisites
Navigate to Azure DevOps Web Portal
To navigate to Azure DevOps web portal, you can use the following link: Azure DevOps Portal. If you do not have an account, you can sign up for free. Once you log in, you will be directed to your Azure DevOps dashboard.
Sign in to your Organization (https://dev.azure.com/{Your_Organization}).
Sign in to your project (https://dev.azure.com/{Your_Organization}/{Your_Project}).
Create Project in Azure DevOps
First we need to create a project, then only we can create a repo. There can be multiple repos in single project. After you login to Azure DevOps, select your Organization. Organization is auto created when you sign up. You can create more organizations.
Single Organization can have multiple projects and single project can have multiple repos. I have created two organization. One of them is created by default.
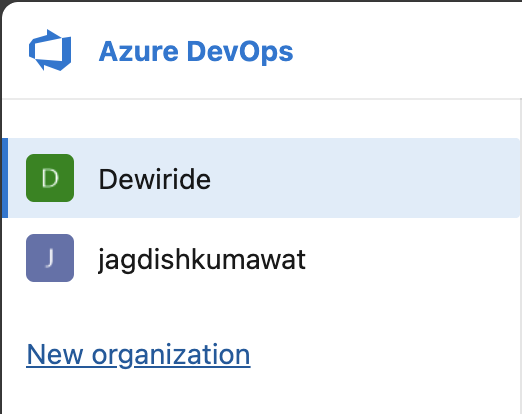
If you coming for the first time to this portal, you will be asked to create a new project on the home screen. For returning users, you will see your projects listed.
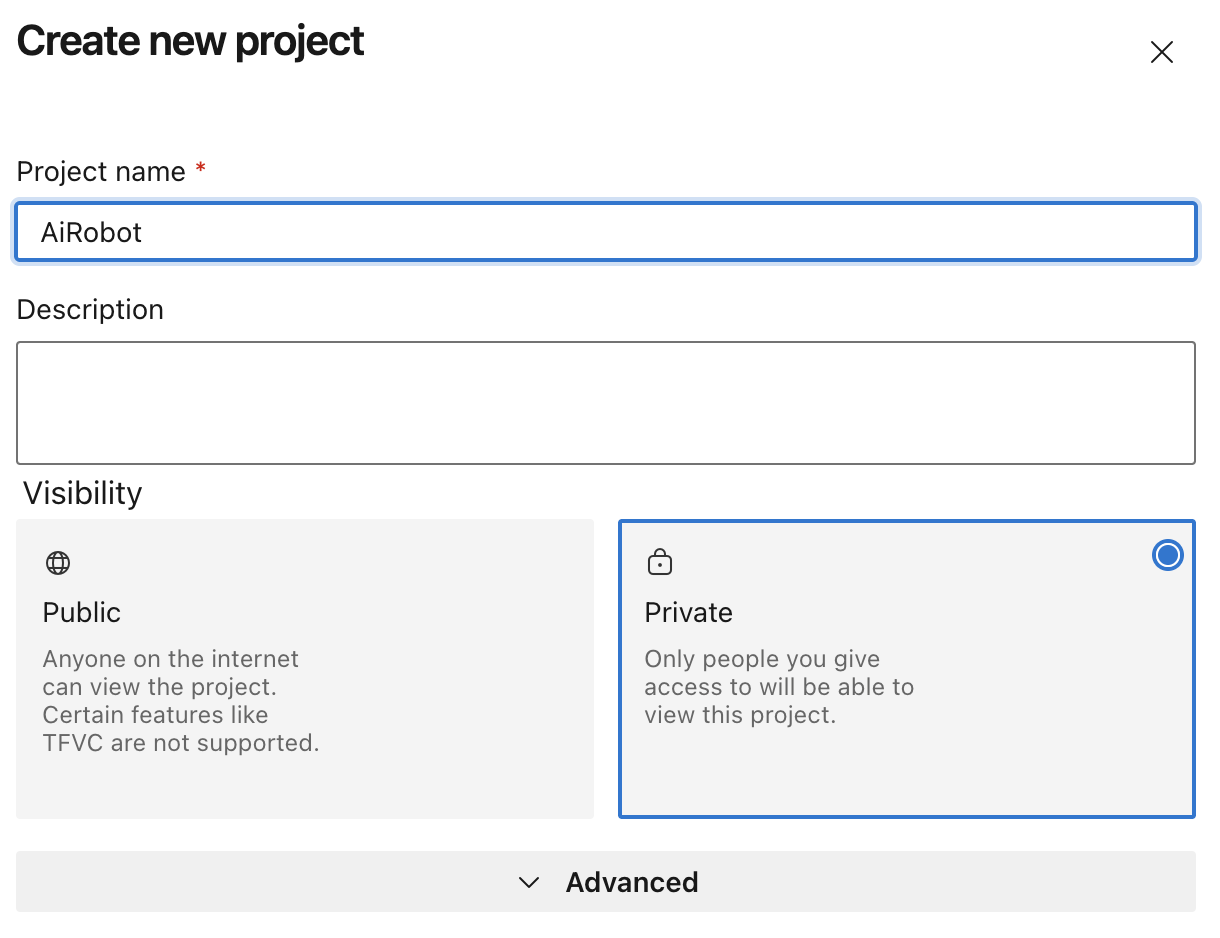
Give a name for your project, select the visibility and create project. When project is created, you will land up in a similar dashboard as below.
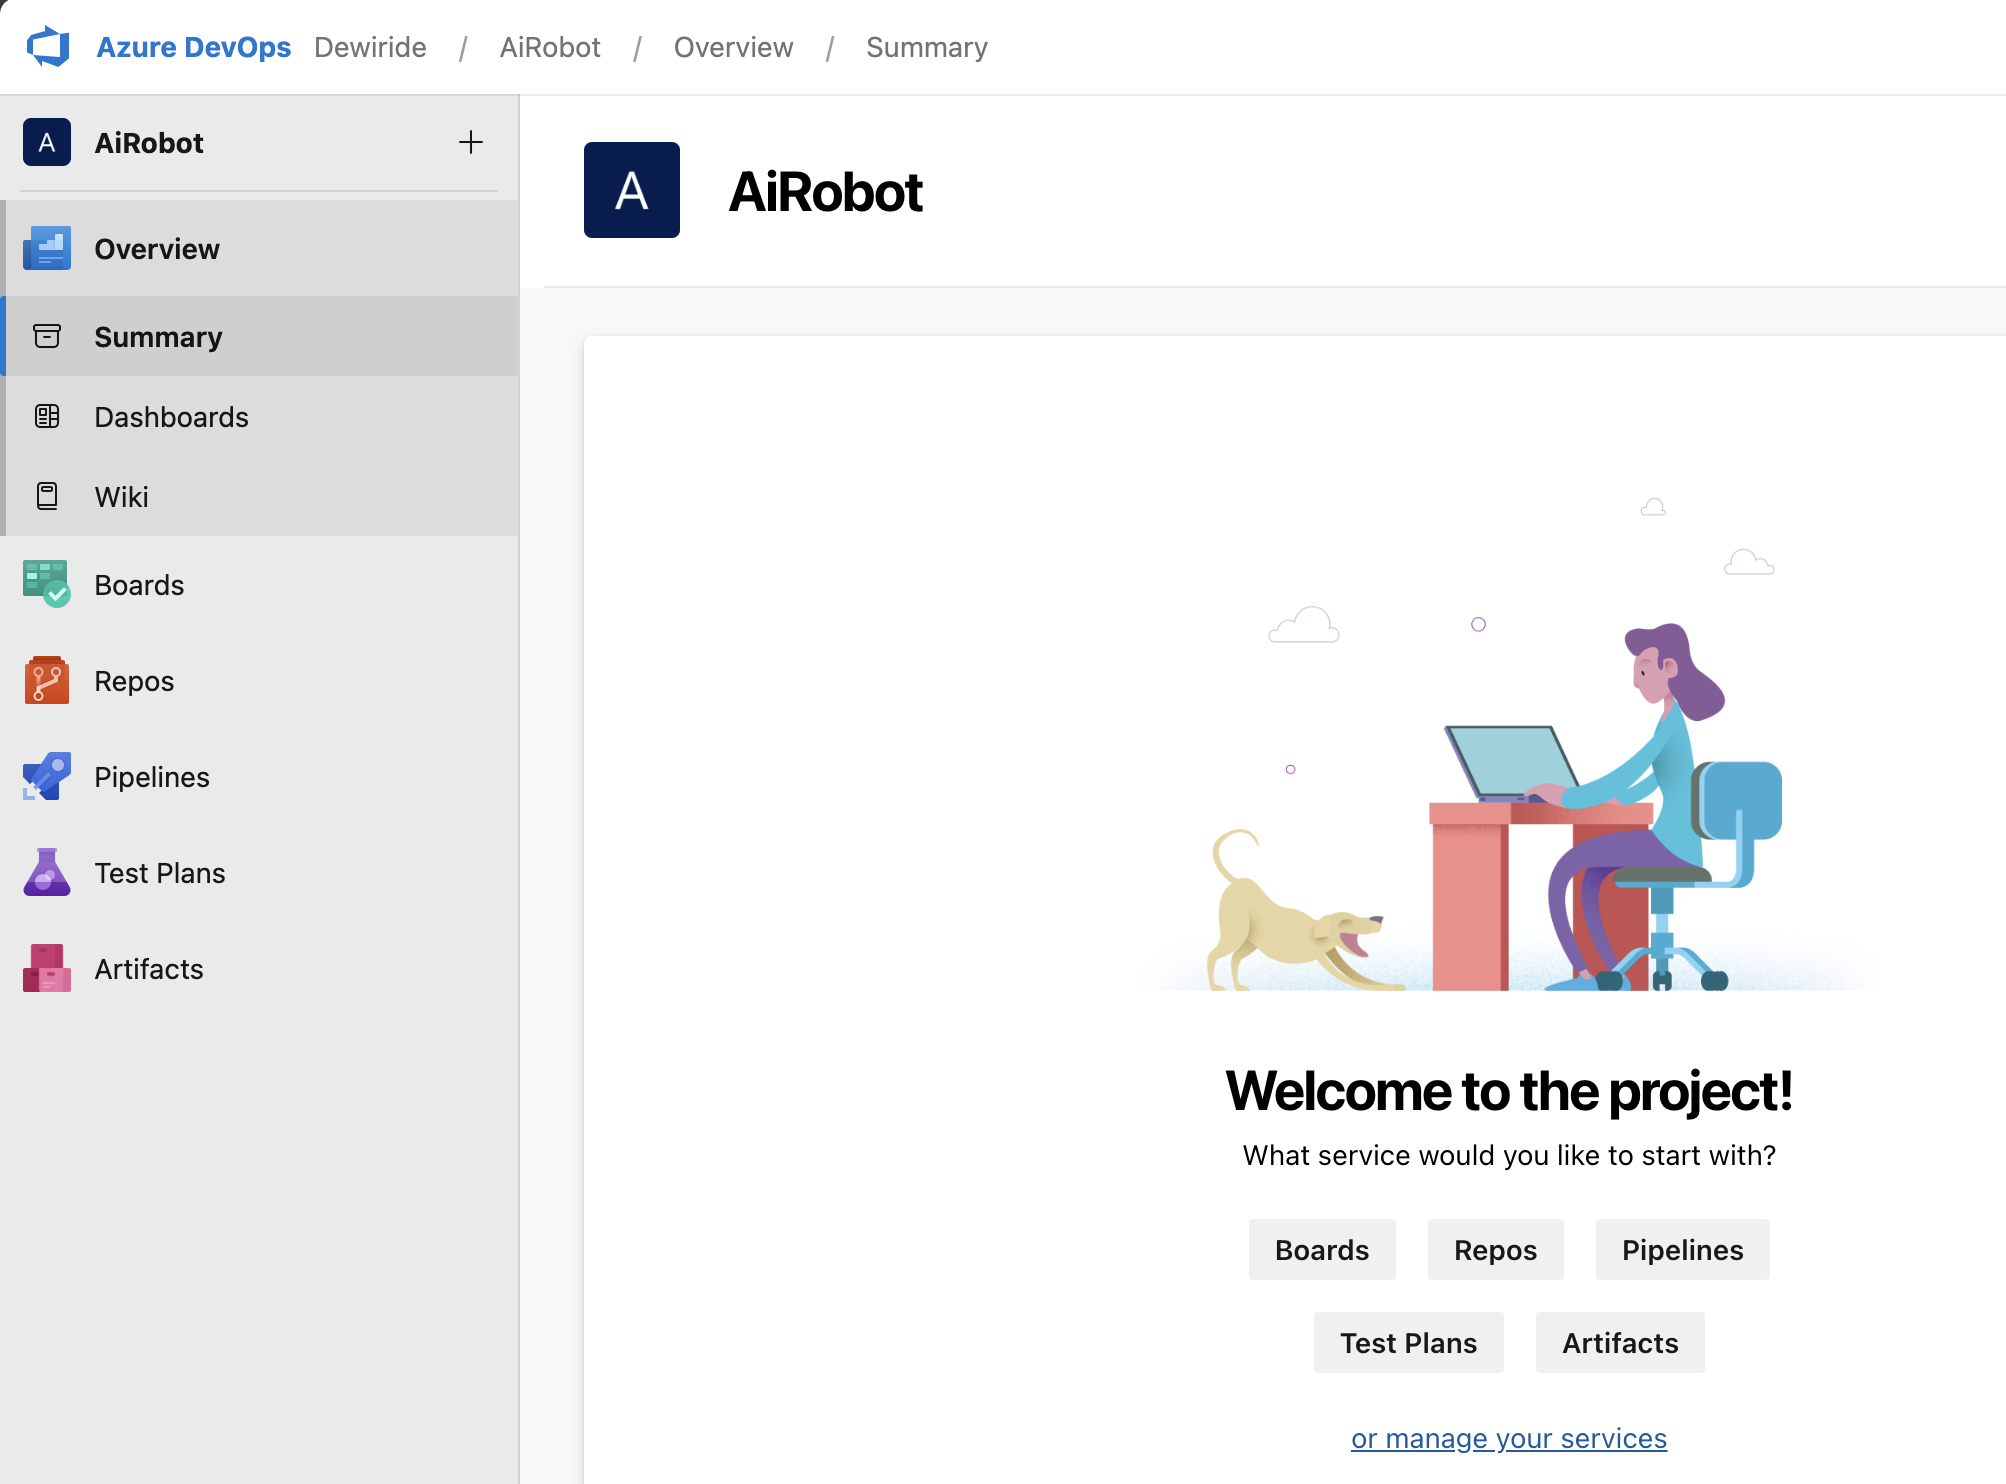
In the left side menu, click on Repos. A default repository is auto created, you can select from the top menu. Once you select, it will give instructions to Push existing repos or import a repo or clone.
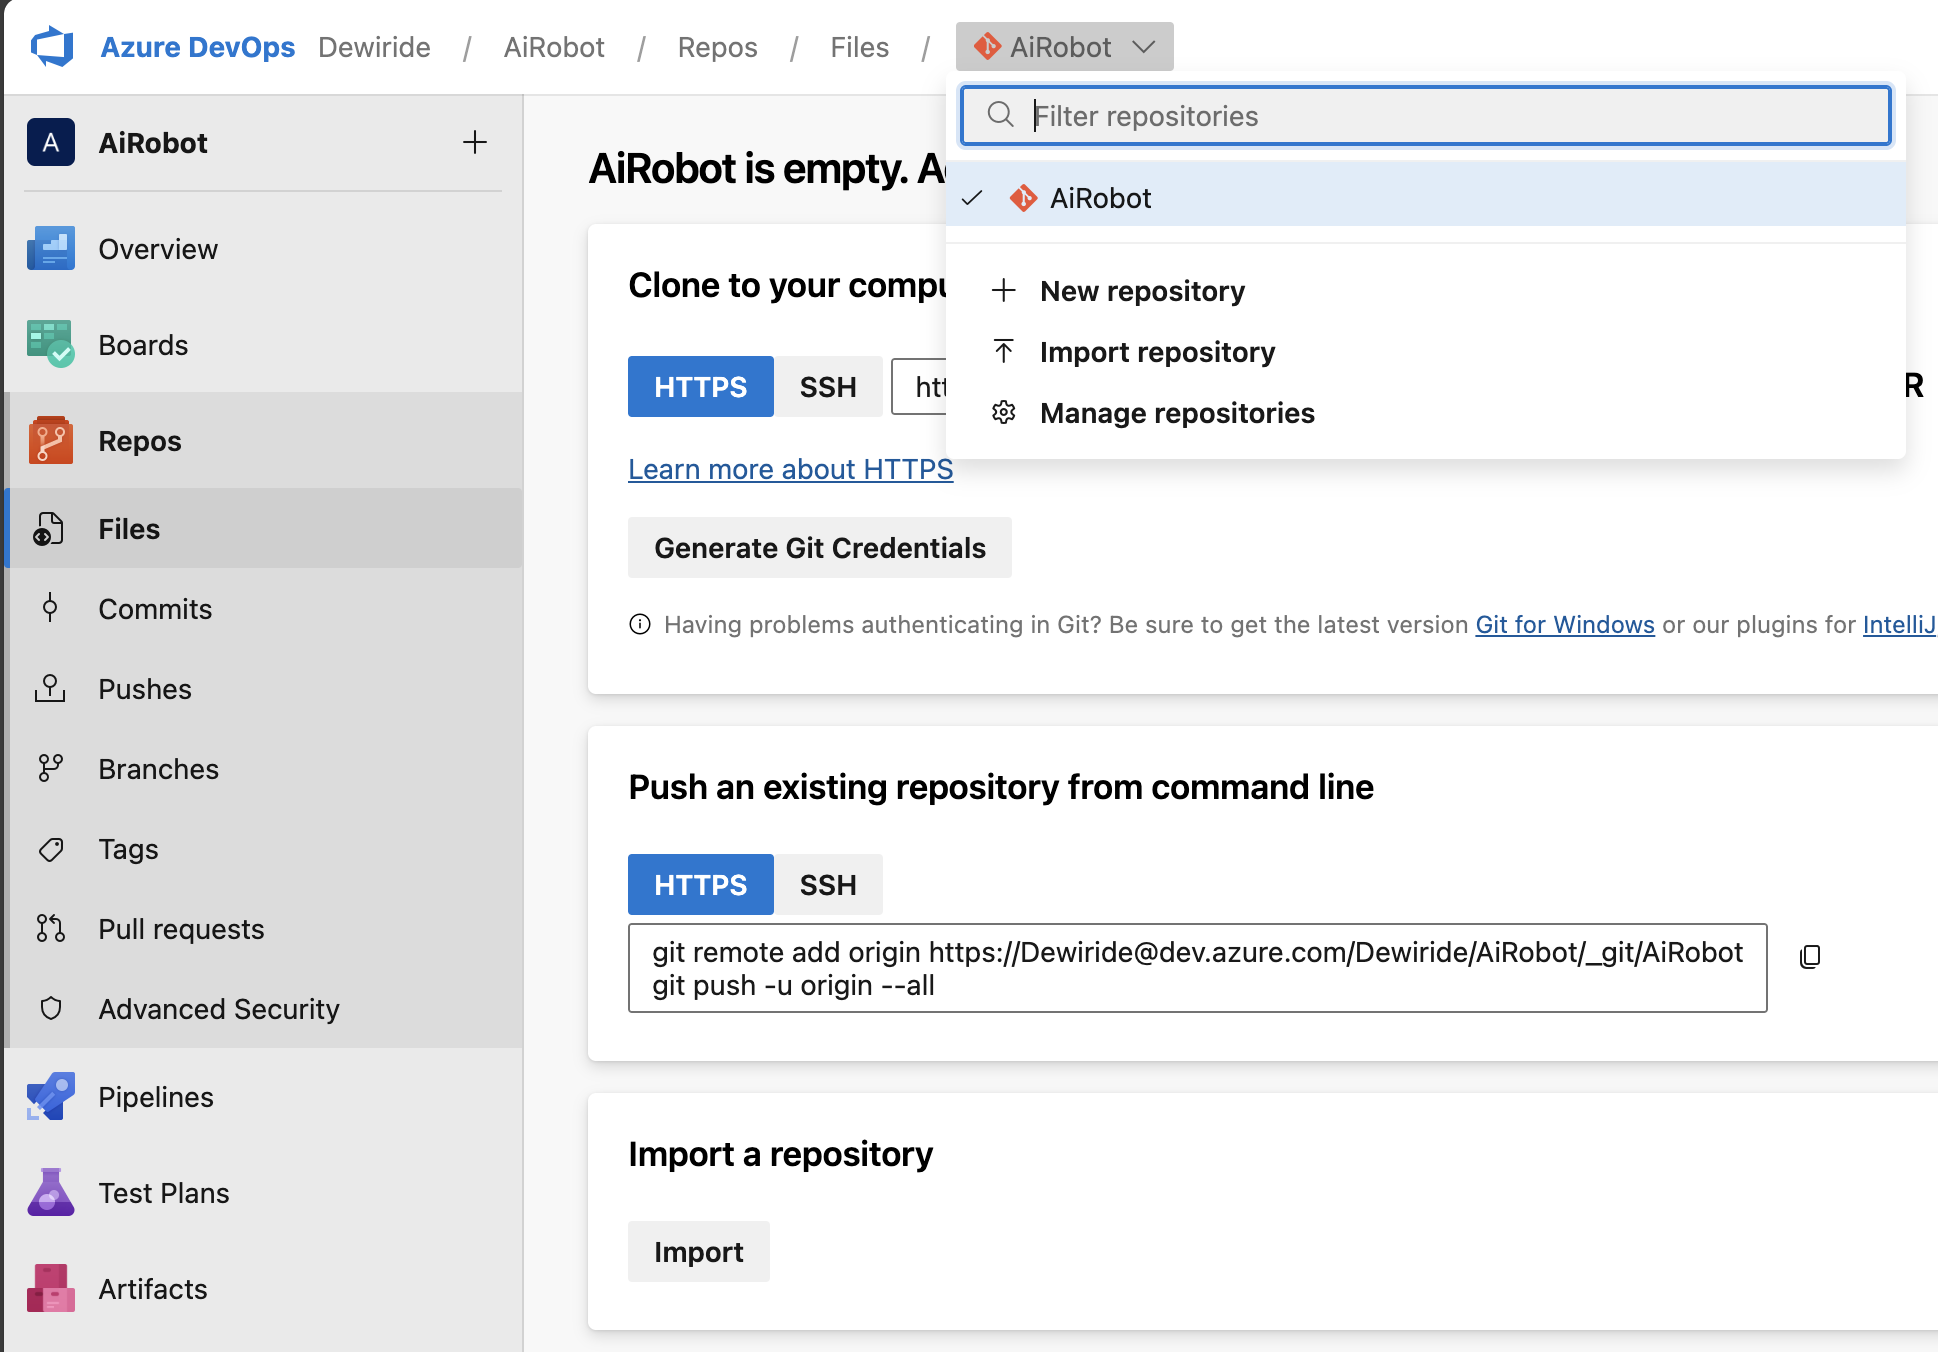
It will say that, your repo is empty.
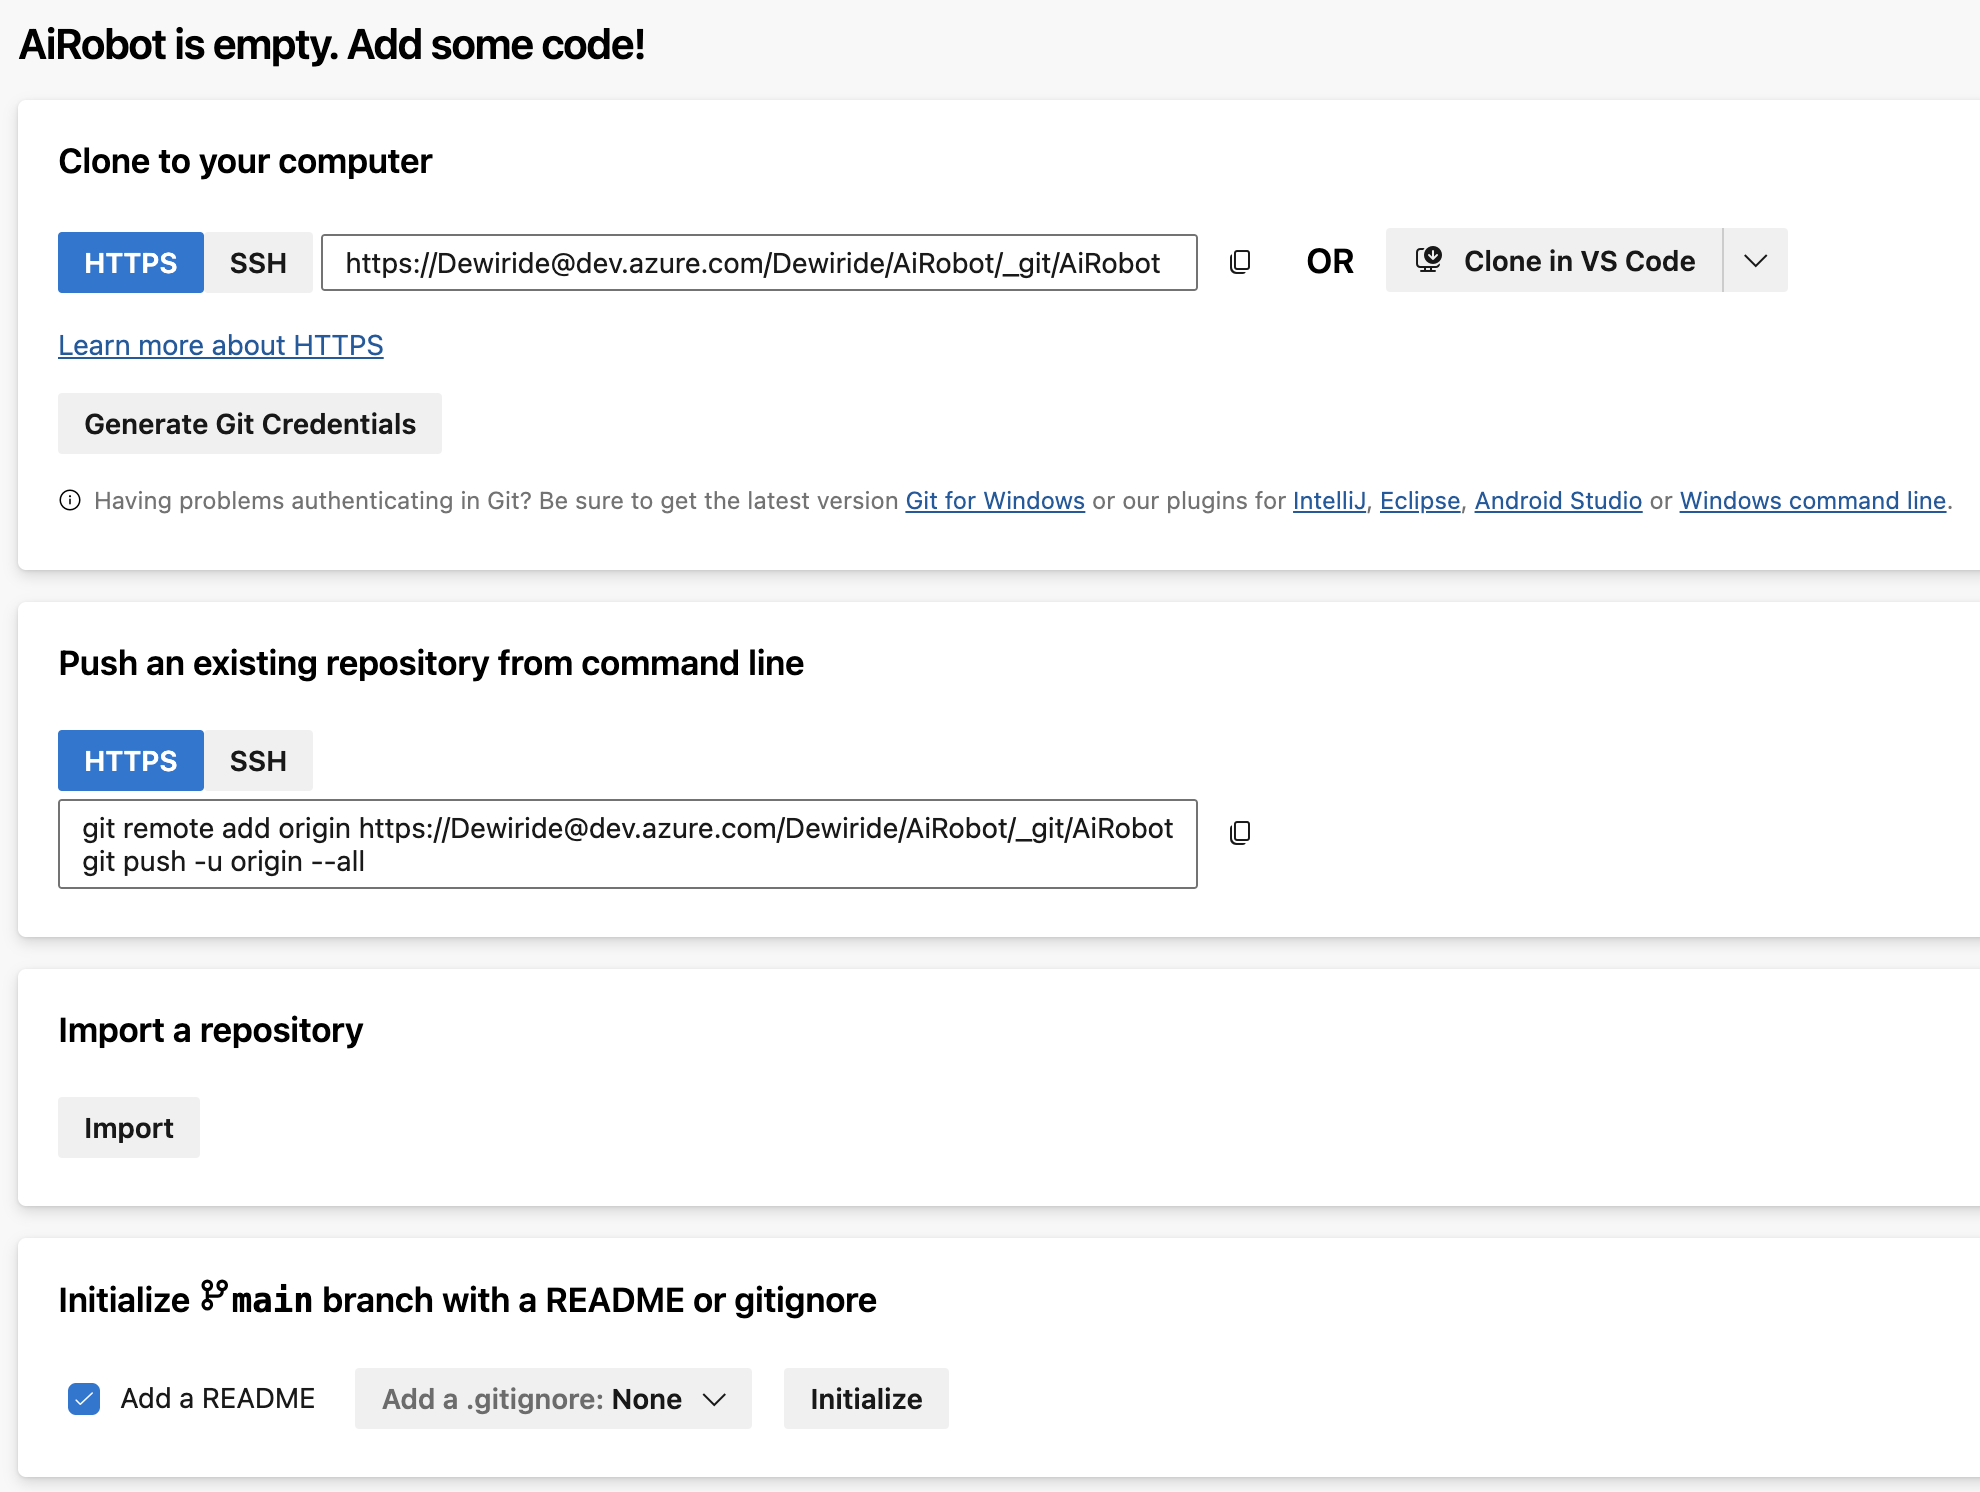
Now let us go ahead and add some code.
Push your Code to the Azure Repo
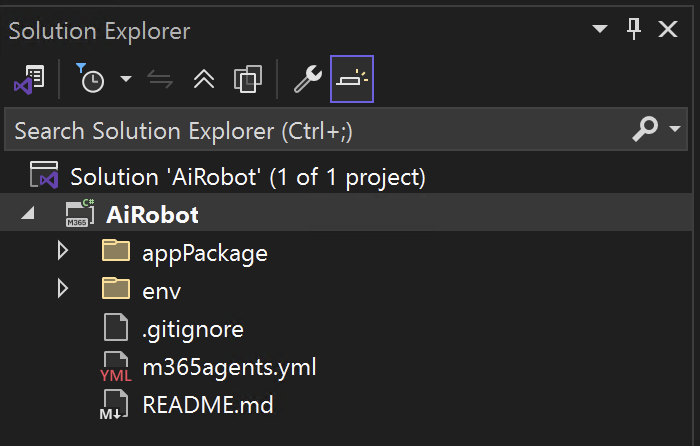
I hope you have the project or code changes ready in the Visual Studio to be pushed to Azure Repo. You will have similar project like this with a Solution and under the solution one or more projects.
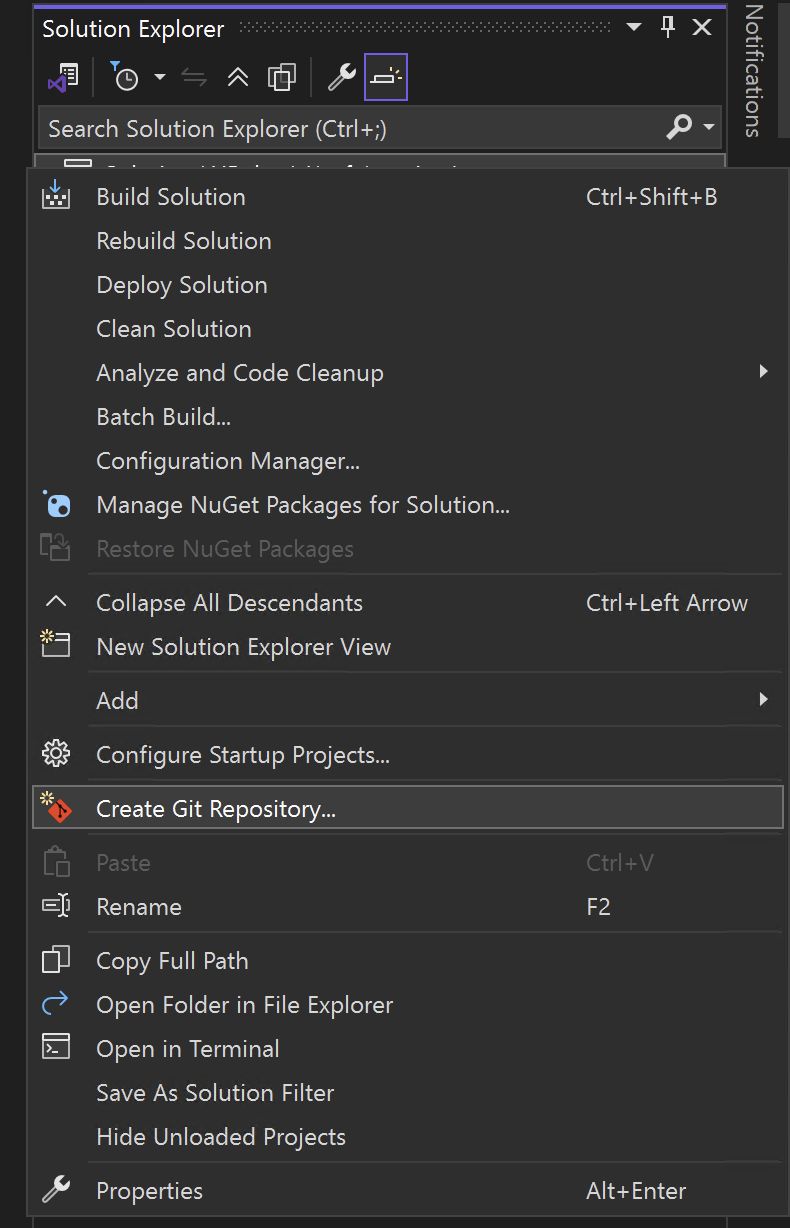
Right click on the solution file and click Create Git Repository. On the older version of Visual Studio, it will be Add Solution to source control.
If you are using older version of Visual Studio, you will see that, as soon as you click, an empty git repo is created locally and a blue lock symbol comes in front of every file and folder. For latest visual studio, a Git popup will be shown asking to create a Git repository.
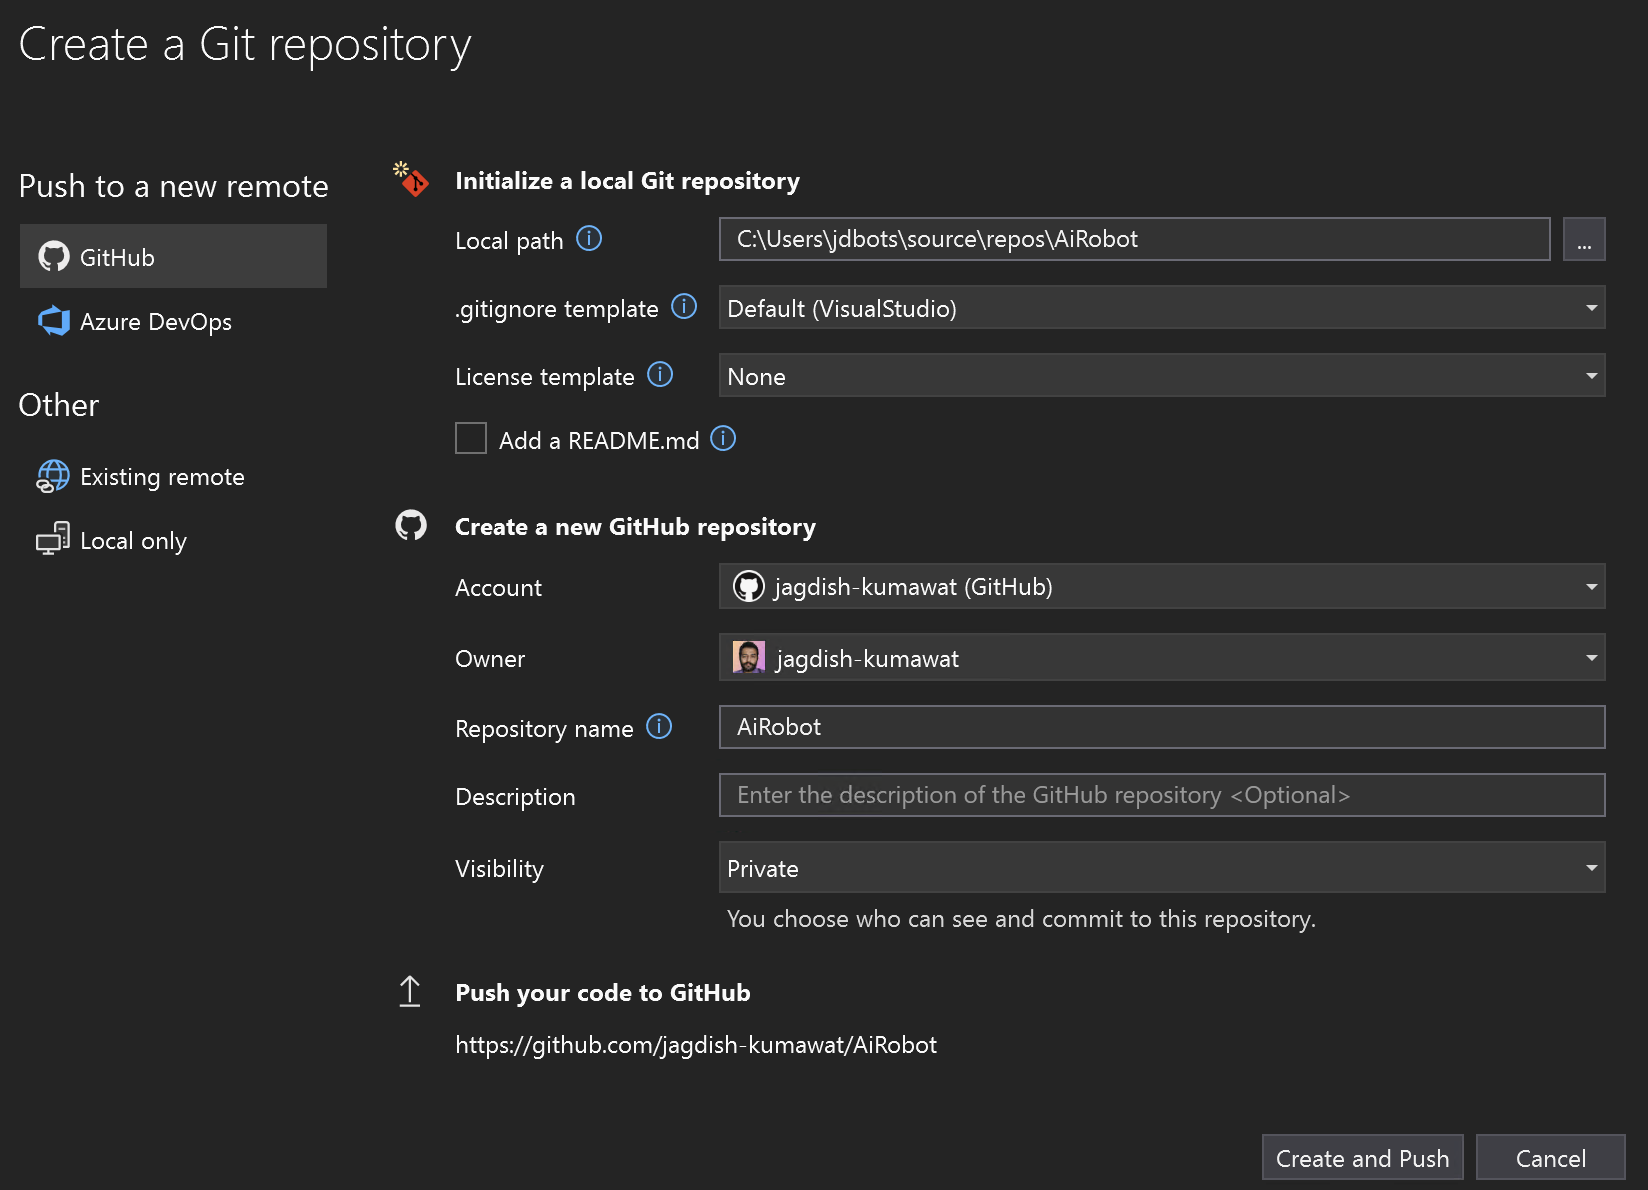
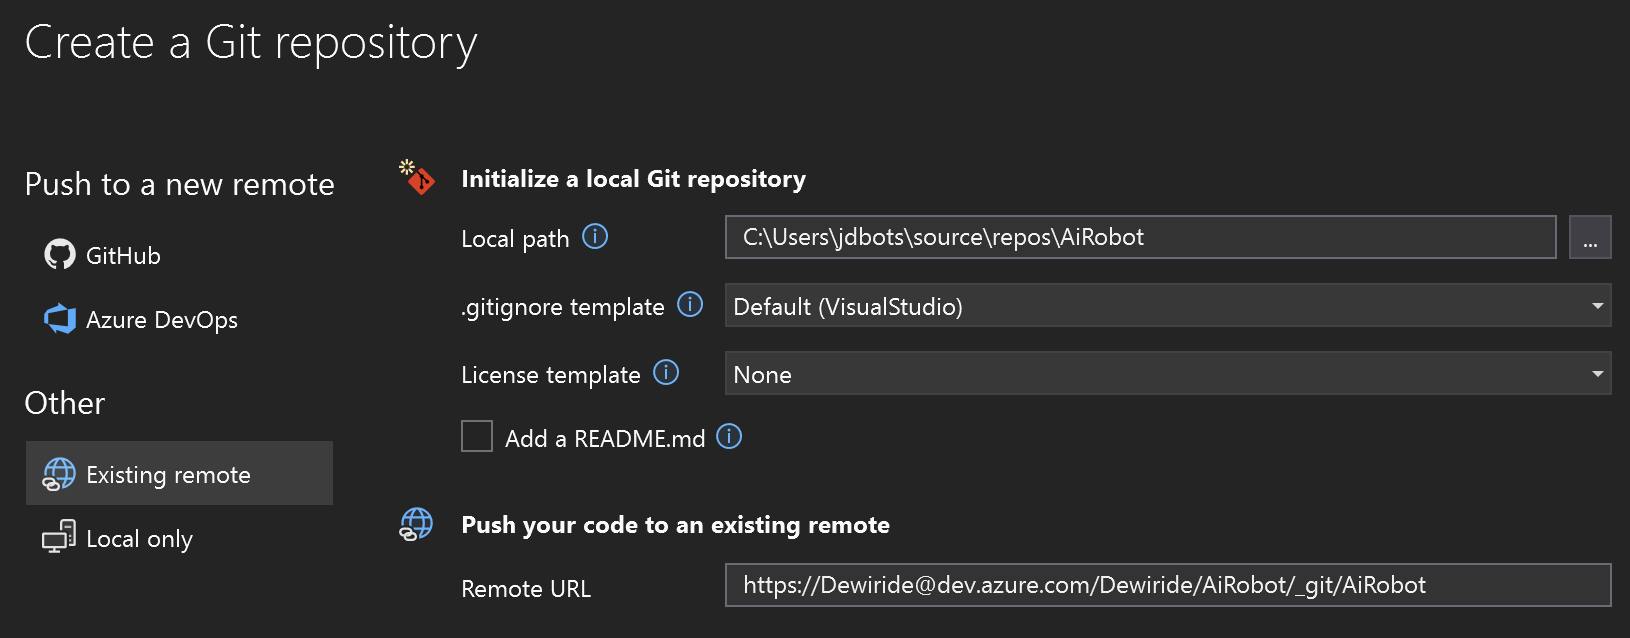
Under Other -> select Existing remote. Provide the URL. The URL can be found in the Repo instruction page in Azure DevOps. Then click on Create and Push. This will create a local repo and connect it to Azure Repo and push your code.

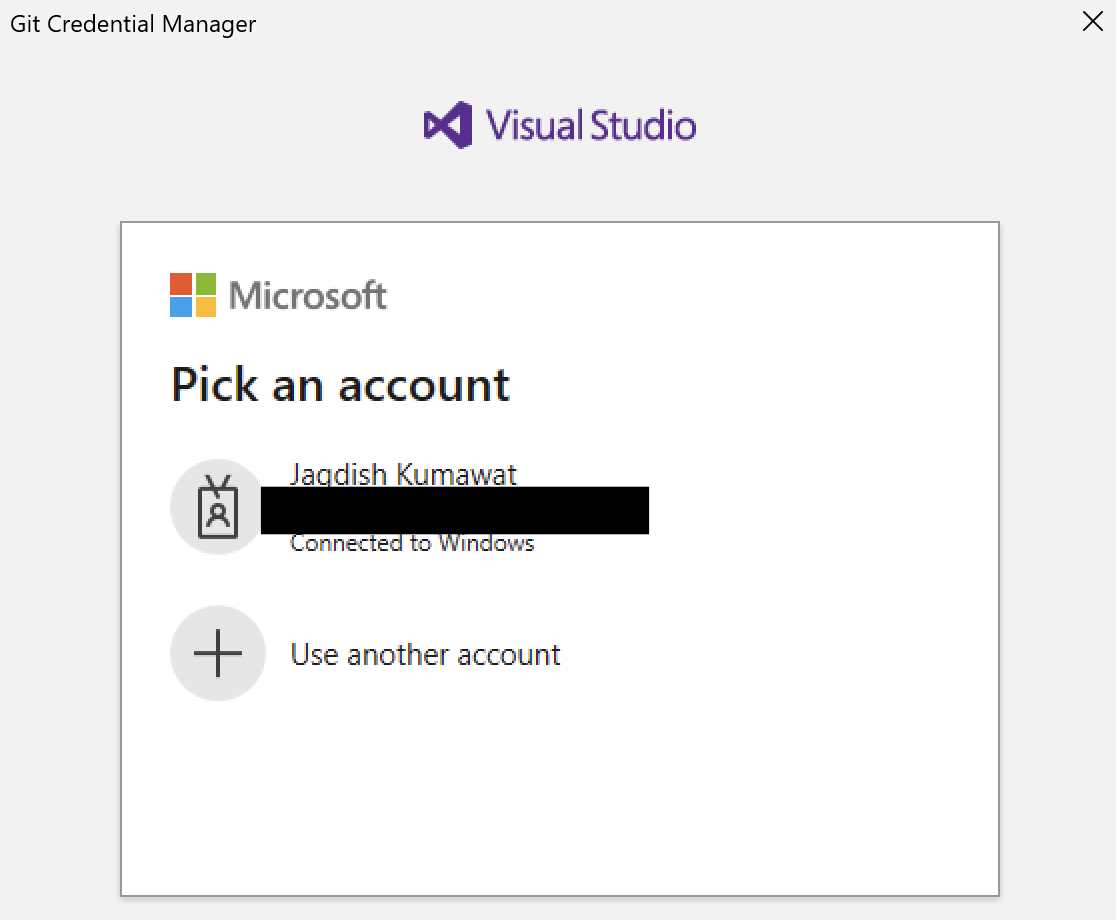
If you are setting this up for the first time, you will be asked to sign in to your Azure DevOps account. Login with your Azure DevOps credentials.
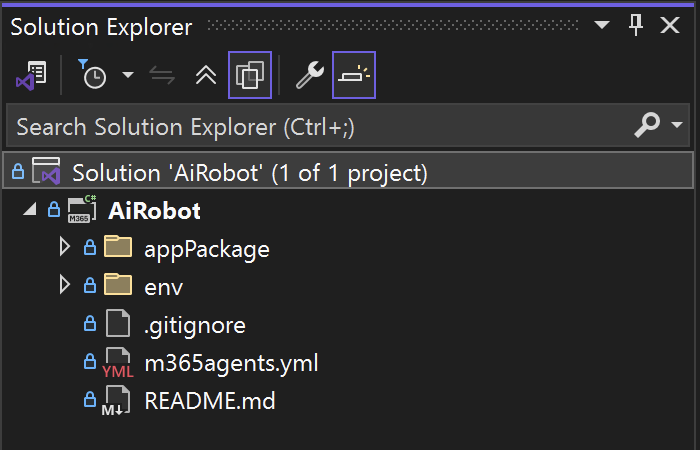
You will see in your Solution Explorer that on each file and folder, a new blue lock is shown. This verifies that, a local git repo is created.
For older version of Visual Studio
For older version of Visual Studio, after you click on Add Solution to Source Control, you come to Team Explorer tab. If not shown, Click on View -> Team Explorer. In Team Explorer, you see many options as below.
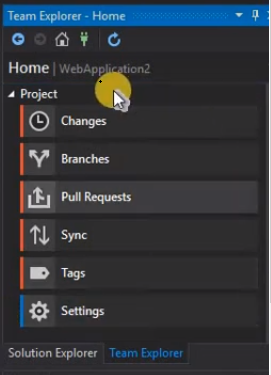
Click on Sync and you will find 3 options to choose from – > GitHub, Azure DevOps and Remote Repository. Select the Azure DevOps and login. Select the project you created in the Azure DevOps. You can choose the existing Azure Repo or create a new one. You can check the checkbox to make it private. After that, click on connect. Your code will be pushed to the Azure repo.
If not pushed, come back on Home screen of Team Explorer, again click on Sync. This time, you will be shown the connected Azure repo link. Just click on Sync. That’s all. Also you can check in the Changes tab if no files is present there. If present, give a commit message and Click on Commit All and Push.
On the latest visual studio version, this process has become very easy with the help of Git plugin in the Visual Studio. If you don’t find it, don’t worry, Visual Studio will show you a prompt to download it when you try to access the Team Explorer.
Verify Azure Repo
Just reload the Azure DevOps portal and you will see your code pushed to the repo.

Update Code and Commit / Push new Changes
Now we will see, how to commit and push new changes. Till now, we have pushed the complete code to the Azure repo. Now, try making changes in the code, what do you see against the file you just made the change to. I made some changes to Home.js file.
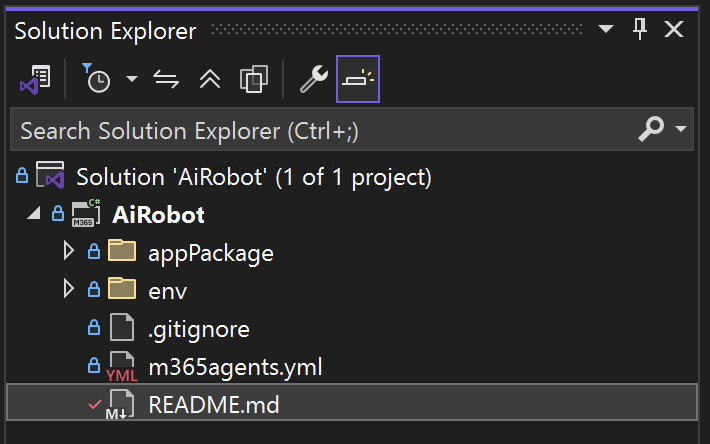
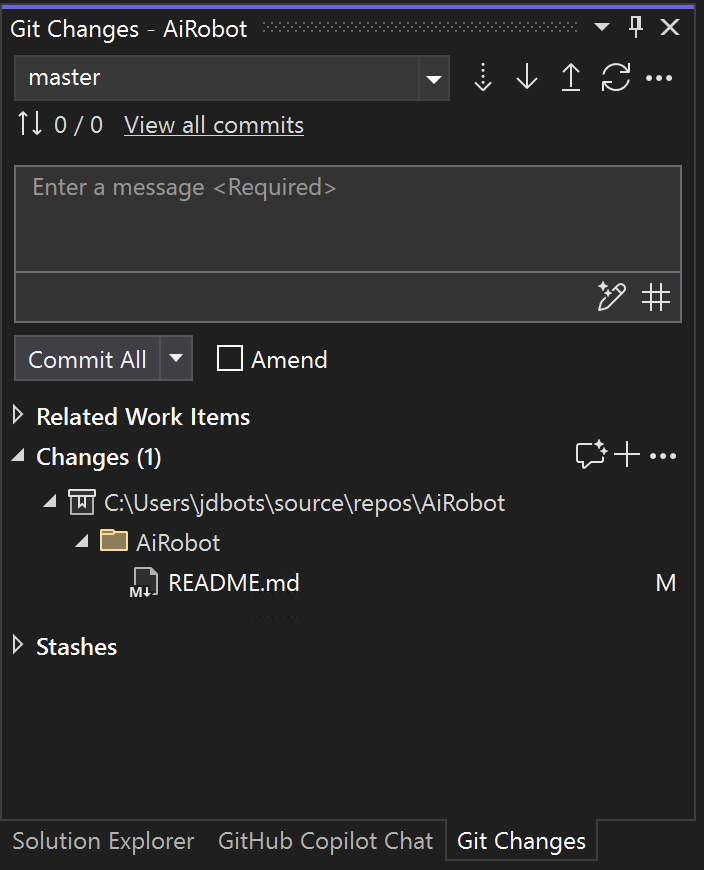
When you make any changes, you will see a red tick mark in front of the file. This tells us that, there are unstaged changes. Go to the Git Changes tab. You find the files, you made changes to in the Git Changes tab.
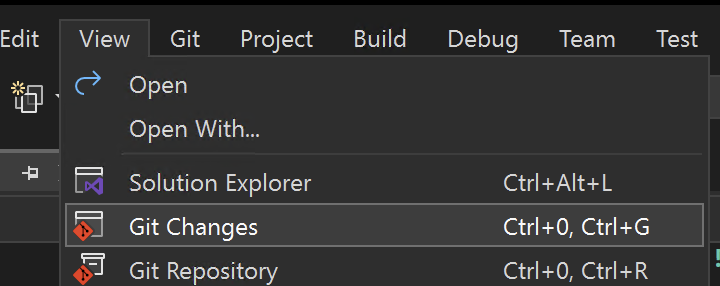
If you don’t find the Git Changes tab, you can go to View -> Git Changes.
Either you can directly commit all, or Stage them before commit. If you want to stage them, select the Commit All dropdown and click Stash All and Keep Staged. This will move your file under Stashes with an unique reference ID.
We will not stage it, we will directly Commit All with a commit message to be provided in the box. You can also Commit All and Push at the same time, we do have an option for that in the dropdown.
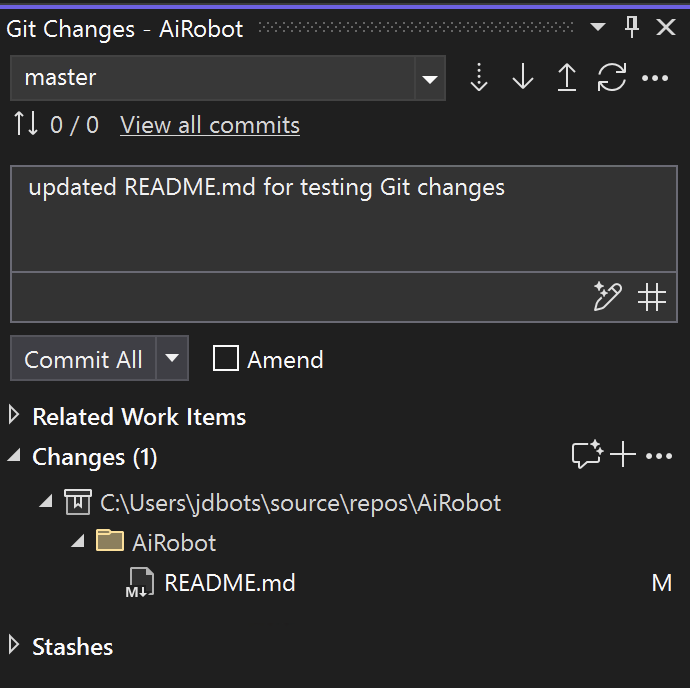
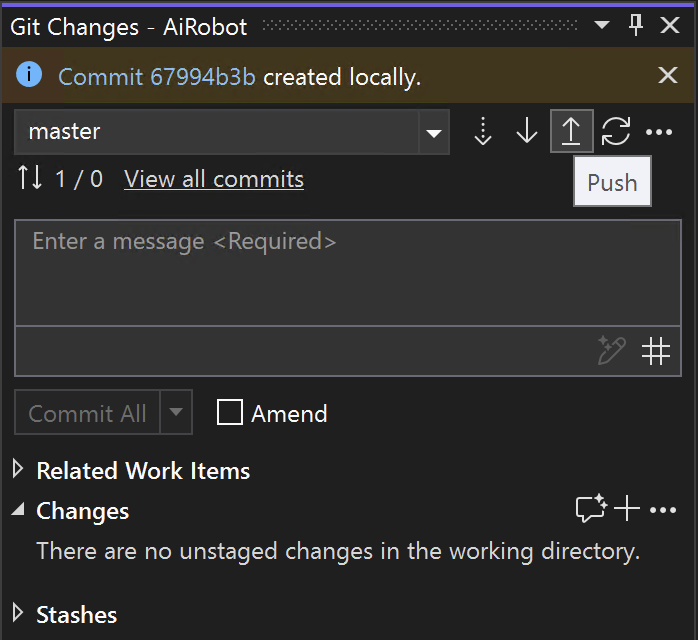
When you click Commit All, the commit will be created locally, now click on Push arrow button to push it to Azure repo.
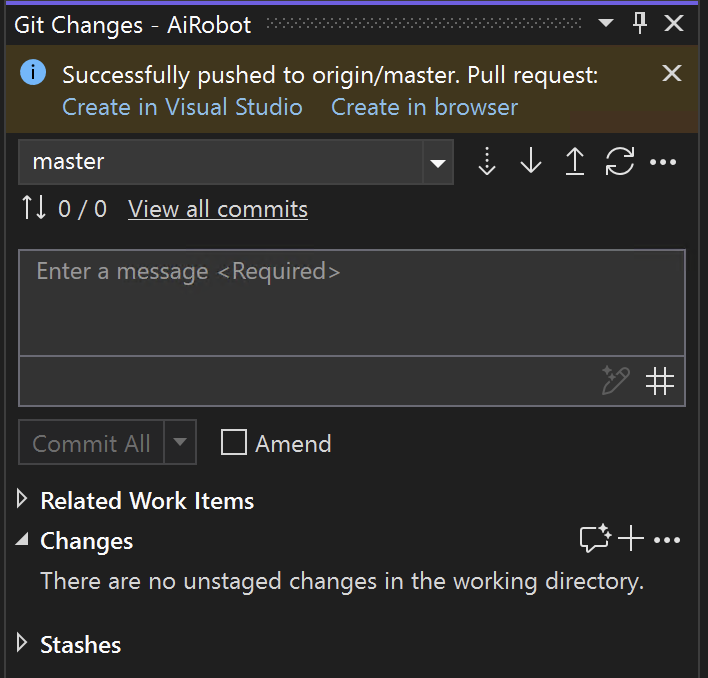
You will see the success message, when it is pushed to remote repo.
If you have the changes in the Azure repo which are not available in the local repo, you can make a pull request first and then make your changes on top of it.
It is always a good practice to pull the code first and then make your changes to avoid losing the code changes made by your team members.
Conclusion
In this guide, we have covered the process of pushing your code to an Azure DevOps repository from Visual Studio. We started by verifying the Azure repo, then we made changes to our code and committed those changes. Finally, we pushed our changes to the remote repository and discussed the importance of pulling the latest changes before making new ones. By following these steps, you can ensure a smooth and efficient workflow when working with Azure DevOps and Visual Studio.
