Creating Azure OpenAI Resource and Deploying Models - Step-by-Step Guide

Azure OpenAI provides access to powerful AI models through Microsoft Azure cloud platform. This comprehensive guide will walk you through creating an Azure OpenAI resource and deploying AI models, enabling you to integrate advanced AI capabilities into your applications.
Prerequisites
Before getting started, ensure you have:
- An active Microsoft Azure subscription
- Sufficient permissions to create Azure resources
- Access to Azure OpenAI service (may require approval)
Create Azure OpenAI Resource
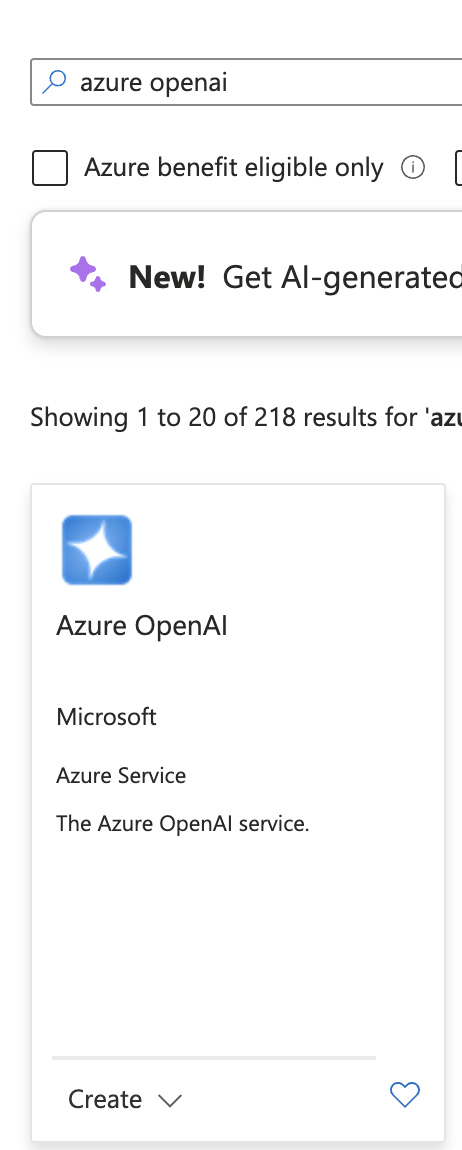
Step 1: Navigate to Azure Marketplace
In the Azure portal, search for Azure OpenAI in the marketplace and select it to create a new resource.
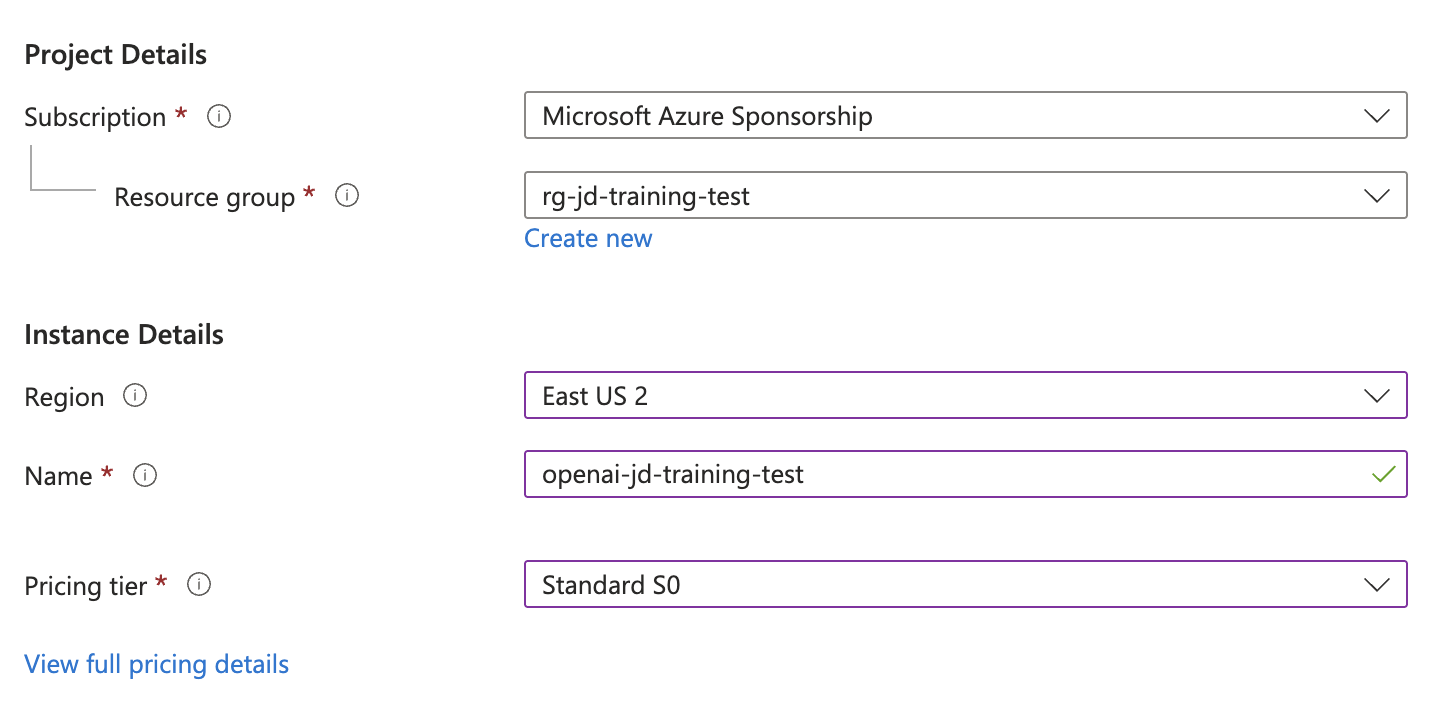
Step 2: Configure Resource Details
Fill out the required information for your Azure OpenAI resource:
- Subscription: Select your Azure subscription
- Resource Group: Choose an existing resource group or create a new one
- Region: Select the region closest to your users or where you want to deploy
- Name: Provide a unique name for your Azure OpenAI resource
- Pricing Tier: Choose the appropriate pricing tier based on your needs
Step 3: Review and Create
Review all the configuration details and click Review + create to create the Azure OpenAI resource. Wait for the deployment to complete.
Access Azure AI Foundry Portal
After the resource is created successfully:
- Open the newly created Azure OpenAI resource
- Navigate to the Overview section
- Click on the link to open the Azure AI Foundry portal
Make sure your newly created resource is selected in the Azure AI Foundry portal interface.

Deploy AI Models
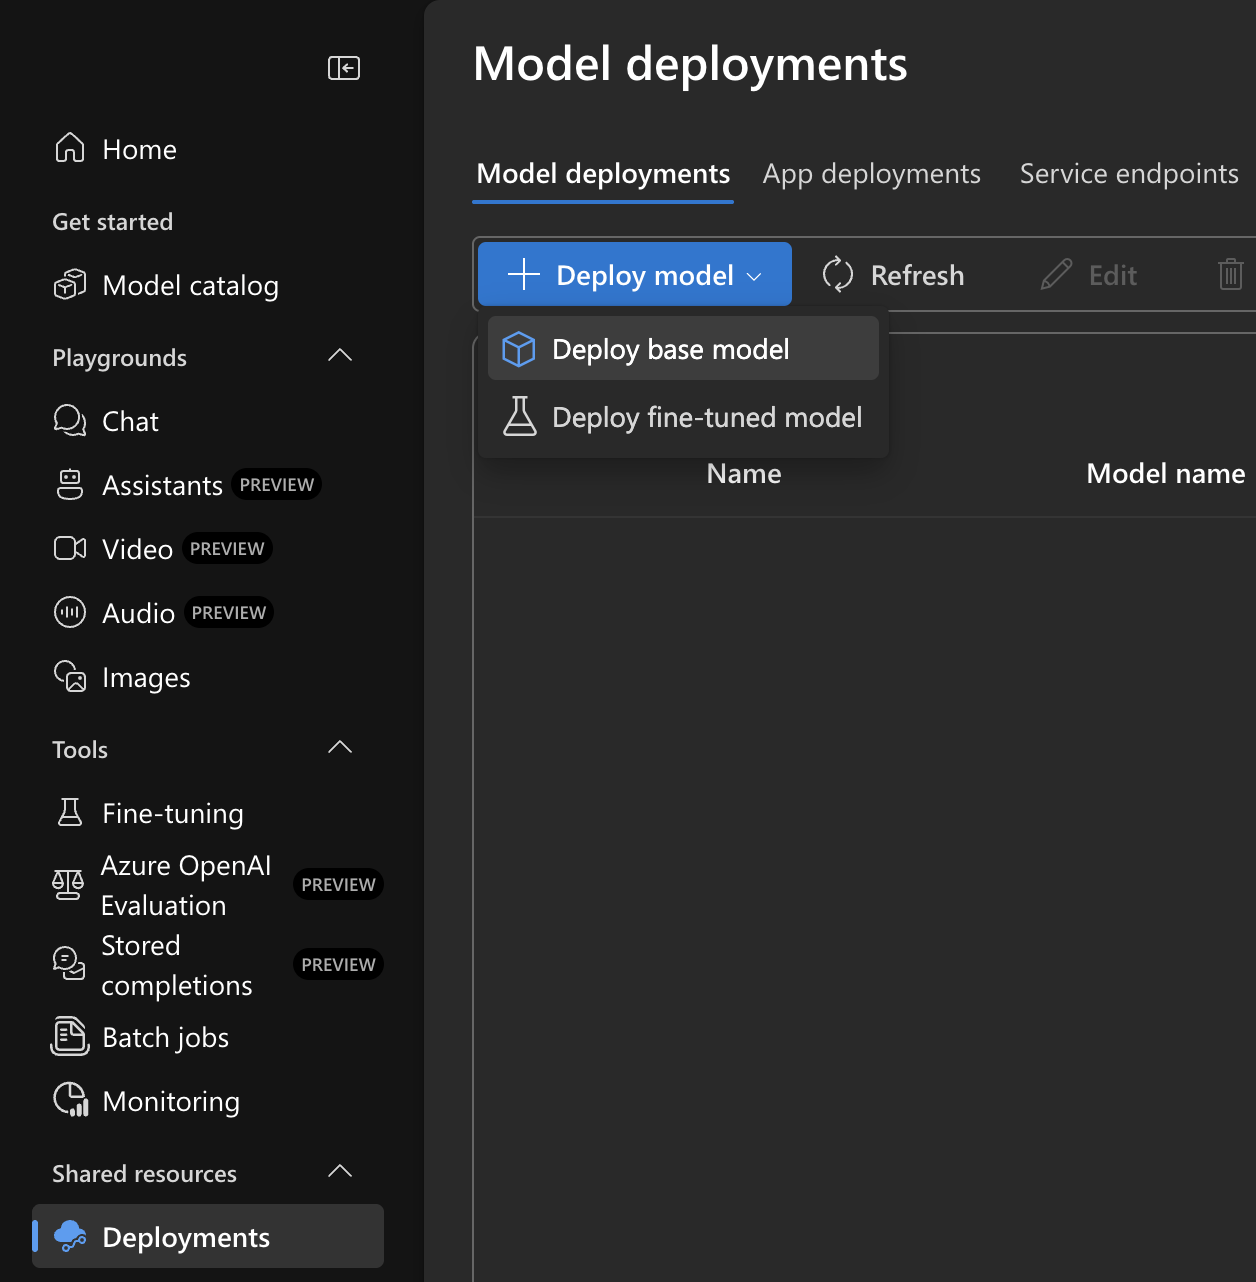
Step 1: Navigate to Deployments
In the Azure AI Foundry portal:
- Click on the Deployments tab
- Select Deploy Mode
- Choose Deploy base model
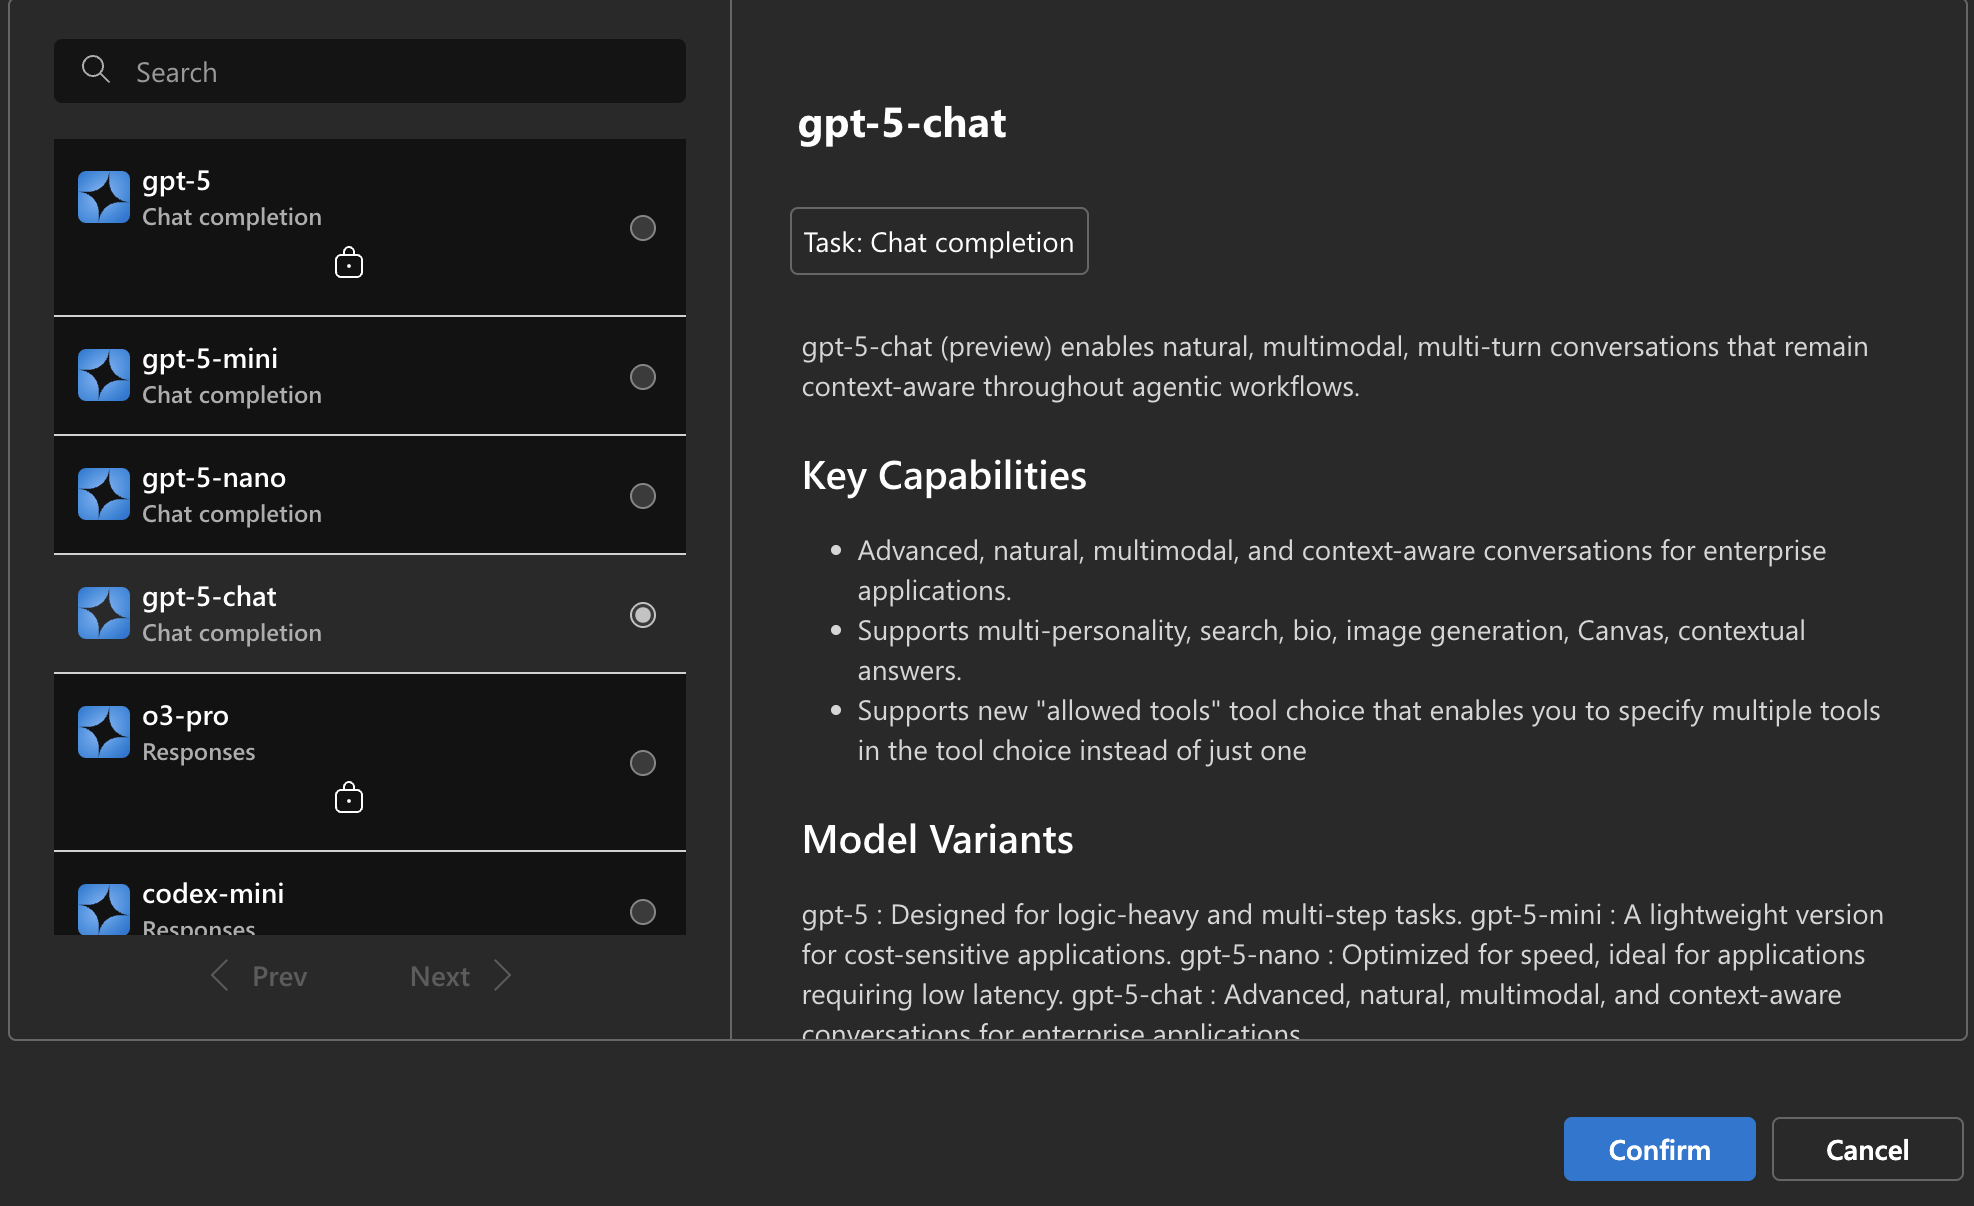
Step 2: Select Your Model
Choose the AI model you want to deploy. Current popular options include:
Latest GPT-5 Series Models (August 2025):
- GPT-5 (2025-08-07) - Latest flagship model requiring registration for access
- GPT-5-mini (2025-08-07) - Efficient version of GPT-5, no registration required
- GPT-5-nano (2025-08-07) - Ultra-lightweight GPT-5 variant
- GPT-5-chat (2025-08-07) - Optimized for conversational AI
GPT-4.1 Series (April 2025):
- GPT-4.1 (2025-04-14) - Advanced model with 1 million token context limit
- GPT-4.1-mini (2025-04-14) - Cost-effective GPT-4.1 variant
- GPT-4.1-nano (2025-04-14) - Lightweight GPT-4.1 version
Advanced Reasoning Models:
- o4-mini (2025-04-16) - Latest reasoning model
- o3 (2025-04-16) - Enhanced reasoning capabilities
- o3-pro (2025-06-10) - Professional-grade reasoning
- o3-mini (2025-01-31) - Efficient reasoning model
- o3-deep-research (2025-06-26) - Specialized for research tasks
Specialized AI Models:
- GPT-image-1 (2025-04-15) - Advanced image generation with editing capabilities
- Computer-use-preview (2025-03-11) - AI that can interact with computers
- Model-router (2025-08-07) - Automatically selects best model for each prompt
- Codex-mini (2025-05-16) - Specialized code generation
Audio & Speech Models:
- GPT-4o-audio-preview - Audio generation and processing
- GPT-4o-realtime-preview (2025-06-03) - Real-time audio interactions
- GPT-4o-transcribe (2025-03-20) - Advanced speech-to-text
- GPT-4o-mini-tts (2025-03-20) - Text-to-speech synthesis
Legacy Models (Still Supported):
- GPT-4o (2024-11-20) - Multimodal model with text and image capabilities
- GPT-4o-mini (2024-07-18) - Cost-effective multimodal option
In this example, we'll deploy GPT-5-chat (2025-08-07), which is the latest conversational model.
Step 3: Configure Model Settings
Customize the model deployment settings:
- Deployment name: Provide a unique name for this deployment
- Model version: Select the model version to deploy
- Rate limit: Set the tokens per minute limit based on your usage requirements
- Content filter: Configure content filtering policies if needed
For high-usage scenarios, consider setting the maximum rate limit available.
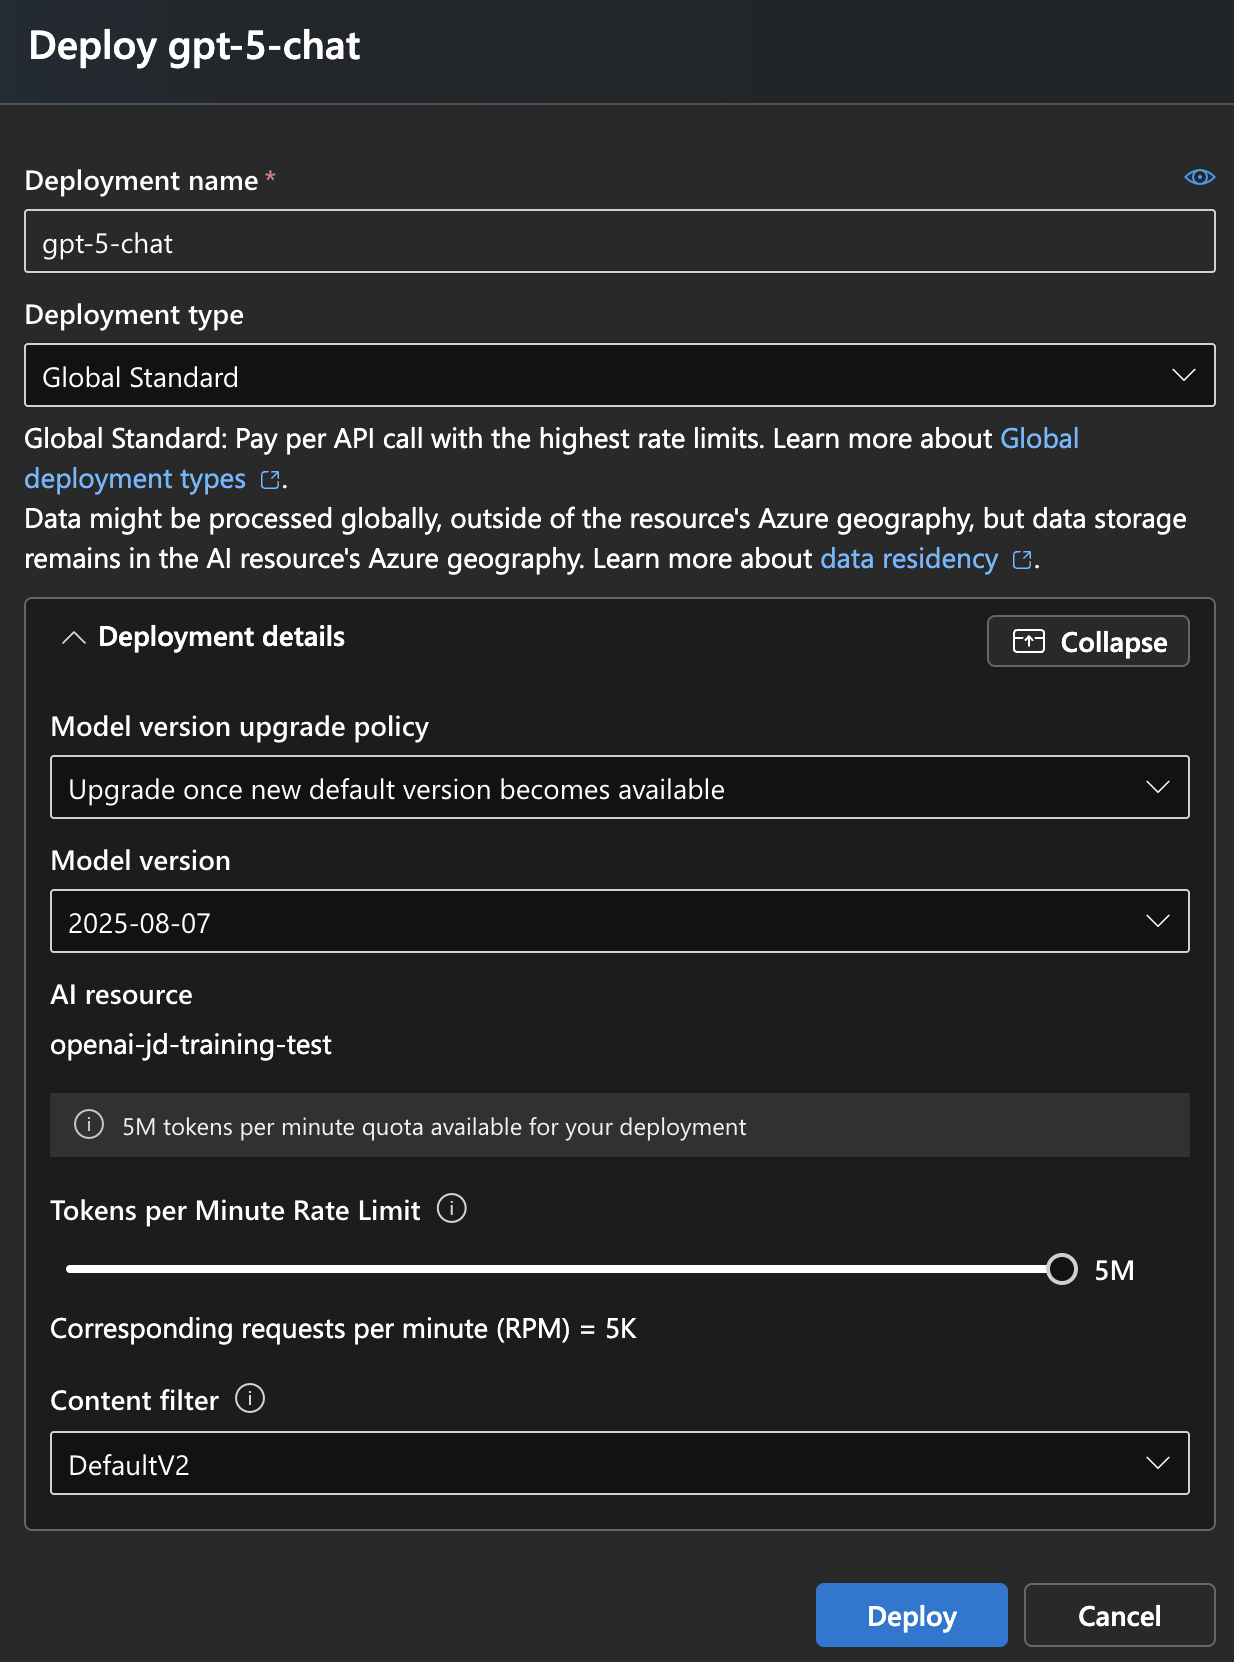
Step 4: Deploy the Model
Review your configuration and click Deploy to start the model deployment process. The deployment may take a few minutes to complete.
Retrieve Connection Details
After successful deployment, you'll need to collect the following information for integration:
Deployment Name
Note the deployment name you assigned to your model (e.g., gpt-5-chat).
Endpoint URL
From the Azure AI Foundry portal home page, retrieve the endpoint URL for your resource.
API Key
Access the API key from the Azure AI Foundry portal or from the Azure OpenAI resource keys section in the Azure portal.
Best Practices
Regional Availability Considerations
Different models are available in different Azure regions. Top regions with the latest model support include:
Premium Regions (Latest Models Available):
- Sweden Central - Full support for GPT-5 series, o3/o4 models, and all latest features
- East US 2 - Comprehensive model availability including GPT-5 and advanced reasoning models
- East US - Good coverage for most models including GPT-4.1 series
Other Well-Supported Regions:
- West US 3 - Strong coverage for newer models
- Poland Central - Good availability for GPT-4.1 and reasoning models
- South Central US - Solid model support across various families
Important Notes:
- GPT-5 requires registration for access: Apply here
- GPT-5-mini, GPT-5-nano, and GPT-5-chat do not require registration
- Sweden Central and East US 2 have the broadest model availability
- Always check the official models page for the latest regional availability
Model Selection Guidelines
- GPT-5 series - Latest and most capable models for cutting-edge applications
- GPT-4.1 - Best for applications requiring very large context (1M tokens)
- o3/o4 models - Choose for complex reasoning, mathematical problems, research tasks
- GPT-image-1 - Superior image generation with editing capabilities
- Model-router - Automatically selects optimal model for each request
Security Considerations
- Store API keys securely using Azure Key Vault
- Implement proper authentication and authorization
- Use managed identities when possible
- Regularly rotate API keys
Cost Optimization
- Monitor token usage and costs through Azure Cost Management
- Set appropriate rate limits to control usage
- Use the most cost-effective model for your use case
- Implement caching strategies to reduce API calls
Performance Optimization
- Choose the region closest to your users
- Implement retry logic for API calls
- Use connection pooling for high-volume applications
- Monitor response times and adjust rate limits accordingly
Troubleshooting Common Issues
Deployment Fails
- Verify you have sufficient quota for the selected model
- Check if the model is available in your selected region
- Ensure your subscription has access to Azure OpenAI service
Access Denied Errors
- Verify API key is correct and not expired
- Check if your IP address is allowed if network restrictions are enabled
- Confirm the endpoint URL is correctly formatted
Rate Limit Exceeded
- Monitor your token usage in the Azure portal
- Adjust rate limits if necessary
- Implement exponential backoff in your application
Next Steps
Now that you have successfully created an Azure OpenAI resource and deployed models, you can:
- Integrate the API into your applications
- Set up monitoring and alerting
- Configure additional models for different use cases
- Implement content filtering and safety measures
- Connect to development tools like GitHub Copilot
Conclusion
Creating and deploying Azure OpenAI resources provides a powerful foundation for integrating AI capabilities into your applications. By following this step-by-step guide, you've successfully set up an Azure OpenAI resource and deployed AI models ready for integration.
The deployed models can now be used for various AI-powered features including text generation, code completion, content creation, and more, all backed by Microsoft Azure's robust cloud infrastructure.