How to Deploy Next.js Application in Linux Ubuntu Server and Connect to Your Custom Domain

Learn how to deploy a Next.js application on a Linux Ubuntu server and connect it to your custom domain. This guide covers server setup, app deployment, Nginx reverse proxy, SSL (HTTPS), and DNS configuration.
Prerequisites
- Ubuntu server (cloud VM or physical)
- Root or sudo access
- A registered custom domain (e.g., example.com)
- Next.js app ready to deploy (local or Git repo)
Step 1: Connect to Your Linux Ubuntu Server
Open your terminal on your local machine. If you are on Windows, you can use Command Prompt or PowerShell, or a terminal emulator like Git Bash. If you are on macOS or Linux, you can use the built-in terminal.

Use SSH to connect to your server. Replace username and server_ip with your actual server username and IP address:
ssh username@server_ip
If you use a custom SSH port, add the -p flag:
ssh -p 3333 username@server_ip
Step 2: Update Your Server
sudo apt update && sudo apt upgrade -y
Step 3: Install Node.js and npm
At the time of writing, the latest LTS version is Node.js 22.17.0. Install Node.js (LTS recommended):
# Download and install nvm:
curl -o- https://raw.githubusercontent.com/nvm-sh/nvm/v0.40.3/install.sh | bash
# in lieu of restarting the shell
\. "$HOME/.nvm/nvm.sh"
# Download and install Node.js:
nvm install 22
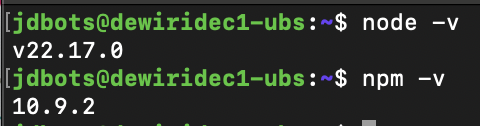
# Verify the Node.js version:
node -v # Should print "v22.17.0".
nvm current # Should print "v22.17.0".
# Verify npm version:
npm -v # Should print "10.9.2".
Verify installation:
Step 4: Clone or Upload Your Next.js App
Clone from GitHub (replace with your repo):
git clone https://github.com/yourusername/your-nextjs-app.git
cd your-nextjs-app
Step 5: Install Dependencies and Build
npm install
npm run build
Step 6: Start the Next.js App (Production)
For production, use npm start or yarn start:
npm start
Or use PM2 to keep the app running in the background:
npm install -g pm2
pm2 start npm --name "nextjs-app" -- start
pm2 startup
pm2 save
Step 7: Install and Configure Nginx as a Reverse Proxy
Install Nginx:
sudo apt install nginx -y
Configure Nginx to proxy requests to your Next.js app (default port 3000):
sudo nano /etc/nginx/sites-available/nextjs
Paste the following (replace yourdomain.com):
server {
    listen 80;
    server_name yourdomain.com www.yourdomain.com;

    location / {
        proxy_pass http://localhost:3000;
        proxy_http_version 1.1;
        proxy_set_header Upgrade $http_upgrade;
        proxy_set_header Connection 'upgrade';
        proxy_set_header Host $host;
        proxy_cache_bypass $http_upgrade;
    }
}
Enable the config and restart Nginx:
sudo ln -s /etc/nginx/sites-available/nextjs /etc/nginx/sites-enabled/
sudo nginx -t
sudo systemctl restart nginx
Step 8: Configure Your Domain's DNS
- Go to your domain registrar's DNS settings.
- Create an A record pointing your domain (e.g.,
@andwww) to your server's public IP address. - Wait for DNS propagation (can take up to 24 hours, usually much faster).
Step 9: Secure with SSL (HTTPS) Using Let's Encrypt
Install Certbot:
sudo apt install certbot python3-certbot-nginx -y
Obtain and install SSL certificate:
sudo certbot --nginx -d yourdomain.com -d www.yourdomain.com
Follow prompts to complete SSL setup. Certbot will auto-renew certificates.
Step 10: Test Everything
- Visit
https://yourdomain.comin your browser. - Your Next.js app should load securely with HTTPS.
- Check Nginx and PM2 status if you encounter issues:
sudo systemctl status nginx
pm2 status
Troubleshooting
- App not loading? Check that your app is running (
pm2 statusornpm start). - Nginx errors? Run
sudo nginx -tto check config syntax. - SSL issues? Ensure DNS is pointed correctly and port 80/443 are open.
- Firewall: Allow HTTP/HTTPS traffic:
sudo ufw allow 'Nginx Full'
Conclusion
You have successfully deployed a Next.js application on a Linux Ubuntu server and connected it to your custom domain with HTTPS. For production, always use a process manager (like PM2), keep your server updated, and monitor logs for issues.
Video Tutorial
Coming soon!