Self-Host Dewiride Analytics on Ubuntu Server — Part 3: Custom Domain and Free HTTPS with Caddy

Your dashboard currently answers on 127.0.0.1 and nowhere else, which is safe but unusable. This part gives it a real domain name and a free, automatically renewed HTTPS certificate using Caddy — six lines of configuration, no certbot, no cron job, and no renewal to forget.
This is Part 3 of a 6-part series.
- Part 1: Run the Stack with Docker Compose
- Part 2: Close the Ports Docker Opened Behind Your Firewall
- Part 3: Custom Domain and Free HTTPS with Caddy (you are here)
- Part 4: Claim the Install and Add Your First Website
- Part 5: Read the Dashboard — Humans, Bots and Engagement
- Part 6: Backups, Updates and Day-2 Operations
Why This Part Is Not Optional
For most self-hosted software, a domain and a certificate are a nicety. For an analytics product they are load-bearing, for a reason that is easy to miss:
The address you read the dashboard on is the address you paste into your own website. The tracker script is served from your installation, and every measured page fetches it. A browser on the public internet cannot fetch a script from 127.0.0.1, and a page served over HTTPS will refuse to load a script over plain HTTP anyway.
So the dashboard's address is not just for you. It is a public dependency of every site you measure.
By the end of this part you will have:
- A subdomain resolving to your server.
- A Let's Encrypt certificate, obtained automatically, renewing automatically.
- Plain HTTP redirecting to HTTPS, and HTTP/2 and HTTP/3 switched on, without asking for either.
- The forwarded-header arrangement that lets the engine see your visitors' addresses rather than your proxy's.
Why Caddy Rather Than Nginx and Certbot
Both work. We have an Nginx and certbot guide on this site and it is a perfectly good route. The honest comparison:
| Caddy (this guide) | Nginx + Certbot | |
|---|---|---|
| Certificate setup | Automatic, from the site name | A separate certbot run |
| Renewal | Built in, no configuration | A timer or cron job that must keep working |
| Config for this job | 6 lines | ~25 lines, plus a second file after certbot edits it |
| Forwarded headers | Correct by default | You write proxy_set_header lines, and omitting one is silent |
| HTTP → HTTPS redirect | Automatic | You write a second server block |
| HTTP/3 | On by default | Compile-time or module dependent |
| Familiarity | Fewer people know it | Everybody's examples are Nginx |
The last row is the only real argument for Nginx. Everything above it is an argument for Caddy — and for a tutorial whose bar is "someone who is not a developer must be able to follow it", six lines that cannot be half-written wins.
Step 1: Point a Subdomain at Your Server
In whatever manages DNS for your domain — your registrar, Cloudflare, Route 53, Google Cloud DNS — create a single record:
| Field | Value |
|---|---|
| Type | A |
| Name | analytics (or whatever subdomain you want) |
| Value | your server's public IPv4 address |
| TTL | 300 seconds, or the lowest offered |
That is the entire DNS step. If your server also has an IPv6 address, add an AAAA record with it; Caddy will use both.
Set a low TTL before you need to change anything. TTL is how long the rest of the internet is allowed to cache the answer, so a record you create with a 24-hour TTL is a record you cannot correct for 24 hours.
Wait a minute, then check from your own machine:
dig +short analytics.example.com A
dig @8.8.8.8 +short analytics.example.com A
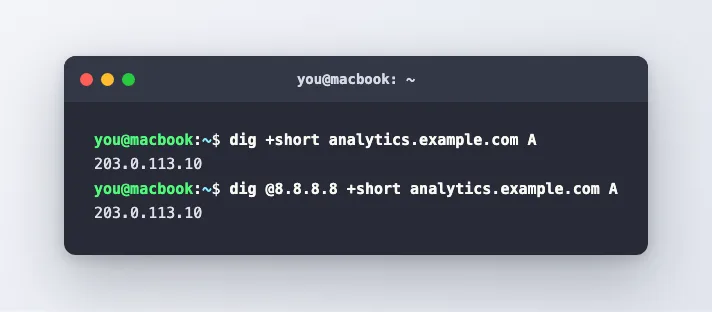
Both should print your server's IP. Asking 8.8.8.8 as well as your own resolver is worth the extra second: your machine may have cached an answer from before the record existed, and a "not found" from your laptop can send you debugging a problem that only exists locally.
Do not continue until both commands return the right address. Every certificate failure in the Troubleshooting table below is really a DNS problem wearing a disguise. Let's Encrypt validates by connecting to the name — if the name does not point at you, nothing else can work.
Step 2: Install Caddy
Caddy is not in Ubuntu's own repositories at a useful version, so add the project's:
sudo apt install -y debian-keyring debian-archive-keyring apt-transport-https curl
curl -1sLf 'https://dl.cloudsmith.io/public/caddy/stable/gpg.key' \
  | sudo gpg --dearmor -o /usr/share/keyrings/caddy-stable-archive-keyring.gpg
curl -1sLf 'https://dl.cloudsmith.io/public/caddy/stable/debian.deb.txt' \
  | sudo tee /etc/apt/sources.list.d/caddy-stable.list
sudo apt update
sudo apt install -y caddy
Line by line: the first installs the keyring tools. The second downloads Caddy's signing key and converts it into the binary format apt wants, storing it where only signed packages from that key are trusted. The third adds the repository itself. Then a refresh and the install.
caddy version
v2.11.4 h1:XKxkMTgNSizEvKG6QHue6cAsFOteU2qA61w2tKkCWi0=
Installing the package also creates a caddy system user, a systemd service that is already enabled and running, and /etc/caddy/Caddyfile with a placeholder site. You do not need to start anything; you only need to tell it what to serve.
Step 3: Write the Caddyfile
sudo nano /etc/caddy/Caddyfile
Delete everything in it and put this in its place, with your own domain:
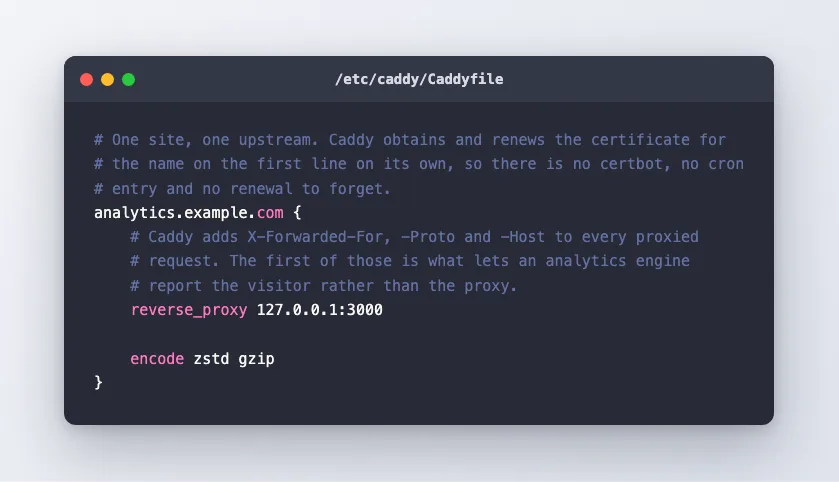
# One site, one upstream. Caddy obtains and renews the certificate for the name on the first line
# on its own, so there is no certbot, no cron entry and no renewal to forget.
analytics.example.com {
	# The dashboard, which is the only thing published to this machine. Everything the browser
	# asks the engine for is forwarded on from there, so this is the whole of the product.
	#
	# Caddy adds X-Forwarded-For, -Proto and -Host to every proxied request. The first of those
	# is what lets an analytics engine report the visitor rather than the proxy, and it is the
	# reason this line is not simply a port forward.
	reverse_proxy 127.0.0.1:3000

	encode zstd gzip
}
That is the entire configuration. Three meaningful lines:
analytics.example.com {— the site address. Because it is a real hostname rather than a port number, Caddy treats it as a site that should have a certificate, and goes and gets one. This single line is the whole of "set up HTTPS".reverse_proxy 127.0.0.1:3000— pass every request to the dashboard container, and pass its answer back. This is why Part 2's loopback binding was safe: Caddy runs on the host, so127.0.0.1is reachable to it and to nothing else.encode zstd gzip— compress responses for browsers that say they can handle it, preferring the newerzstd.
Caddyfile syntax wants tab indentation inside a site block, and it is picky about it. If caddy validate complains about an unexpected token, that is usually spaces.
Check the file before you make it live:
sudo caddy validate --config /etc/caddy/Caddyfile
Valid configuration
Step 4: Reload and Watch the Certificate Arrive
sudo systemctl reload caddy
reload re-reads the configuration without dropping connections. Now watch it work:
sudo journalctl -u caddy --no-pager -n 20 --output=cat
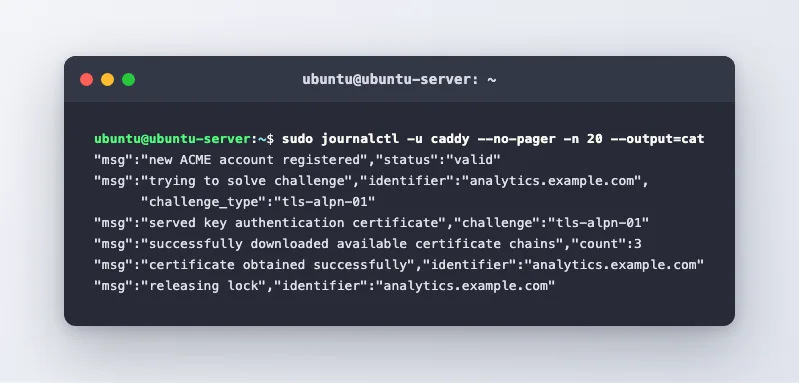
"msg":"trying to solve challenge","identifier":"analytics.example.com","challenge_type":"tls-alpn-01"
"msg":"served key authentication certificate","server_name":"analytics.example.com","challenge":"tls-alpn-01"
"msg":"certificate obtained successfully","identifier":"analytics.example.com"
On the real server this took four and a half seconds from first challenge to certificate in hand.
What happened in those seconds is worth understanding, because it explains every failure mode:
- Caddy registered an account with Let's Encrypt.
- It asked for a certificate for your name, and Let's Encrypt issued a challenge.
- Caddy chose TLS-ALPN-01, which is answered entirely inside a TLS handshake on port 443.
- Let's Encrypt connected to your domain from several places around the world at once, saw the right answer, and issued the certificate.
Point 4 is the one that catches people. Validation comes from Let's Encrypt's servers to your server, over the public internet, to the address your DNS record names. If DNS is wrong, or port 443 is blocked, or something else is already using it, this fails — and no amount of re-running fixes a firewall.
Where it ends up:
sudo find /var/lib/caddy -name '*.crt'
/var/lib/caddy/.local/share/caddy/certificates/acme-v02.api.letsencrypt.org-directory/analytics.example.com/analytics.example.com.crt
You never need to touch that file. Caddy renews it on its own, well before expiry, and reloads itself when it does.
Step 5: Check It From Outside
From your own machine:
curl -sI https://analytics.example.com/
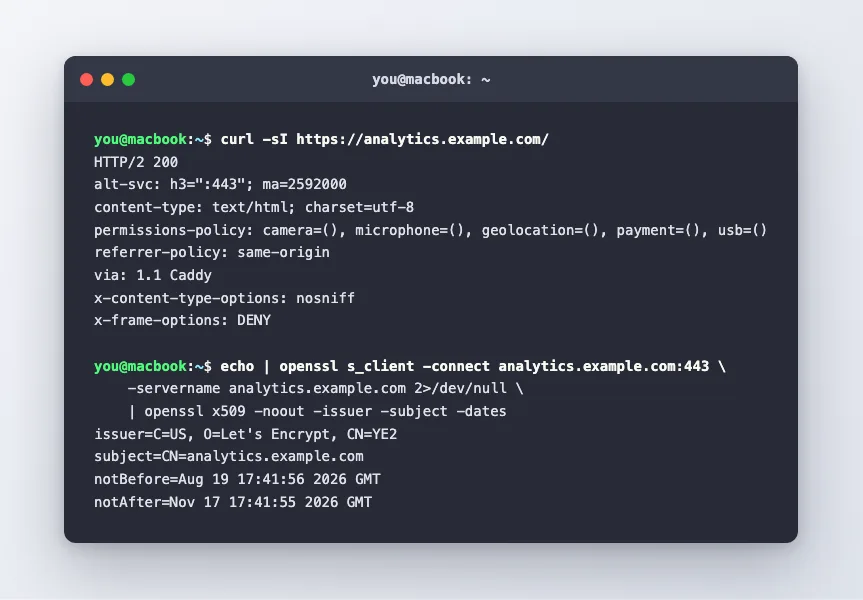
HTTP/2 200
alt-svc: h3=":443"; ma=2592000
content-type: text/html; charset=utf-8
permissions-policy: camera=(), microphone=(), geolocation=(), payment=(), usb=()
referrer-policy: same-origin
via: 1.1 Caddy
x-content-type-options: nosniff
x-frame-options: DENY
Three things to notice:
HTTP/2 200— not just working, but over HTTP/2, which you did not configure.alt-svc: h3=":443"— Caddy is advertising HTTP/3 as well. Browsers that support it will switch on their next visit.via: 1.1 Caddy— confirmation that the answer came through the proxy rather than from somewhere else.
Now inspect the certificate itself:
echo | openssl s_client -connect analytics.example.com:443 -servername analytics.example.com 2>/dev/null \
  | openssl x509 -noout -issuer -subject -dates
issuer=C=US, O=Let's Encrypt, CN=YE2
subject=CN=analytics.example.com
notBefore=Aug 19 17:41:56 2026 GMT
notAfter=Nov 17 17:41:55 2026 GMT
A real Let's Encrypt certificate for exactly your name, valid for 90 days. And confirm the plain-HTTP redirect exists:
curl -sI http://analytics.example.com/ | head -3
HTTP/1.1 308 Permanent Redirect
Location: https://analytics.example.com/
Server: Caddy
You did not write that redirect. Caddy adds it to every site that has a certificate.
Finally, open the domain in a browser. You get a padlock, and the dashboard asking who you are.
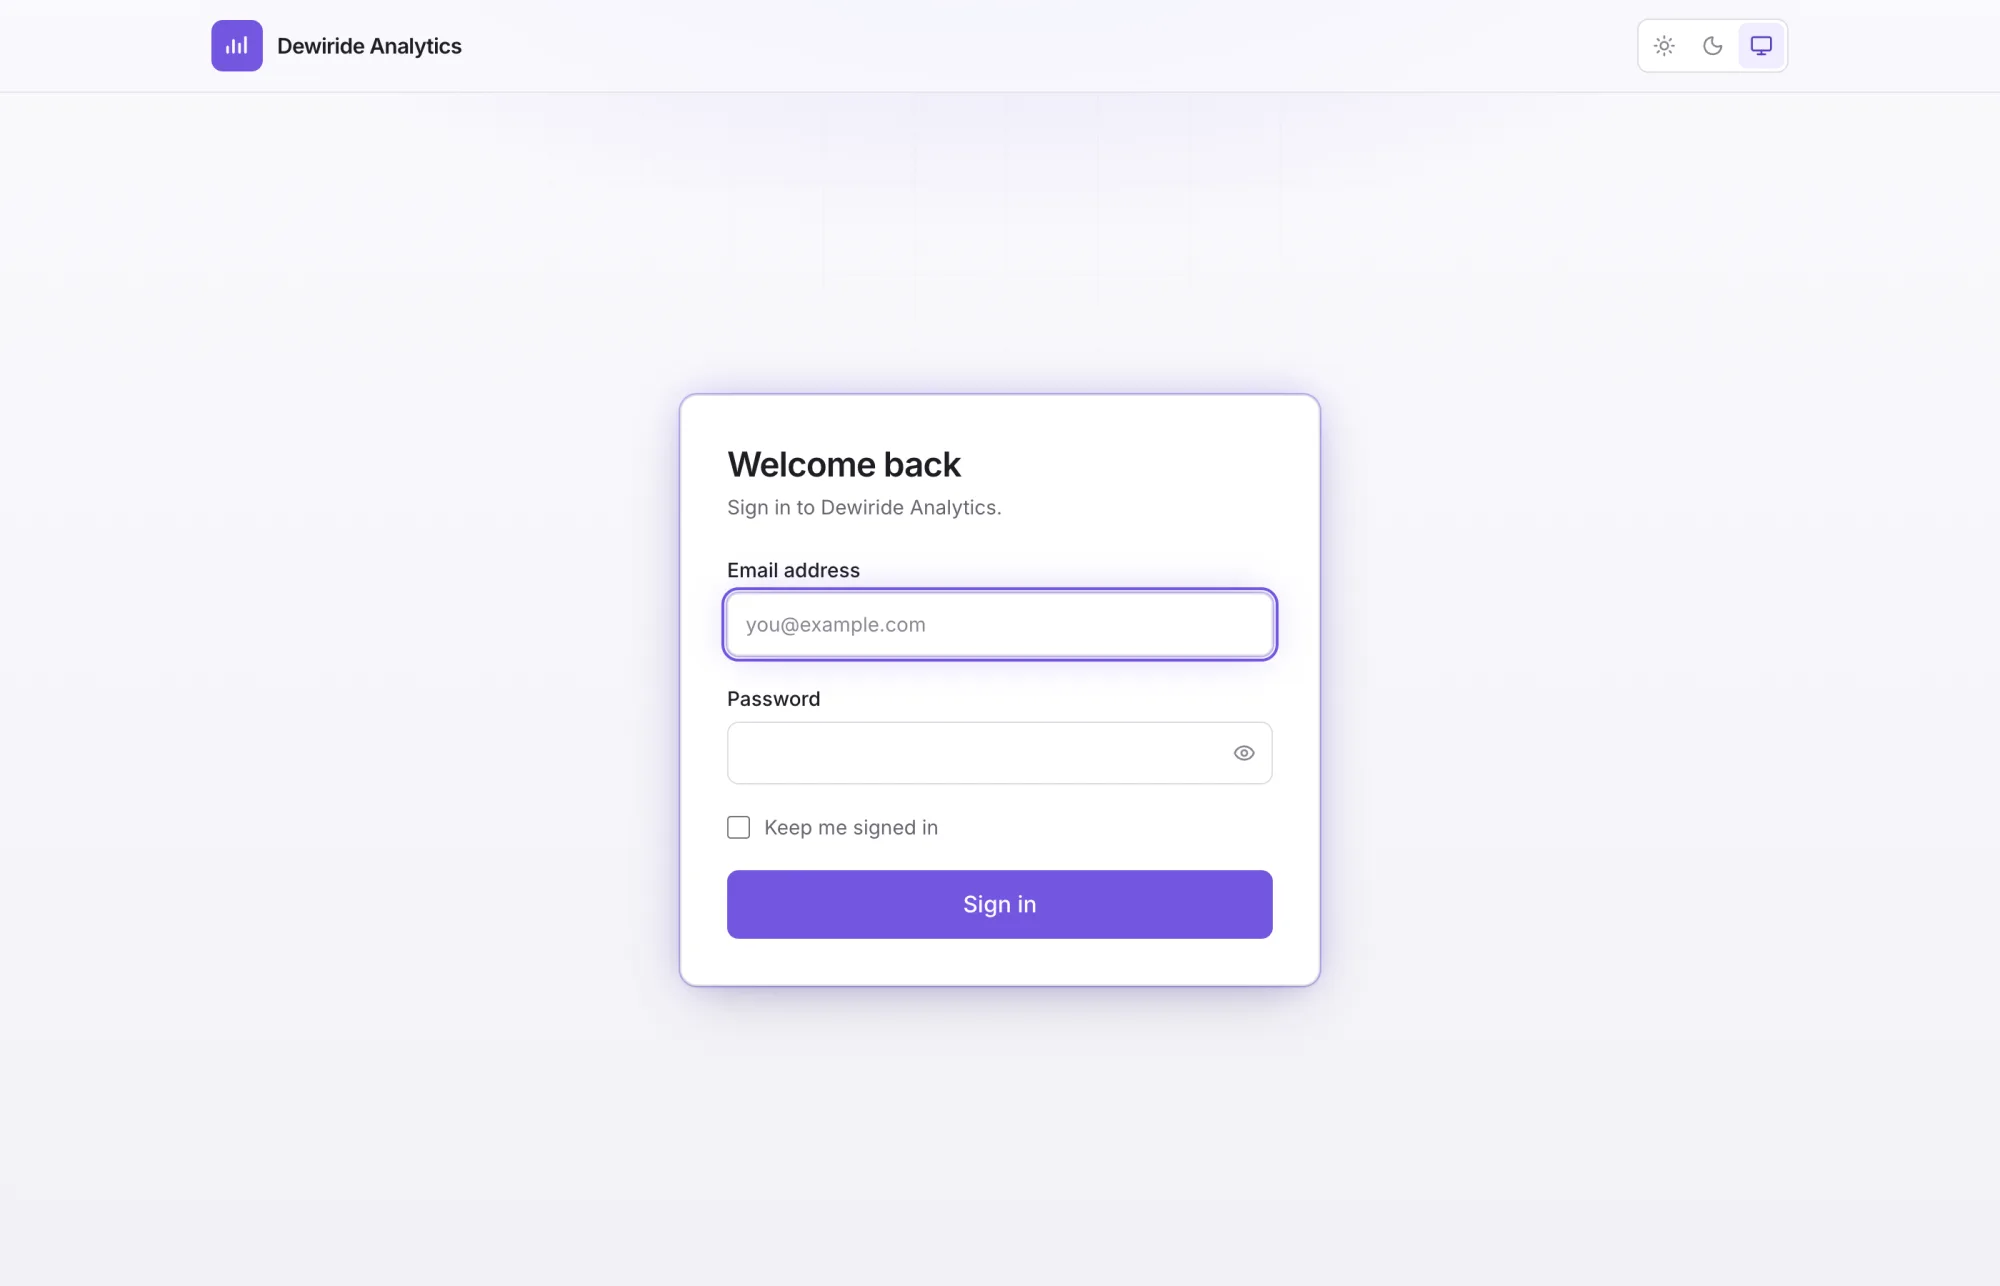
A brand-new installation shows a one-time welcome screen here instead of a sign-in form, because nobody has claimed it yet. The screenshot above was taken on an installation that had already been claimed. Claiming yours is the first thing Part 4 does.
The Setting That Decides Whether You Measure Anyone
This is the part specific to analytics, and it is easy to get silently wrong.
Every request from a visitor now arrives at Caddy, and Caddy passes it to the dashboard container, which passes it to the engine. By the time the engine sees a request, the TCP connection it arrives on came from a container next door — not from the visitor.
That matters more here than in most applications, because the visitor's address is what decides their country, their town, their network operator, and a good deal of whether they were a person at all. Get this wrong and every visitor appears to come from a Docker bridge network in your own server.
The convention that solves it is the X-Forwarded-For header: each proxy appends the address it received the request from, so the chain is preserved. Caddy adds it automatically — that is why the comment sits above reverse_proxy in the Caddyfile.
But a header can be written by anybody, which is exactly why an engine must not believe it blindly. Dewiride Analytics therefore only trusts it from addresses you nominate, in .env:
TRUSTED_PROXY_NETWORK=172.16.0.0/12
172.16.0.0/12 covers 172.16.x.x through 172.31.x.x, which is the private range Docker allocates its networks from. Requests arriving from inside that range are believed when they say who they came from. Anything arriving from anywhere else is counted from the address it actually came from, whatever it claims.
That default is correct for this setup, where Caddy runs on the host and reaches the dashboard over loopback. Two situations need it changed:
- A CDN or load balancer in front of Caddy — Cloudflare, for instance. Add its address ranges, or the visitor addresses you record will be your CDN's.
- Caddy running in a container on a custom network with a different subnet. Add that subnet.
Never widen this to 0.0.0.0/0. That tells the engine to believe any address any client claims — which means anyone can attribute traffic to any country they like, and a bot can trivially dress itself up as a person from somewhere respectable.
We confirm this is working end to end in Part 5, once there is real traffic with real countries to look at. It is not something to take on trust: the check is simply whether your visitors' countries look plausible or whether everything reads as not known.
Security Headers: Look Before You Add
Most reverse-proxy tutorials tell you to add a block of security headers here. Check first:
curl -sI https://analytics.example.com/ | grep -iE "x-frame|referrer|content-type-options|permissions"
permissions-policy: camera=(), microphone=(), geolocation=(), payment=(), usb=()
referrer-policy: same-origin
x-content-type-options: nosniff
x-frame-options: DENY
The application already sets all four, and it knows more about its own requirements than a proxy does. Adding a second X-Frame-Options at the proxy risks sending the header twice, which some browsers treat as invalid and ignore entirely — leaving you less protected than before you helpfully intervened.
The one header worth considering at the proxy is HSTS, which tells browsers never to try plain HTTP for this name again:
header Strict-Transport-Security "max-age=31536000"
Understand it before you enable it. For a year afterwards, browsers that have seen that header will refuse to connect to the name over HTTP at all, and there is no way to retract it early. That is exactly what you want for a permanent installation — and a trap if you are still experimenting with the domain.
Common Mistakes
| Mistake | What happens | Fix |
|---|---|---|
| Configuring Caddy before DNS resolves | Certificate fails, and repeated retries risk a rate limit | Confirm with dig first. Let's Encrypt validates by connecting to the name |
| Spaces instead of tabs in the Caddyfile | caddy validate rejects the file with an unhelpful message | Use tabs inside site blocks |
| Port 80 or 443 closed at the firewall | Validation never reaches you; the certificate never arrives | sudo ufw allow 80/tcp and 443/tcp — done in Part 1 |
Using http:// in the site address | Caddy serves plain HTTP and never requests a certificate | Write the bare hostname, with no scheme |
Proxying to the container name instead of 127.0.0.1 | Caddy runs on the host and cannot resolve Compose service names | Use 127.0.0.1:3000, the address Part 2 bound |
| Adding security headers the app already sets | Duplicated headers that browsers may ignore | Check with curl -sI before adding anything |
Widening TRUSTED_PROXY_NETWORK to fix a problem | Every visitor can now forge their own location | Name only the networks your proxies actually use |
Troubleshooting
| Symptom | Likely cause | What to do |
|---|---|---|
could not get certificate in the log | DNS not resolving, or 80/443 unreachable from outside | dig +short yourname and scan 443 from another machine |
| Browser warns the certificate is invalid | Caddy is still serving its internal fallback because ACME failed | Read the log. It always names the reason |
too many certificates already issued | Let's Encrypt rate limit from repeated failures | Wait an hour. Use acme_ca https://acme-staging-v02.api.letsencrypt.org/directory while debugging |
502 Bad Gateway | The dashboard container is not running or not on port 3000 | docker compose ps — the web row should say 127.0.0.1:3000 |
| Site works on HTTP, not HTTPS | Port 443 blocked upstream of your server | Check your provider's own firewall as well as UFW |
address already in use on start | Another web server is installed and running | sudo ss -tulpn | grep -E ':80|:443' and stop it |
| Everything works, all visitors show as unknown country | Forwarded headers not trusted, or reference data not downloaded | Check TRUSTED_PROXY_NETWORK, then docker compose logs api | grep -i reference |
FAQ
Is the certificate really free? Yes. Let's Encrypt is a non-profit certificate authority and charges nothing. The only cost in this part is your domain name.
What happens in 90 days? Nothing you have to do. Caddy renews well before expiry and reloads itself. This is the main practical advantage over certbot, where renewal is a separate timer that can quietly stop working and is usually discovered by an expired certificate.
Can I serve several sites from one Caddy?
Yes — add another block with its own hostname and its own reverse_proxy. Each gets its own certificate automatically.
Do I need to open port 80 if everything redirects to HTTPS? Keep it open. It serves the redirect, and it is a fallback validation route if TLS-ALPN-01 ever fails.
Can I use Cloudflare in front of this?
Yes, but then Cloudflare terminates TLS and its addresses become the ones the engine sees. Add Cloudflare's published ranges to TRUSTED_PROXY_NETWORK, or your entire audience will appear to be Cloudflare.
What if my server is behind a home router? Forward ports 80 and 443 to it, and make sure your public IP is stable or use a dynamic-DNS name. Validation must be able to reach you from outside.
Should I use Nginx instead if I already know it?
If you are already comfortable with Nginx and certbot, that route works and we have a guide for it. Just remember to set X-Forwarded-For yourself — Nginx does not add it unless you say so, and its absence fails silently in exactly the way that ruins analytics data.
Conclusion
One DNS record, one repository, six lines of configuration — and your analytics installation has a real address, a real certificate, HTTP/2, HTTP/3, an automatic redirect from plain HTTP, and a renewal you will never think about again.
It also has the one setting that decides whether it measures your visitors or your own infrastructure, which we will verify with real traffic before the series ends.
Nobody has claimed the installation yet. That is next — along with getting the tracking code onto a real website.
← Previous: Part 2: Close the Ports Docker Opened Behind Your Firewall Next: Part 4: Claim the Install and Add Your First Website →
