Build an Overtime Timesheet App in Power Apps — Part 4: Create the Solution, Environment Variables and Canvas App

The app gets its home in this part: a Power Apps solution that holds the Overtime Timesheet canvas app and four environment variables, which tell it where its SharePoint data is. By the end, the app exists, it's responsive with modern controls, and it's connected to both lists and to people's Microsoft 365 profiles.
This is Part 4 of a 20-part series.
- Part 1: Plan the App and Set Up the Demo Organization
- Part 2: Create the SharePoint Site and Lists
- Part 3: Keep Overtime Private with SharePoint Permissions
- Part 4: Create the Solution, Environment Variables and Canvas App (you are here)
- Part 5: Build the Home Screen
- Part 6: Build the Log Overtime Screen
- Part 7: Build the My Overtime Screen
- Part 8: Build the Approval Flow for Teams and Outlook
- Part 9: Show Approvers What's Waiting (coming soon)
- Part 10: Build the Departments Screen (coming soon)
- Part 11: Build the Reports Screen (coming soon)
- Part 12: Import the Old Excel Timesheet (coming soon)
- Part 13: Create the Monthly Payroll Workbook with Office Scripts (coming soon)
- Part 14: Build the Power BI Overtime Report (coming soon)
- Part 15: Share the App and Add It to Microsoft Teams (coming soon)
- Part 16: Test Every Role and Department (coming soon)
- Part 17: Build a Setup Flow That Creates the Lists (coming soon)
- Part 18: Run the Solution Checker and Export the Solutions (coming soon)
- Part 19: Install the App in a New Environment (coming soon)
- Part 20: Recap, Production Checklist and Next Steps (coming soon)
Parts 2 and 3 built and secured the SharePoint side. This part starts the Power Platform side. Each generic task has its own short guide, and this part gives the values for this app, and why.
What You'll Set Up
- A solution, Overtime Timesheet, from the Dewiride publisher, and your preferred solution.
- Four environment variables: one for the site, one for each list, and one for the payroll library.
- The canvas app: a responsive tablet app with modern controls and three data sources, Office365Users, Departments and OvertimeEntries, the lists coming through the variables.
Prerequisites
- Part 3 completed: the site, its two lists and the library, with their permissions.
- Dataverse in your Default environment, and the System Administrator role in it. Part 1 explains why the app lives in the Default environment. The example's already had both. If yours doesn't, follow How to Add a Dataverse Database to the Default Power Platform Environment and How to Make Yourself System Administrator of a Power Platform Environment first.
- The guides this part relies on. Each step says which one to follow:
- How to Create a Solution and Publisher in Power Apps
- How to Create Environment Variables for a SharePoint Site and List in Power Apps
- How to Create an Environment Variable for a SharePoint Document Library in Power Apps
- How to Create a Canvas App Inside a Solution in Power Apps
- How to Add a Description to a Canvas App in Power Apps
- How to Make a Canvas App Responsive in Power Apps
- How to Turn On Modern Controls and Themes in Power Apps
- How to Add the Office 365 Users Connector to a Canvas App in Power Apps
- How to Connect a Canvas App to SharePoint Lists with Environment Variables
- How to Publish a Canvas App in Power Apps
- How to Check a Canvas App's License Designation in Power Apps
Step 1: Create the Solution
Follow How to Create a Solution and Publisher in Power Apps, with these values:
| Field | Value |
|---|---|
| Display name | Overtime Timesheet |
| Name | OvertimeTimesheet, filled in for you |
| Publisher | Dewiride (Dewiride), or your own |
| Version | 0.1.0.0 |
| Set as your preferred solution | Ticked |
| Description, under More options | Overtime Timesheet canvas app, flows and environment variables. Staff log their overtime, department approvers approve it, and payroll gets the monthly totals. |
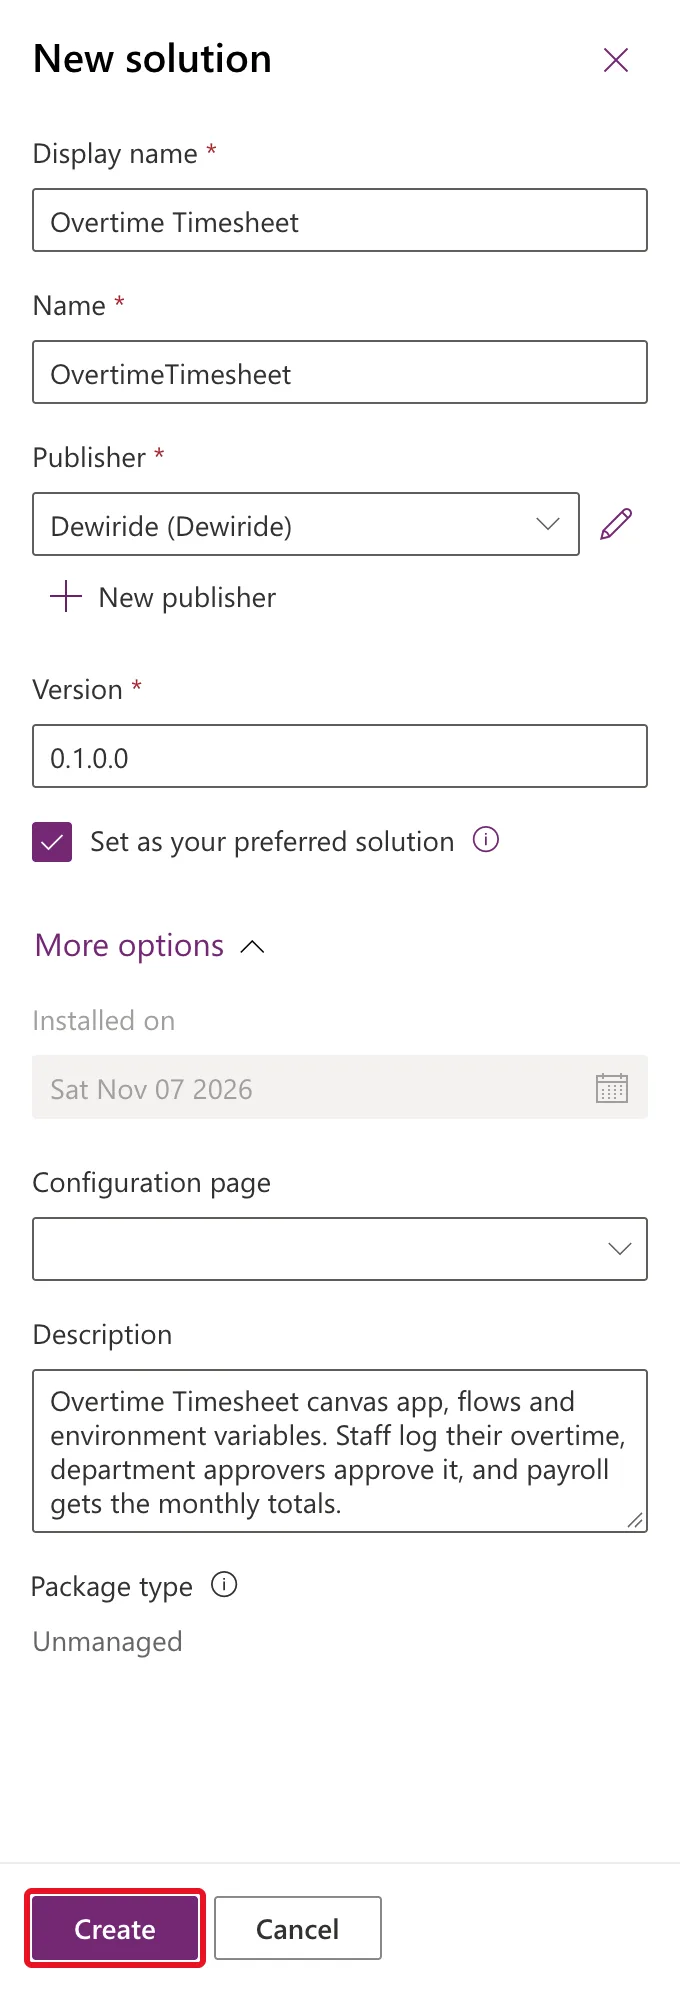
Why these values:
- Reuse your publisher. A publisher stands for whoever builds the solutions, so one serves them all. The example reuses an existing publisher, Dewiride, so this solution's names start with
dewiride_. If you have no publisher yet, the guide creates one. - Version 0.1.0.0 while the app is being built. Part 18 sets the first release's version.
- The preferred solution. Anything you create outside a solution lands in your preferred one, and so does anything you create inside another solution. In the example, another solution was still preferred, so ticking the box mattered: without it, the flows in later parts would land in both solutions, as in Fixed: A New Cloud Flow Shows Up in Two Solutions.
Select Create. Back on Solutions, the card at the top and the tag in the list both show the new preferred solution:
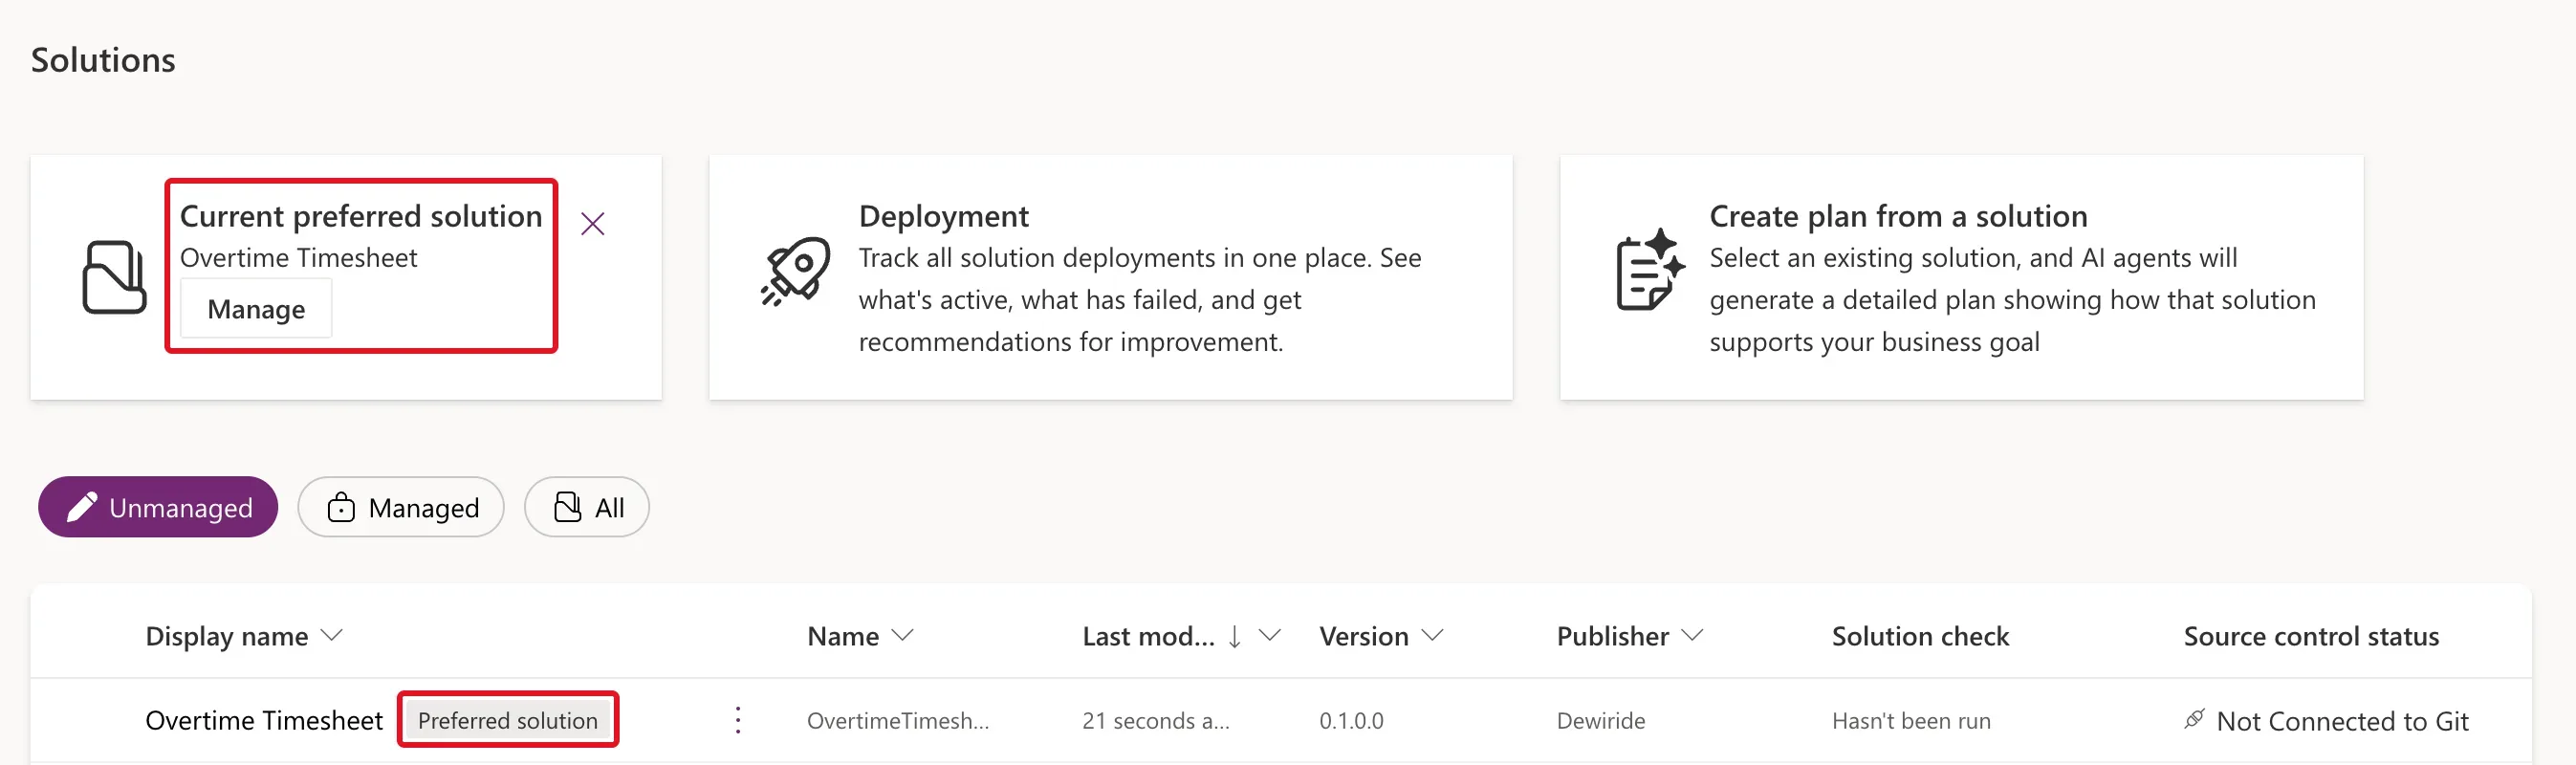
Step 2: Create the Site and List Variables
Open the solution and follow How to Create Environment Variables for a SharePoint Site and List in Power Apps:
| Display name | Name | Parameter Type | Site | Current value | Description |
|---|---|---|---|---|---|
| Overtime Timesheet Site | dewiride_OvertimeTimesheetSite | Site | — | https://<your-organization>.sharepoint.com/sites/OvertimeTimesheet | The SharePoint site that holds the Overtime Timesheet lists and library. |
| Departments | dewiride_DepartmentsList | List | Overtime Timesheet Site | Departments | The SharePoint list of departments and their approvers. |
| OvertimeEntries | dewiride_OvertimeEntriesList | List | Overtime Timesheet Site | OvertimeEntries | The SharePoint list of overtime entries. |
Leave Default Value empty on all three. Here's the OvertimeEntries variable before Save:
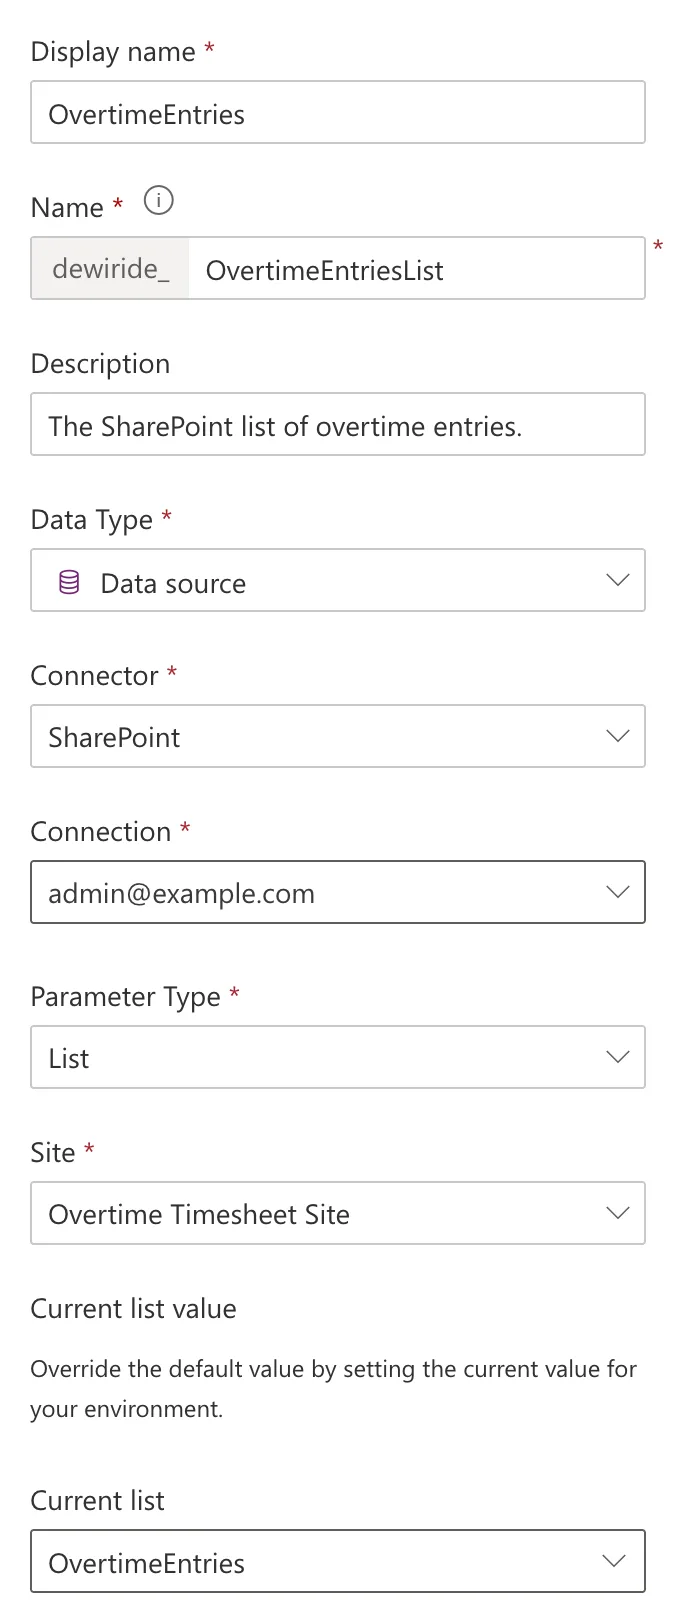
Why:
- The list variables are named exactly like the lists. The app's data sources take the variables' display names, so formulas say
DepartmentsandOvertimeEntries. - Pick the right site variable. A list variable's Site box lists every site variable in the environment. The example's also offered a site variable from another solution.
- No default values. A buyer installing the solution has their own site. With no value in the solution, Power Apps asks them for theirs during the install.
Step 3: Create the Library Variable
The payroll library gets a variable too. Follow How to Create an Environment Variable for a SharePoint Document Library in Power Apps:
| Display name | Name | Parameter Type | Site | Current list | Description |
|---|---|---|---|---|---|
| Payroll Exports | dewiride_PayrollExportsLibrary | List | Overtime Timesheet Site | Payroll Exports | The SharePoint document library for the monthly payroll workbooks. |
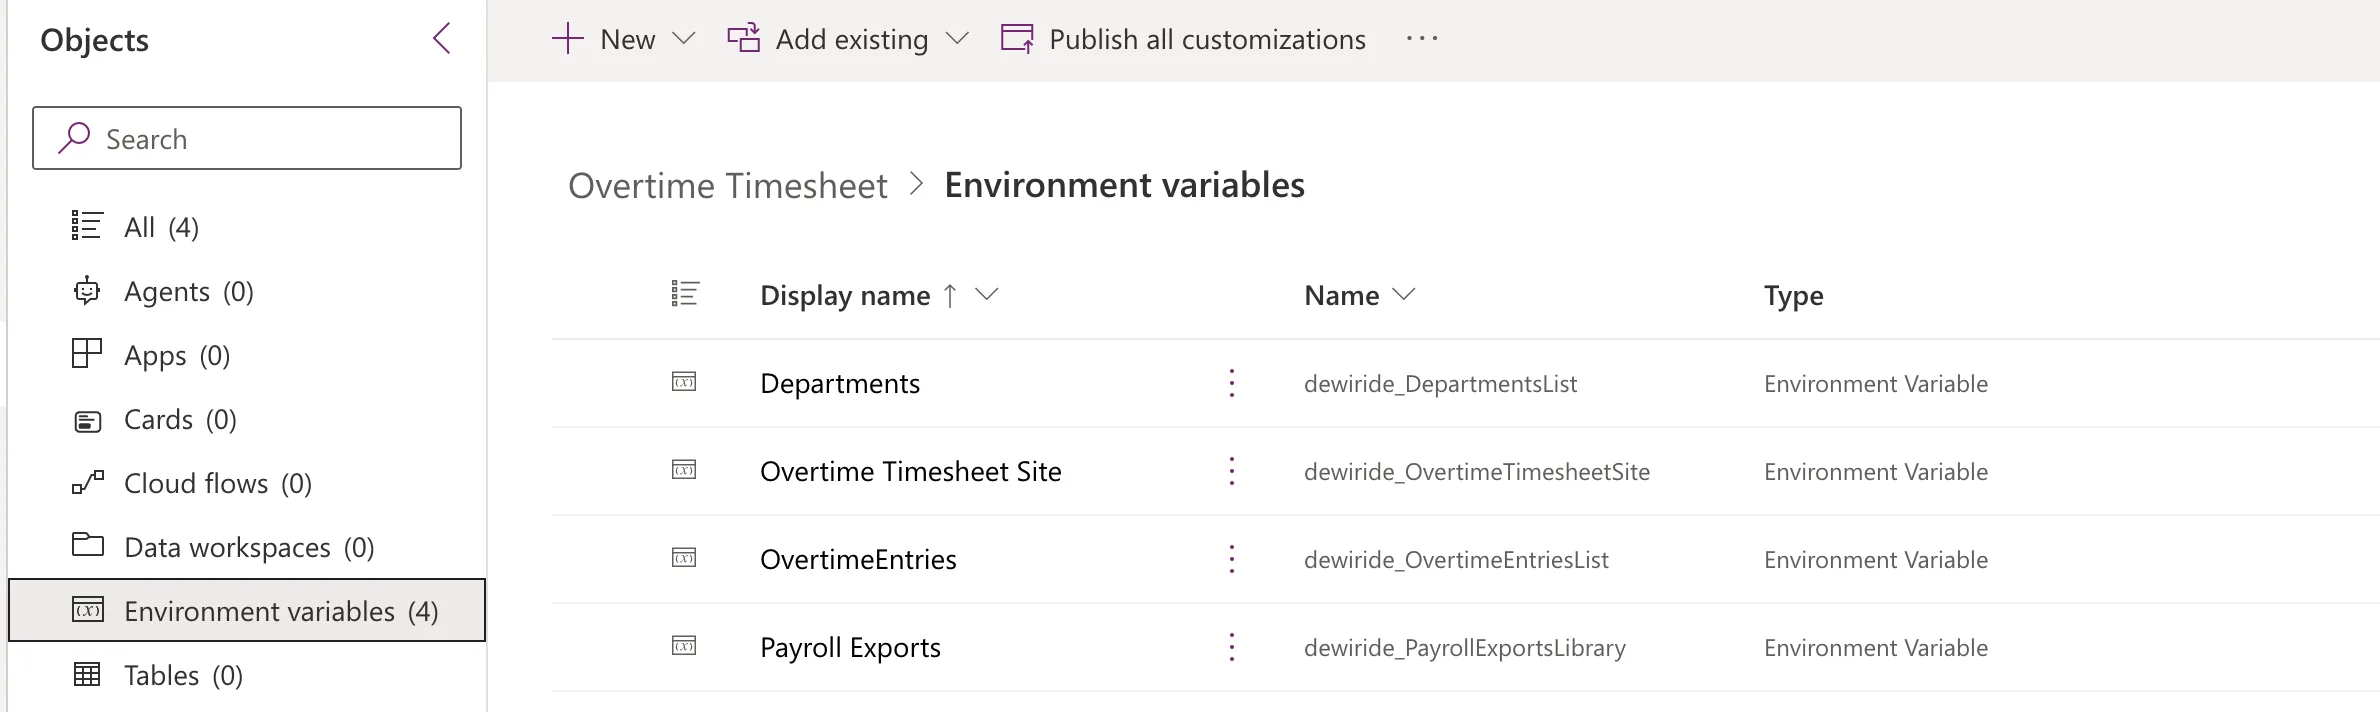
There's no Library parameter type: a library is a kind of list, and Current list offers the site's libraries alongside its lists. The app itself won't use this variable. The monthly payroll flow in Part 13 saves workbooks into the library, and creating the variable now keeps all the solution's settings in one place.
The solution's Environment variables now lists all four:
Step 4: Create the Canvas App
Follow How to Create a Canvas App Inside a Solution in Power Apps: New → App → Canvas app.
| Field | Value |
|---|---|
| App name | Overtime Timesheet |
| Format | Tablet |
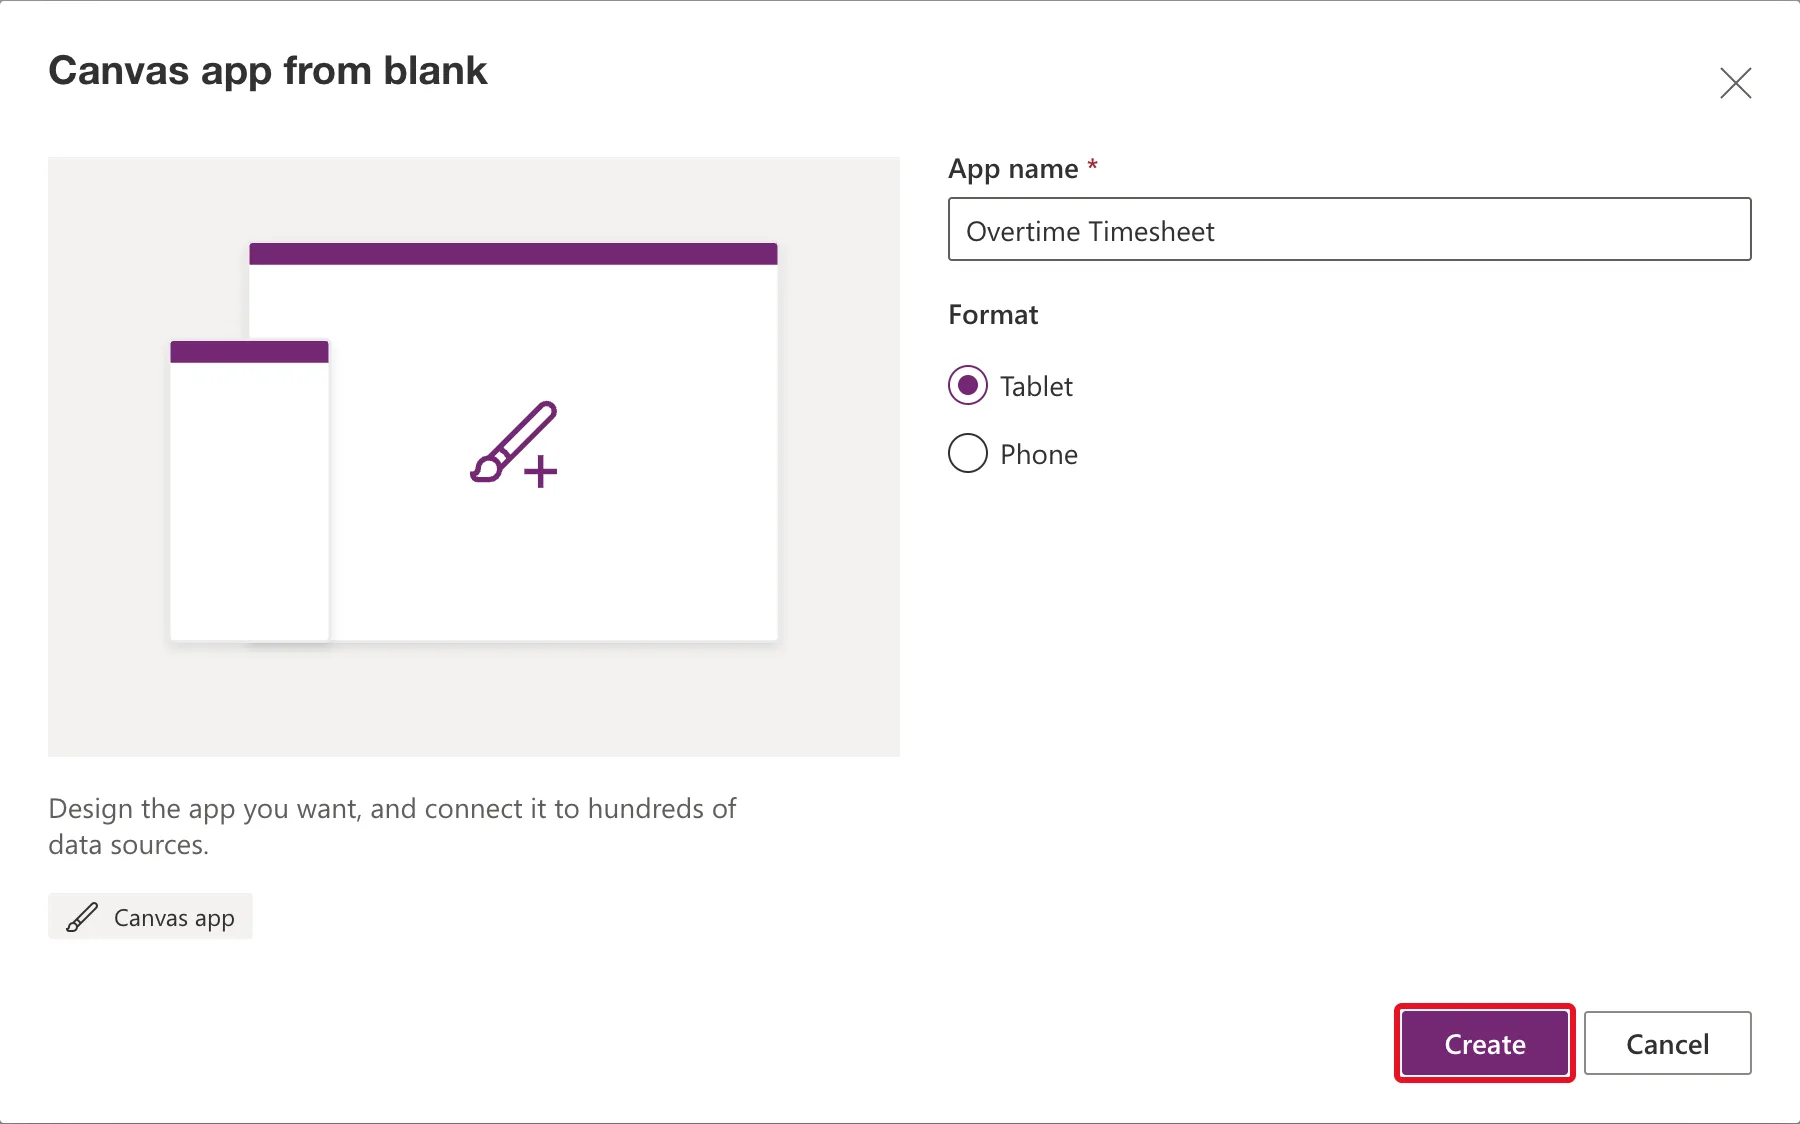
Tablet, because Microsoft recommends it for apps that should respond to phone, tablet and web sizes; staff will log overtime from phones as well as computers. Studio opens with a Welcome to Power Apps Studio dialog: select Skip, then Save. This is the app now, one empty screen:
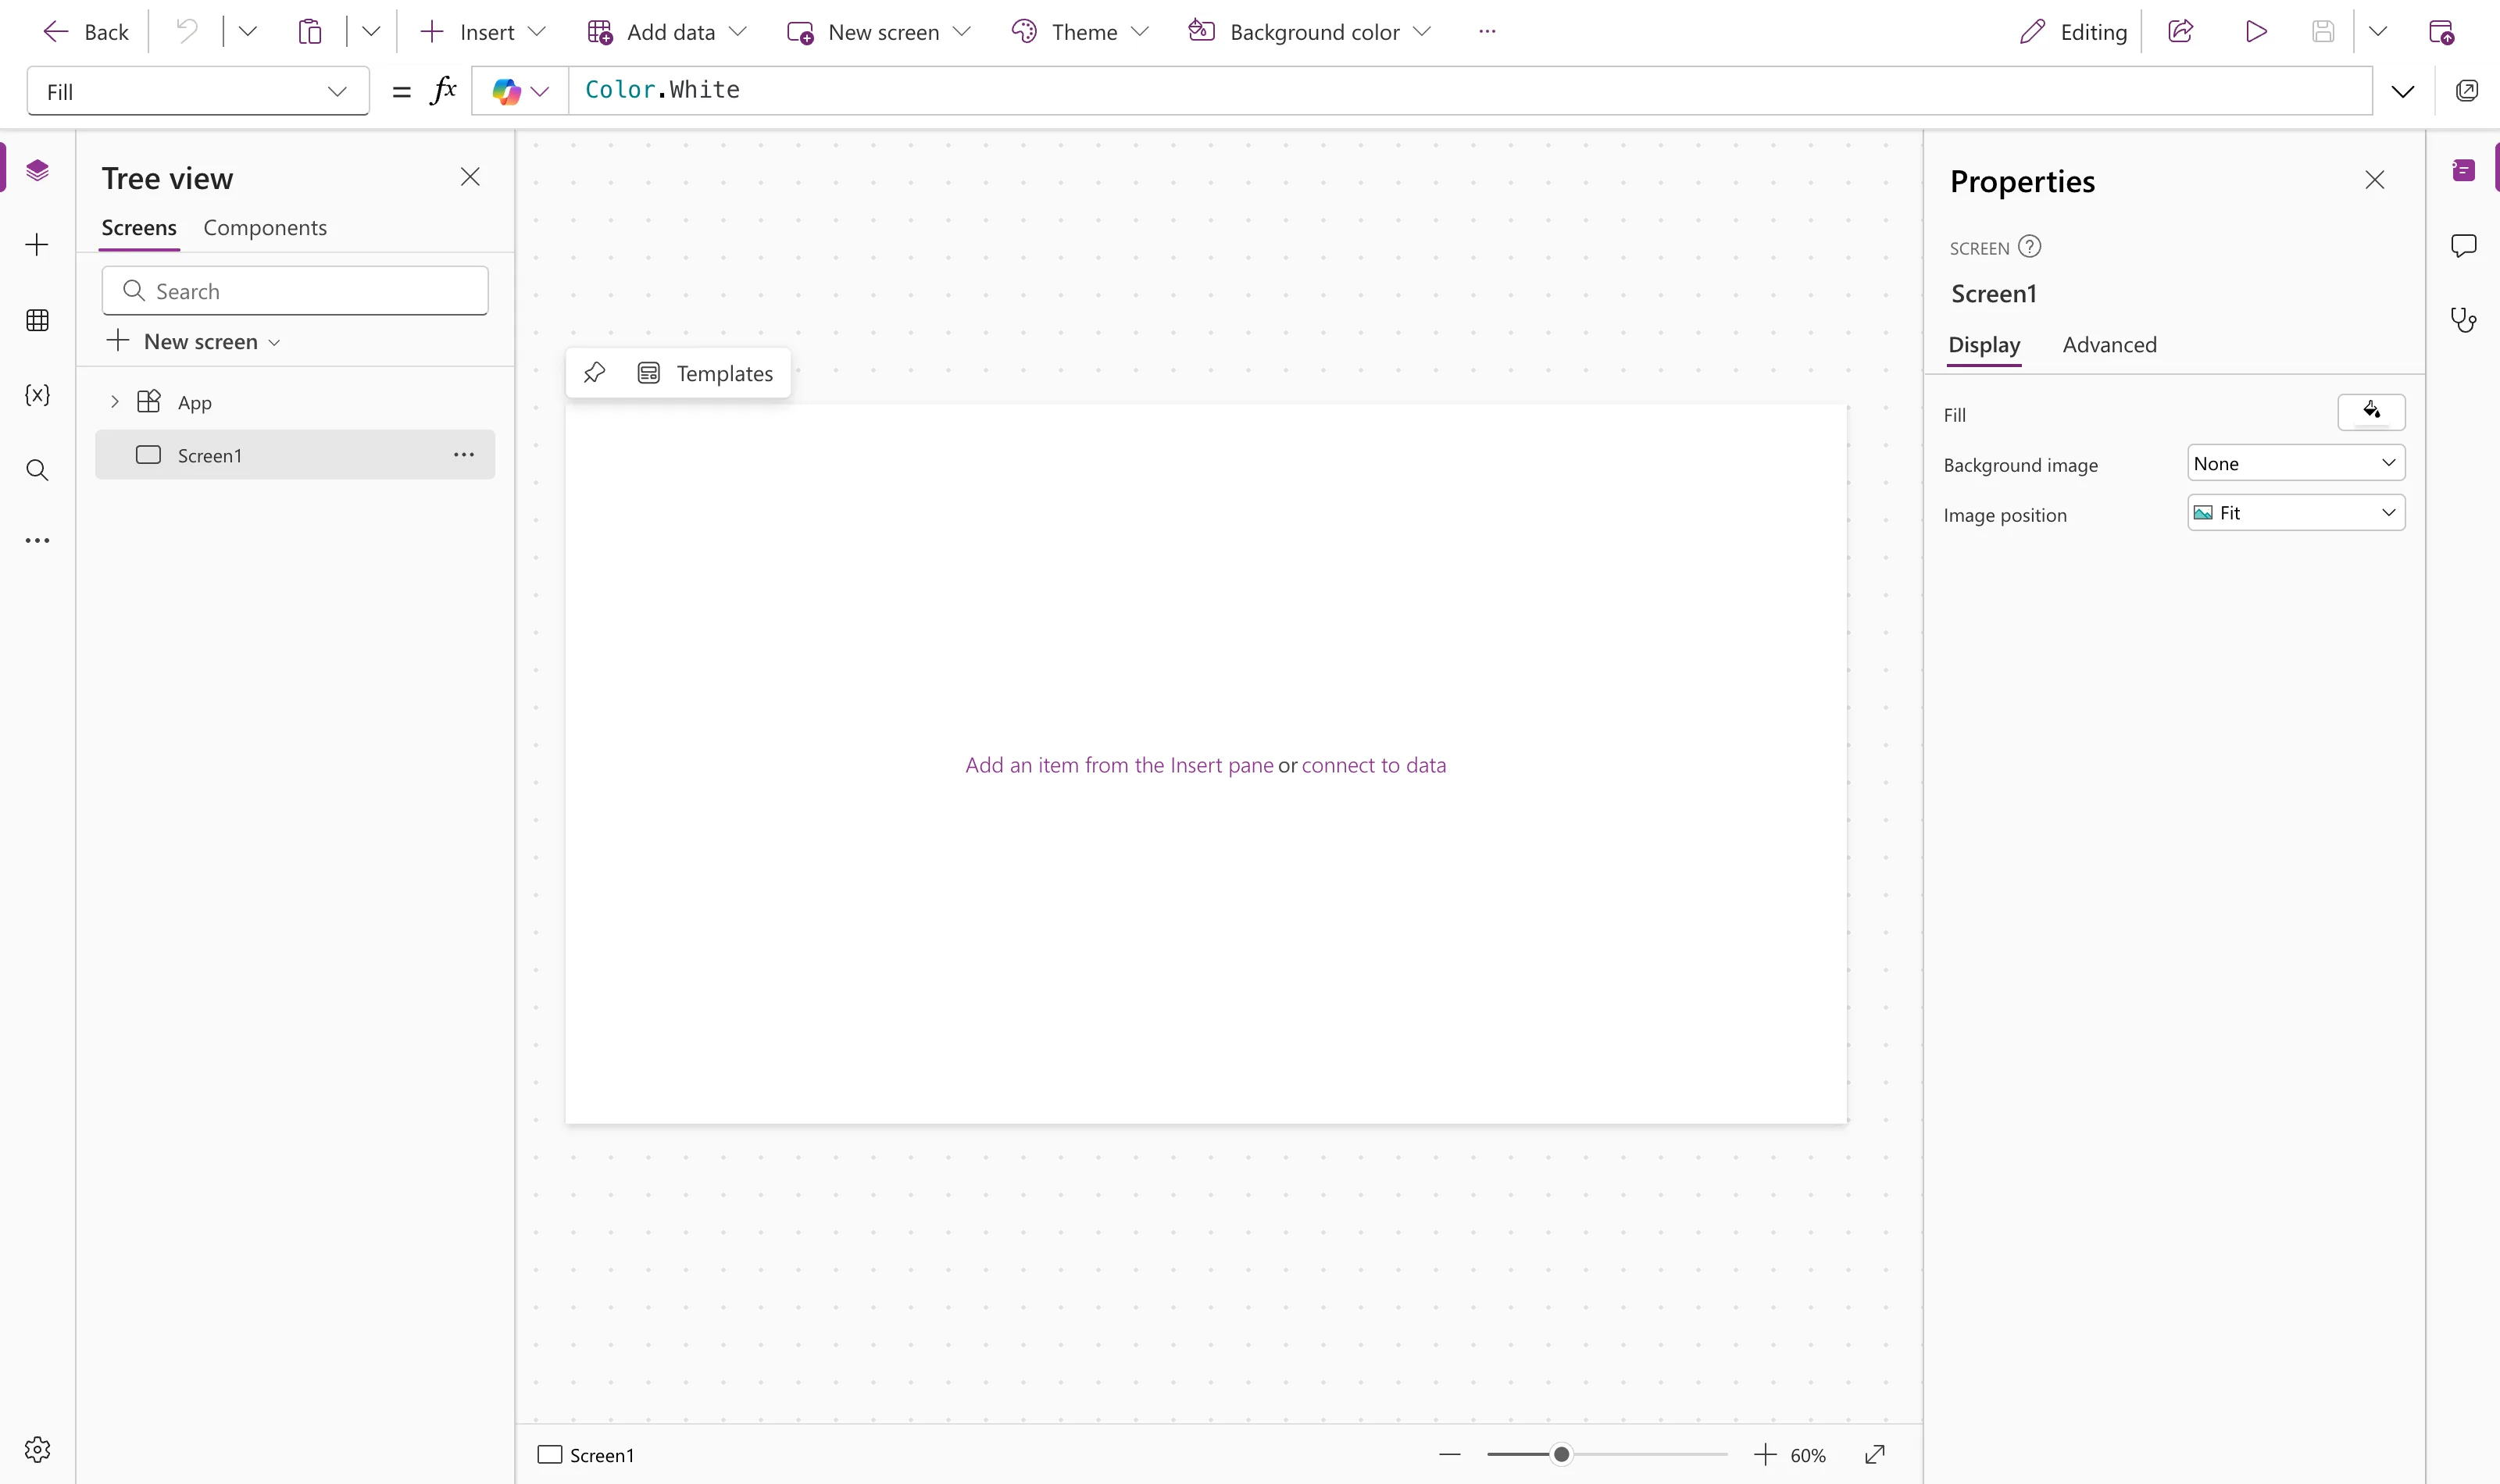
Step 5: Change the App's Settings
Open App settings, the gear at the bottom left of Studio:
| Tab | Setting | Value | Guide |
|---|---|---|---|
| General | Description | Log your overtime and see your totals. Approvers see what's waiting for them, and payroll gets each month's totals. | Add a description |
| General | Data row limit | 500, the default | What is delegation |
| General | Automatically create environment variables when adding data sources | Off, the default | Connect lists with variables |
| Display | App layout | Responsive | Make it responsive |
| Updates → New | Modern controls and themes | On | Turn on modern controls |
Why:
- The description tells people what the app is for.
- Data row limit is the most rows Power Apps fetches when it can't hand a query to SharePoint. Microsoft allows 1 to 10,000. The app's queries will be handed to SharePoint, so 500 stays as a safety net.
- Automatic variables stay off, because you created the variables yourself, with the names you want.
- Responsive, so screens fill the window instead of being zoomed: on a phone, a fixed tablet app shrinks to a thin strip.
- Modern controls, because every control from Part 5 on is a modern one. The Updates tab says new updates are on for new apps, yet this switch was Off in the new app. Turn it on:
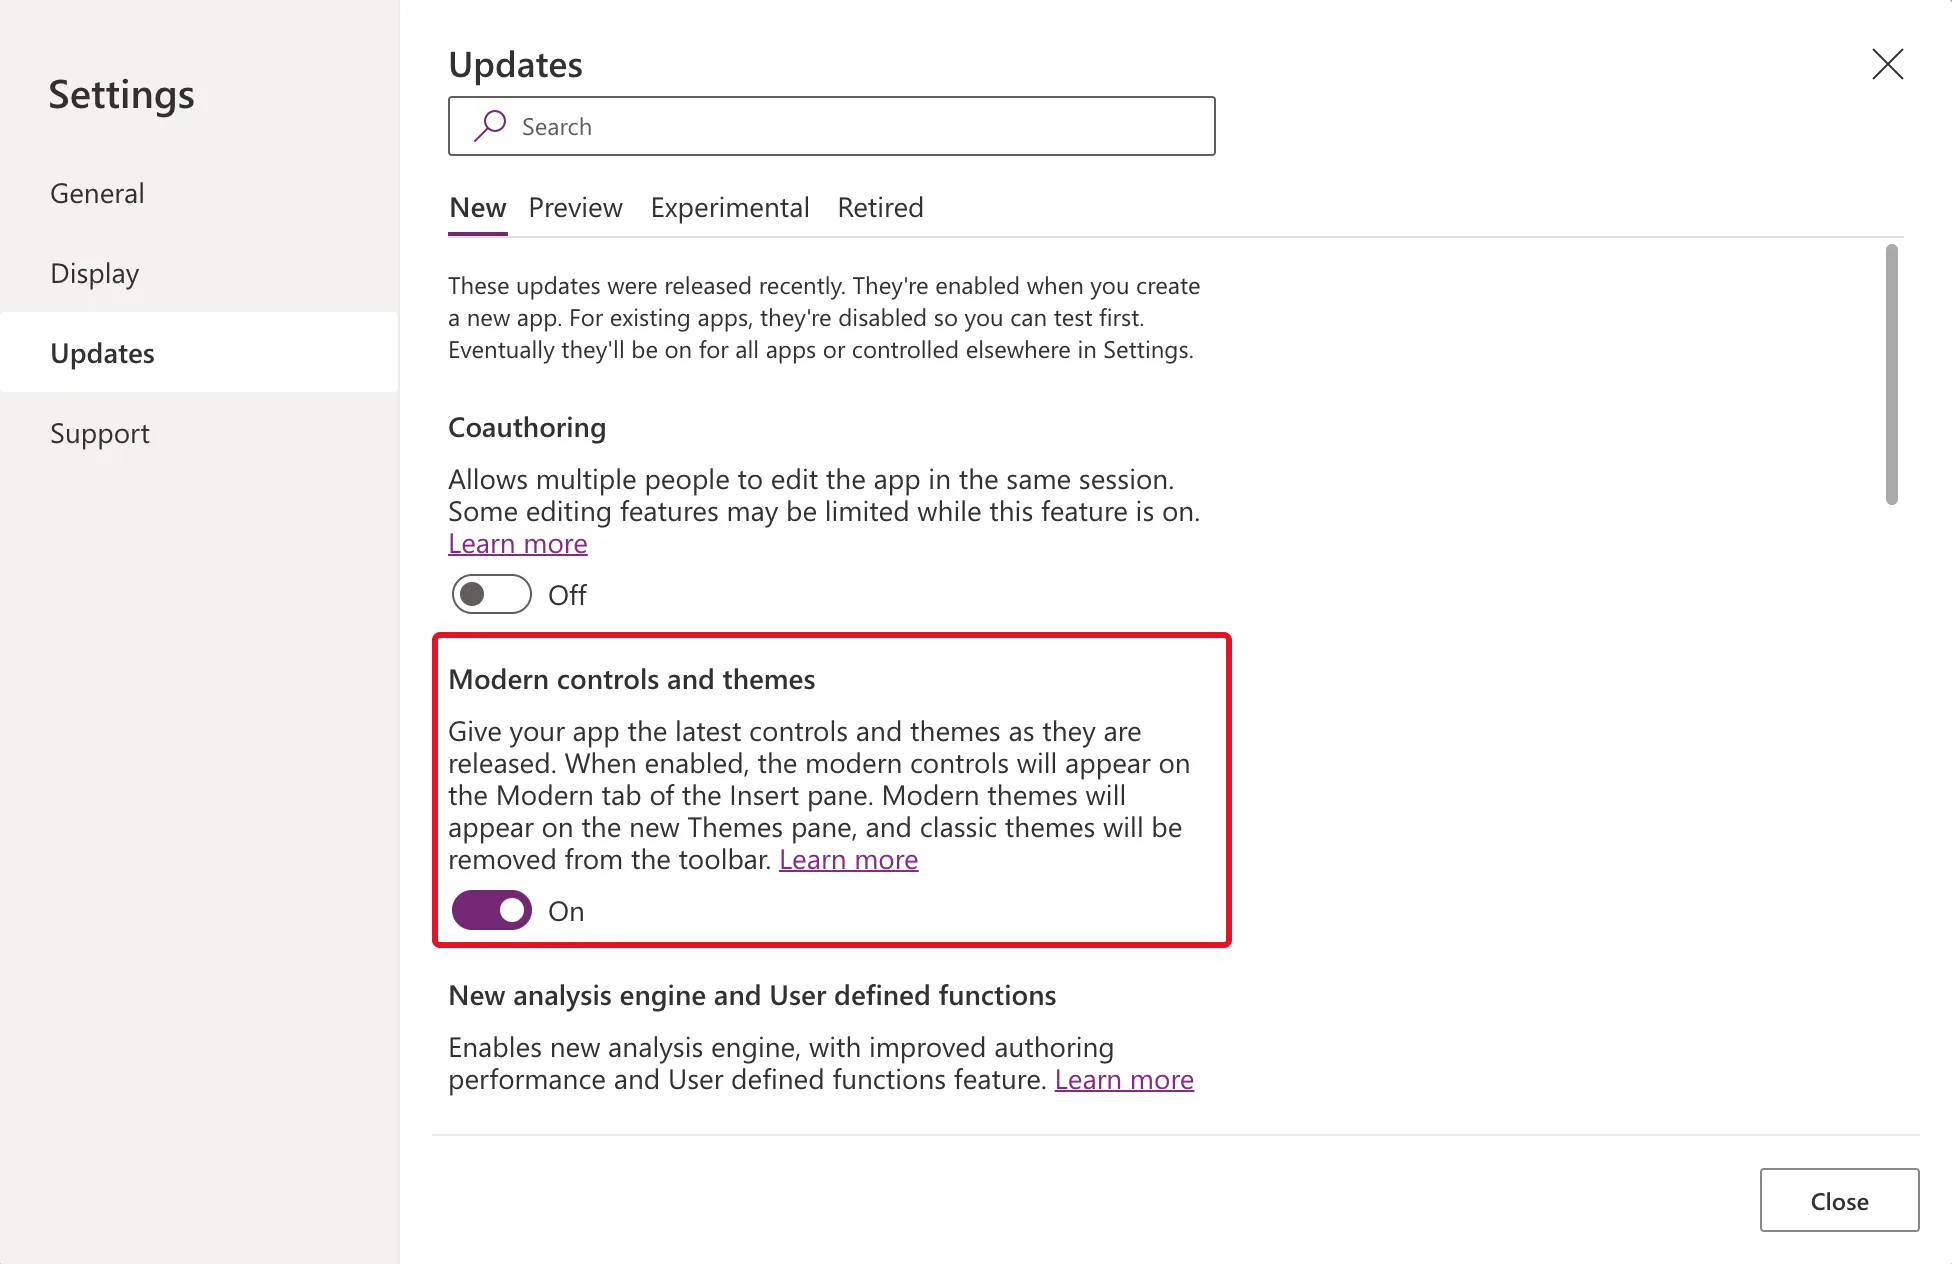
The classic Theme button disappears from the command bar. Close Settings and save.
Step 6: Connect the Data
Add three data sources:
- Office 365 Users: follow How to Add the Office 365 Users Connector to a Canvas App in Power Apps. The app reads each person's department from their profile.
- Departments and OvertimeEntries: follow How to Connect a Canvas App to SharePoint Lists with Environment Variables. Choose Overtime Timesheet Site on the Advanced tab, then tick Departments and OvertimeEntries on the second Advanced tab. Leave Payroll Exports unticked.
The Data pane shows all three:
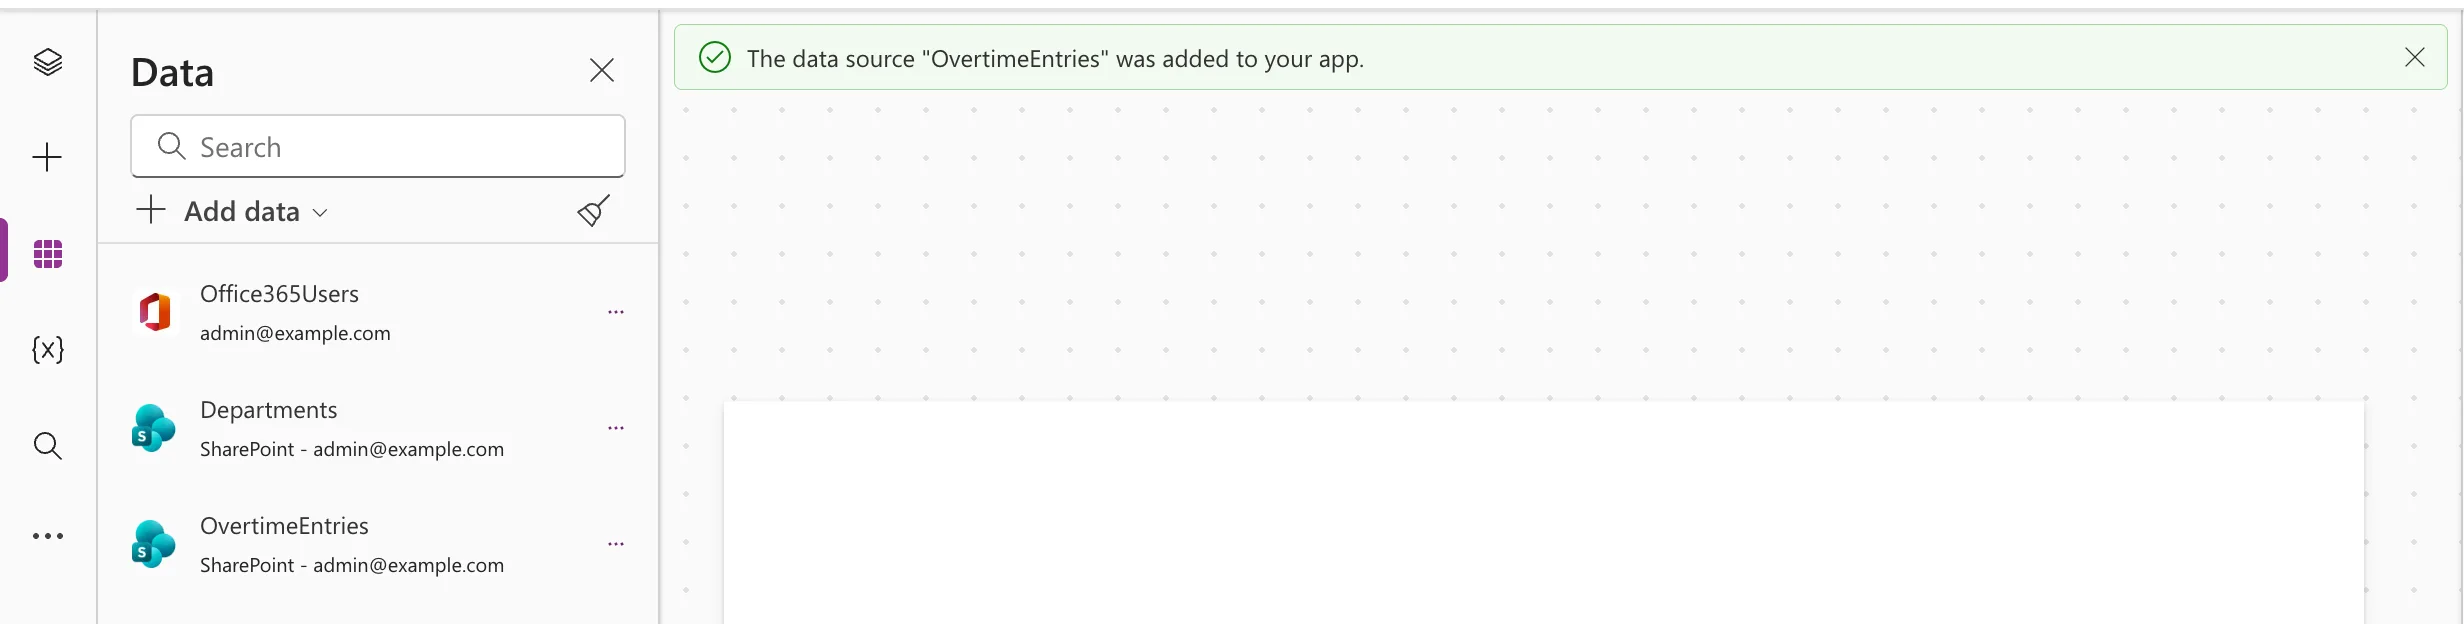
Save. The App checker now lists the three under Unused data sources, and suggests renaming Screen1. Both are expected until Part 5 builds the first real screen: Fixed: "Unused Data Sources" and Fixed: "Revise Screen Name".
Step 7: Publish Once and Check the Solution
Publish the app. Nobody else can open it yet, because it isn't shared until Part 15; the notice says Overtime Timesheet is now available to everyone, and Microsoft's documentation says publishing pushes the saved app to the people it's shared with. Publishing now lets the solution record what the app uses.
Back in the solution, All shows five objects: the canvas app and the four variables:
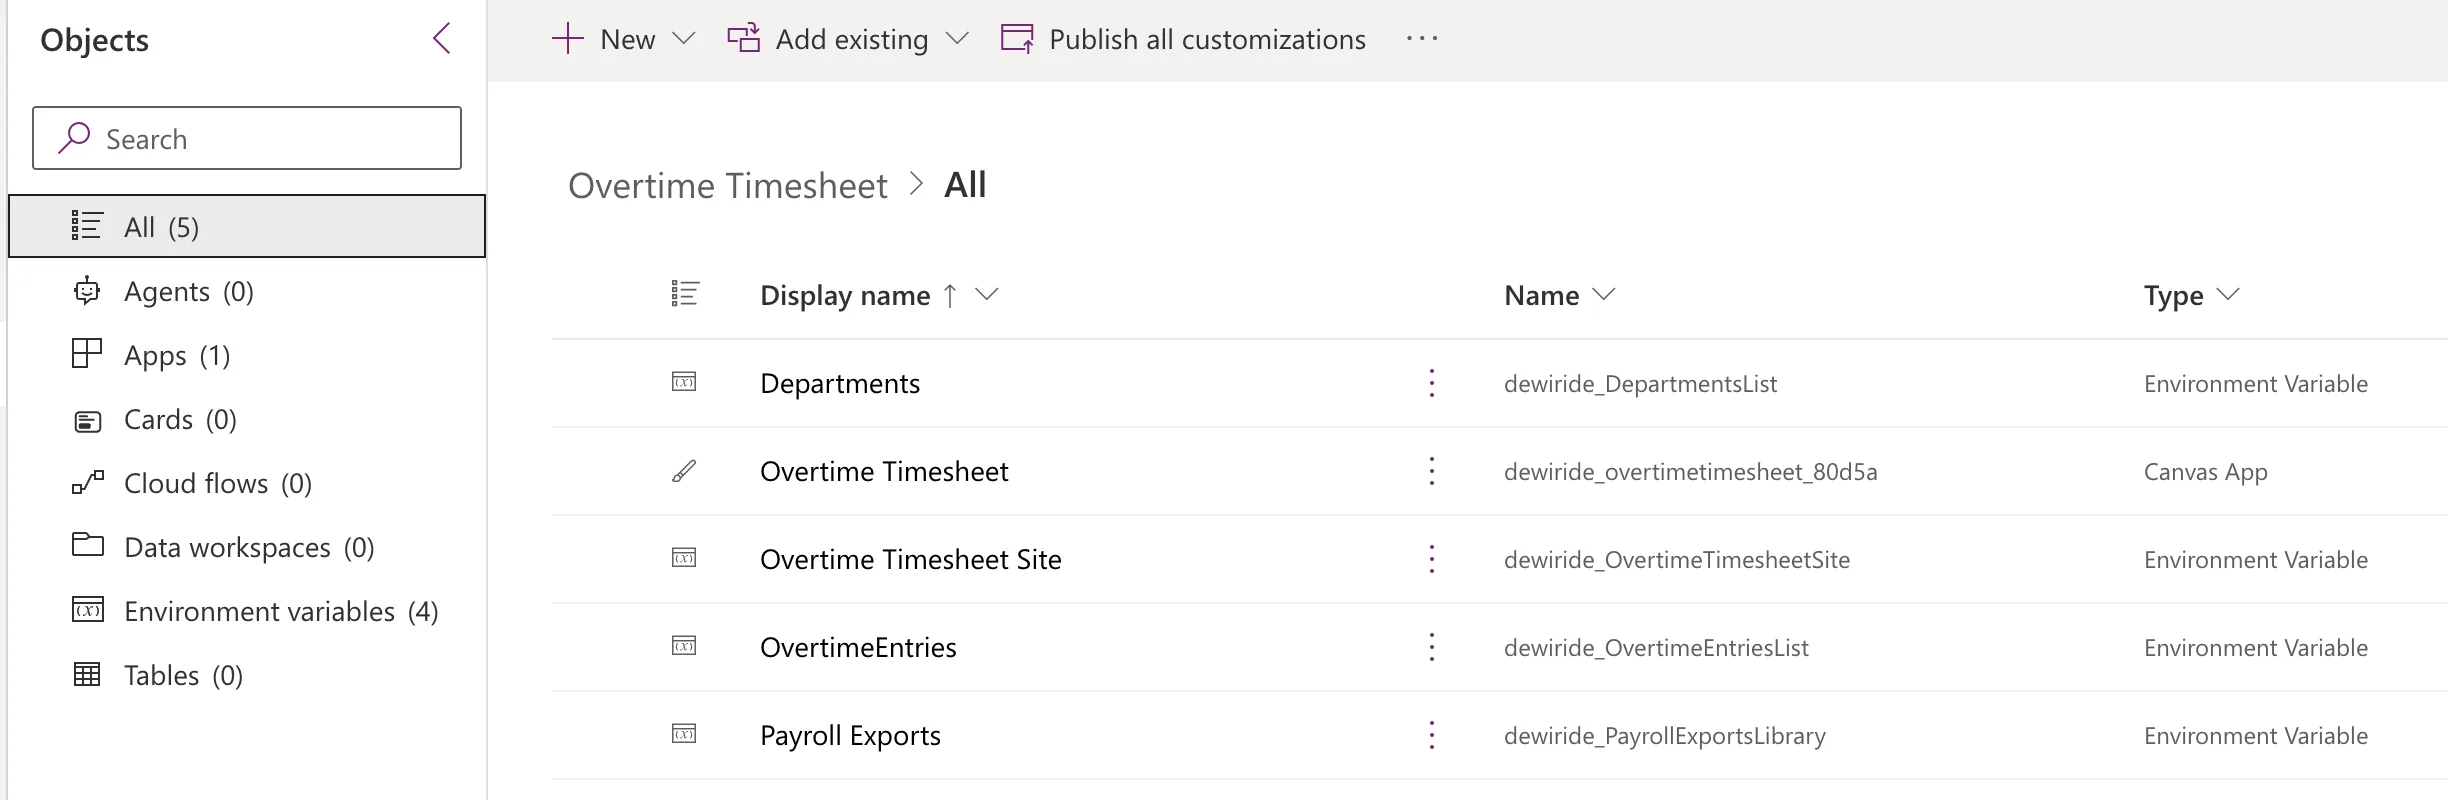
Select the app's ⋮ → Advanced → Show dependencies → Uses. It lists Departments, OvertimeEntries and Overtime Timesheet Site: the app follows the variables, not the site's address. Before the app was published, the same tab was empty.
There are no connection references, which is expected: Microsoft documents that canvas apps use them only for implicitly shared connections, and SharePoint and Office 365 Users connect as each person using the app.
Last, the license. In Apps, select the app's ⋮ → Settings:
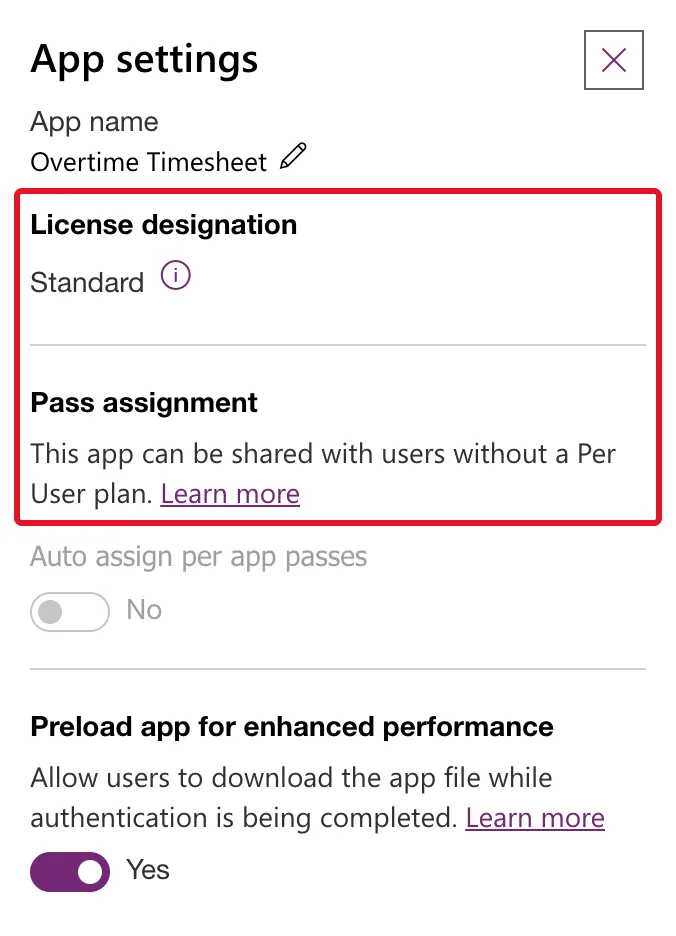
License designation: Standard, and "This app can be shared with users without a Per User plan." How to Check a Canvas App's License Designation in Power Apps shows the same on the Details page.
Common Mistakes
| Mistake | What happens | Do this instead |
|---|---|---|
| Creating the app from Apps | It isn't in the solution | Create it from the solution |
| Leaving another solution preferred | New flows are added to both solutions | Make Overtime Timesheet your preferred solution |
| Choosing another solution's site variable | The list variables point at the wrong site | Choose Overtime Timesheet Site |
| Choosing the site on Recent sites | The app is tied to this one site's address | Use the Advanced tabs |
| Naming a variable Departments List | The data source becomes 'Departments List' | Name the list variables like the lists |
| Building screens while App layout is Fixed | They're designed for a zoomed 16:9 canvas | Switch to Responsive first |
Troubleshooting
| Symptom | Likely cause | Fix |
|---|---|---|
| Solutions says We couldn't load your data | Your Environment Maker role hasn't arrived after adding Dataverse | Fixed: "We Couldn't Load Your Data" |
| A bar says some commands are unavailable due to your privileges | You're Environment Maker, not System Administrator | Fixed: "One or More Commands Are Unavailable" |
| Payroll Exports isn't in Current list | Your account can't open the library, which Part 3 restricted to payroll | Use a site owner's account |
| Studio's Advanced tab doesn't list Overtime Timesheet Site | The variable has no current value, or the app isn't in the solution | Give it a value; open the app from the solution |
| Show dependencies → Uses is empty | The app hasn't been published yet | Publish once |
FAQ
Why a new solution instead of adding to an existing one?
A solution is the unit you export and install, so an app that's installed on its own gets its own solution.
Does any of this need premium licenses?
No. The app uses SharePoint and Office 365 Users, both standard connectors, and Microsoft's environment variables FAQ says the variables don't need premium licenses. Step 7 shows the app's designation: Standard.
Why publish an app with an empty screen?
So the solution records what it uses: Show dependencies reads the published app. Nobody can open it until it's shared in Part 15.
Where does the app's description show?
In Studio's Settings, the App object's properties and the Publish dialog. The app's Details page said Not provided; How to Add a Description to a Canvas App in Power Apps shows what the example saw.
Conclusion
The Overtime Timesheet solution, your preferred one, now holds:
- four environment variables: the site, Departments, OvertimeEntries and the Payroll Exports library;
- a responsive tablet canvas app with modern controls and a description;
- three data sources in the app: Office365Users, Departments and OvertimeEntries, the lists coming through the variables, as Show dependencies confirms.
The app's license designation is Standard.
Part 5 builds the first screen: a theme, named formulas for the signed-in person and their roles, and the Home screen.
Additional Resources
- Use data source environment variables in canvas apps: the Advanced tab and how canvas apps use the variables.
- Use environment variables in Power Platform solutions: types, values and the FAQ.
- Change screen size and orientation of canvas apps: scale to fit, which Studio now calls App layout.
- Overview of modern controls and theming in canvas apps: turning them on.
- Save and publish canvas apps: what publishing does.
- Use a connection reference in a solution with Microsoft Dataverse: when canvas apps use connection references.
← Previous: Part 3: Keep Overtime Private with SharePoint Permissions Next → Part 5: Build the Home Screen
