Build an Overtime Timesheet App in Power Apps — Part 10: Build the Departments Screen

Admins need to add departments and choose who approves their overtime without opening SharePoint. This part builds two screens for them: a list of departments with their approvers and whether each is active, and one screen that adds or edits a department, with a people picker, an Active toggle and a check for duplicate names.
This is Part 10 of a 20-part series.
- Part 1: Plan the App and Set Up the Demo Organization
- Part 2: Create the SharePoint Site and Lists
- Part 3: Keep Overtime Private with SharePoint Permissions
- Part 4: Create the Solution, Environment Variables and Canvas App
- Part 5: Build the Home Screen
- Part 6: Build the Log Overtime Screen
- Part 7: Build the My Overtime Screen
- Part 8: Build the Approval Flow for Teams and Outlook
- Part 9: Show Approvers What's Waiting
- Part 10: Build the Departments Screen (you are here)
- Part 11: Build the Reports Screen (coming soon)
- Part 12: Import the Old Excel Timesheet (coming soon)
- Part 13: Create the Monthly Payroll Workbook with Office Scripts (coming soon)
- Part 14: Build the Power BI Overtime Report (coming soon)
- Part 15: Share the App and Add It to Microsoft Teams (coming soon)
- Part 16: Test Every Role and Department (coming soon)
- Part 17: Build a Setup Flow That Creates the Lists (coming soon)
- Part 18: Run the Solution Checker and Export the Solutions (coming soon)
- Part 19: Install the App in a New Environment (coming soon)
- Part 20: Recap, Production Checklist and Next Steps (coming soon)
Since Part 5, the Home screen has shown admins a Departments button that did nothing. This part builds what it opens: the Departments screen, which lists every department, and the Edit Department screen, which adds a department or changes one. Each generic task has its own guide; this part gives the values for this app, and why.
What You'll Build
The two screens and their controls:
Departments Screen
└─ conMainDS                  vertical: fills the screen
   ├─ conHeaderDS             horizontal: copied from the My Overtime screen
   │  ├─ btnBackDS
   │  ├─ lblTitleDS           "Departments"
   │  └─ btnAddDS             opens an empty form
   └─ conBodyDS               vertical: scrolling
      └─ galDepartmentsDS     one row per department
         ├─ lblDepartmentNameDS
         ├─ lblApproversDS
         ├─ bdgStatusDS
         └─ btnEditDS

Edit Department Screen
└─ conMainED                  vertical: fills the screen
   ├─ conHeaderED             horizontal: copied from the Log Overtime screen
   │  ├─ btnBackED
   │  └─ lblTitleED           "Add department" or "Edit department"
   └─ conBodyED               vertical: scrolling
      ├─ conNameED            lblNameED, txtNameED
      ├─ conApproversED       lblApproversED, cmbApproversED
      ├─ tglActiveED
      ├─ lblProblemED         the first problem with the form
      └─ btnSaveED
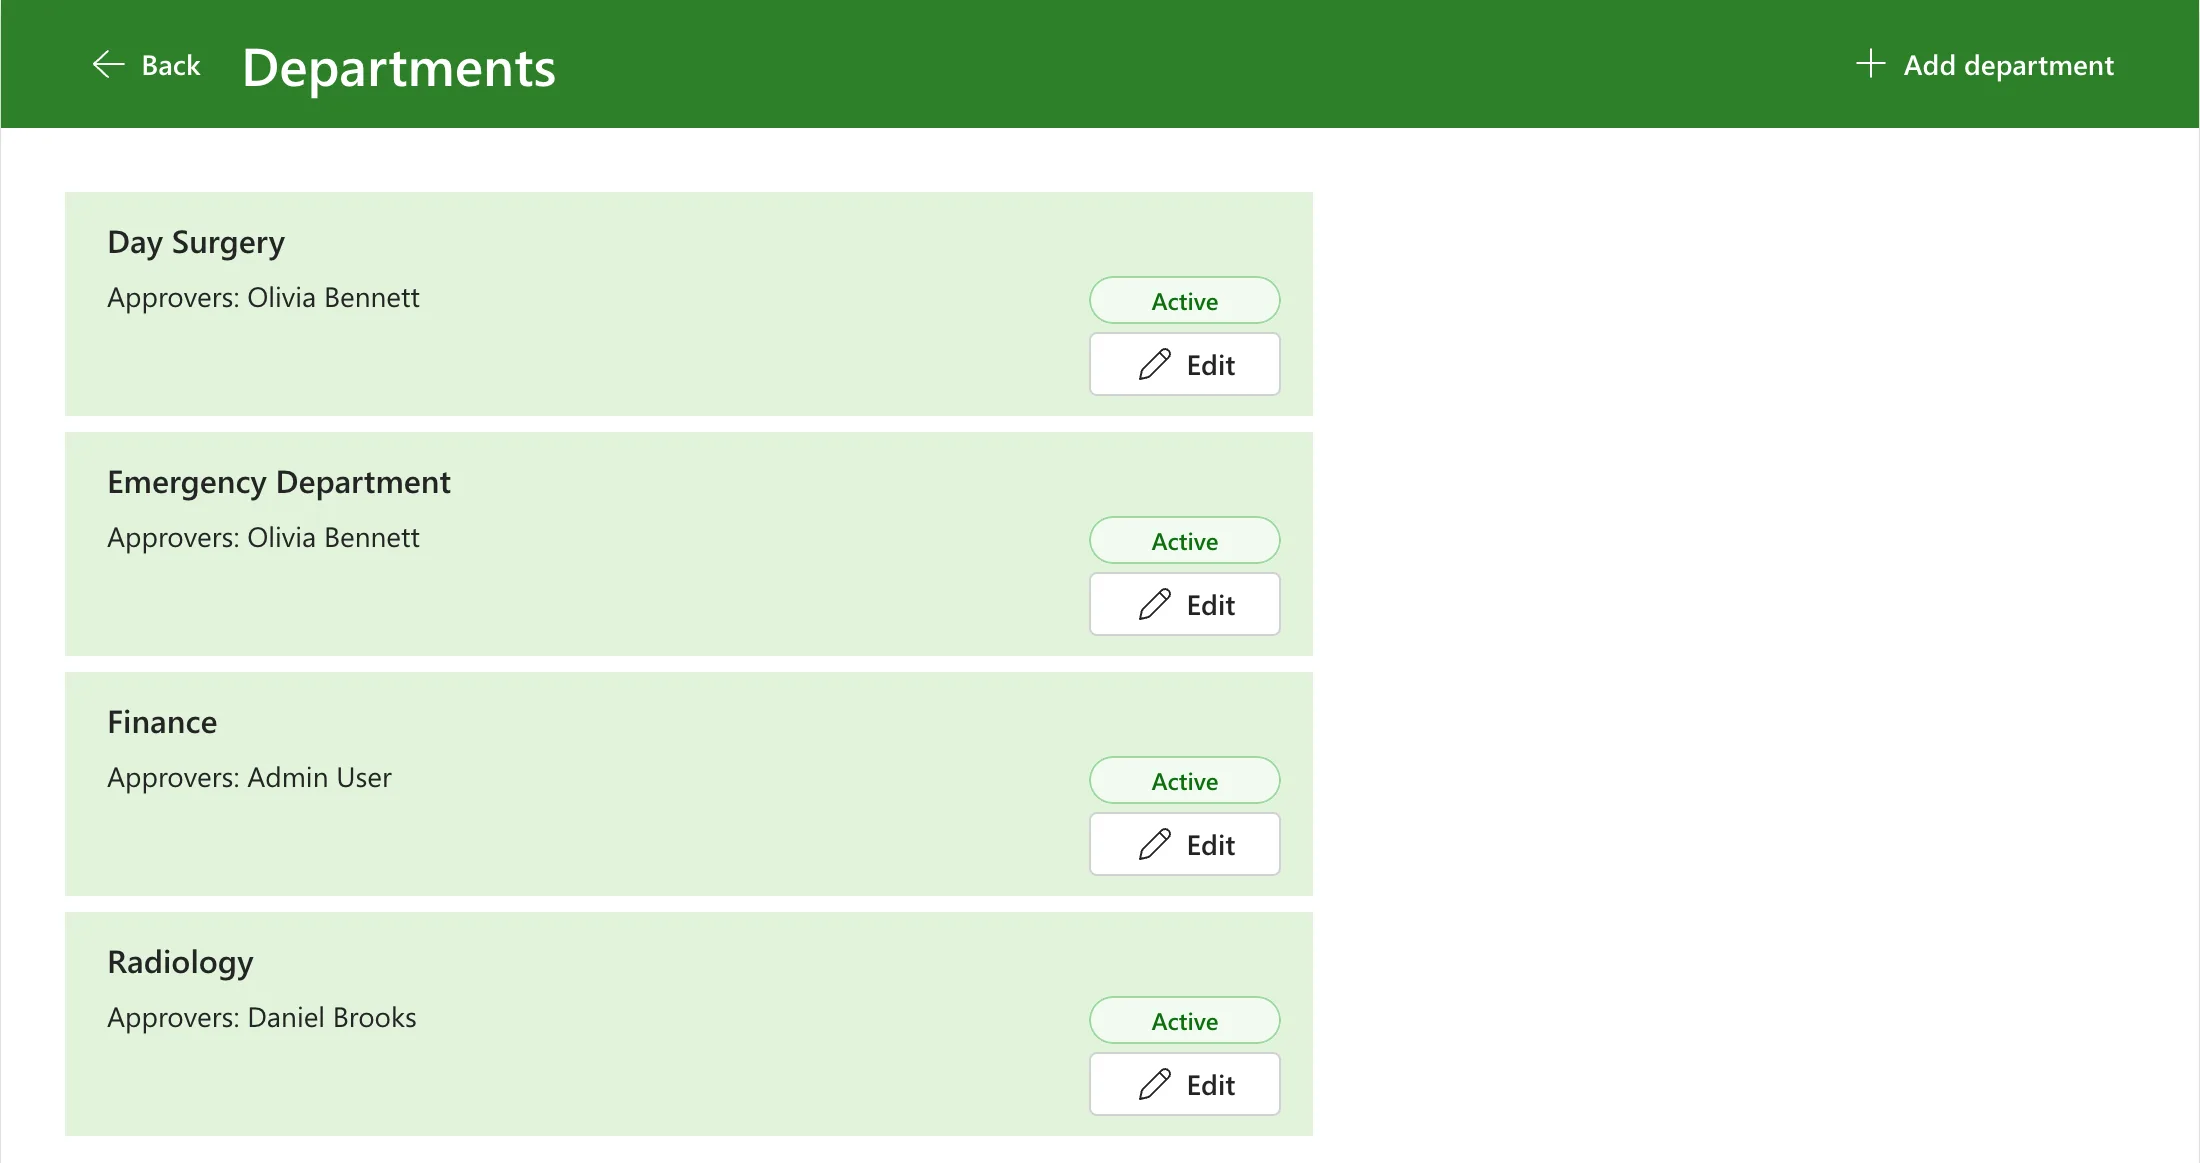
The finished list:
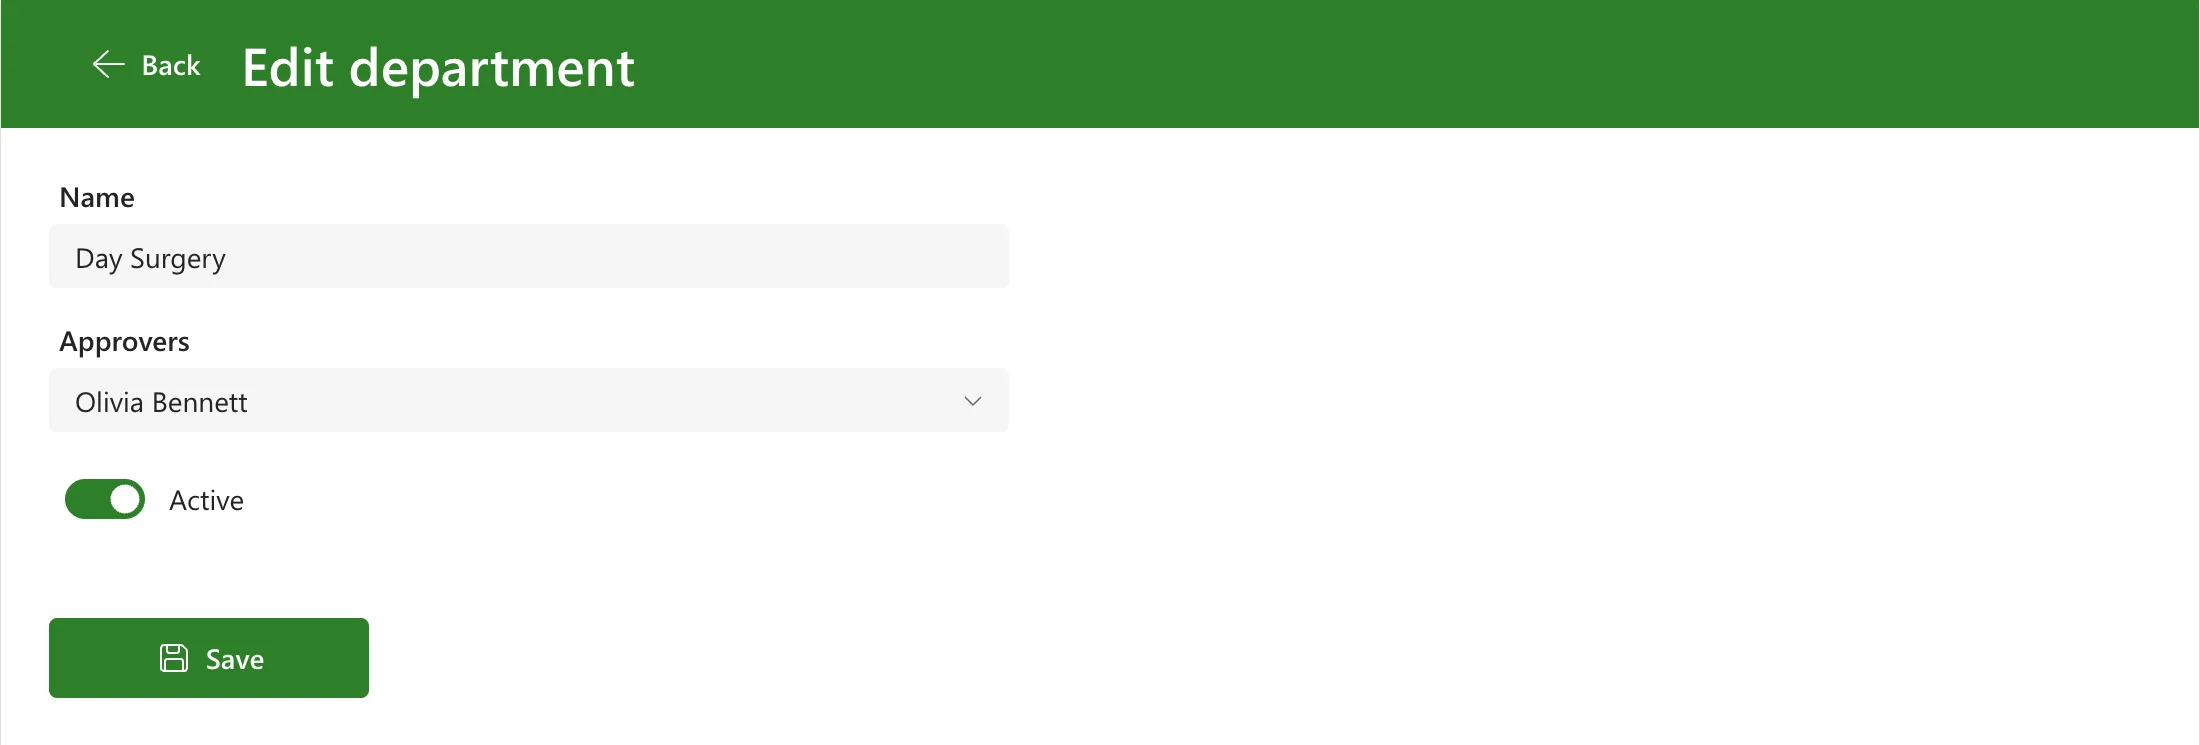
Edit on a row opens the department, ready to change:
How the Screens Work
The decisions behind them:
- SharePoint decides who can change departments. Part 3 gave the Overtime Admins group Contribute Without Delete on the Departments list, and everyone else read access. The Home screen shows the Departments button only to admins, but that's a convenience: anyone else who reached the screen couldn't save a change, because SharePoint doesn't let them edit the list.
- One screen adds and edits. The Departments screen opens the Edit Department screen with a department's ID, or with a blank ID for a new one (How to Use One Screen to Add and Edit Items in Power Apps).
- Departments are turned off, not deleted. Admins can't delete items anyway (Part 3), and entries refer to their department by its ID. Turning Active off takes a department out of the Log Overtime screen's list, which shows only active ones (Part 6), while its entries, totals and approvals stay as they are (How to Remove an Item Without Deleting It in Power Apps).
- Names stay unique. The Department column only accepts unique values (Part 2). The screen checks before saving and names the department that already has the name, including an inactive one, which can be turned back on instead of created again.
- Approvers are people in Microsoft 365. As the admin types the start of a first name or surname, the picker asks the Approvers column for matching people, and Save stores the people chosen in that column.
- Changes apply from now on. Each entry keeps the department name it was saved with, and its DepartmentId still links it to the department after a rename. Part 8's flow reads a department's approvers when it starts an approval, so new approvers get the requests that start after the change; requests already waiting stay with the people they were sent to.
Prerequisites
- Part 9 completed, with the app open in Power Apps Studio.
- You in the Overtime Admins group from Part 1, so the Home screen shows the Departments button (Part 5) and SharePoint lets you edit the list (Part 3).
- The guides this part relies on. Each step says which one to follow:
- The screens: How to Add a New Screen in Power Apps, How to Add a Vertical Container in Power Apps, How to Copy and Paste Controls Between Screens in Power Apps and How to Show Only the Icon on a Button on Phones in Power Apps
- The list: How to Add a Vertical Gallery in Power Apps and Connect It to a SharePoint List, How to Use ThisItem in a Power Apps Gallery, How to Show the Names in a SharePoint Person Column in Power Apps, How to Add a Badge Control in Power Apps and How to See the Code of a Control in Power Apps Studio
- The form: How to Choose When a Text Input Updates in Power Apps with TriggerOutput, How to Add a Combo Box in Power Apps, How to Add a People Picker in Power Apps, How to Show Saved People in a Combo Box in Power Apps, How to Add a Toggle in Power Apps, How to Limit Text Length and Show a Character Count in Power Apps and How to Reset a Control to Its Default Value in Power Apps with Reset
- The checks: How to Create a User-Defined Function in Power Apps, How to Prevent Duplicate Items in a SharePoint List from Power Apps, How to Exclude the Item Being Edited from a LookUp in Power Apps, How to Validate a Form Without an Edit Form in Power Apps and How to Make Screen Readers Announce a Message in Power Apps
- Saving: How to Create or Update a SharePoint List Item with Patch in Power Apps, How to Save People to a SharePoint Person Column with Patch in Power Apps, How to Save a Toggle to a SharePoint Yes/No Column in Power Apps, How to Use the Defaults Function in Power Apps, How to Handle Errors in Power Apps with IfError, How to Stop a Button Being Selected Twice While It Saves in Power Apps and How to Show a Notification in Power Apps with Notify
- Opening the screens: How to Go to Another Screen in Power Apps with Navigate, How to Go Back to the Previous Screen in Power Apps with Back and How to Run a Formula When a Screen Opens in Power Apps
Step 1: Add the Departments Screen and Its Header
Add a Blank screen named Departments Screen (How to Add a New Screen in Power Apps). Its controls end in DS.
The main container. Insert a vertical container, conMainDS, with the same settings as the other screens': X, Y 0; Width Parent.Width; Height Parent.Height; Align (horizontal) Stretch; Padding 0; Drop shadow None; Border radius 0 (How to Add a Vertical Container in Power Apps).
The header. Copy conHeaderMO on the My Overtime screen and paste it into conMainDS (How to Copy and Paste Controls Between Screens in Power Apps). Rename the copies conHeaderDS, btnBackDS and lblTitleDS, and set the title's Text to "Departments". The Back button keeps its Back(), and its AccessibleLabel says where it goes: "Back to the Home screen".
The Add department button. The copy of Refresh becomes btnAddDS. It keeps Refresh's Layout formula, so on a phone it shows only its icon (How to Show Only the Icon on a Button on Phones in Power Apps), and needs these new values:
| Property | Value |
|---|---|
| Text | "Add department" |
| Icon | "Add" |
| Width | If(App.ActiveScreen.Size = ScreenSize.Small, 40, 168) |
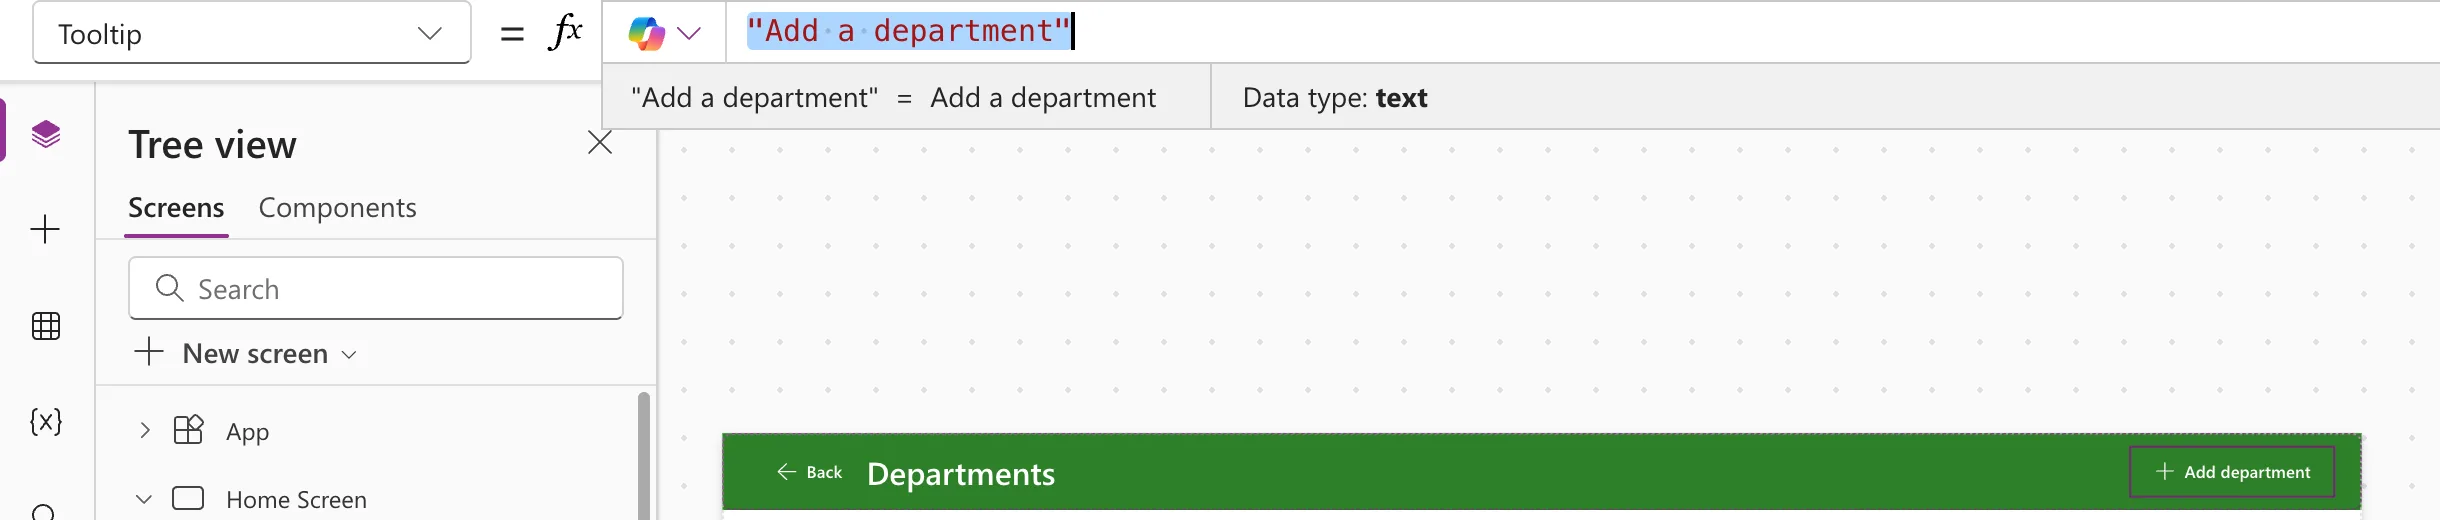
| AccessibleLabel, Tooltip | "Add a department" |
| OnSelect | Step 9 |
The copy kept Refresh's Tooltip, Refresh this screen, and I didn't notice at first. I found it when I read the screen's code with View code in the tree view's More options menu, which lists every property that isn't at its default (How to See the Code of a Control in Power Apps Studio).
The body. Insert a vertical container into conMainDS after the header, conBodyDS: Flexible height On; Align (horizontal) Start; Gap 16; Padding 24; Vertical overflow Scroll; Drop shadow None; Border radius 0.
Step 2: List the Departments
Copy the gallery galEntriesMO from the My Overtime screen and paste it into conBodyDS. Its row already has two text controls, a badge and an Edit button with the right sizes and styles. Rename the copies, and delete the third text control, which the row doesn't need:
| My Overtime copy | New name |
|---|---|
galEntriesMO | galDepartmentsDS |
lblEntryDayMO | lblDepartmentNameDS |
lblEntryTimesMO | lblApproversDS |
bdgStatusMO | bdgStatusDS |
btnEditMO | btnEditDS |
The gallery keeps Part 7's TemplateSize 112, TemplatePadding 8, TemplateFill, Width Min(640, Parent.Width - 48) and minimum height of 240. Change the properties that belonged to entries:
| Property | Value |
|---|---|
| Items | Sort(Departments, Department) |
| Visible | true |
| AccessibleLabel | "Departments and their approvers" |
Sort on a text column runs in SharePoint, so the list stays complete however many departments there are:

The row. TW stands for Parent.TemplateWidth, the width of the row:
| Control | X, Y | Width, Height | Text or Content |
|---|---|---|---|
lblDepartmentNameDS | 16, 12 | TW - 144, 24 | ThisItem.Department |
lblApproversDS | 16, 42 | TW - 144, 56 | Below |
bdgStatusDS | TW - Self.Width - 16, 12 | 96, 24 | If(ThisItem.IsActive, "Active", "Inactive") |
btnEditDS | TW - Self.Width - 16, 70 | 96, 32 | "Edit" |
Approvers is a column that holds several people, so ThisItem.Approvers is a table with a record for each person. Concat joins their DisplayName values into one line (How to Show the Names in a SharePoint Person Column in Power Apps):
"Approvers: " & Concat(ThisItem.Approvers, DisplayName, ", ")
Two approvers make a long line, so the label is 56 high, with Vertical align Top, to wrap onto a second line inside the row.

The badge is green for an active department and grey for an inactive one (How to Add a Badge Control in Power Apps), and tells screen readers what it is:
If(ThisItem.IsActive, BadgeIntent.Positive, BadgeIntent.Neutral)
"Status: " & If(ThisItem.IsActive, "Active", "Inactive")
The Edit button shows on every row, so set its Visible to true. Its AccessibleLabel names the department, such as Edit Radiology, so a screen reader user knows which row they're on:
"Edit " & ThisItem.Department
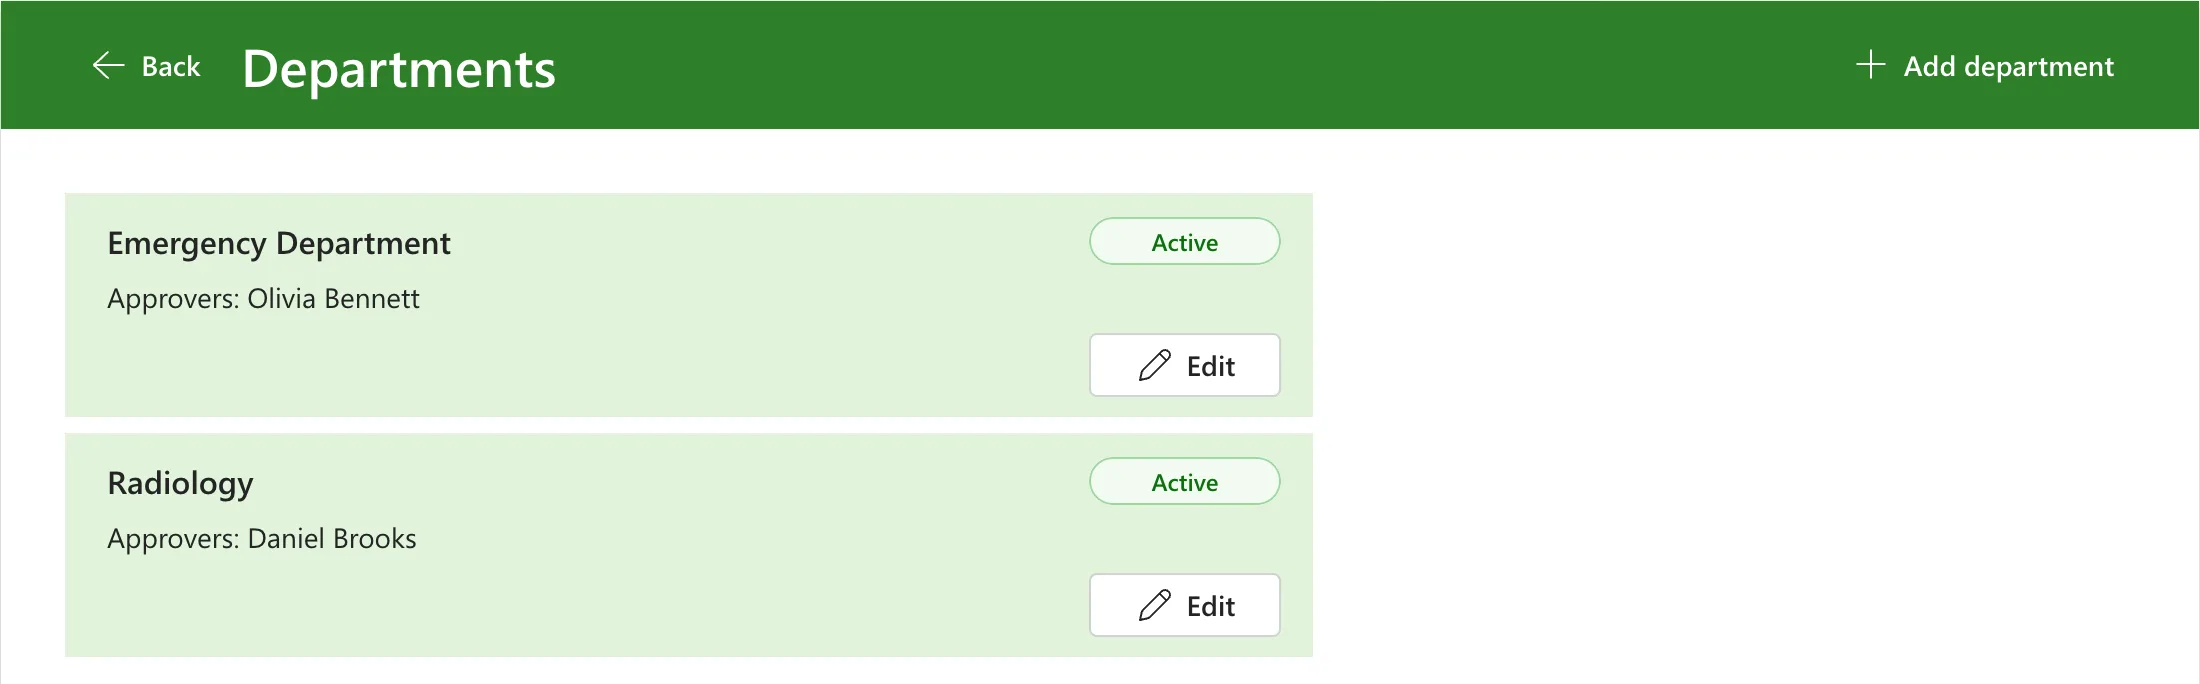
Its OnSelect comes in Step 9. In Preview, the list showed the two departments from Part 2:
Step 3: Add the Edit Department Screen
Add a second Blank screen, Edit Department Screen, whose controls end in ED. It follows the Log Overtime screen from Part 6, so most of it is copied from there:
-
The main container,
conMainED, with the same settings asconMainDS. -
The header. Copy
conHeaderLOintoconMainEDand rename the copiesconHeaderED,btnBackEDandlblTitleED. Back keepsBack()and its label, Back to the previous screen. The title shows what the screen is doing:lblTitleED → TextIf(IsBlank(locDepartmentId), "Add department", "Edit department") -
The body,
conBodyED, a vertical container with the same settings asconBodyDS. -
The field groups. Copy
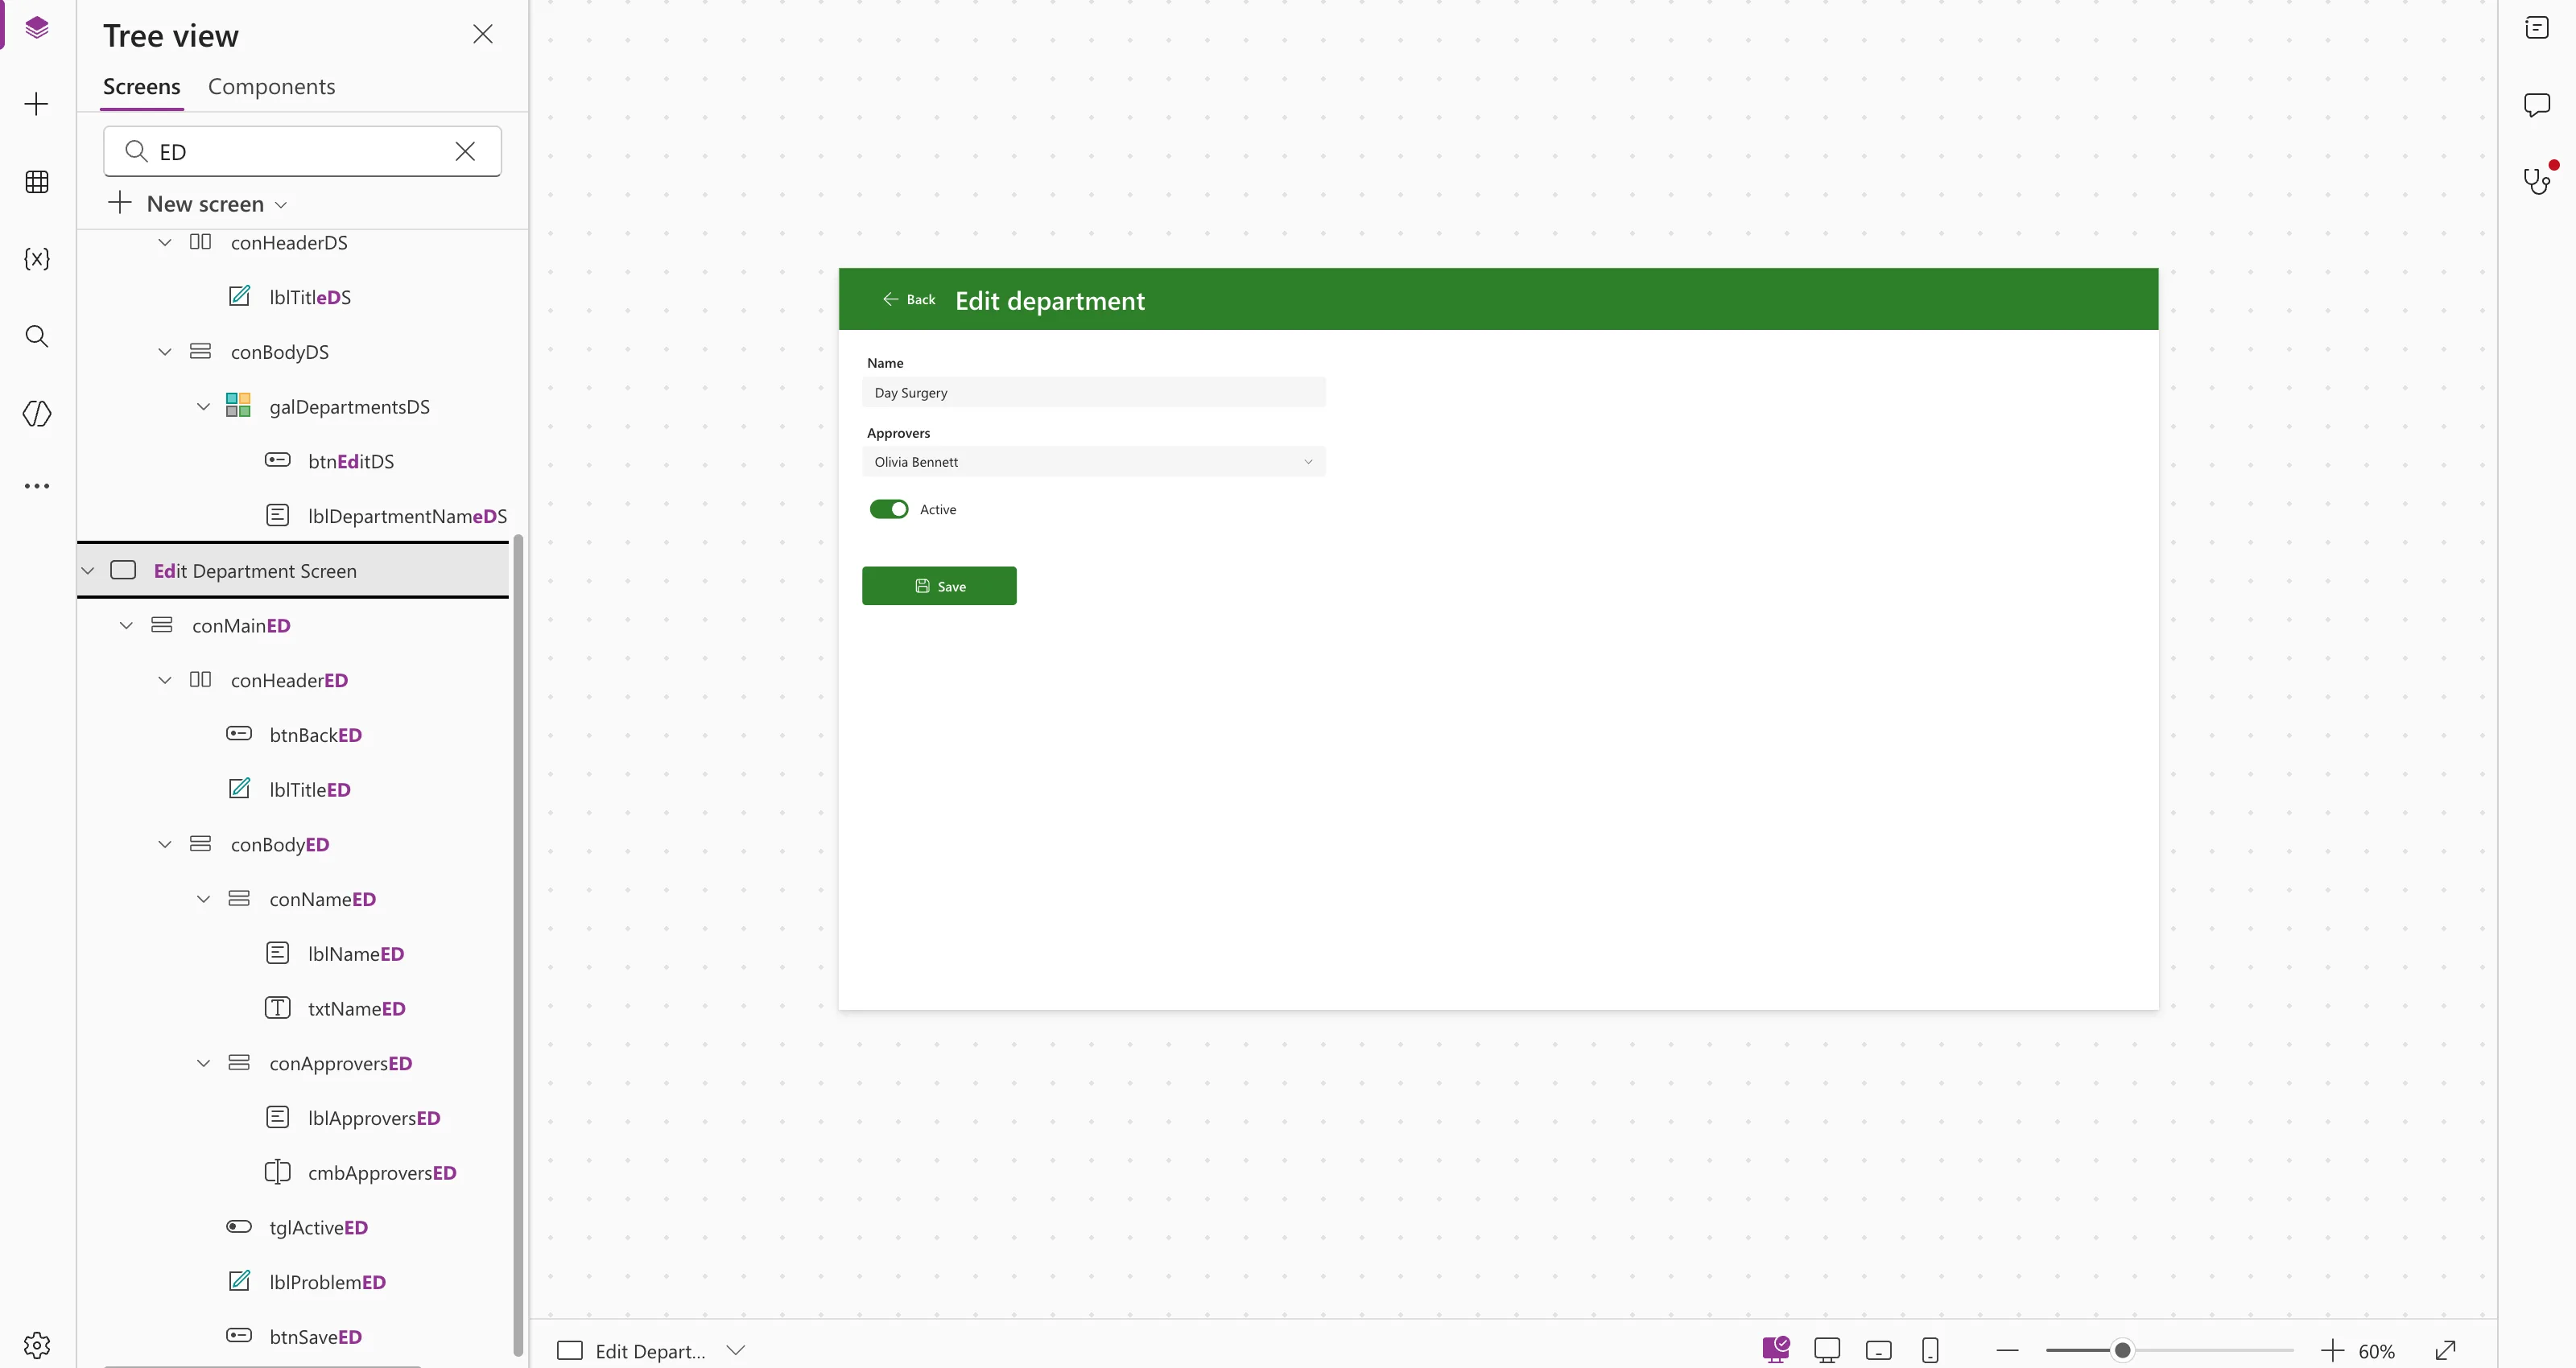
conReasonLOintoconBodyEDand rename itconNameED, withlblNameEDandtxtNameED; delete the character count, and set the group's Height to56. CopyconDepartmentLOafter it and rename itconApproversED, withlblApproversEDandcmbApproversED. The groups keep Part 6's WidthMin(480, Parent.Width - 48)and their gap of4.
The labels' Text is "Name" and "Approvers". The rest of the form comes in the next steps:
Step 4: The Name
txtNameED was Part 6's multi-line reason box. Change it to a single line for a name:
| Property | Value | Why |
|---|---|---|
| Type | TextInputType.SingleLine | One line |
| Height | 32 | The height of the other inputs |
| Default | locDepartment.Department | The department's name when editing; blank when adding (Step 8) |
| MaxLength | 255 | The most a SharePoint single line of text holds |
| Placeholder | "For example, Day Surgery" | |
| AccessibleLabel | "Department name" | |
| TriggerOutput | TriggerOutput.Delayed | Below |
The name is checked against the list as it's typed (Steps 7 and 8), and every check asks SharePoint. TriggerOutput decides when Text updates: on every keystroke by default, or with Delayed, after a short pause, which Microsoft's page for the modern text input suggests for expensive operations (How to Choose When a Text Input Updates in Power Apps with TriggerOutput). With Delayed, the check runs when the typing pauses, not once per letter.
Step 5: The Approvers
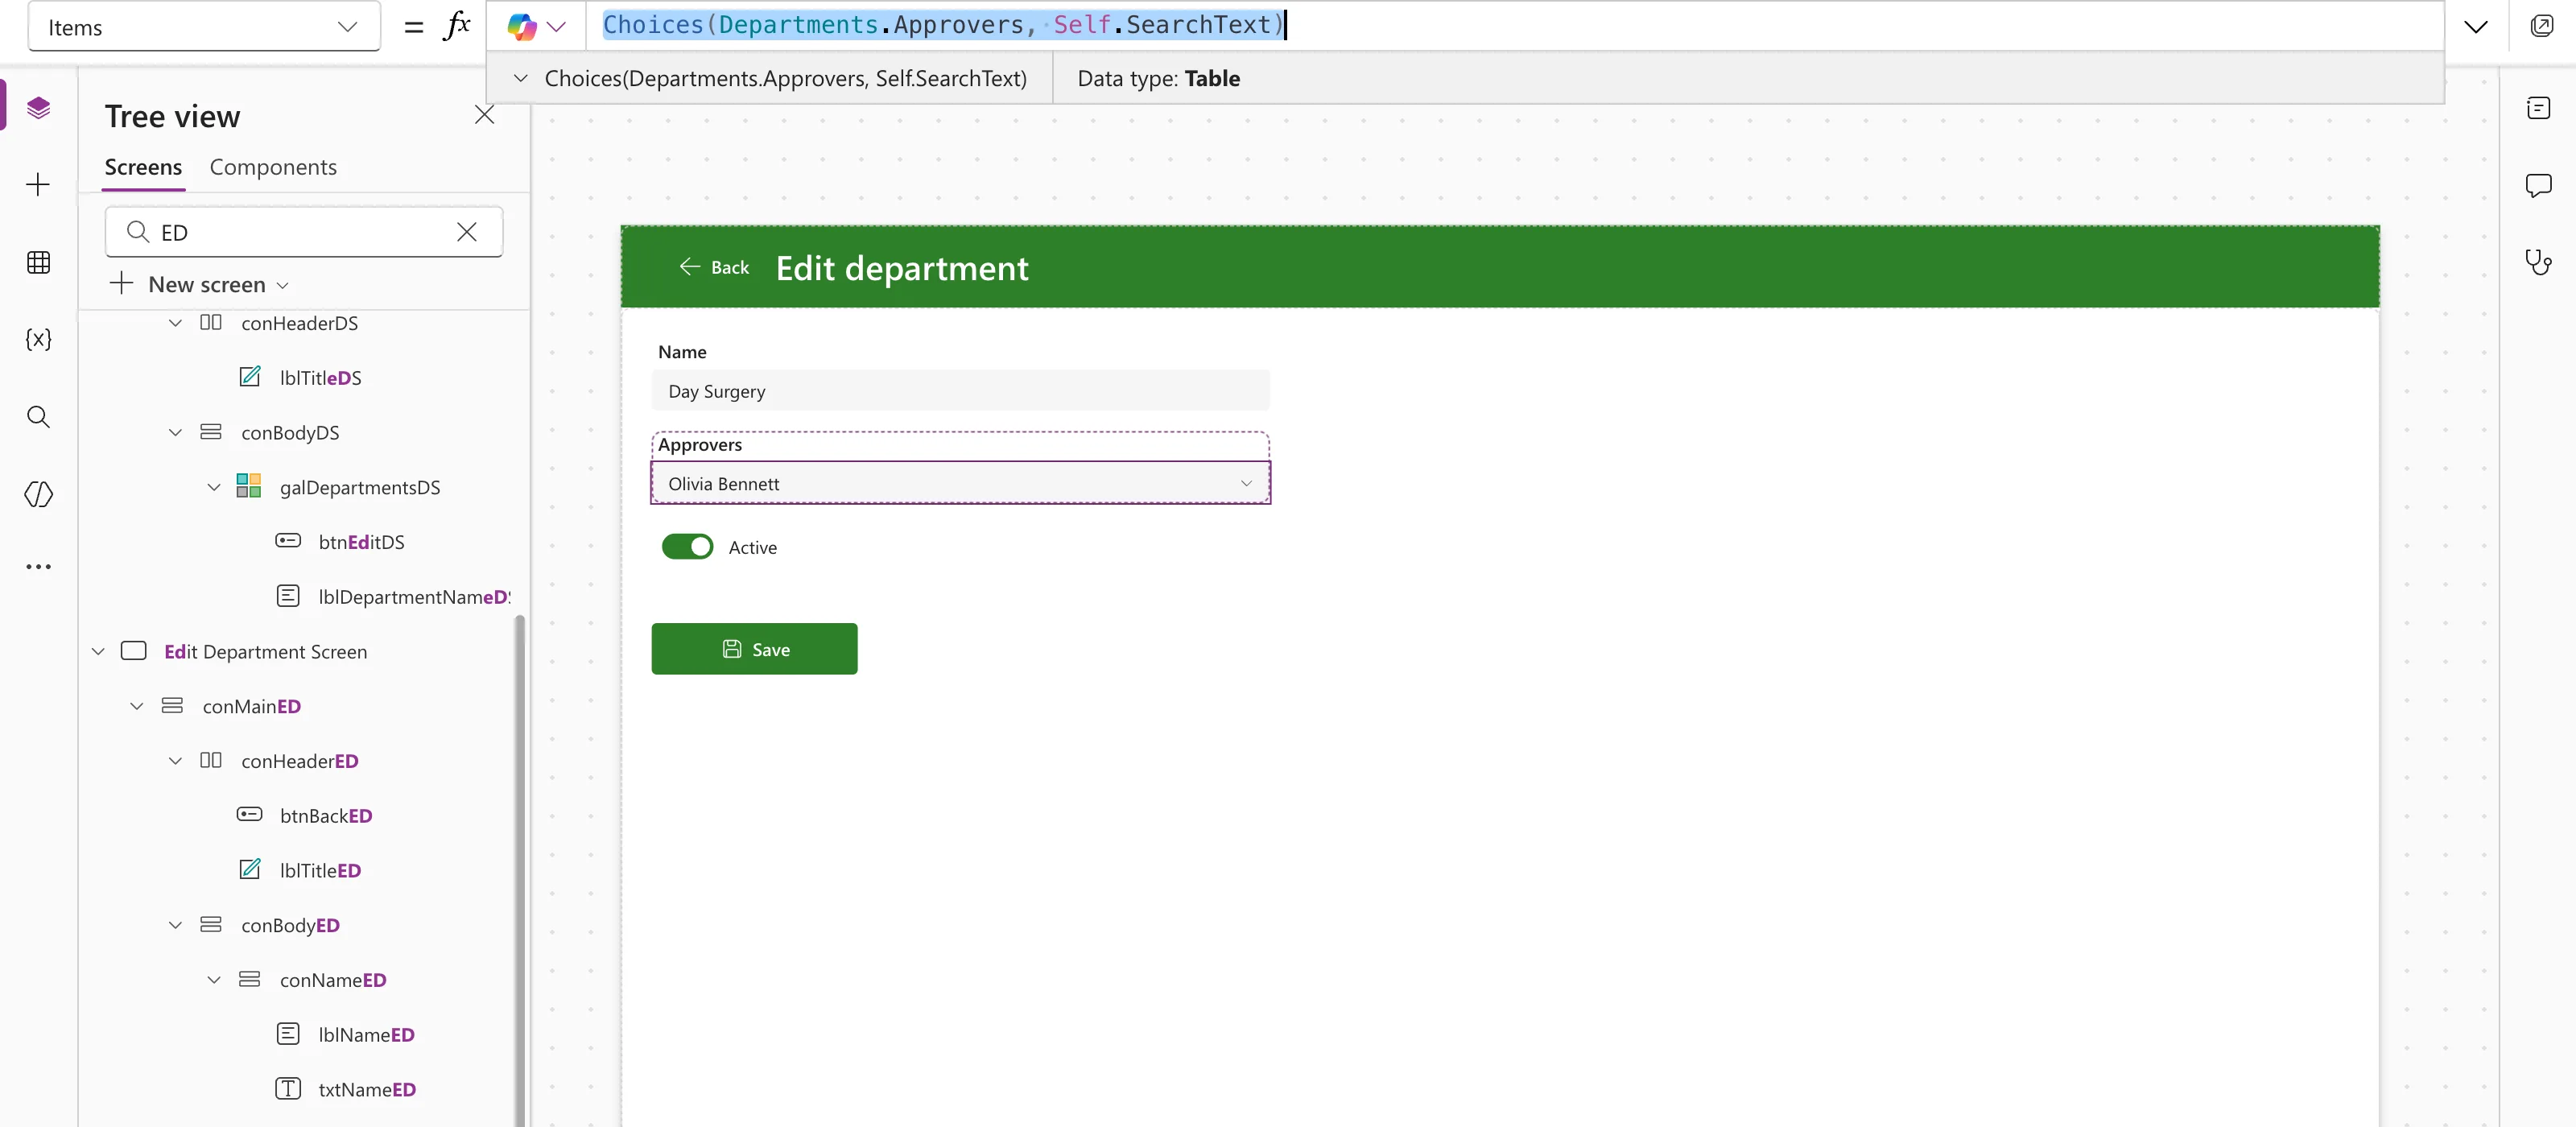
cmbApproversED was Part 6's department picker. Now it finds people: Items asks the Approvers column for the people it can hold, filtered by what the admin types (How to Add a People Picker in Power Apps):
Choices(Departments.Approvers, Self.SearchText)
Choices(Departments.Approvers, ...)returns people as the records the column keeps for a person: DisplayName, Email, Claims, Department, JobTitle and Picture. They come from the column itself, so they can be saved back to it as they are.Self.SearchTextis what the admin has typed. Microsoft's reference for Choices says the second argument returns only the choices that start with that text: Dan and Bro found Daniel Brooks, Ben found Olivia Bennett, and liv found nobody.
The other properties:
| Property | Value | Why |
|---|---|---|
| ItemDisplayText | ThisItem.DisplayName | Names in the list and the box |
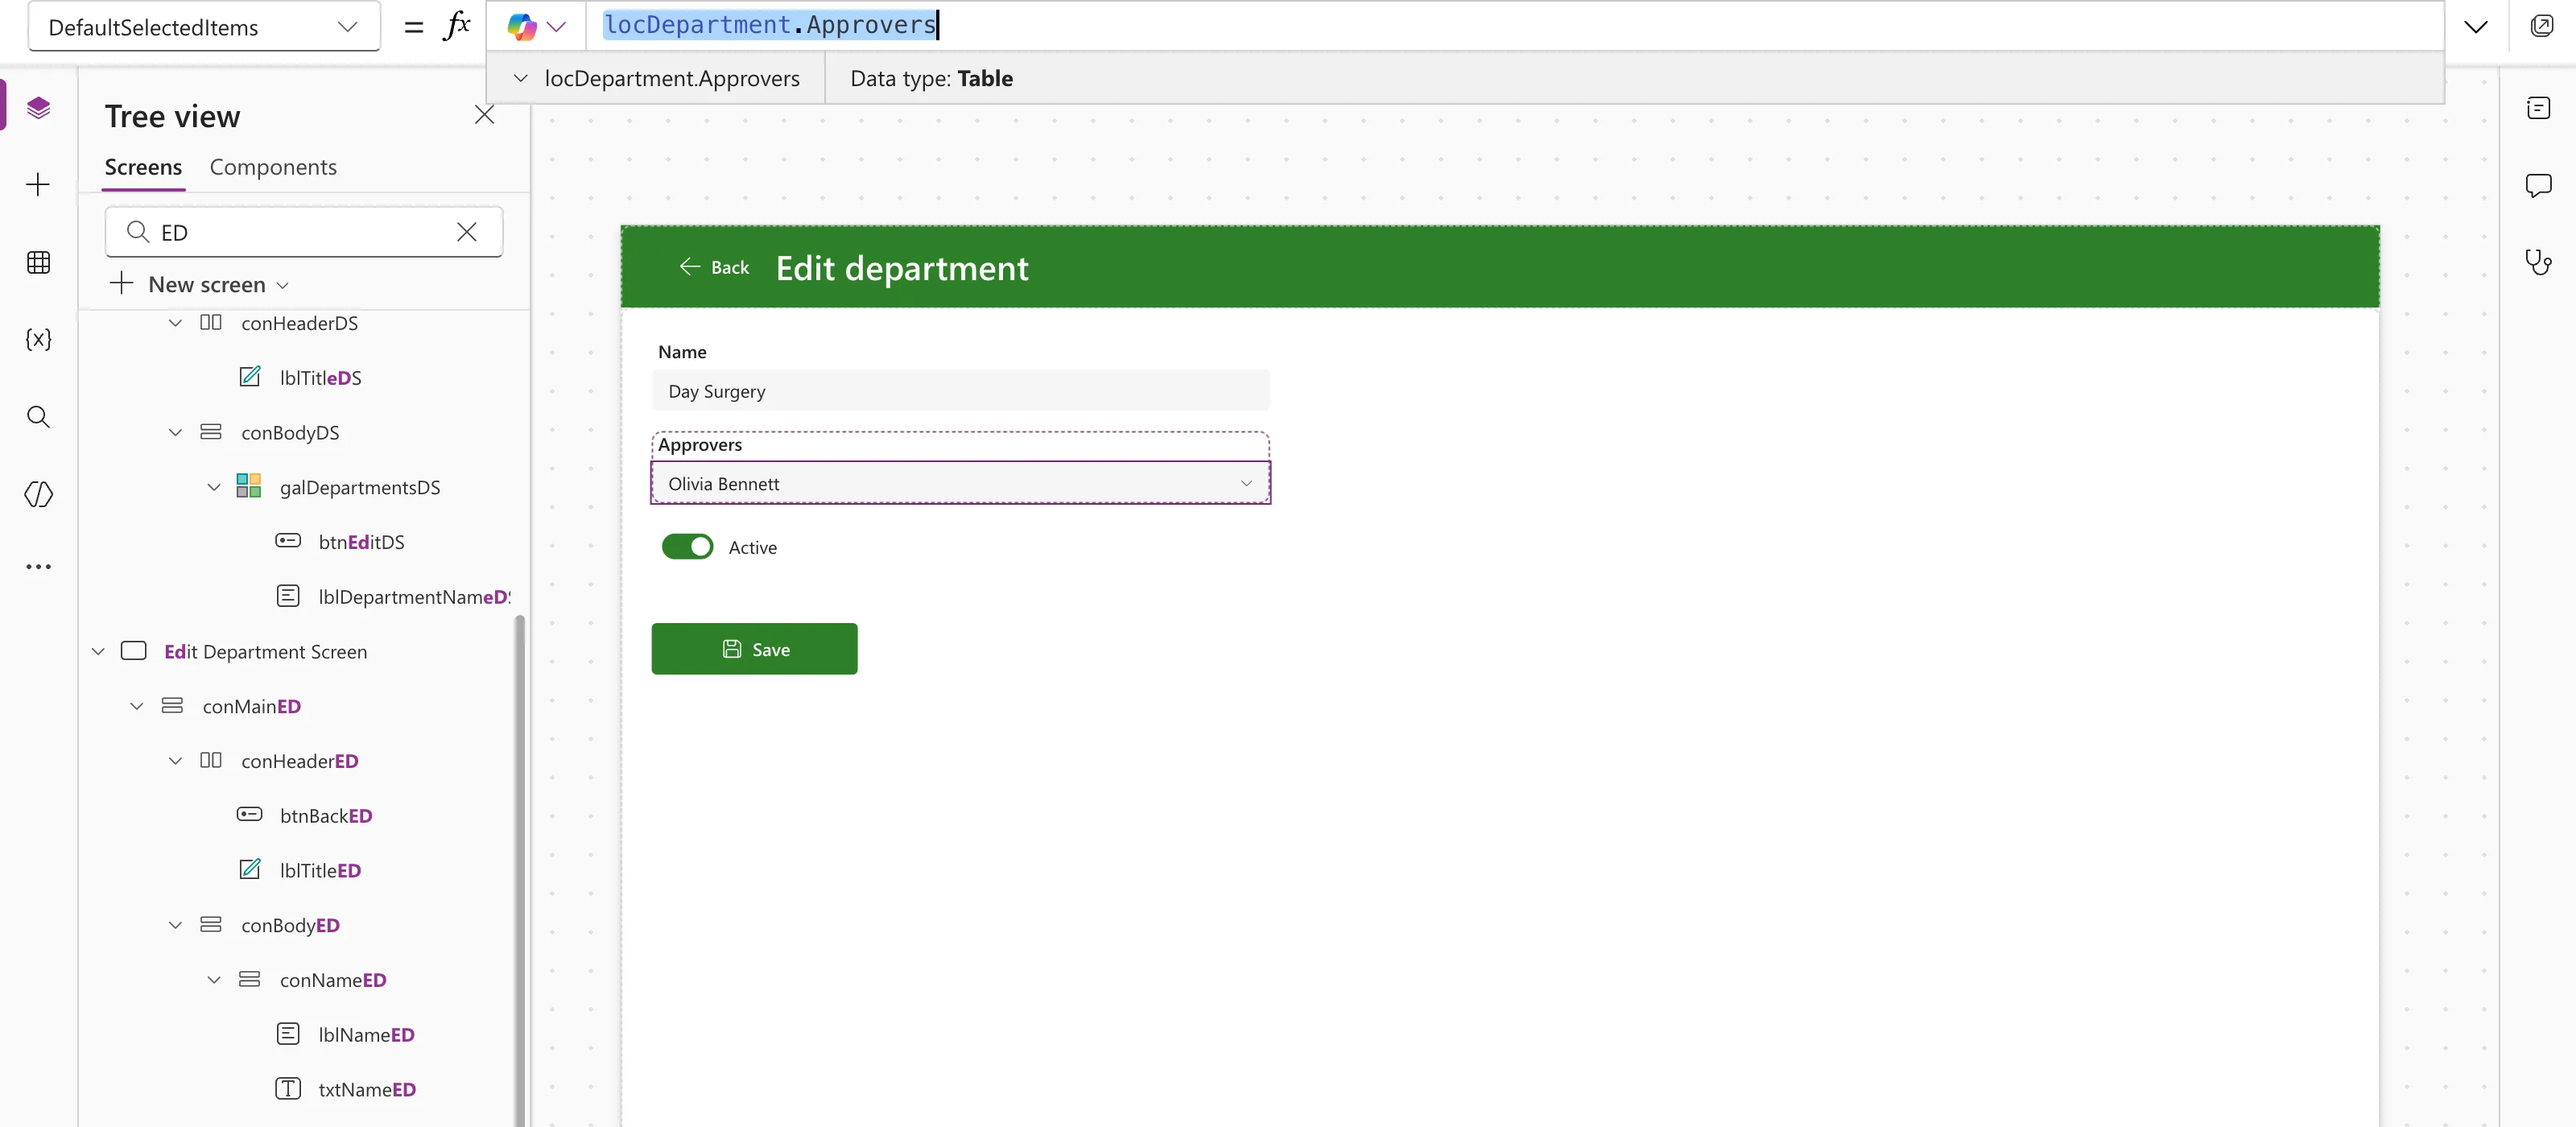
| DefaultSelectedItems | locDepartment.Approvers | The department's approvers when editing |
| SelectMultiple | true | A department can have several approvers |
| DelayOutput | true | SearchText waits until the typing pauses, so a search doesn't run for every letter |
| InputTextPlaceholder | "Search for people" | |
| AccessibleLabel | "Approvers: the people who approve overtime in this department" |
DefaultSelectedItems is the saved approvers of the department being edited. They're records from the same column, so they fit the combo box as they are, and a new department, with a blank locDepartment, starts with nobody chosen (How to Show Saved People in a Combo Box in Power Apps):
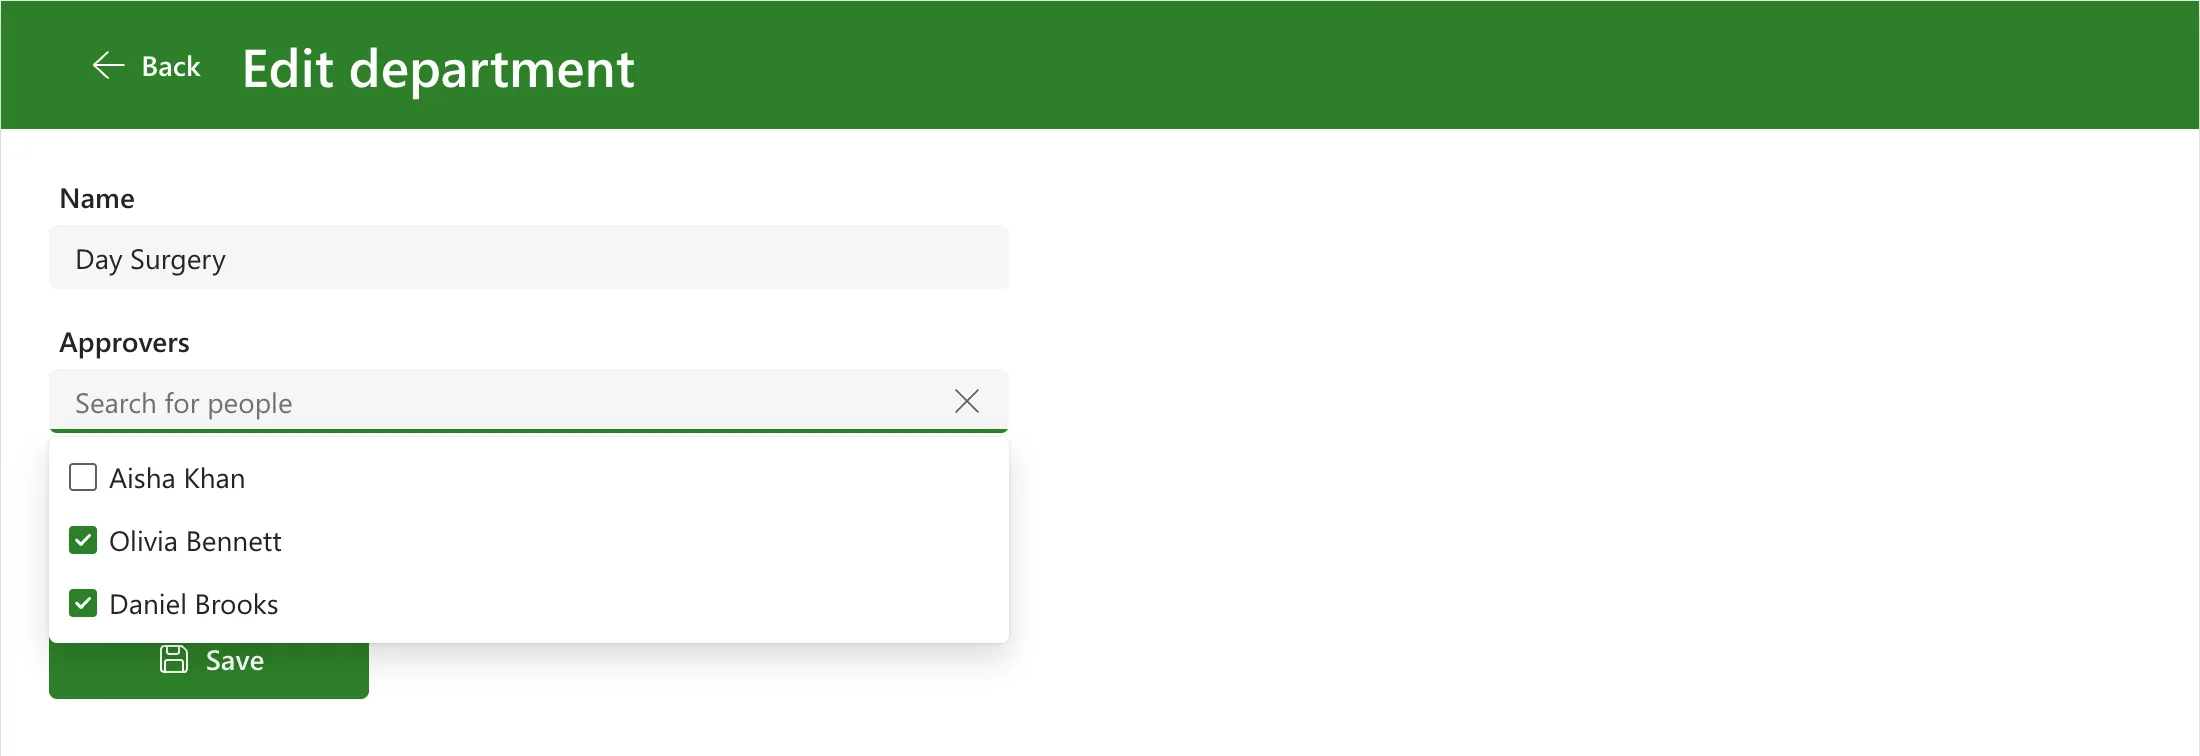
A search changes Items, so the saved approvers often aren't in it. AllowExternalSelectedItems, which new combo boxes have on, keeps them selected and in the list anyway. With nothing typed, the list showed them with a tick, below Aisha Khan, the only person Choices returned for an empty search. Microsoft's reference says an empty filter returns all the choices, and its pages don't explain the single result; typing the start of a name is what finds people:
Typing Dan in Preview listed Daniel Brooks:
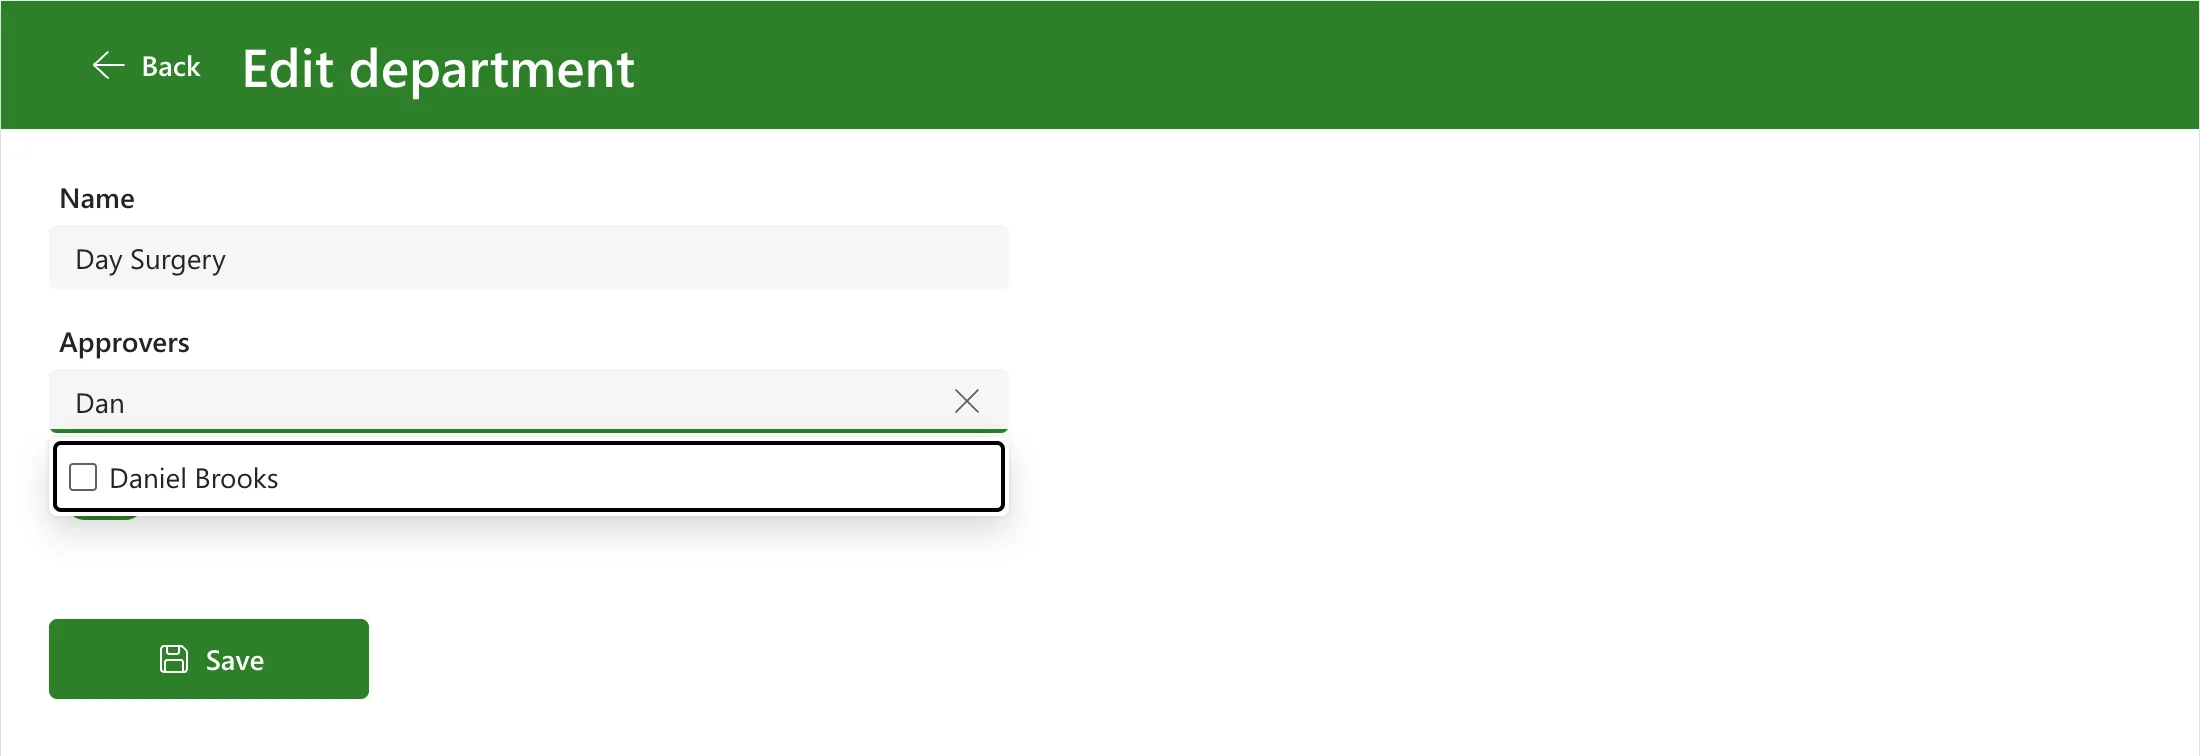
Choosing a person ticks them and keeps the list open, with the typed text still in the box, so several people can be chosen in a row. Selecting anywhere outside the box closes the list, and the box then shows everyone chosen, separated by commas. The modern combo box page says the search text clears on selection; here it stayed until the list closed.
Step 6: The Active Toggle
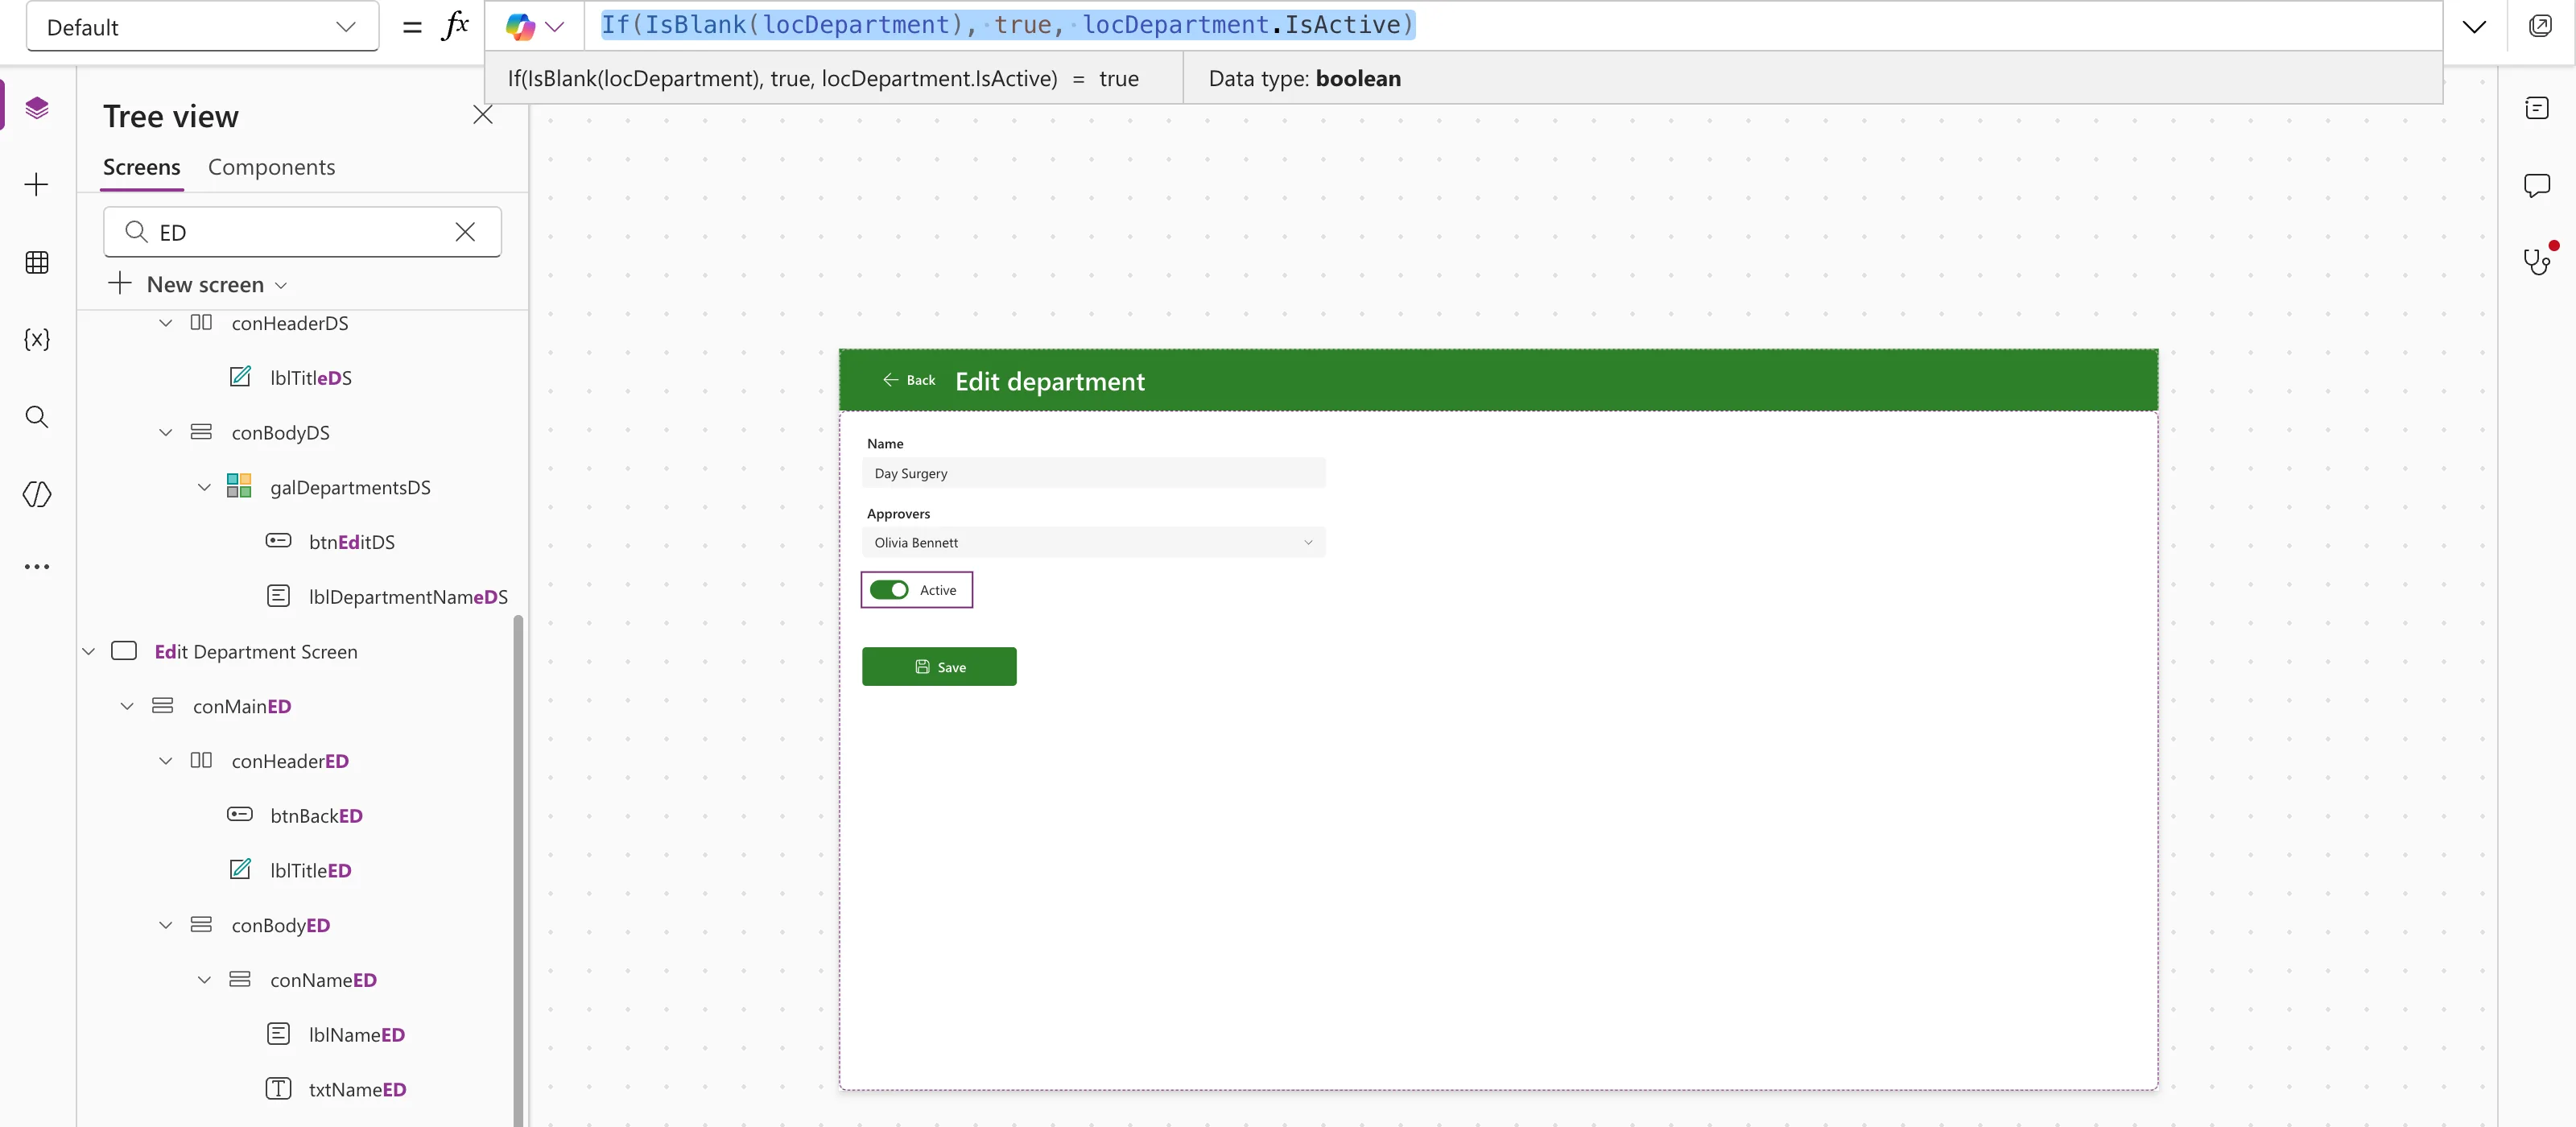
Select conBodyED and insert a modern Toggle: the one under Input in the Insert pane, not the one under Classic (How to Add a Toggle in Power Apps). It goes in at the end of the body, after the approvers. Name it tglActiveED:
| Property | Value |
|---|---|
| Label | "Active" |
| Default | If(IsBlank(locDepartment), true, locDepartment.IsActive) |
| AccessibleLabel | "Active: staff can choose this department when they log overtime" |
A new department starts active; an existing one shows its saved value. In formulas, the toggle's value is tglActiveED.Checked.
Step 7: Check the Form with a Function
One function in App.Formulas, added after Part 7's, returns the first problem with the form as a sentence, or an empty text when there's none (How to Create a User-Defined Function in Power Apps):
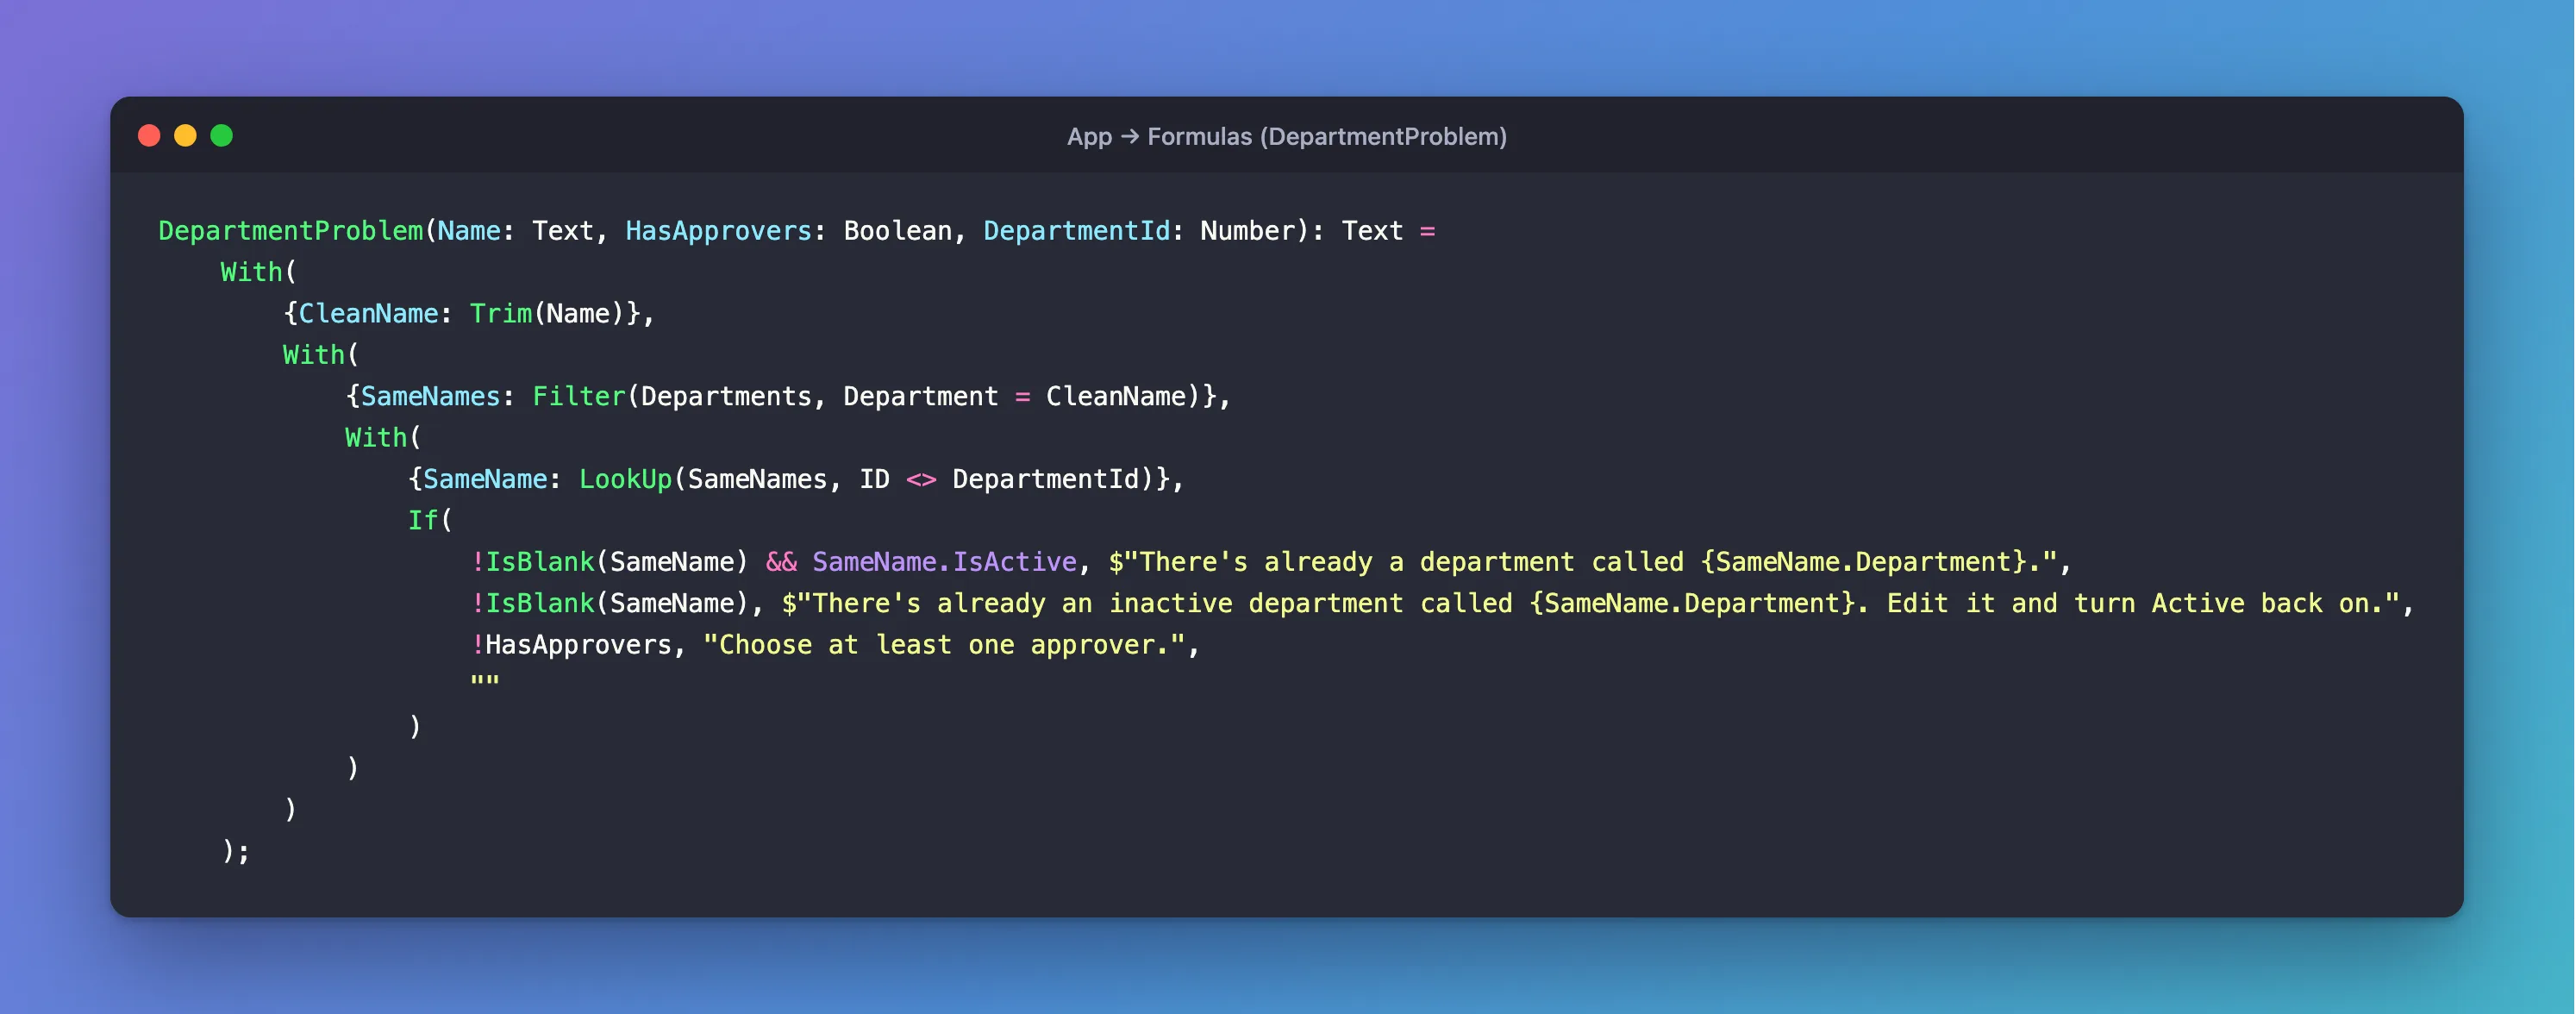
DepartmentProblem(Name: Text, HasApprovers: Boolean, DepartmentId: Number): Text =
    With(
        {CleanName: Trim(Name)},
        With(
            {SameNames: Filter(Departments, Department = CleanName)},
            With(
                {SameName: LookUp(SameNames, ID <> DepartmentId)},
                If(
                    !IsBlank(SameName) && SameName.IsActive, $"There's already a department called {SameName.Department}.",
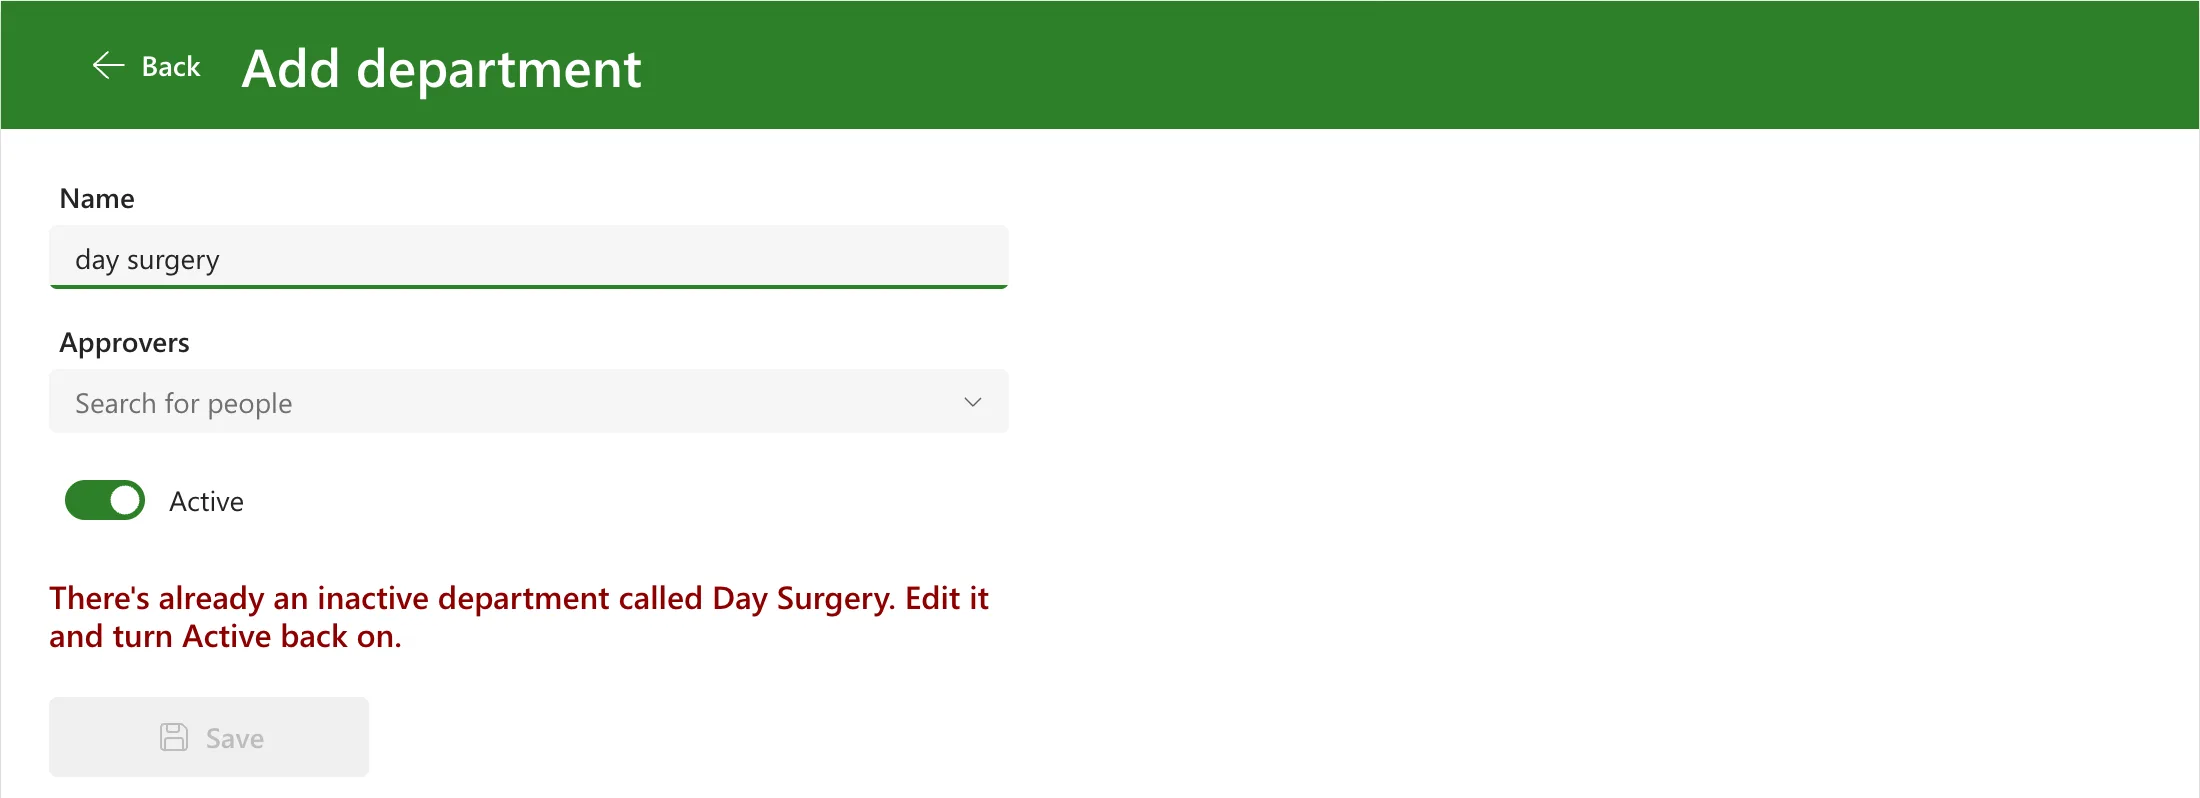
                    !IsBlank(SameName), $"There's already an inactive department called {SameName.Department}. Edit it and turn Active back on.",
                    !HasApprovers, "Choose at least one approver.",
                    ""
                )
            )
        )
    );
CleanNameis the name without spaces at the start or end, or doubled in between, the way it's saved (How to Remove Extra Spaces in Power Apps with Trim and TrimEnds).SameNamesis every department with that name.=on a text column runs in SharePoint, so the check works however long the list gets (How to Prevent Duplicate Items in a SharePoint List from Power Apps).SameNameskips the department being edited, so saving a department under its own name isn't a duplicate.SameNamesis already in memory, so the<>doesn't need SharePoint (How to Exclude the Item Being Edited from a LookUp in Power Apps).- The messages say which department has the name, and whether it's inactive, because the fix differs: an inactive department is turned back on, not added again.
When I shortened the function, I moved Trim into the filter, Filter(Departments, Department = Trim(Name)). Studio flagged two delegation warnings on it: SharePoint can't run Trim inside the condition, so the whole filter would have run on the device, over the first 500 departments only. Trimming the name first with With removed both (Fixed: Delegation Warning. The "Trim" Part of This Formula Might Not Work Correctly on Large Data Sets).
Step 8: The Problem Message, Save and Loading the Department
The problem message. Copy lblProblemLO from the Log Overtime screen into conBodyED, after the toggle, and rename it lblProblemED. It's a live region, so screen readers announce it when it changes (How to Make Screen Readers Announce a Message in Power Apps). It asks the function once there's a name:
If(
    IsBlank(Trim(txtNameED.Text)),
    "",
    DepartmentProblem(txtNameED.Text, !IsBlank(cmbApproversED.Selected), locDepartmentId)
)
!IsBlank(cmbApproversED.Selected) is true when at least one approver is chosen (Fixed: IsEmpty Returns False When Nothing Is Selected in a Power Apps Combo Box).
The Save button. Copy btnSaveLO after the message and rename it btnSaveED, with AccessibleLabel "Save this department". It keeps Part 6's text, Saving... while it saves, and its size. DisplayMode enables it when there's a name and no problem, and not while a save is running (How to Validate a Form Without an Edit Form in Power Apps and How to Stop a Button Being Selected Twice While It Saves in Power Apps):
If(
    !locIsSaving && !IsBlank(Trim(txtNameED.Text)) && IsBlank(lblProblemED.Text),
    DisplayMode.Edit,
    DisplayMode.Disabled
)
OnSelect adds the department, or changes the one being edited, and goes back to the list (How to Create or Update a SharePoint List Item with Patch in Power Apps and How to Handle Errors in Power Apps with IfError):
UpdateContext({locIsSaving: true});
IfError(
    Patch(
        Departments,
        If(IsBlank(locDepartment), Defaults(Departments), locDepartment),
        {
            Department: Trim(txtNameED.Text),
            Approvers: cmbApproversED.SelectedItems,
            IsActive: tglActiveED.Checked
        }
    ),
    UpdateContext({locIsSaving: false});
    Notify("The department wasn't saved. " & FirstError.Message, NotificationType.Error),
    UpdateContext({locIsSaving: false});
    Notify(If(IsBlank(locDepartment), "The department was added.", "Your changes were saved."), NotificationType.Success);
    Back()
)
If(IsBlank(locDepartment), Defaults(Departments), locDepartment)makes a new item when adding and changes the loaded one when editing (How to Use the Defaults Function in Power Apps).Approvers: cmbApproversED.SelectedItemssaves the chosen people, as the records from Step 5 (How to Save People to a SharePoint Person Column with Patch in Power Apps).IsActive: tglActiveED.Checkedsaves the toggle to the Yes/No column (How to Save a Toggle to a SharePoint Yes/No Column in Power Apps).- The name is saved trimmed, the same way Step 7 compares it.
Loading the department. The screen's OnVisible loads the department to edit, or nothing for a new one, and resets the three inputs so they show their Default values again (How to Run a Formula When a Screen Opens in Power Apps and How to Reset a Control to Its Default Value in Power Apps with Reset):
UpdateContext({
    locIsSaving: false,
    locDepartment: If(IsBlank(locDepartmentId), Blank(), LookUp(Departments, ID = locDepartmentId))
});
Reset(txtNameED);
Reset(cmbApproversED);
Reset(tglActiveED)
Step 9: Open the Screens
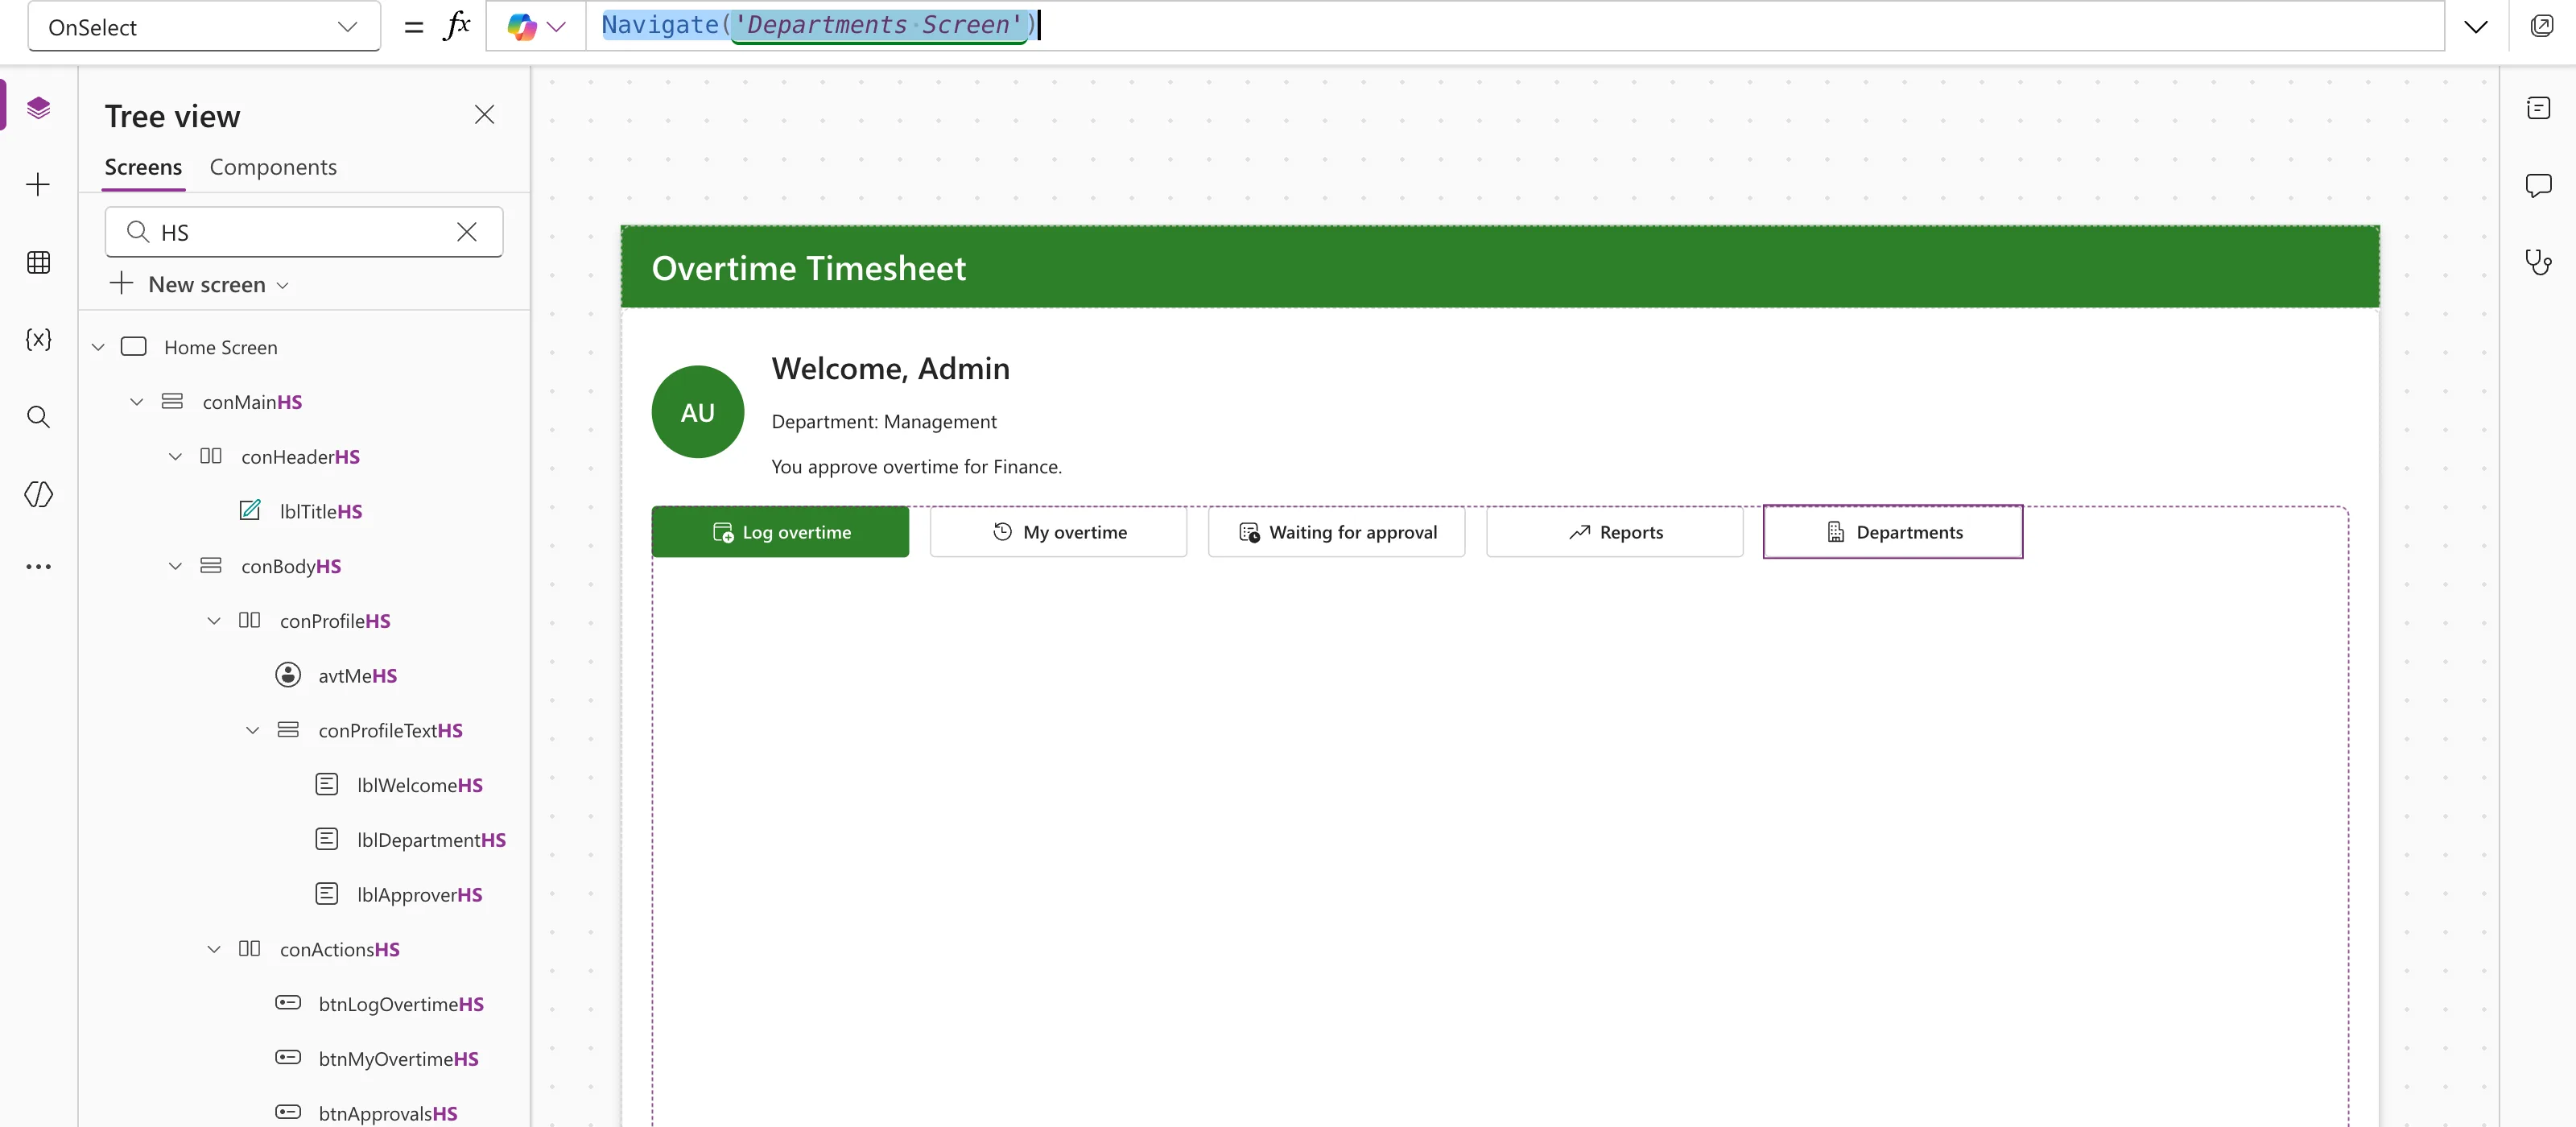
From the Home screen. The Departments button, btnDepartmentsHS, has shown only for admins since Part 5, with OnSelect false. Now it opens the list (How to Go to Another Screen in Power Apps with Navigate):
Navigate('Departments Screen')
Add department opens the form with a blank ID:
Navigate('Edit Department Screen', ScreenTransition.None, {locDepartmentId: Blank()})
Edit opens it with the row's ID:
Navigate('Edit Department Screen', ScreenTransition.None, {locDepartmentId: ThisItem.ID})
The blank ID matters: a context variable keeps its value until the app closes, so without it, Add department after an edit would open the last department again (How to Use Context Variables in Power Apps with UpdateContext).
Step 10: Try It
Start Preview on the Home screen, so the screens' OnVisible formulas run, and select Departments, then Add department.
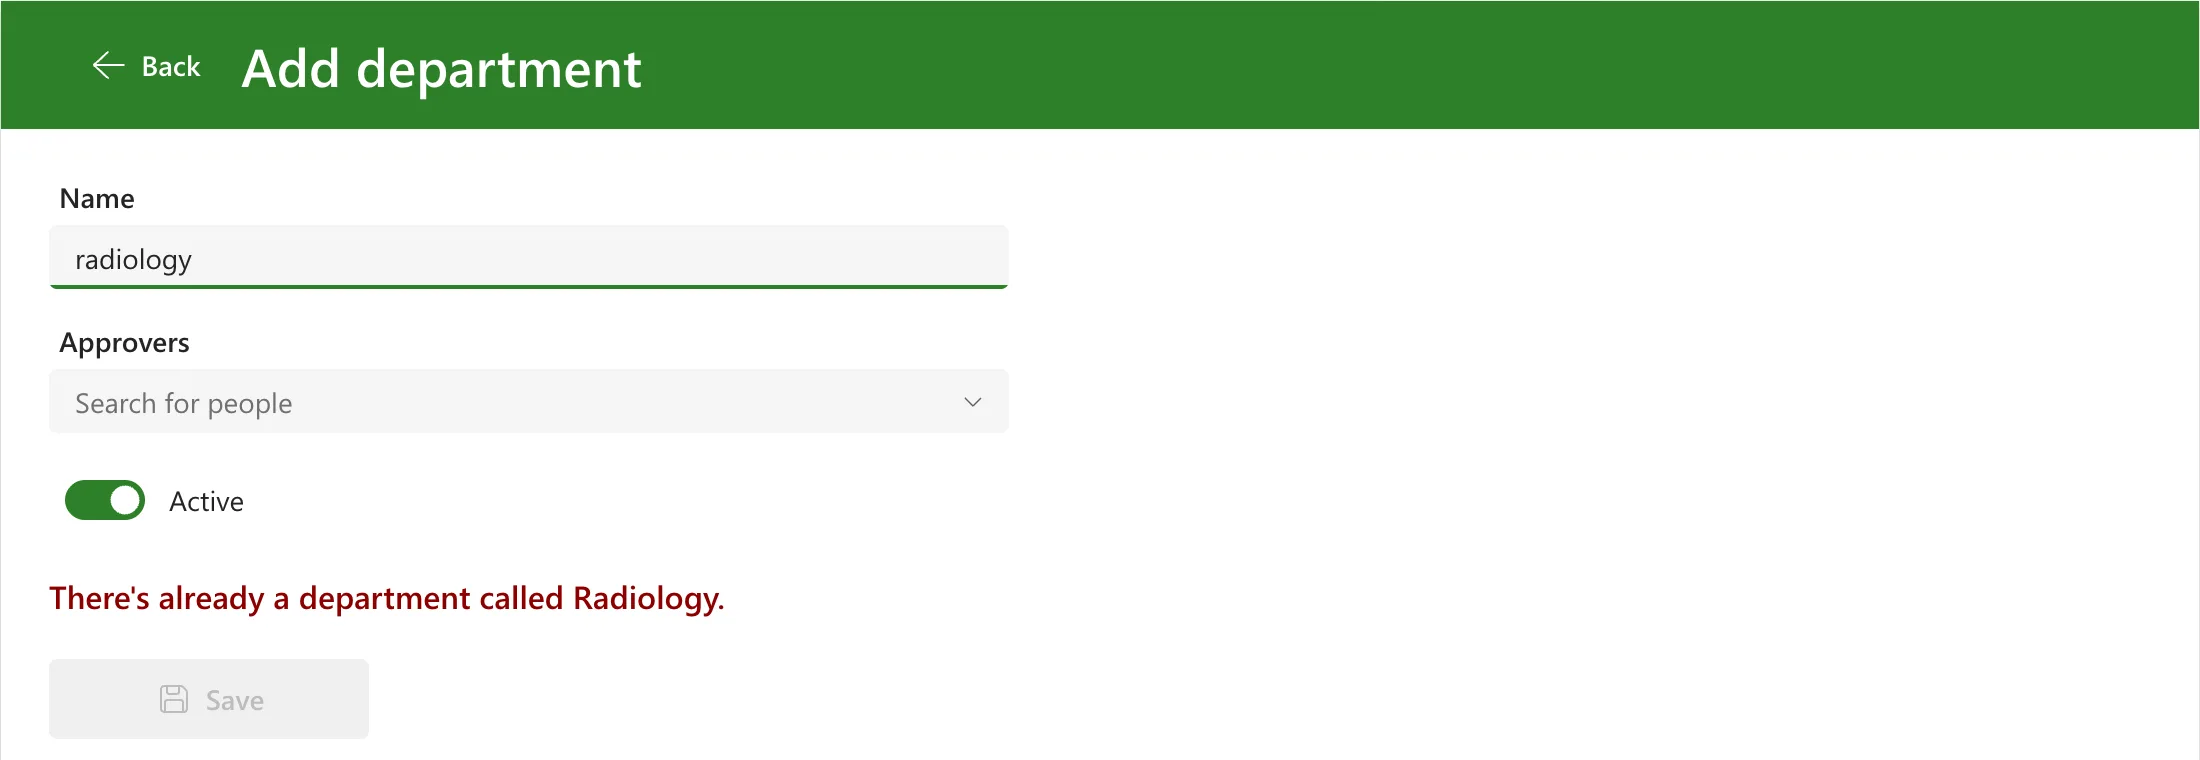
A name that's taken. I typed radiology in lower case. The message named the existing department, and Save stayed disabled: SharePoint compares text without regard to case (How to Prevent Duplicate Items in a SharePoint List from Power Apps):
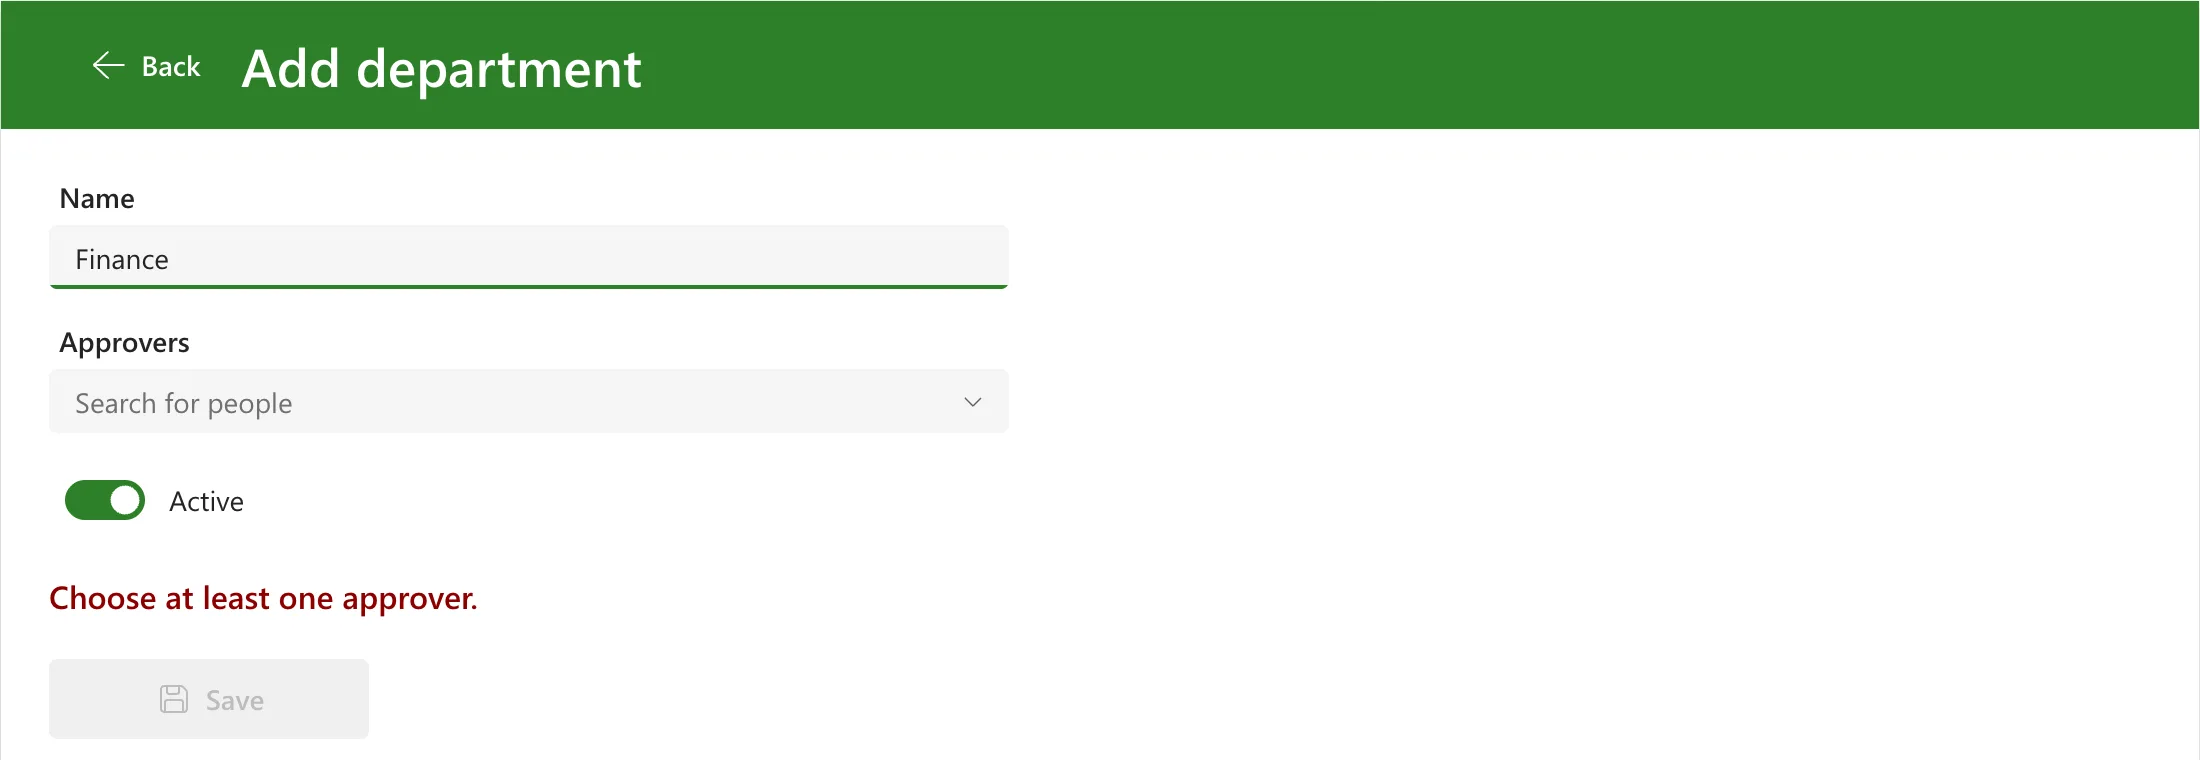
No approver yet. With the name Finance, the department Leo Martin works in from Part 1, the message asked for an approver:
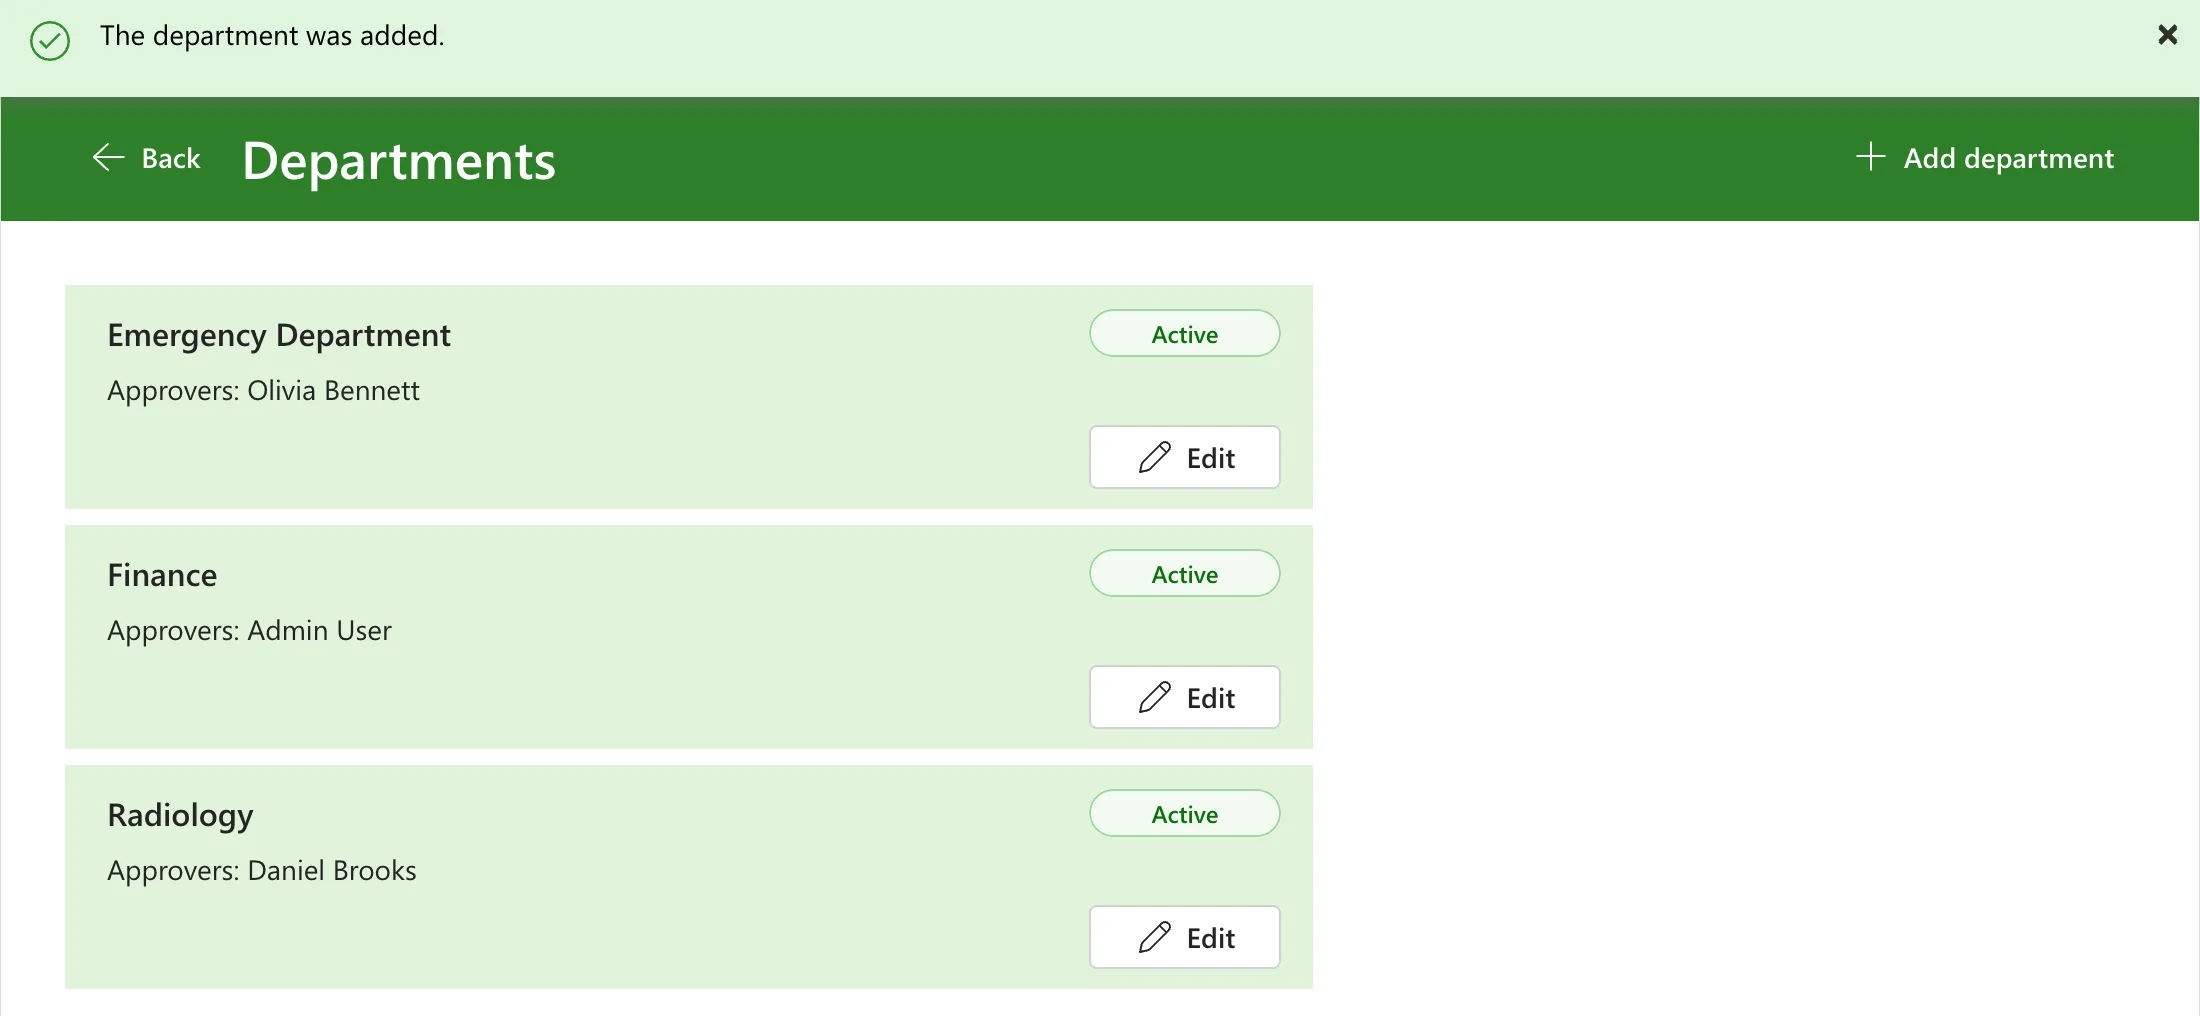
I searched for myself and chose Admin User, so I'm Finance's approver. The message cleared and Save became available. After Save, the list showed The department was added. with Finance between the other two:
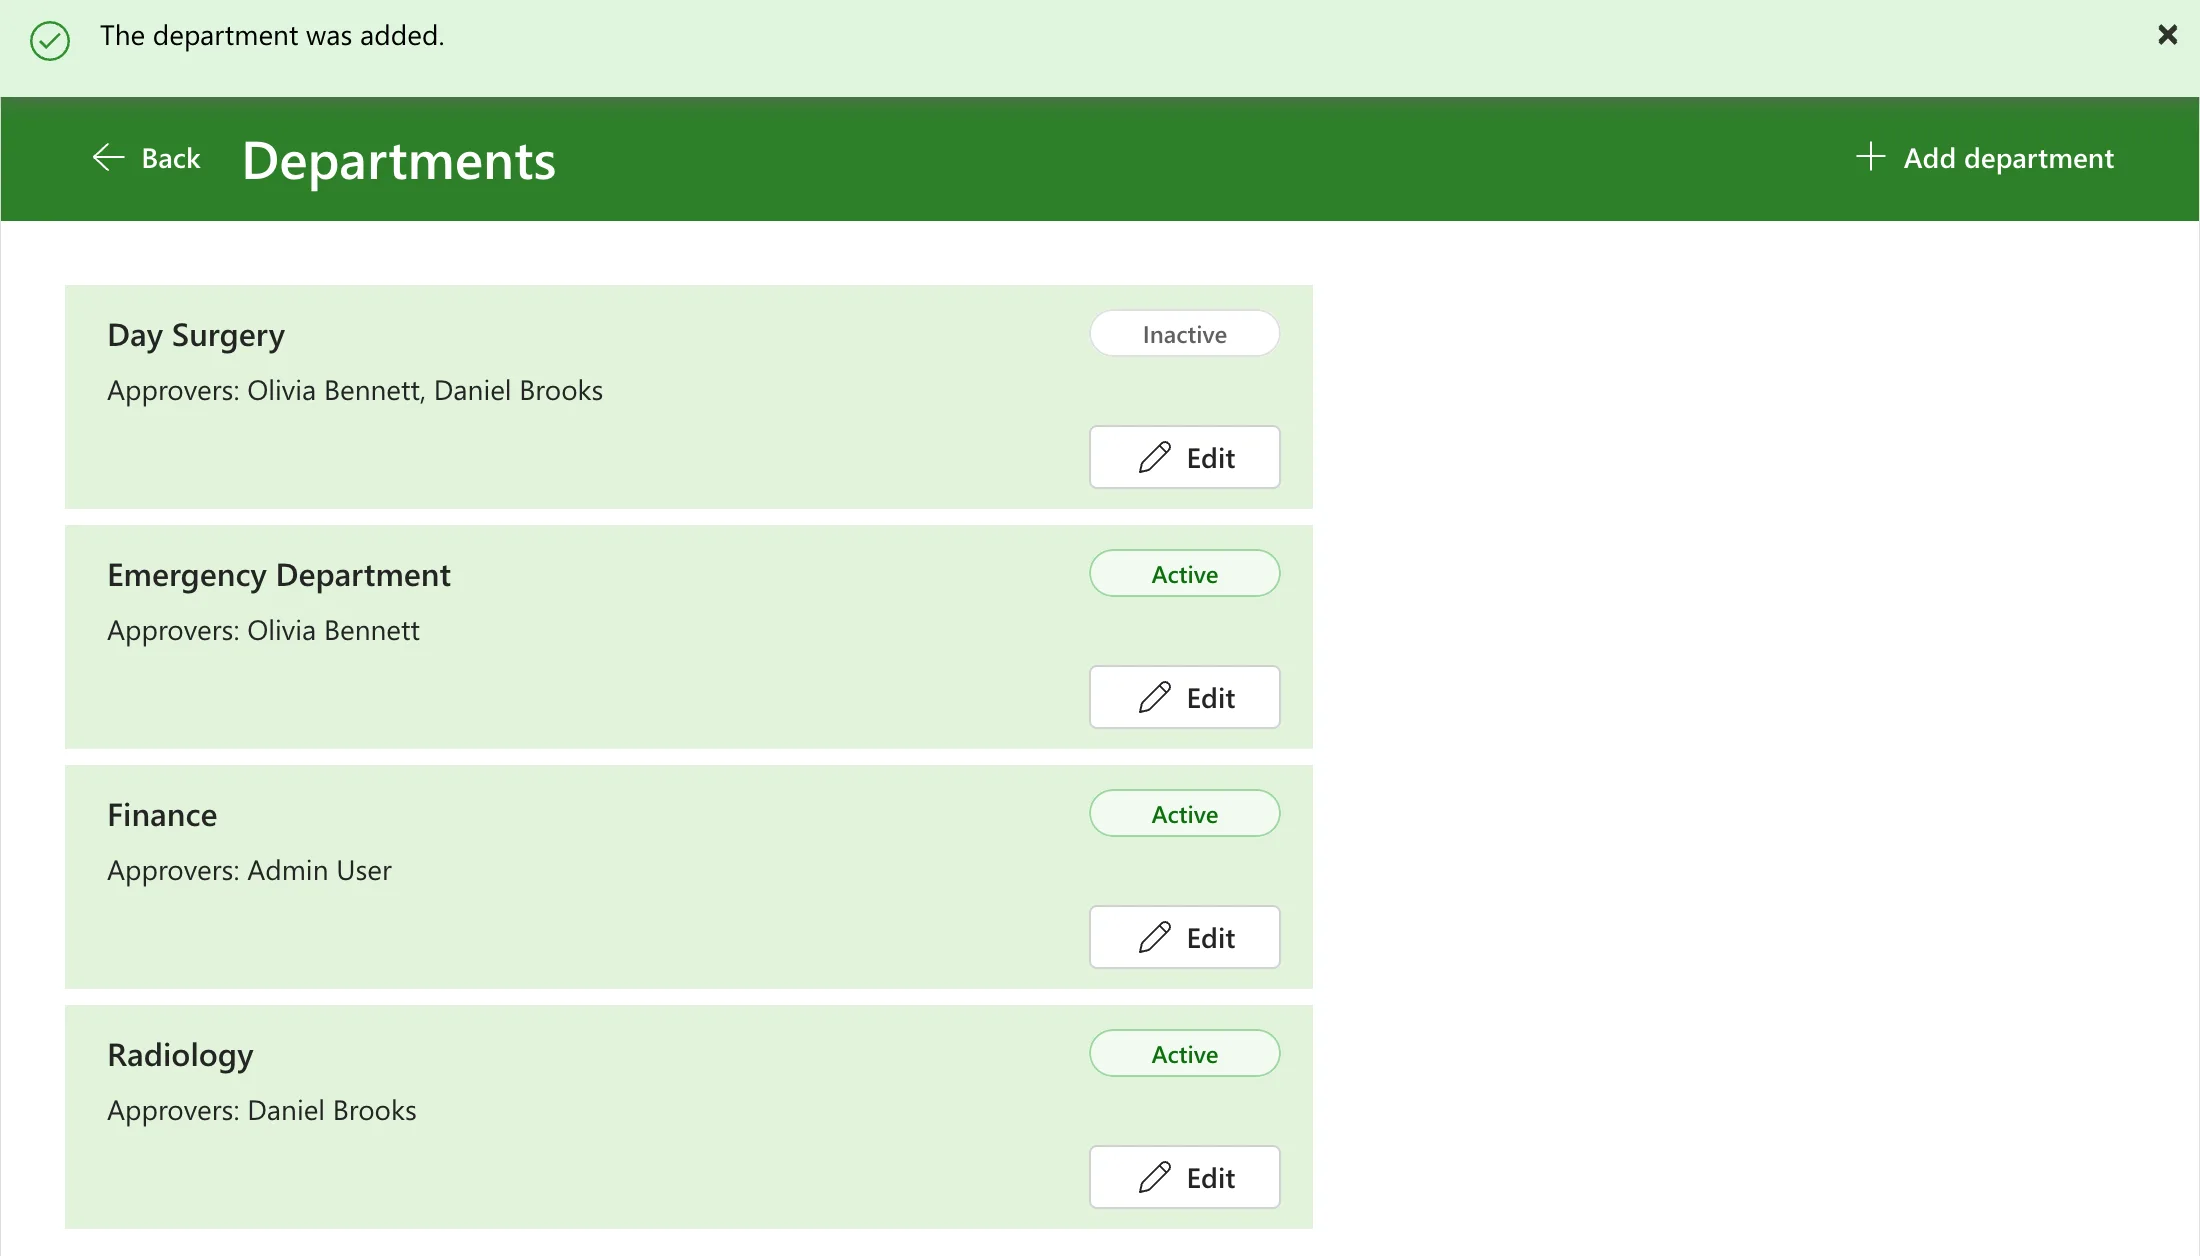
An inactive department. I added Day Surgery with Olivia Bennett and Daniel Brooks as approvers, and turned Active off. The list showed its grey Inactive badge:
Adding day surgery again named the inactive department and said what to do:
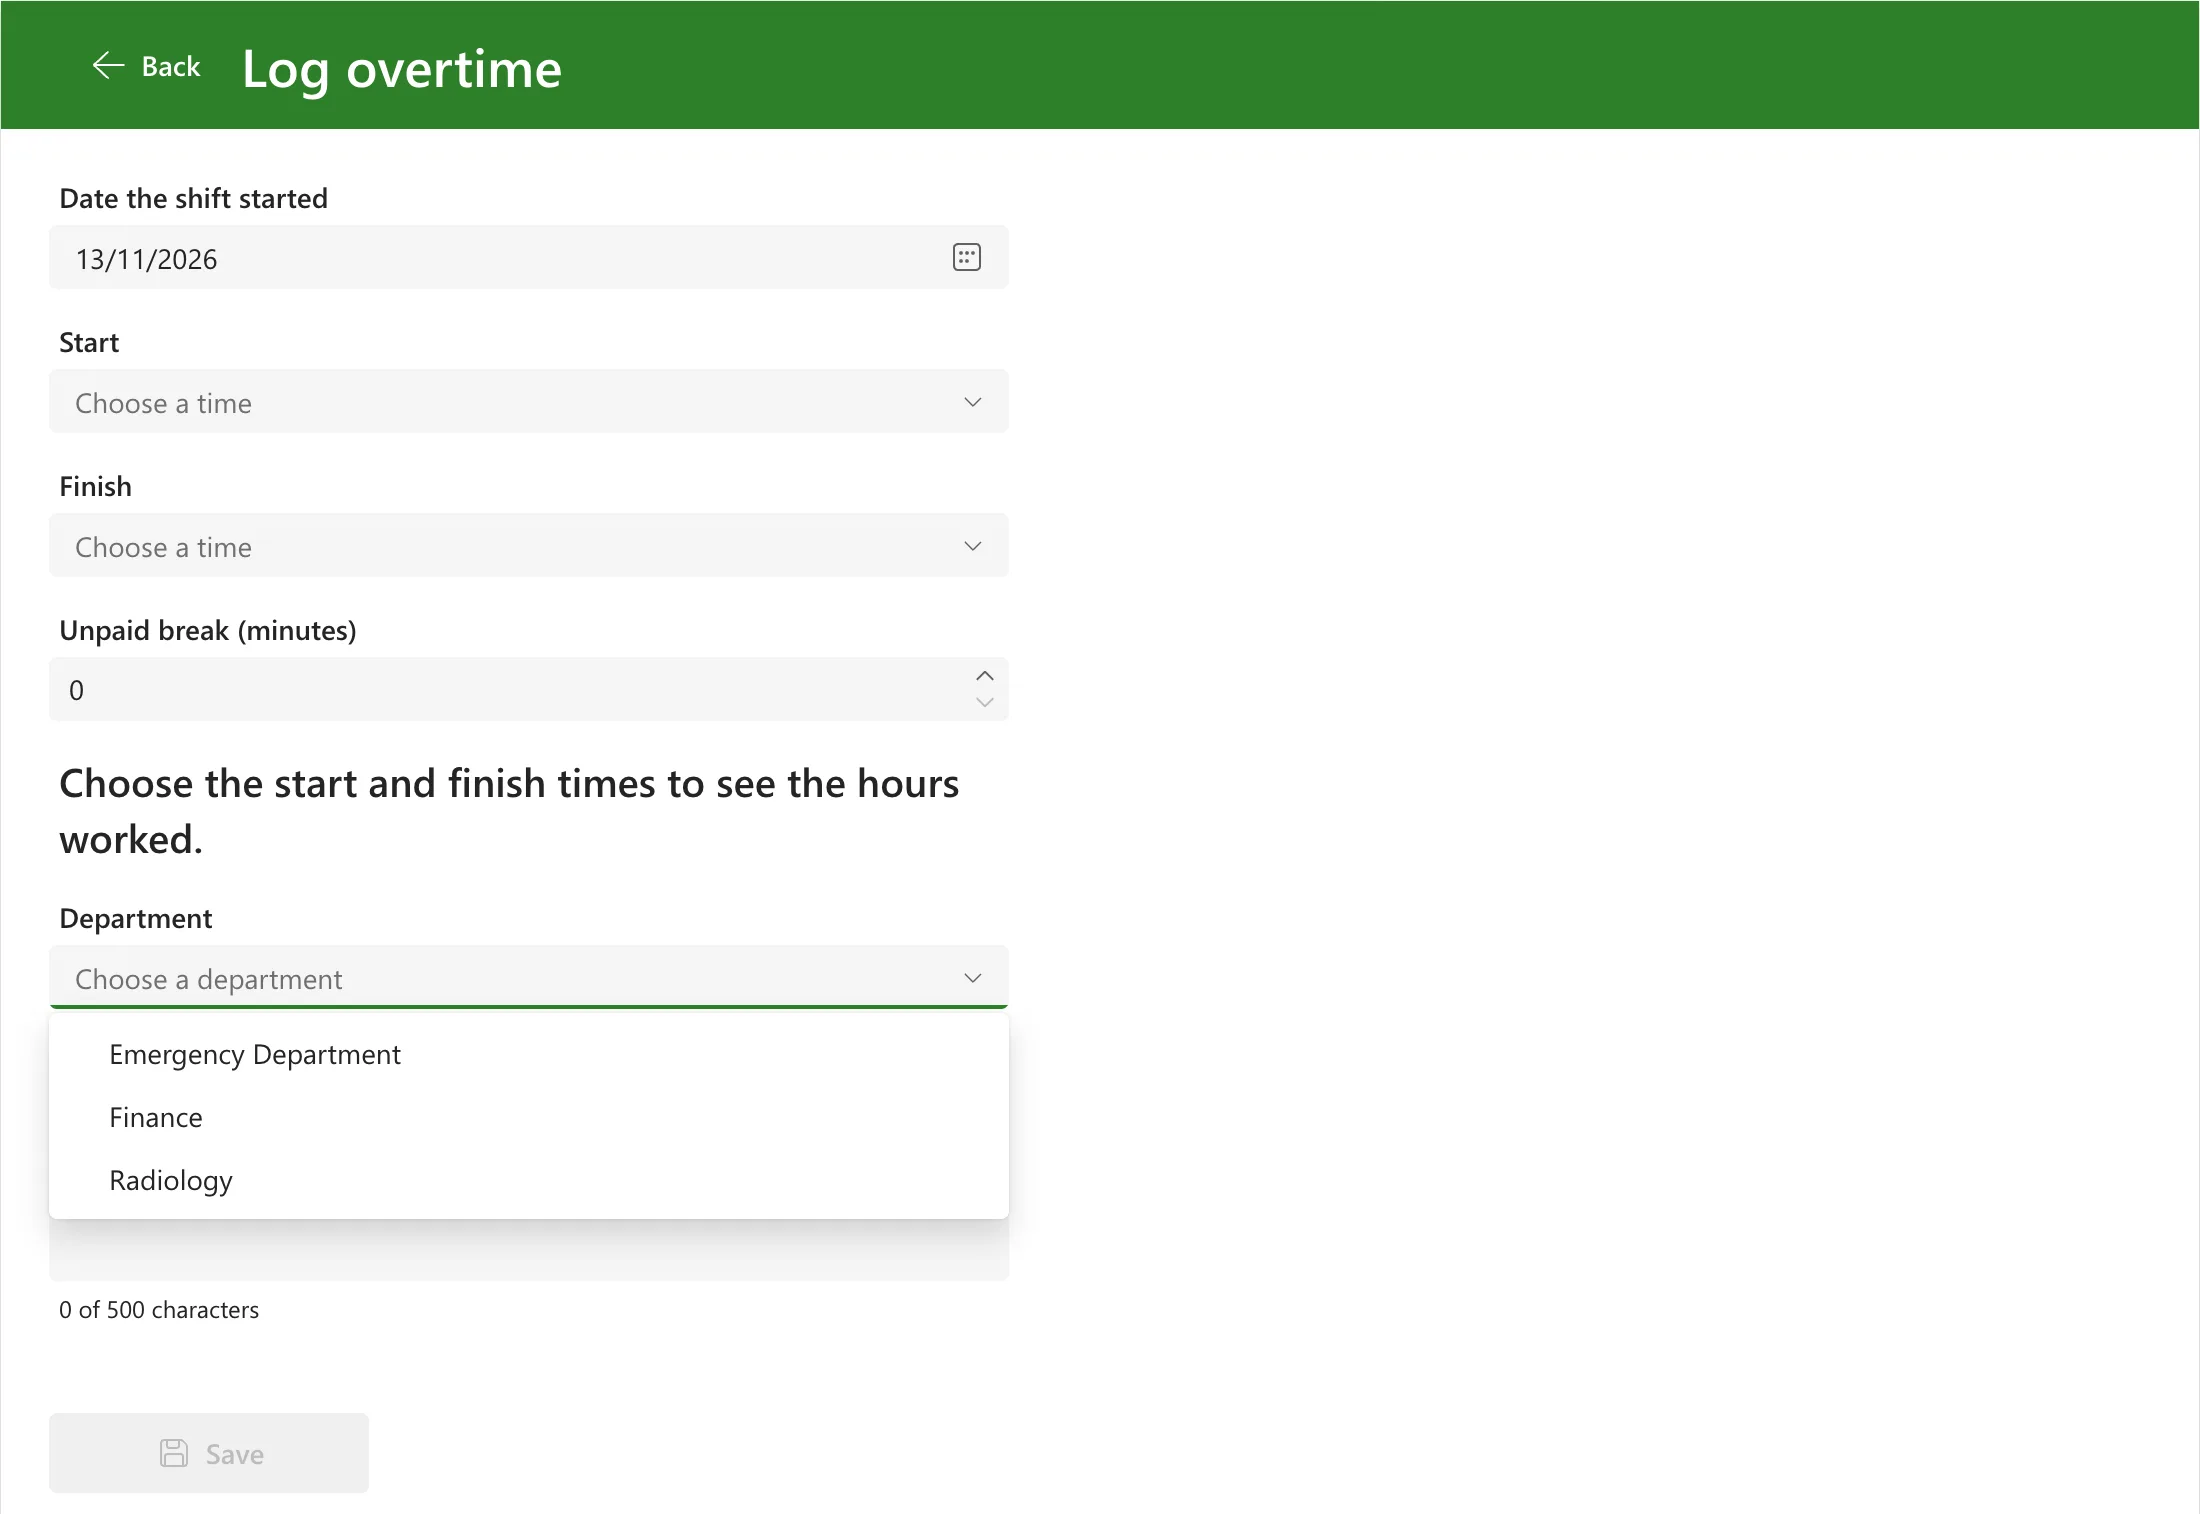
On the Log Overtime screen, the Department list showed Finance, and not Day Surgery:
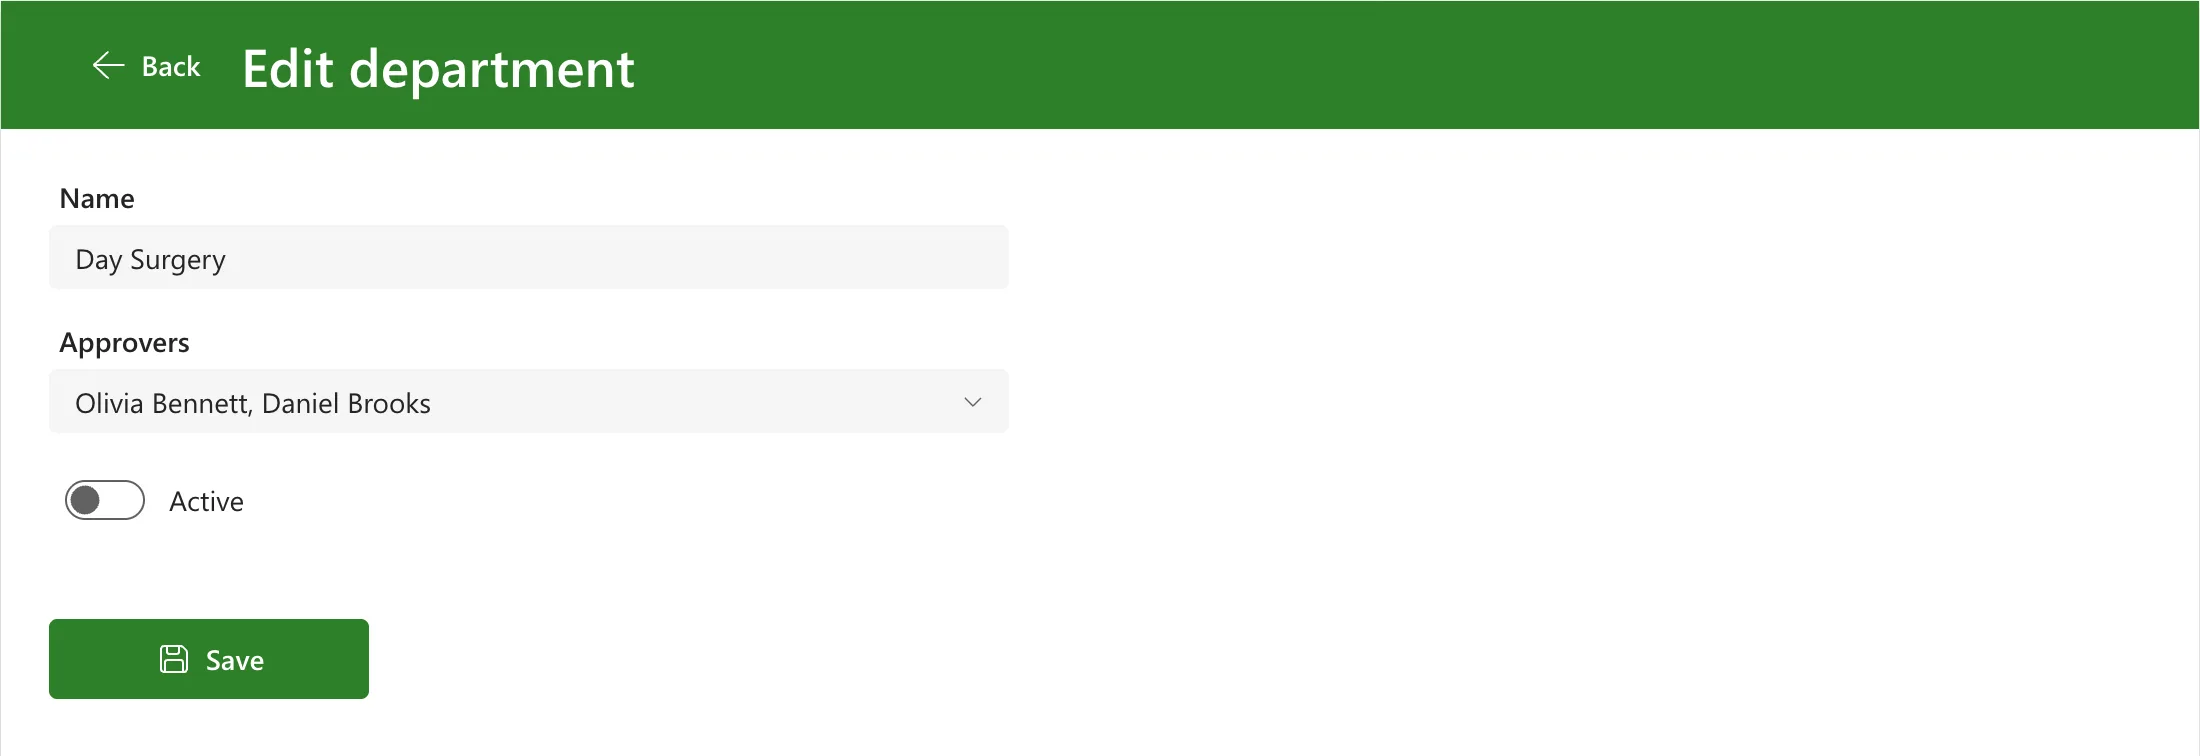
Editing. Edit on Day Surgery opened it with its name, both approvers and Active off:
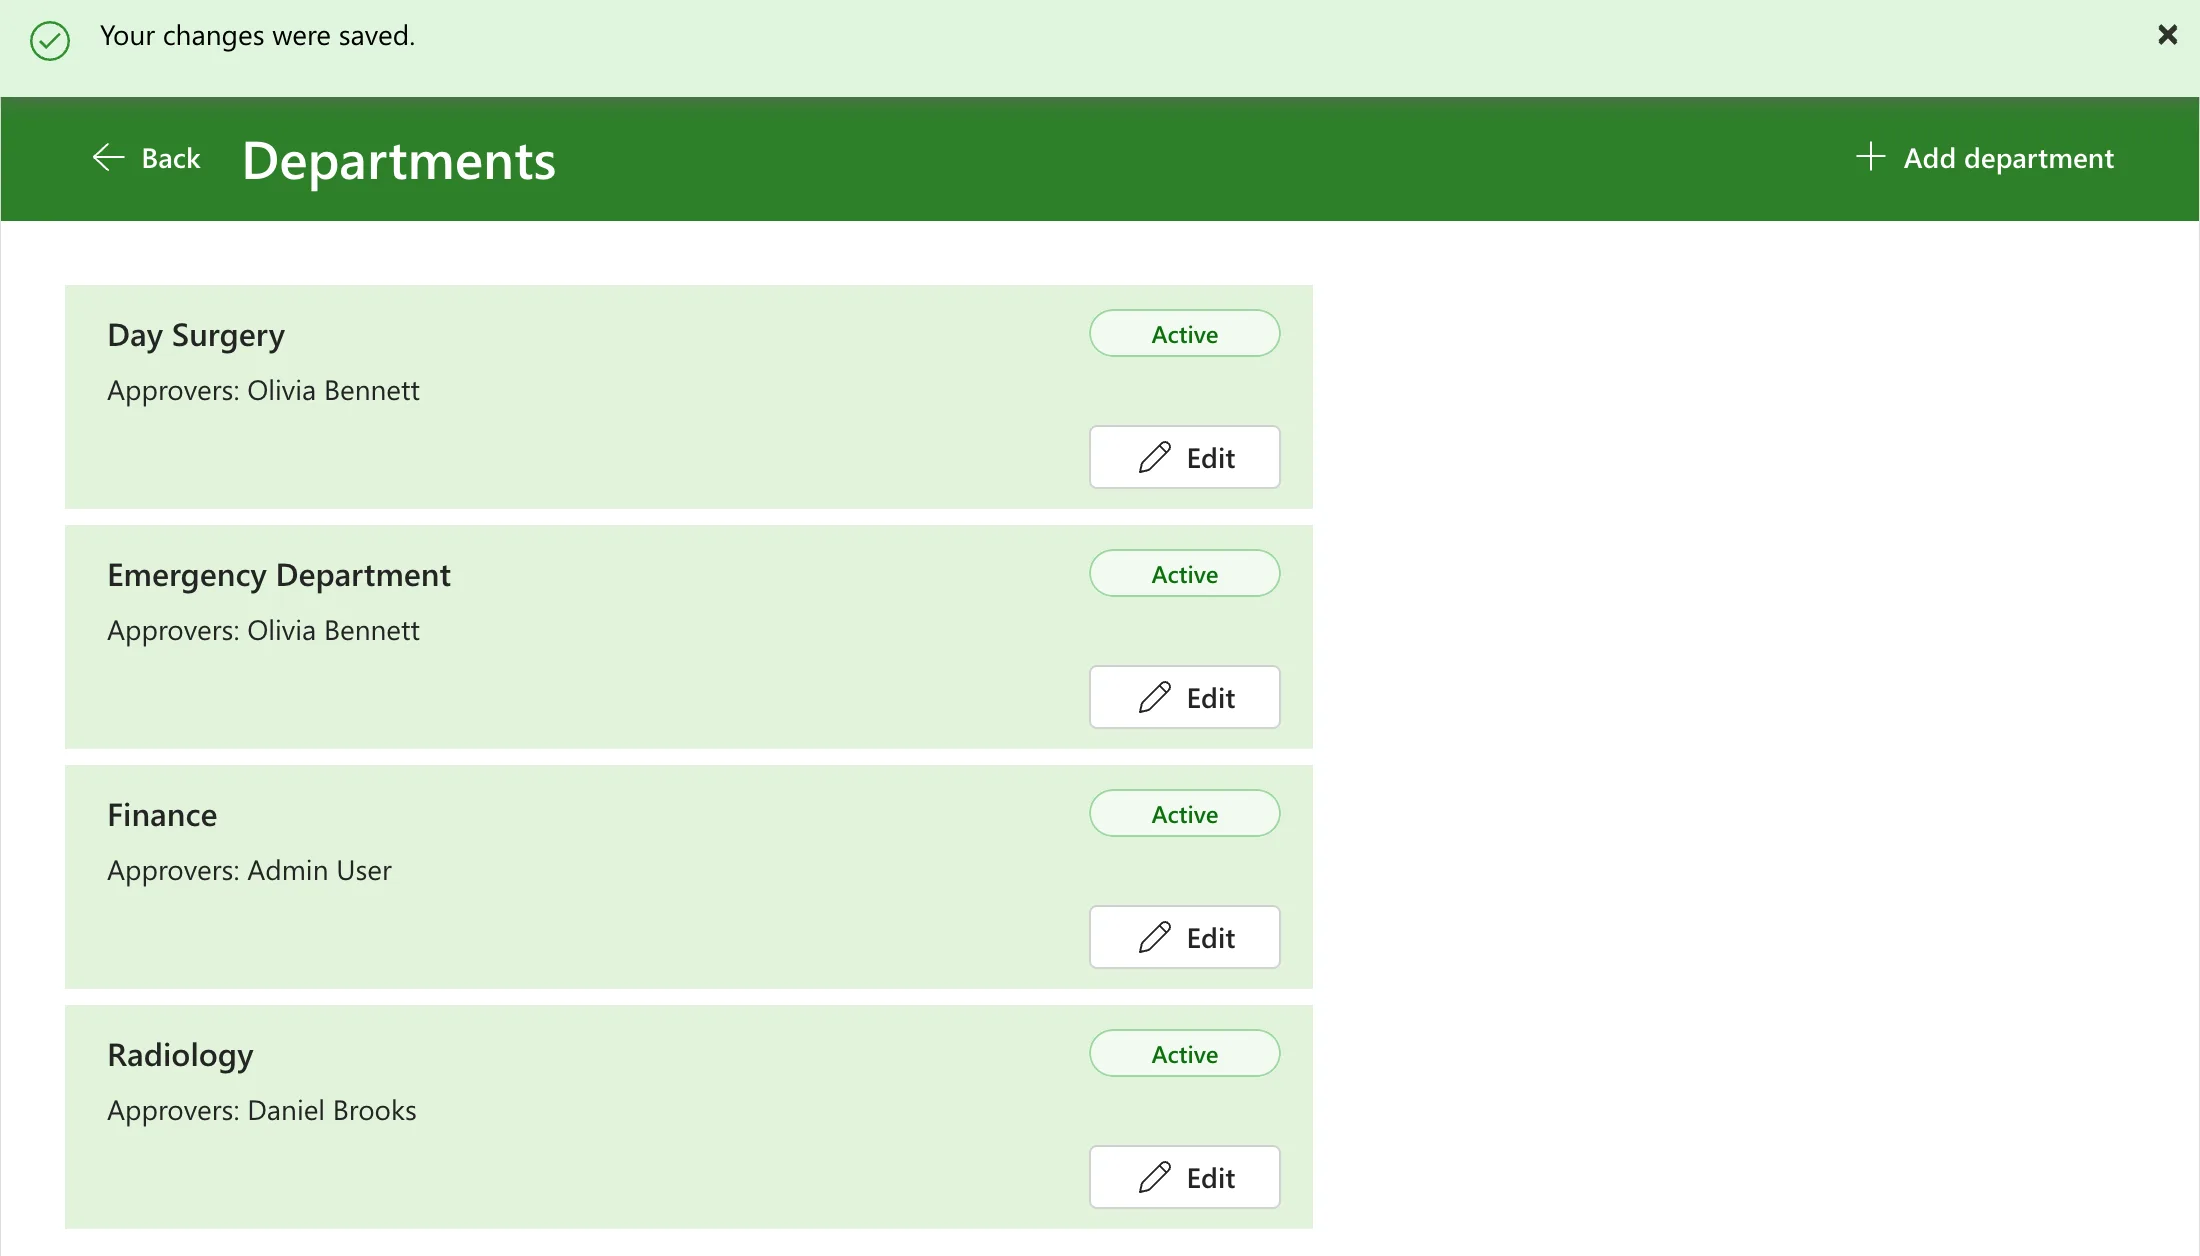
I opened the list, selected Daniel to untick him, turned Active on and saved. The list said Your changes were saved., with Day Surgery active and Olivia as its only approver:
The Log Overtime screen's list now included Day Surgery:
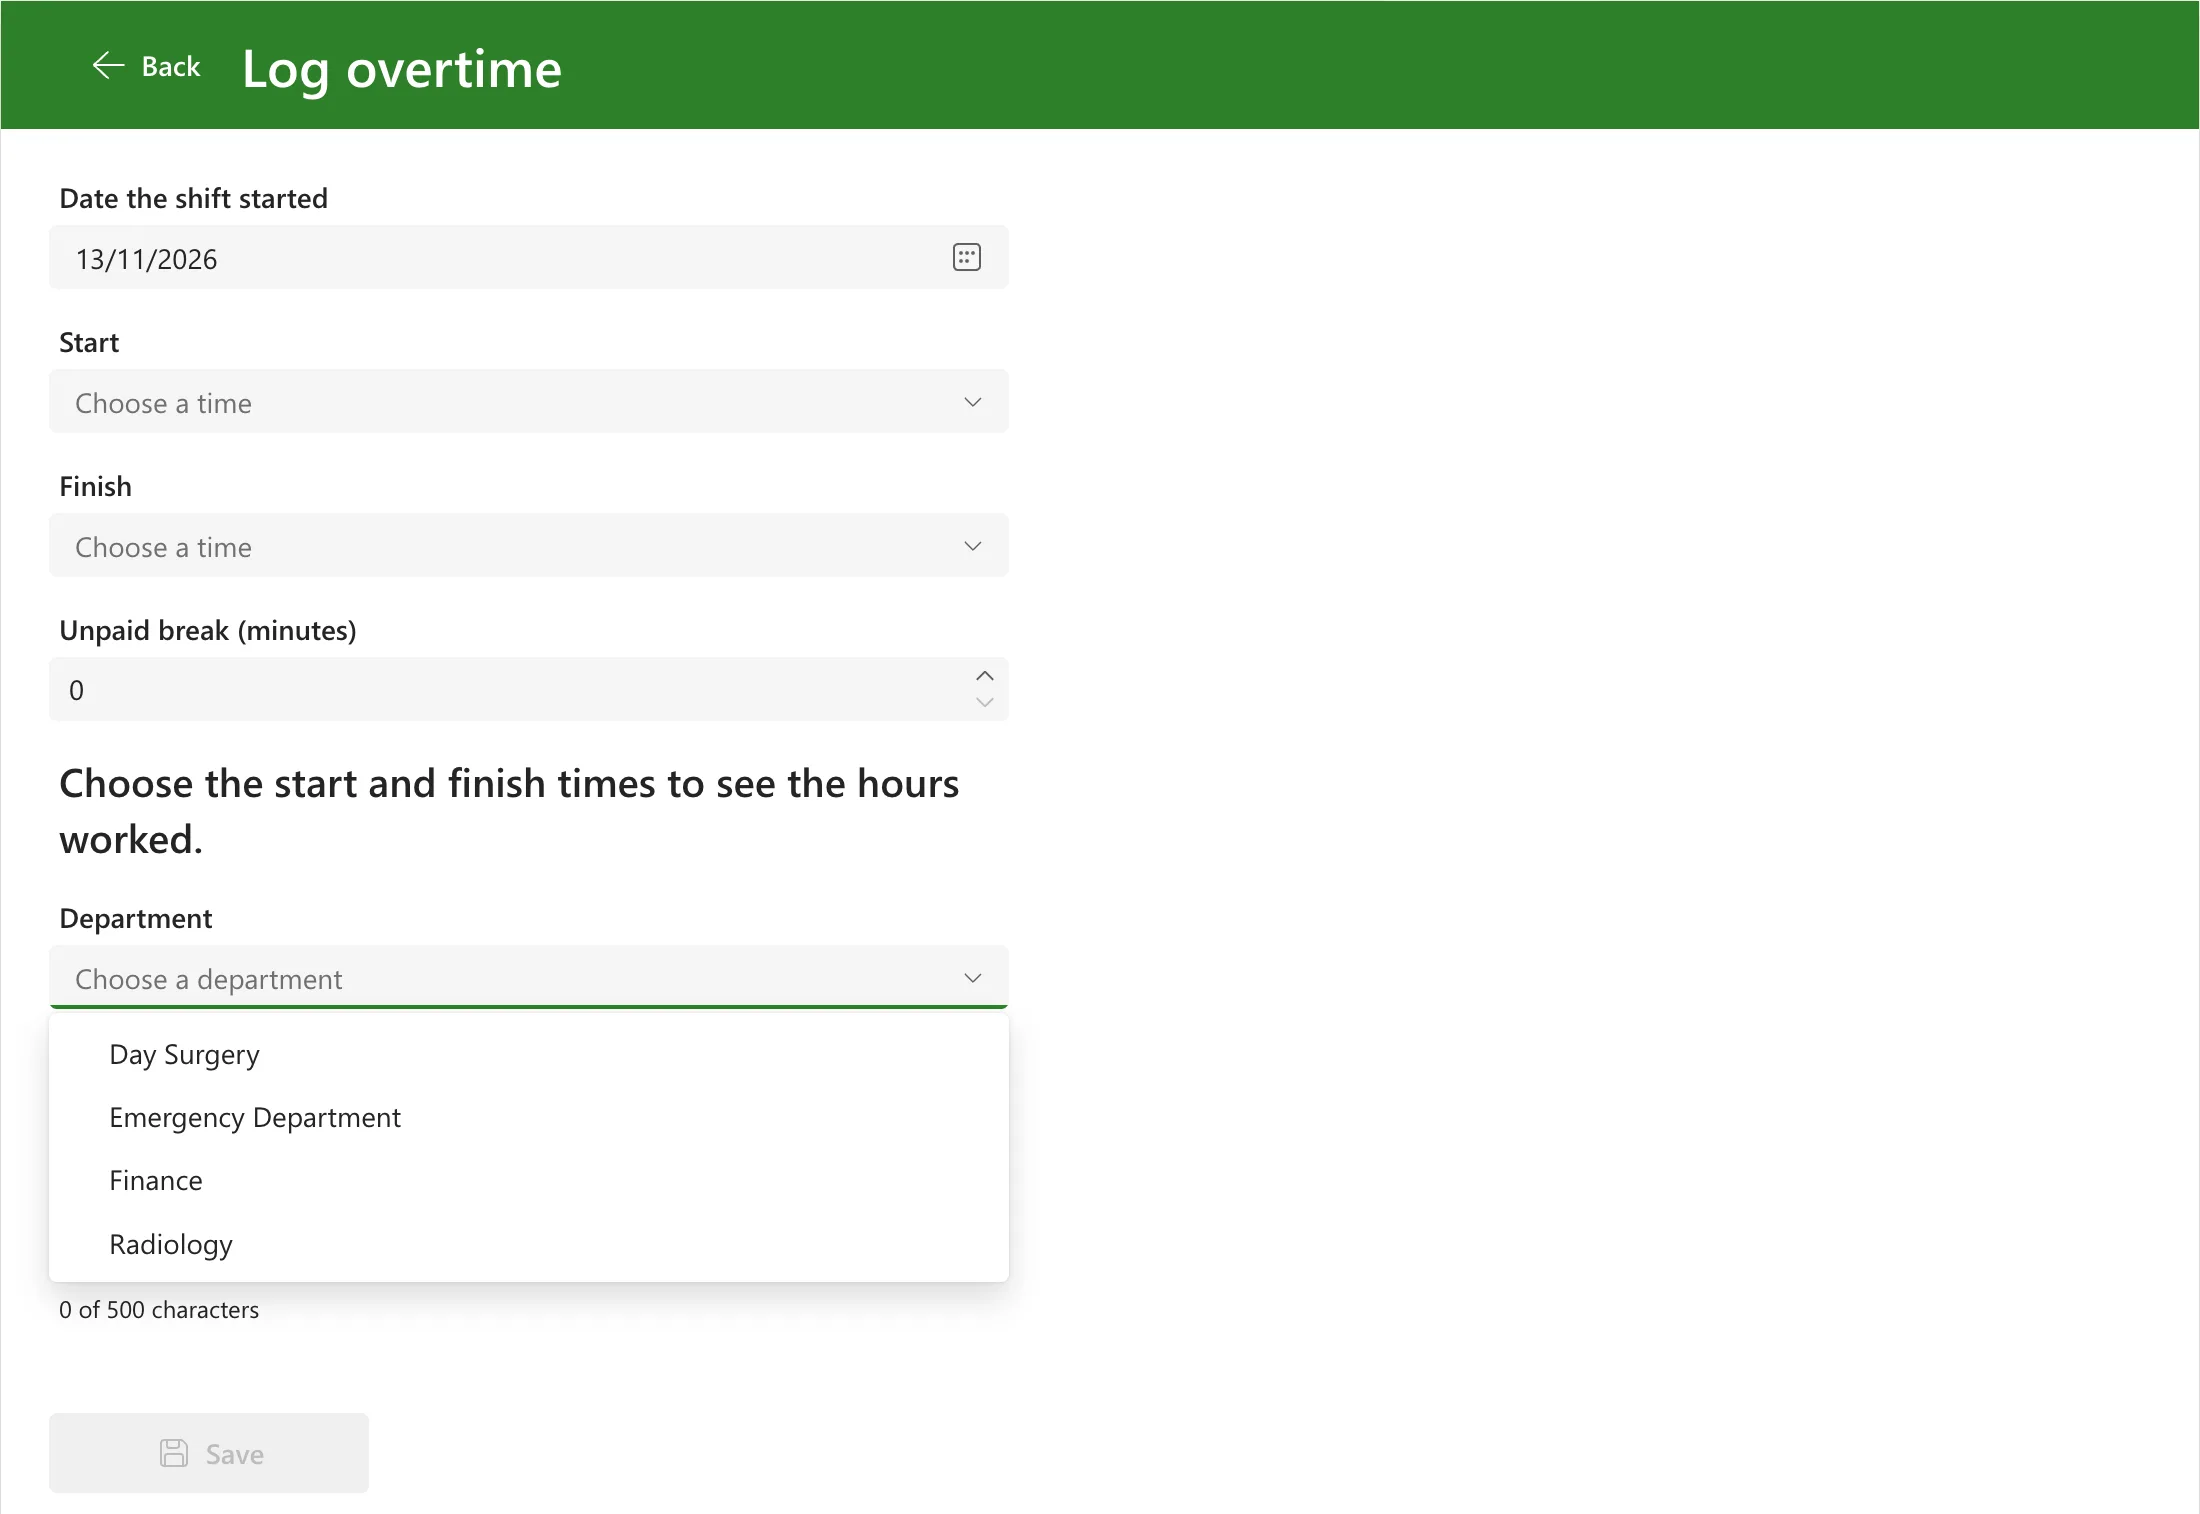
Because I'm now Finance's approver, my Home screen says You approve overtime for Finance. and shows the Waiting for approval and Reports buttons, as Part 5 set up.
Step 11: Check the Screens on a Phone
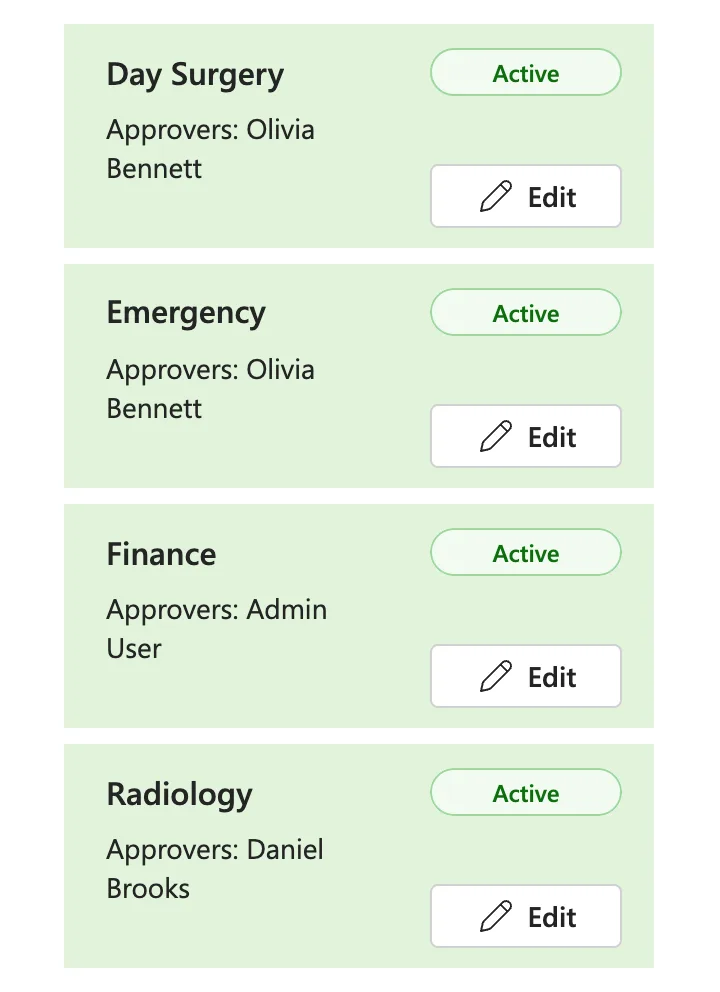
I published the app and opened it in a browser window 360 pixels wide, the width of the narrowest phones in Studio's list (How to Test a Power Apps Canvas App on Phone and Tablet Sizes). Add department showed only its icon, and the Edit Department screen fitted. On the list, though, Emergency Department was cut off after Emergency: the name shared its line with the badge, so it had the row's width less 144 pixels, and wrapped onto a second line its 24-pixel height couldn't show:
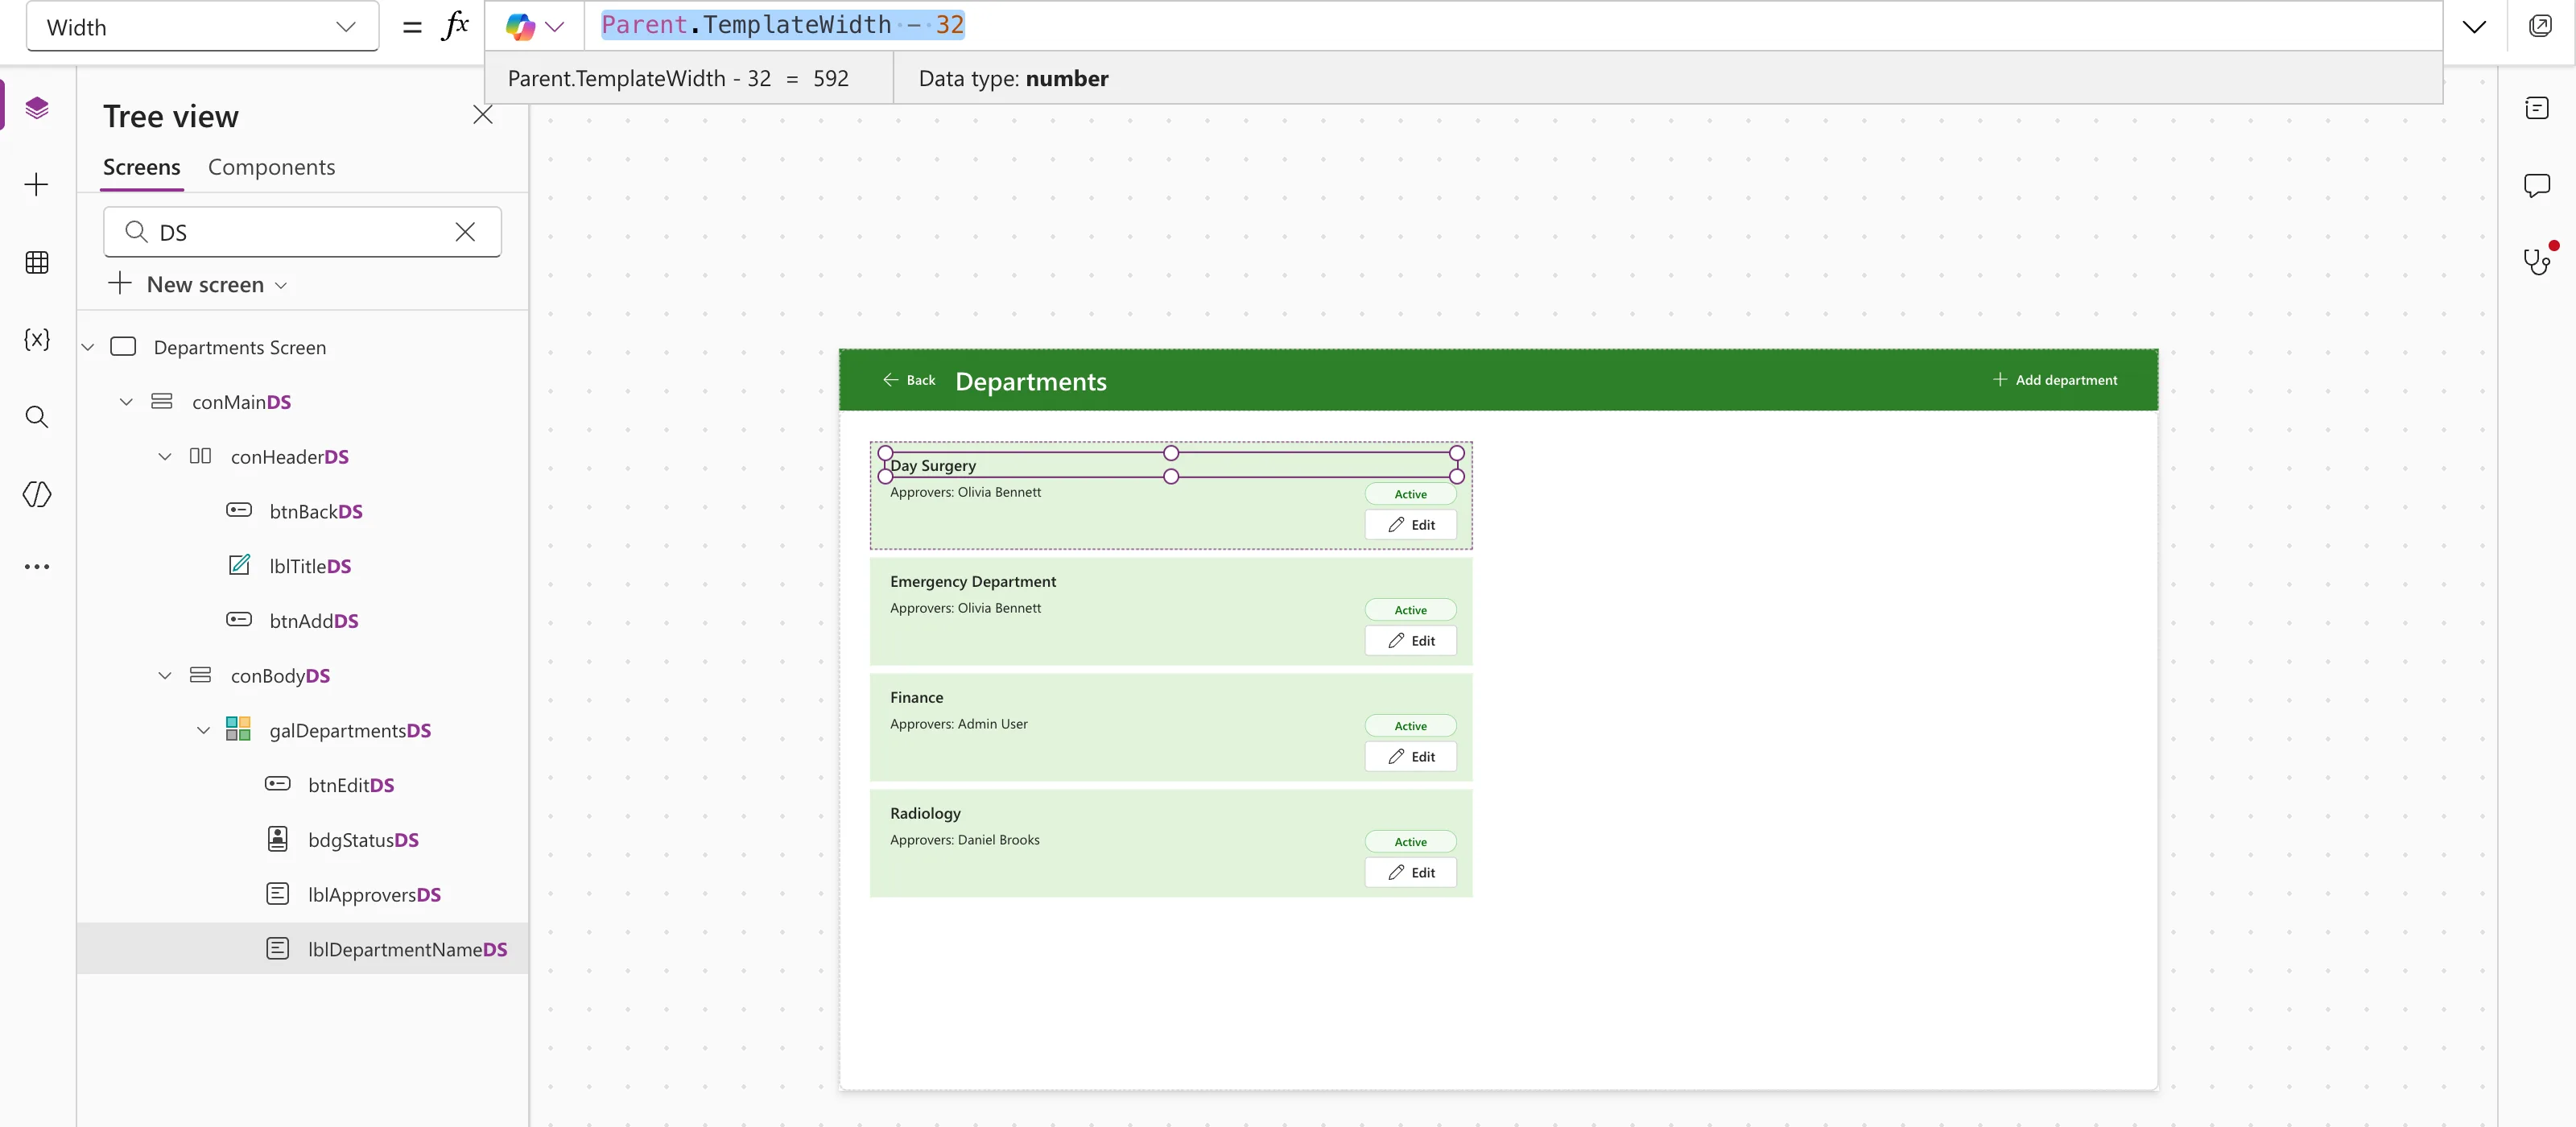
A badge has no icon-only form to shrink to, as Edit has, so the badge moved down a line instead, beside the approvers, and the name took the row's whole width (Fixed: Text and Buttons Cut Off on Narrow Phones in Power Apps):
| Control | Property | Value |
|---|---|---|
lblDepartmentNameDS | Width | Parent.TemplateWidth - 32 |
bdgStatusDS | Y | 42 |
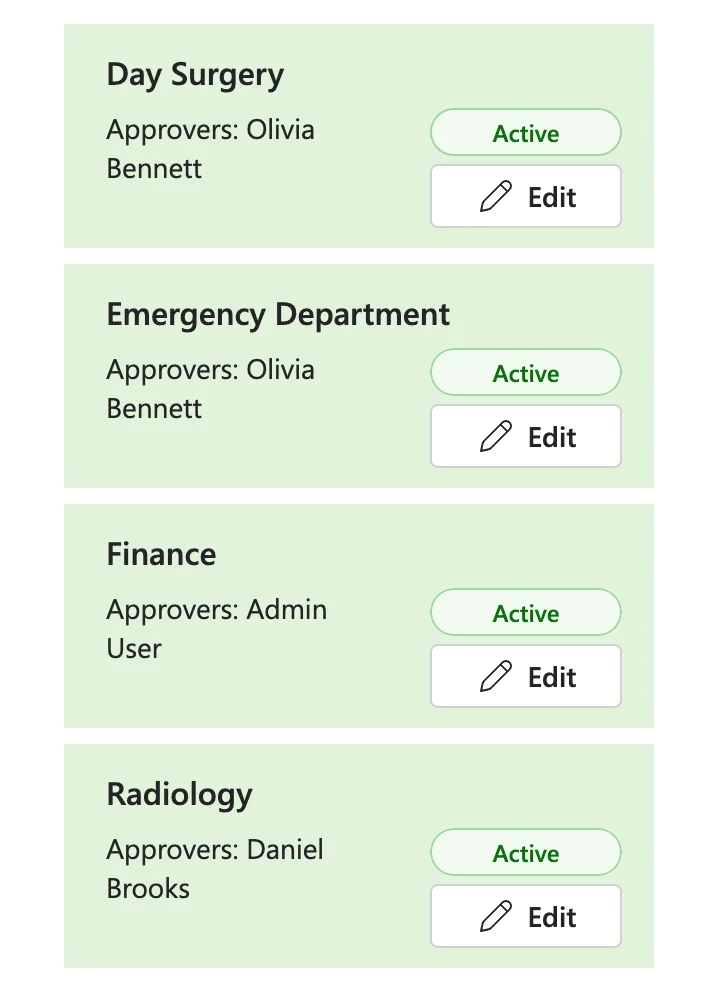
After publishing again, the names fitted at 360 pixels:
The same check found two problems on Part 7's My Overtime screen, now fixed there: the same cut-off name beside its Edit button, and an error banner as the screen opened (Fixed: "The First Argument to the GroupBy Function Cannot Be Blank" in Power Apps).
Step 12: Run the App Checker
Open the App checker and select Accessibility. It listed 14 errors: Focus isn't showing and Missing tab stop on the six screen titles, as in earlier parts, and on lblProblemED:
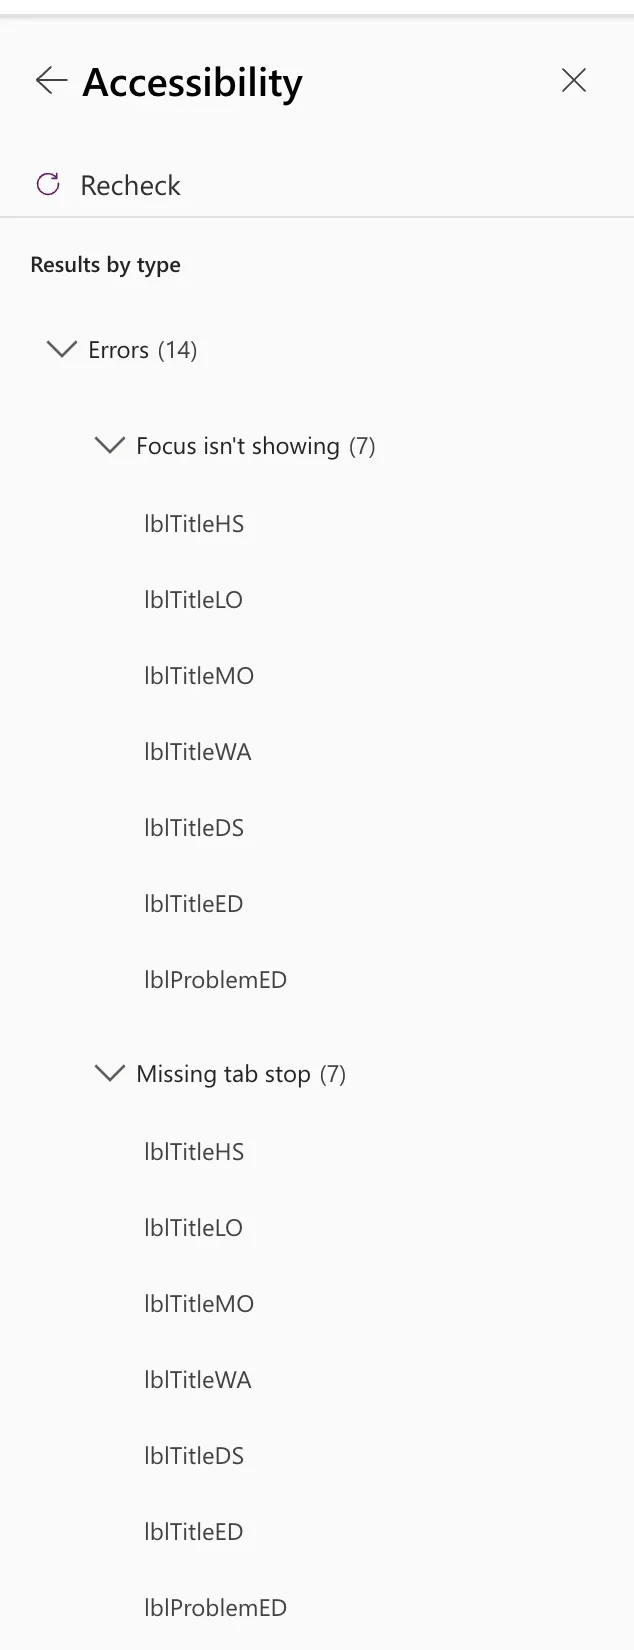
Leave them. The titles are headings that do nothing when selected (Fixed: "Missing Tab Stop" in the Power Apps App Checker and Fixed: "Focus Isn't Showing" in the Power Apps App Checker). lblProblemED is a message, not something to select either: screen readers announce it as it changes, and a tab stop would make them read it out as a button. The checker doesn't list lblProblemLO, which has the same settings, the same inconsistency those two posts found with headings. Formulas, Runtime, Performance and Data source listed nothing.
Step 13: Save and Publish
Select Save, then Publish (How to Publish a Canvas App in Power Apps). The dialog names the environment the new version goes to, with the app's name and description:
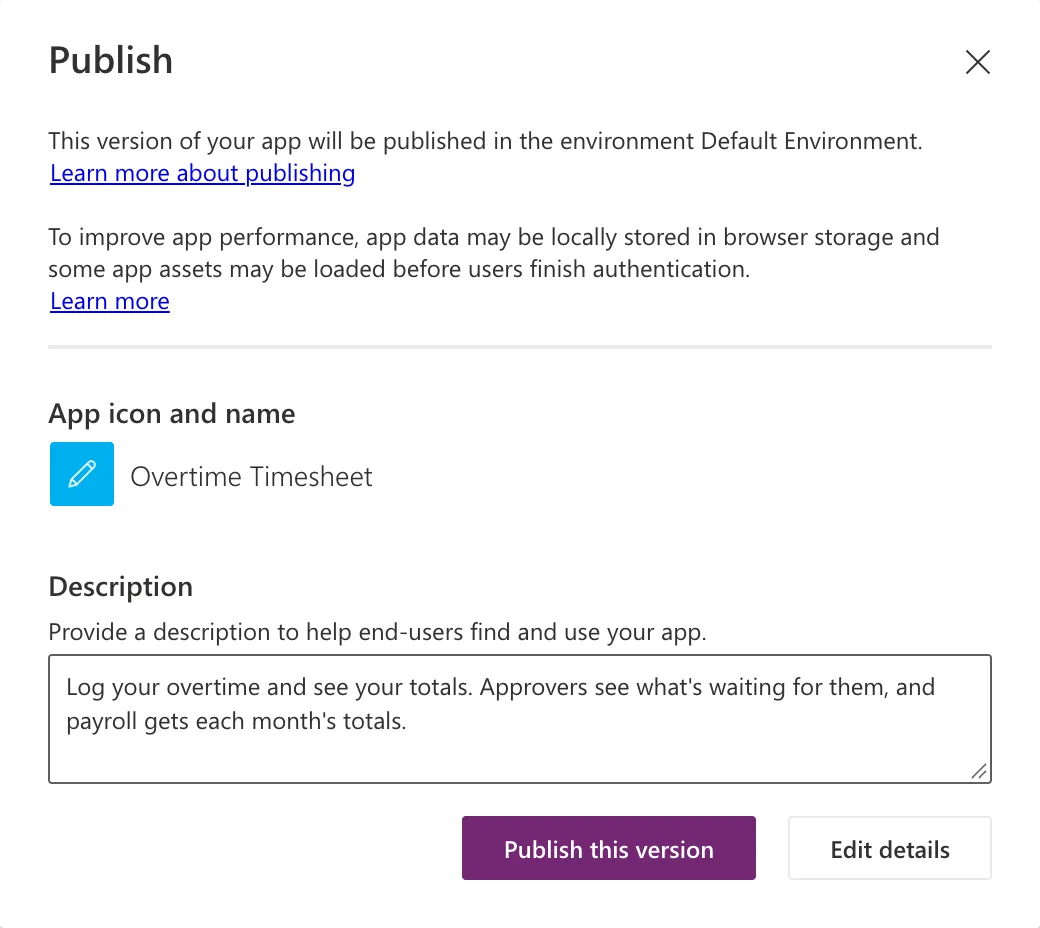
Publish this version ended with this message:
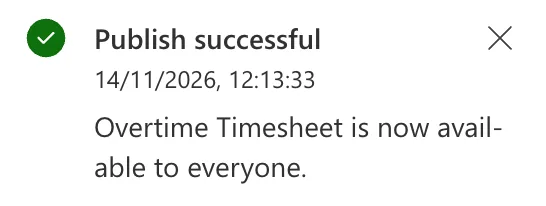
Everyone means everyone the app is shared with: Microsoft's page on publishing says Publish makes the saved changes available to them. This app is still shared only with the two approvers from Part 9, for testing; Part 15 shares it with everyone.
When I opened the app about two minutes later, it showed You're using an old version of this app. Refresh to use the latest version. Opening it again about five minutes after publishing loaded the new version, with the new people picker. Part 9 met the same delay (Fixed: Users Still See the Old Version After You Publish a Canvas App in Power Apps).
Common Mistakes
| Mistake | What happens | Do this instead |
|---|---|---|
| Deleting a department | Its entries point at a department that's gone | Turn Active off |
| Checking only the screen's button for who can edit | Anyone who reaches the screen can try to save | Let SharePoint's permissions decide, as in Part 3 |
| Calling Trim inside the Filter | Two delegation warnings, and the check runs over 500 items only | Trim first with With |
| Checking duplicates without skipping the department being edited | Saving a department under its own name fails | LookUp(SameNames, ID <> DepartmentId) |
| Saving the name as typed | Day Surgery with a trailing space doesn't match | Save and compare Trim(...) |
| Opening Add department without a blank ID | The form opens the last department edited | {locDepartmentId: Blank()} |
| Copying a button and keeping its tooltip | Add department says Refresh this screen | Check every property the copy kept |
| Leaving the badge beside a long name | The name is cut off on a phone | Give the name the row's width |
Troubleshooting
| Symptom | Likely cause | Fix |
|---|---|---|
| There's already a department called … for the department being edited | DepartmentId isn't passed to the function | Pass locDepartmentId |
| Save stays disabled with no message | The name is empty or only spaces | Type a name |
| The search finds nobody | The text isn't the start of a first name or surname: liv finds nobody | Type the start of a name, such as Oli |
| The department wasn't saved. | SharePoint refused the change, such as for someone outside Overtime Admins | Check the person is in Overtime Admins |
| A name is cut off on a phone | It shares its line with a badge or button | Give the name the row's full width |
FAQ
Can staff open the Departments screen?
The button shows only for admins. If anyone else reached the screen, SharePoint wouldn't save their changes: Part 3 gives everyone outside Overtime Admins read access to the list.
What happens to entries when a department is turned off?
Nothing. They keep their department, their totals and their approvals, and Part 9's flow still lists the department's pending entries for its approvers. Only new entries can't choose it.
What happens when a department is renamed?
New entries get the new name. Older entries keep the name they were saved with, and their DepartmentId still links them to the department.
What does a new approver need?
The app and the Get Waiting Approvals flow shared with them. Part 15 shares both with the Overtime Timesheet Users group, so a new approver needs to be in that group.
Conclusion
Admins now manage departments in the app:
- a Departments screen listing each department, its approvers and an Active or Inactive badge, opened from the Home screen's Departments button;
- one Edit Department screen that adds or edits a department, with a name, a people picker for the approvers and an Active toggle;
- a function that catches duplicate names, active or not, without delegation warnings, and asks for at least one approver;
- departments turned off instead of deleted, so their entries and approvals stay;
- rows that fit on a 360-pixel phone, and an App checker whose remaining items are left as they are, for the reasons in Step 12.
Part 11 builds the Reports screen, with overtime totals by department, person and month for approvers and payroll.
Additional Resources
- Choices function: the possible values of a column, filtered by a text.
- Combo box modern control: SearchText, DelayOutput, DefaultSelectedItems and AllowExternalSelectedItems.
- Text Input modern control: TriggerOutput.
- Patch function: adding and changing items.
- Save and publish canvas apps: what Publish changes, and the notices about a new version.
- Delegable functions and operations for SharePoint: what SharePoint can run.
← Previous: Part 9: Show Approvers What's Waiting Next → Part 11: Build the Reports Screen (coming soon)
