Install WordPress on Ubuntu Server with Docker — Part 1: Run WordPress with Docker Compose

Learn how to run WordPress on an Ubuntu Server using Docker — with the website and its database in two tidy containers instead of installed all over your system. This part covers the project folder, a .env file for your passwords, the compose.yaml file explained line by line, and finishing the famous five-minute WordPress installer in your browser.
This is Part 1 of a 2-part series.
- Part 1: Run WordPress with Docker Compose (you are here)
- Part 2: Custom Domain, Free HTTPS, Redis Cache and Backups
Introduction
WordPress runs a very large share of the websites on the internet. It is free, open source, and you can host it yourself on any server you own.
The traditional way to install it is called a LAMP stack — you install a web server, a database, and PHP directly onto the machine, one piece at a time. It works, but it spreads files across dozens of system folders. Months later, when you want the site gone, removing every trace by hand is genuinely annoying.
This guide takes a different route. We put WordPress and its database into containers. A container is a sealed box that holds a program and everything it needs to run. The box sits on your server but does not mix with it. Your server does not get PHP installed. It does not get a web server installed. It does not get a database installed. It only gets Docker, which you already have.
The payoff comes at the end. When you want the whole site gone, one command removes it and your server is exactly as it was before.
Every command in this guide was run on a real, freshly installed Ubuntu 26.04 LTS server, and every screenshot is the actual result. The versions you will see are WordPress 7.0.4, MariaDB 11.8, Apache 2.4.68, and PHP 8.4.24. The same steps work on Ubuntu 24.04 LTS and 22.04 LTS.
What You Will Build
By the end of this part you will have:
- A folder on your server holding just three small files — that folder is your website's configuration.
- Two containers running side by side: one for WordPress, one for the MariaDB database.
- Your passwords kept in a separate
.envfile rather than typed into shared files. - Your website's files and database stored in Docker volumes, so they survive restarts and upgrades.
- A working WordPress site you can open in a browser and log into.
At this stage the site is reachable on your local network at an address like http://192.168.1.50:8080. Part 2 gives it a real domain name and a padlock.
Why Docker Instead of Installing WordPress Directly?
Both approaches produce a working site. Here is the honest comparison:
| Docker (this guide) | Traditional LAMP install | |
|---|---|---|
| What touches your server | Only Docker | Apache, PHP, MySQL, plus dozens of libraries |
| Setting it up | One file, one command | Many packages, several config files |
| Running two sites with different PHP versions | Easy — each has its own container | Painful, often impossible |
| Moving to another server | Copy the folder, run one command | Reinstall and reconfigure everything |
| Removing it completely | One command, nothing left behind | Manual cleanup across many folders |
| Upgrading PHP | Change one line, restart | System-wide change that affects everything |
The last two rows are the reason this guide exists. You asked for something you could remove cleanly, and containers are the honest answer to that.
There is one thing Docker does not do for you: it does not make backups. Containers are disposable by design, so your data lives in volumes instead. We cover backing those up properly in Part 2 — do not skip it.
Prerequisites
Before you start you need:
- An Ubuntu Server — 26.04 LTS, 24.04 LTS or 22.04 LTS all work.
- Docker Engine and the Docker Compose plugin installed. If you have not done that yet, follow our guide on how to install Docker on Ubuntu Server first and come back here.
- The ability to run
dockerwithout typingsudo. That is Step 7 of the Docker guide above. - SSH access to the server.
- About 2 GB of free disk space for the images.
Connect to your server from your own computer (replace username and server_ip with your own):
ssh username@server_ip
Check that Docker is ready:
docker version
docker compose version
If both print a version number without an error, you are good to continue.
Step 1: Make a Folder for Your Website
Everything about this site will live in one folder. That is deliberate — it means the whole site is easy to find, easy to back up, and easy to delete.
mkdir -p ~/wordpress
cd ~/wordpress
mkdir makes a directory (a folder). The -p flag simply means "do not complain if it already exists". cd moves you into it. Every command from here on assumes you are inside this folder.
Step 2: Put Your Passwords in a .env File
Your database needs passwords. Rather than typing them into the main configuration file, we keep them in a separate file named .env. Docker Compose reads this file automatically.
Why bother? Because the main file is the one you would copy, share, or commit to Git. Keeping secrets out of it is a habit worth forming now, while it costs nothing.
Create the file with strong random passwords:
cat > .env <<EOF
WORDPRESS_DB_NAME=wordpress
WORDPRESS_DB_USER=wordpress
WORDPRESS_DB_PASSWORD=$(openssl rand -base64 24 | tr -d "/+=" | cut -c1-24)
MARIADB_ROOT_PASSWORD=$(openssl rand -base64 24 | tr -d "/+=" | cut -c1-24)
EOF
Here is what that does, in plain terms:
cat > .env <<EOF ... EOFwrites everything between the twoEOFmarkers into a file called.env.openssl rand -base64 24generates 24 random bytes — a password no human would guess.tr -d "/+="removes three characters that can confuse other tools.cut -c1-24trims the result to 24 characters.
Because the passwords are generated on the spot, you never choose them and never need to remember them. WordPress reads them from this file automatically.
Now lock the file so only your user can read it:
chmod 600 .env
chmod 600 means "only the owner may read and write this file". Other users on the server cannot open it.
Never share your .env file, and never commit it to a public Git repository. It contains the keys to your database. If you ever put this project on GitHub, add a .gitignore file containing the single line .env.
Step 3: Write the compose.yaml File
This is the heart of the whole setup. It is one file that describes both containers, and Docker Compose builds everything from it.
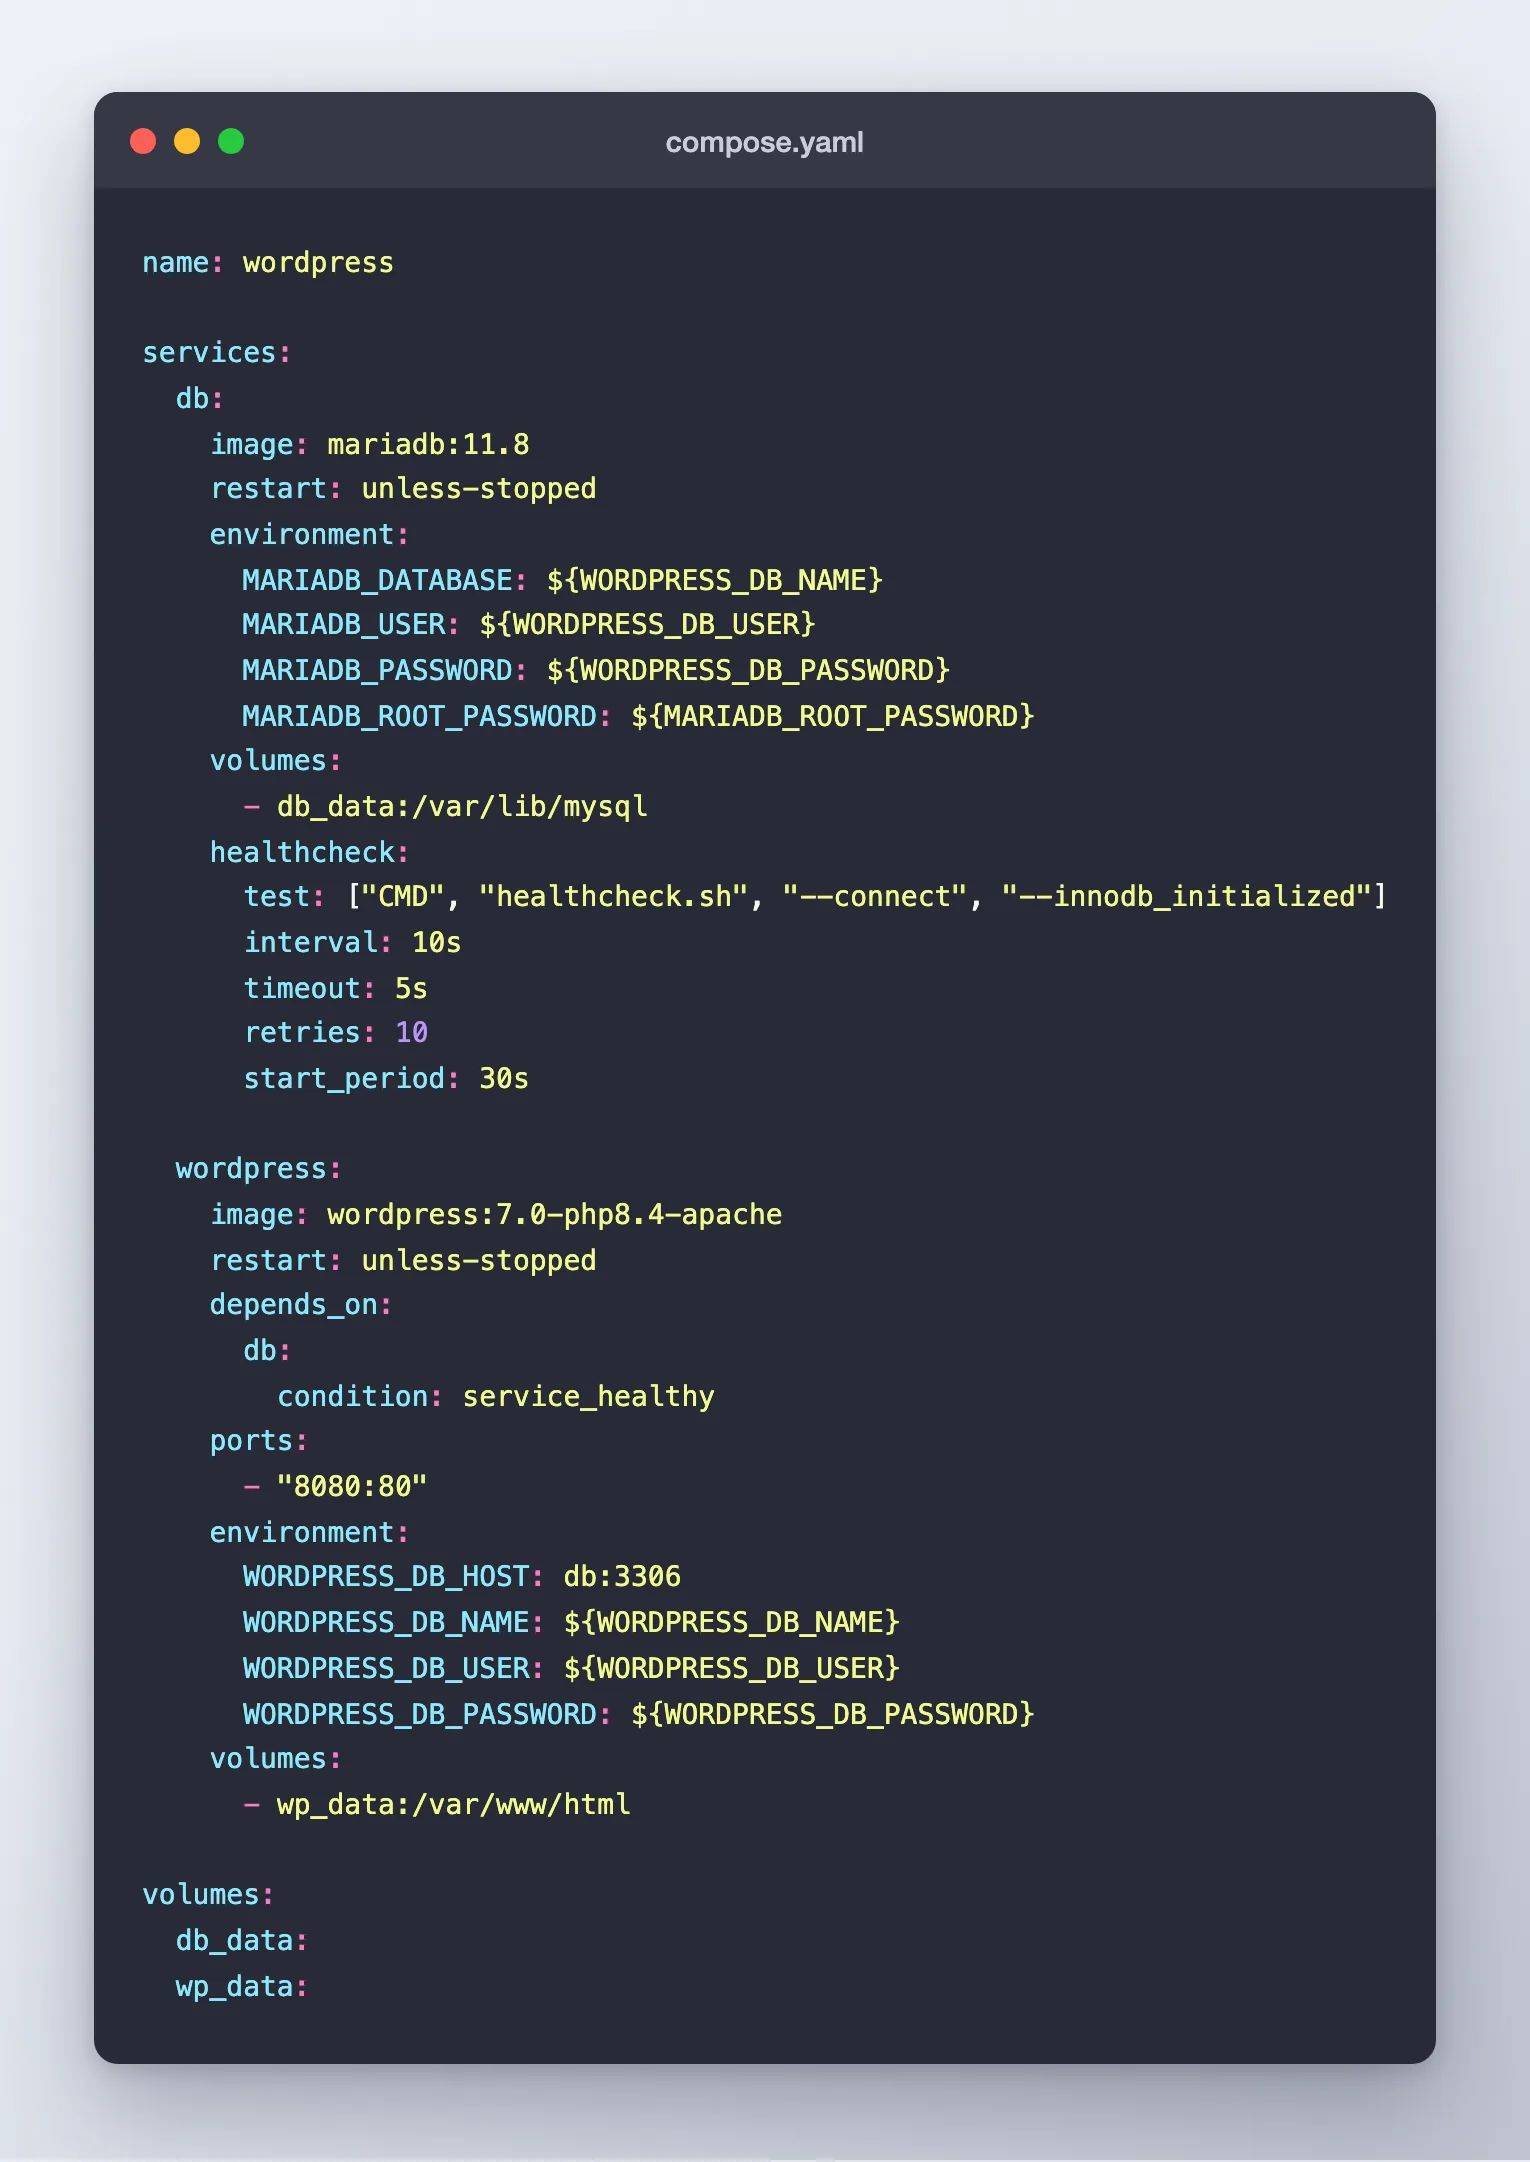
Create it with:
nano compose.yaml
nano is a simple text editor built into Ubuntu. Paste the following in, then press Ctrl+O and Enter to save, and Ctrl+X to exit.
name: wordpress

services:
  db:
    image: mariadb:11.8
    restart: unless-stopped
    environment:
      MARIADB_DATABASE: ${WORDPRESS_DB_NAME}
      MARIADB_USER: ${WORDPRESS_DB_USER}
      MARIADB_PASSWORD: ${WORDPRESS_DB_PASSWORD}
      MARIADB_ROOT_PASSWORD: ${MARIADB_ROOT_PASSWORD}
    volumes:
      - db_data:/var/lib/mysql
    healthcheck:
      test: ["CMD", "healthcheck.sh", "--connect", "--innodb_initialized"]
      interval: 10s
      timeout: 5s
      retries: 10
      start_period: 30s

  wordpress:
    image: wordpress:7.0-php8.4-apache
    restart: unless-stopped
    depends_on:
      db:
        condition: service_healthy
    ports:
      - "8080:80"
    environment:
      WORDPRESS_DB_HOST: db:3306
      WORDPRESS_DB_NAME: ${WORDPRESS_DB_NAME}
      WORDPRESS_DB_USER: ${WORDPRESS_DB_USER}
      WORDPRESS_DB_PASSWORD: ${WORDPRESS_DB_PASSWORD}
    volumes:
      - wp_data:/var/www/html

volumes:
  db_data:
  wp_data:
What Every Line Actually Means
That file looks like a lot. It is not, once you know the vocabulary. A service is one container. We have two: db and wordpress.
The db service — your database:
image: mariadb:11.8— the software to run. MariaDB is a drop-in replacement for MySQL, made by MySQL's original developers. The11.8is a specific version.restart: unless-stopped— if the container crashes, or the server reboots, Docker starts it again automatically. It stays off only if you deliberately stopped it.environment:— settings handed to the container on startup. The${...}parts pull the values out of your.envfile. On first launch MariaDB reads these and creates the database and user for you.volumes: - db_data:/var/lib/mysql— this is the important one./var/lib/mysqlis where MariaDB keeps its data inside the container. Containers are disposable, so we attach a named volume calleddb_data, which Docker stores outside the container. Delete and rebuild the container as often as you like; the data stays.healthcheck:— Docker runs the officialhealthcheck.shscript every 10 seconds to ask "is the database actually ready to answer questions?" This matters more than it sounds, as the next service shows.
The wordpress service — your website:
image: wordpress:7.0-php8.4-apache— the official WordPress image, which already contains WordPress, PHP 8.4, and the Apache web server. Nothing to install.depends_on: db: condition: service_healthy— do not start WordPress until the database reports healthy. Without this, WordPress often starts faster than the database can accept connections and shows a database error on first boot. This one setting prevents the single most common problem people hit with WordPress on Docker.ports: - "8080:80"— the container listens on port 80 internally; we expose it as port 8080 on the server. So you visithttp://your-server-ip:8080. Read it asoutside:inside.WORDPRESS_DB_HOST: db:3306— where to find the database. Notice it saysdb, the service name. Compose creates a private network for the project, and containers find each other by service name. Your database is not exposed to the outside world at all.volumes: - wp_data:/var/www/html— the same idea as before, for your themes, plugins and uploads.
The volumes: block at the bottom simply declares the two named volumes so Docker creates and manages them for you.
Notice both images have a version number — mariadb:11.8, not mariadb:latest. Pinning versions is standard practice for anything you intend to keep running. With latest, a rebuild months from now could silently pull a major new version and break your site. With a pinned version, upgrades happen when you decide.
Step 4: Start WordPress
One command builds everything:
docker compose up -d
up means "create and start everything in the file". -d means detached — it runs in the background and gives your terminal back.
The first run takes a few minutes because Docker downloads both images (about 1.5 GB). You will see a lot of download progress. That happens only once; later starts take seconds.
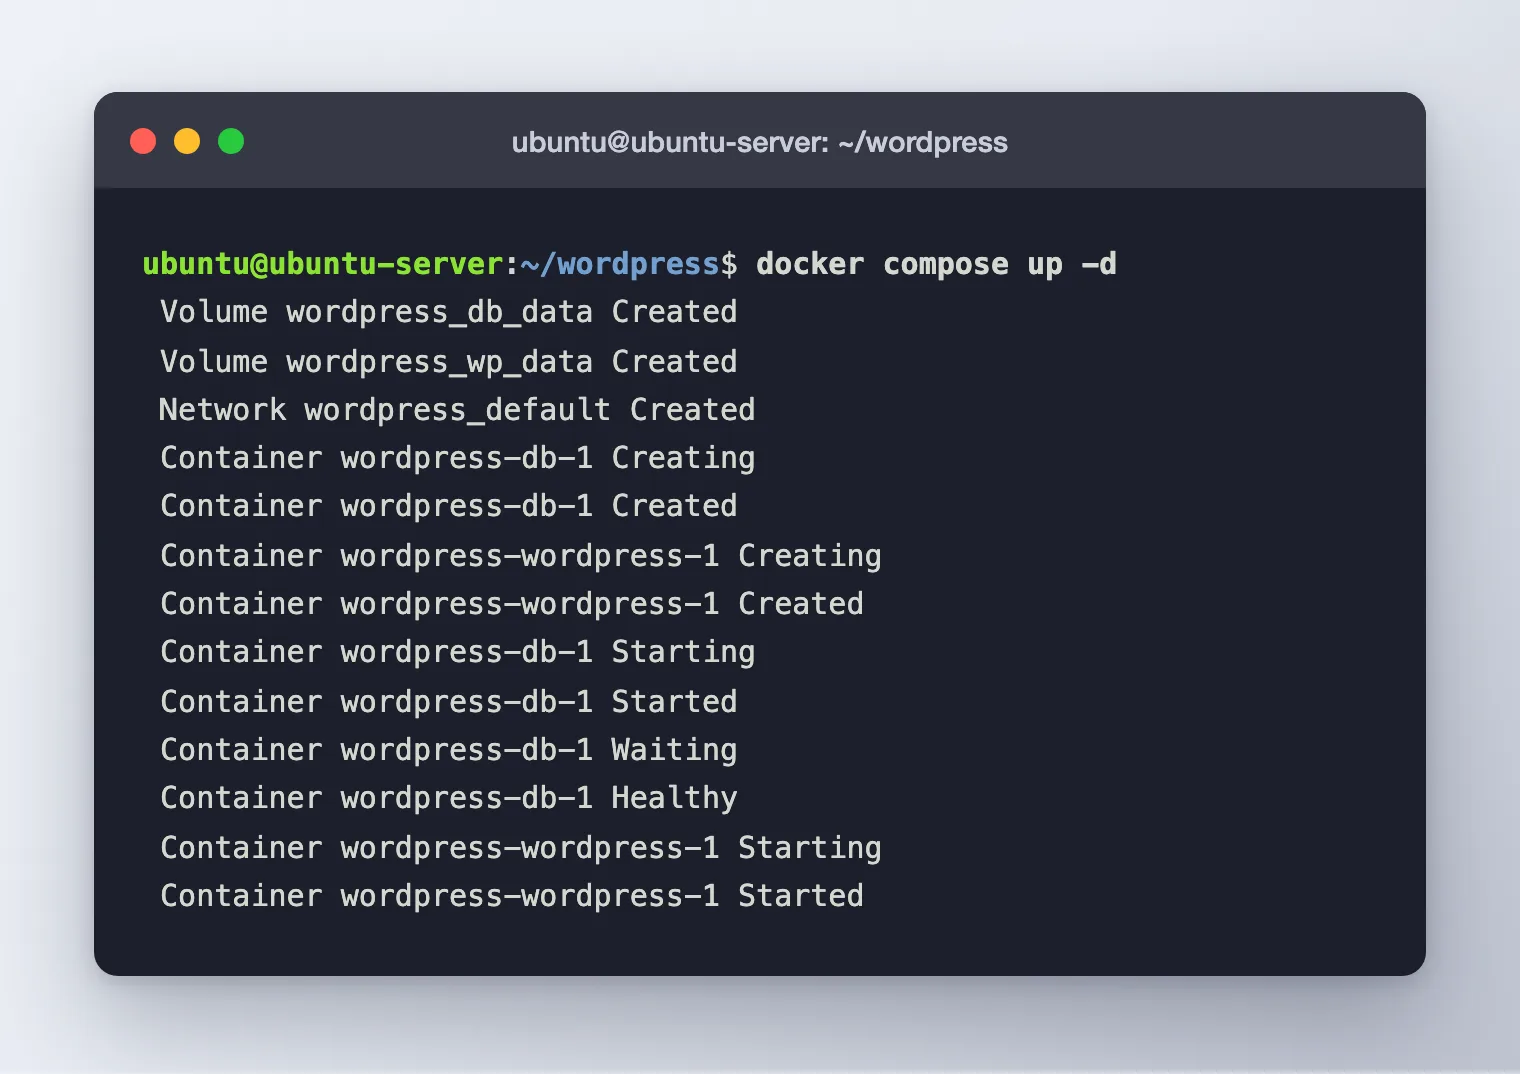
Read the last few lines from the bottom up and you can see the depends_on rule doing its job:
Container wordpress-db-1 Started— the database container is running.Container wordpress-db-1 Waiting— Compose now waits.Container wordpress-db-1 Healthy— the healthcheck passed.Container wordpress-wordpress-1 Started— only now does WordPress start.
That ordering is exactly what you want.
Step 5: Check That Both Containers Are Running
docker compose ps
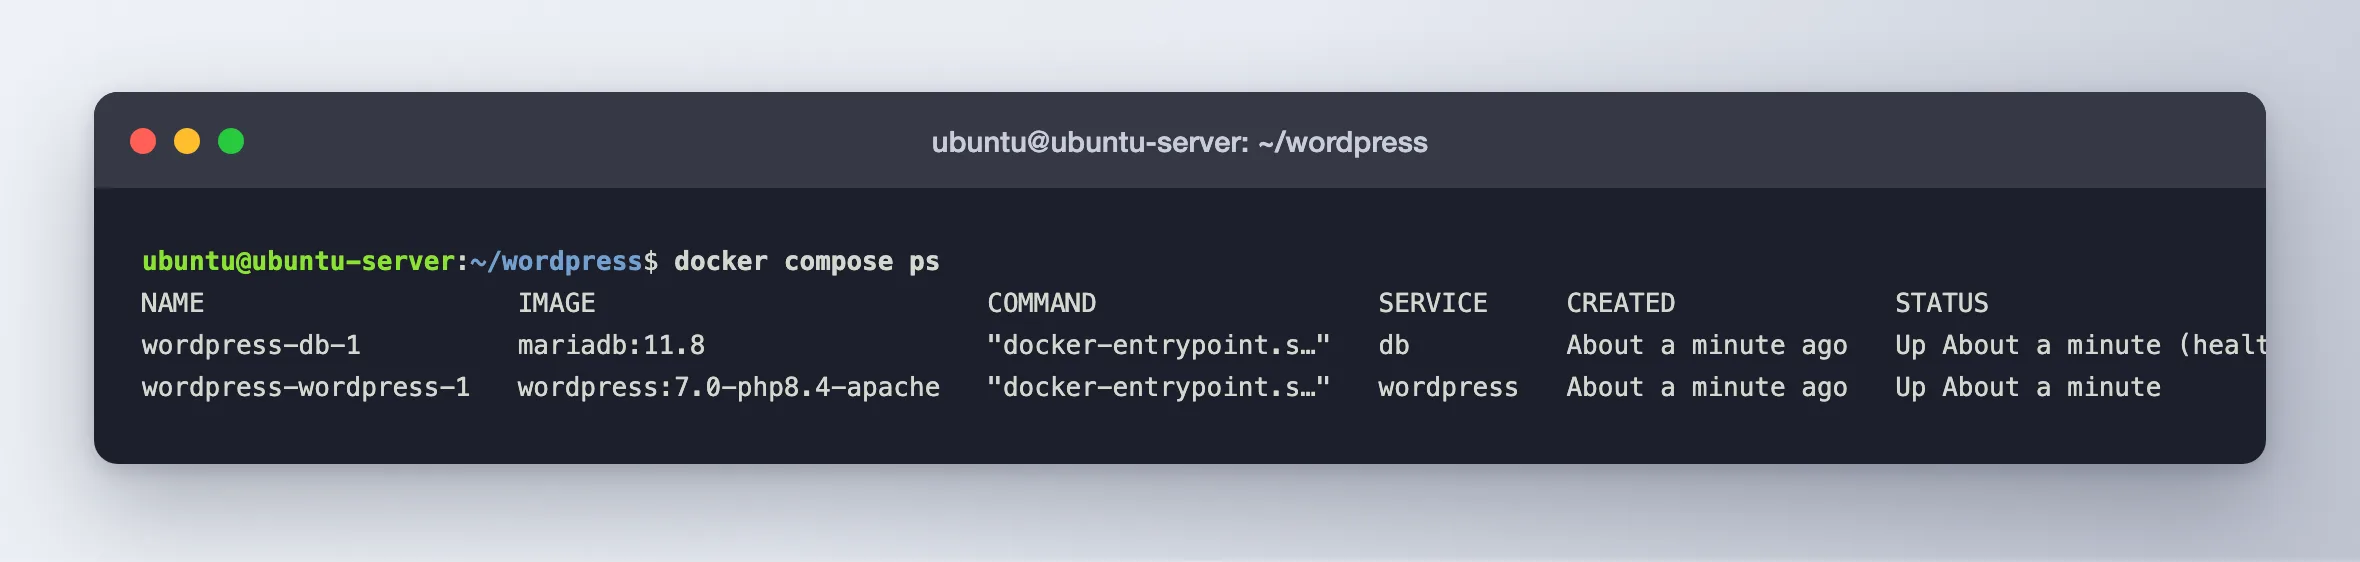
Two things to look for:
- The
dbrow saysUp ... (healthy). The word healthy means the healthcheck is passing. - The
wordpressrow shows0.0.0.0:8080->80/tcp, confirming port 8080 is open on the server.
Note that the db row's PORTS column shows only 3306/tcp with no 0.0.0.0 in front. Your database is reachable only by the WordPress container, never from the internet. That is a meaningful security win you got for free.
You can also confirm the web server is answering:
curl -sI http://localhost:8080
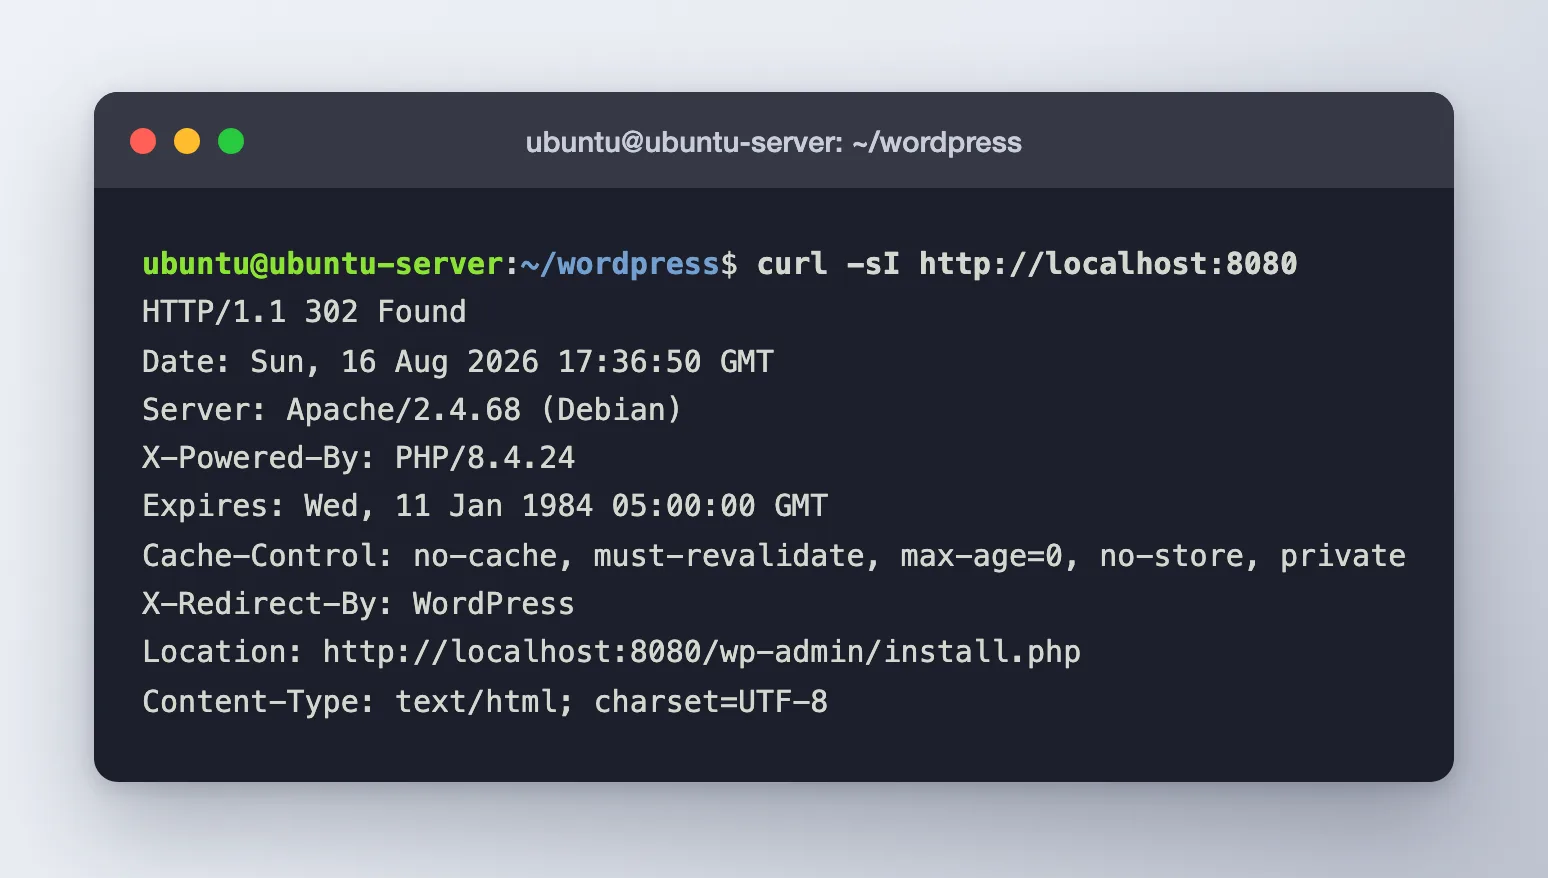
curl fetches a web page from the command line; -s keeps it quiet and -I asks for just the headers. The reply is HTTP/1.1 302 Found with Location: .../wp-admin/install.php — WordPress is up and redirecting you to its installer, exactly as it should on a brand-new site.
Step 6: Finish the Installer in Your Browser
Now leave the terminal. On any computer on the same network, open a browser and go to:
http://YOUR_SERVER_IP:8080
Replace YOUR_SERVER_IP with your server's address. Not sure what it is? Run hostname -I on the server and use the first number it prints.
WordPress greets you with a language list.
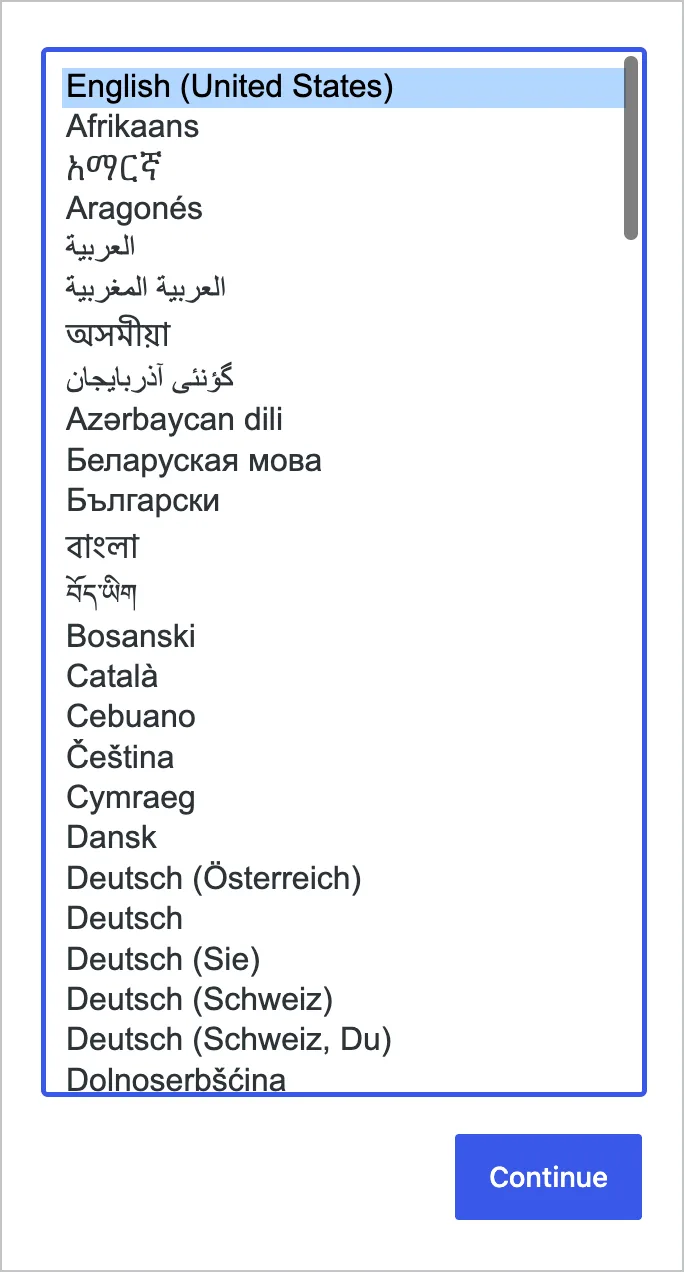
Pick your language and click Continue. Next comes the only form you need to fill in.
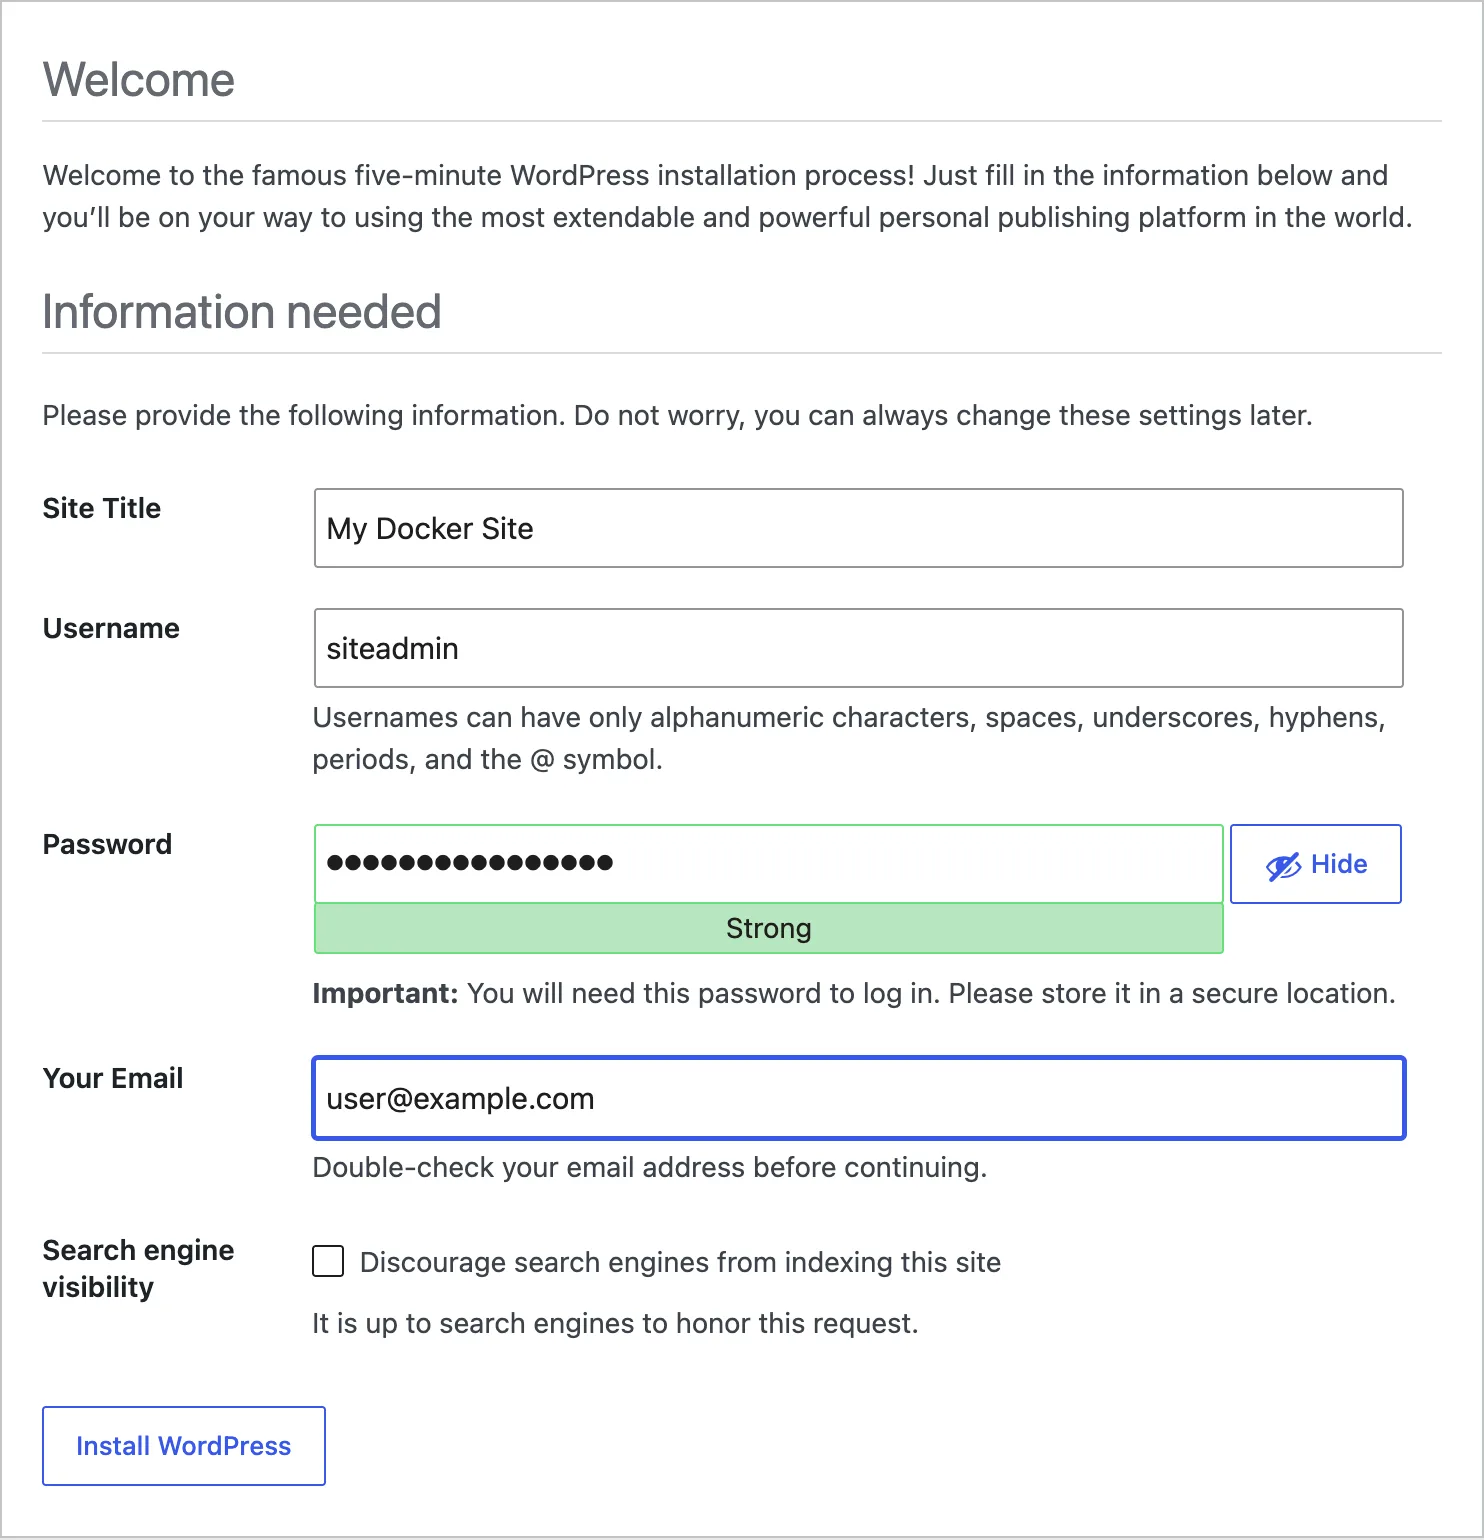
Fill it in carefully:
- Site Title — your website's name. You can change it later.
- Username — the name you will log in with. Avoid
admin; it is the first thing automated attacks try. - Password — WordPress suggests a strong one. Use it, and save it in your password manager now, because this screen is the only time it is shown.
- Your Email — used for password resets and admin notices. Use a real address you can access.
- Search engine visibility — tick this while you are still building, so Google does not index an unfinished site. Remember to untick it when you launch.
Notice that the installer never asks for database details. That is because we passed them in through compose.yaml — WordPress already knows how to reach MariaDB.
Click Install WordPress.
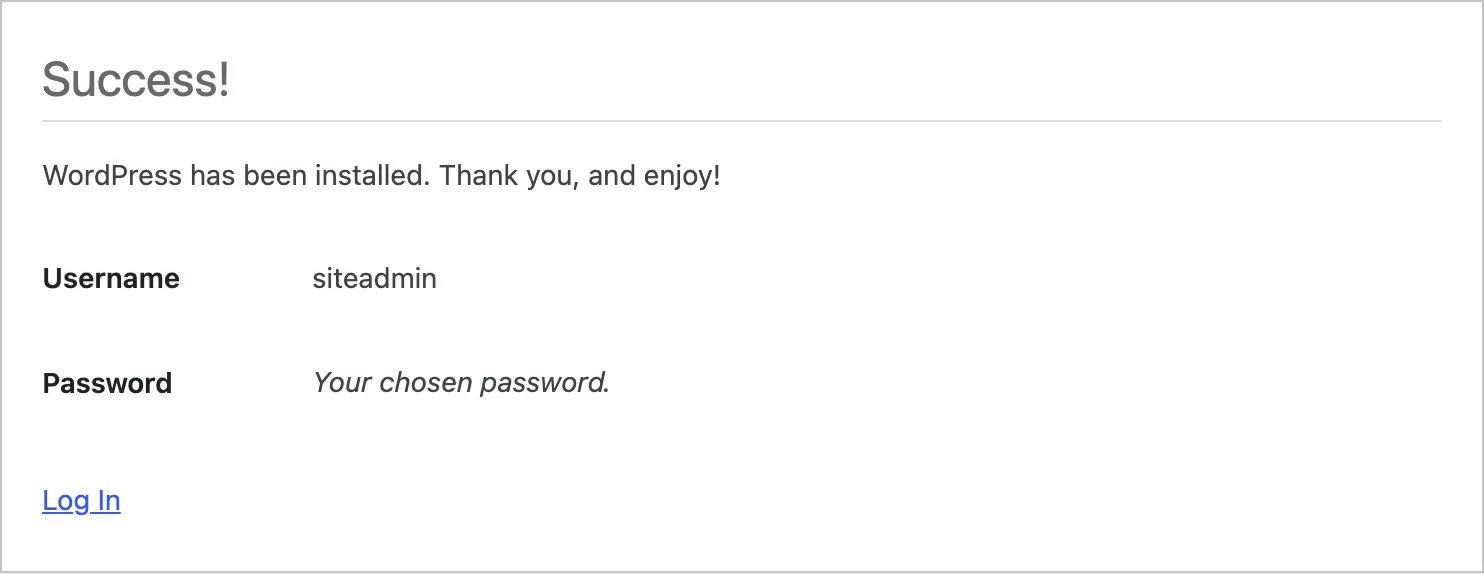
That is the install done — genuinely under a minute.
Step 7: Log In to Your Dashboard
Click Log In (or go to http://YOUR_SERVER_IP:8080/wp-admin) and enter the username and password you just chose.
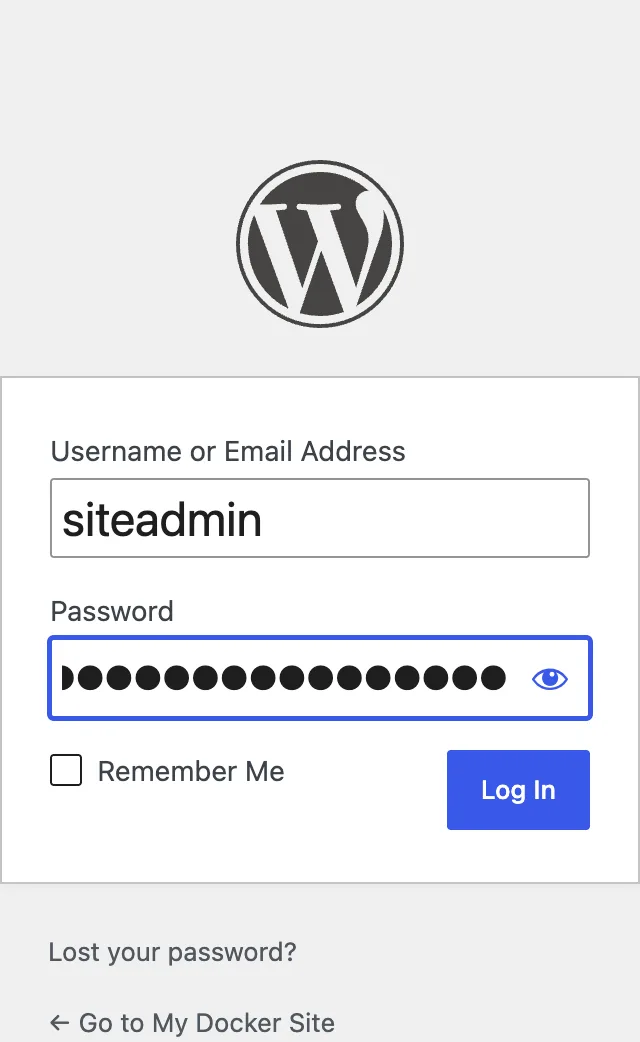
And you are in.
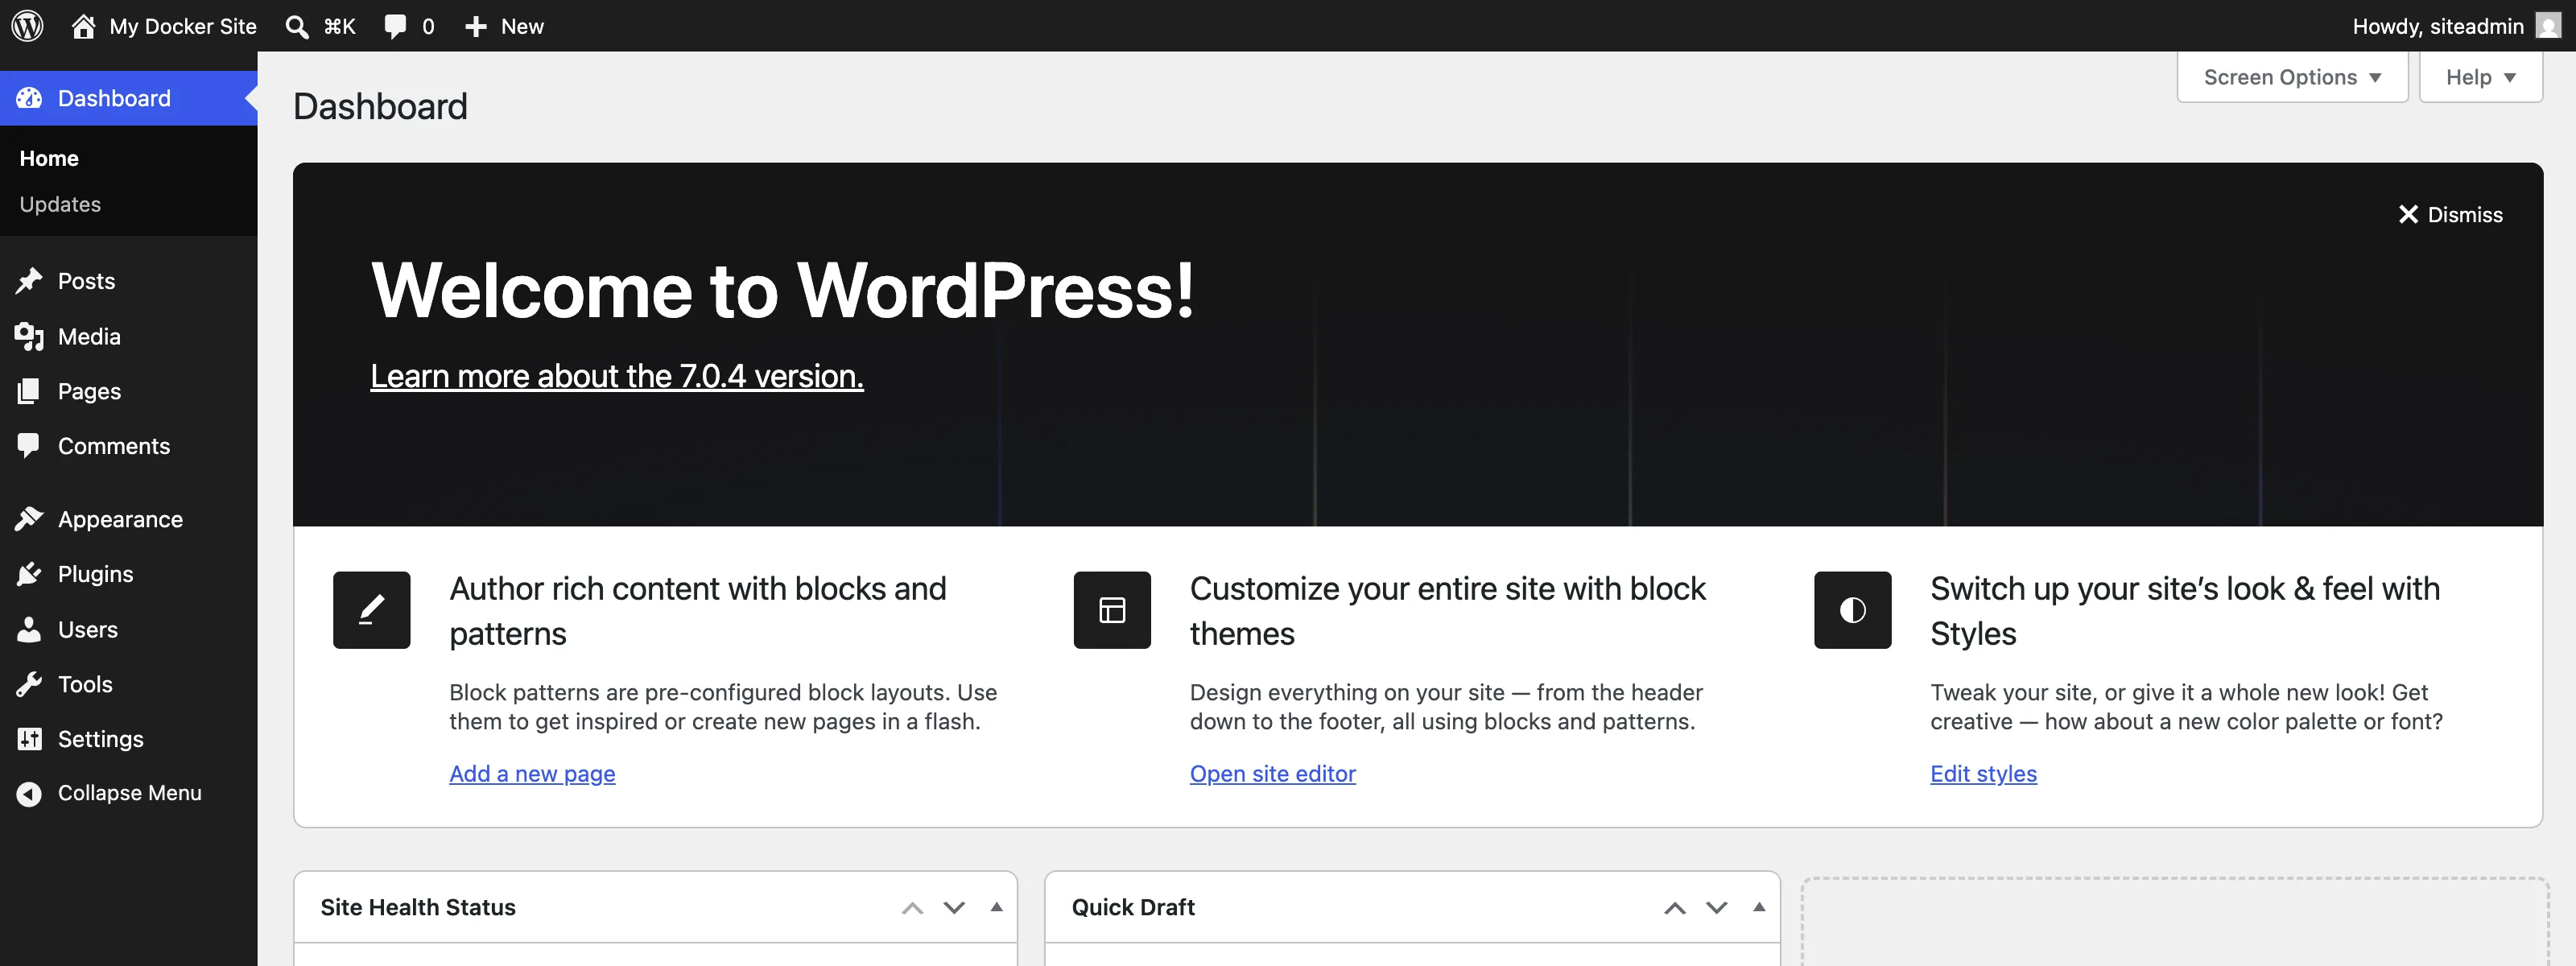
This is the WordPress dashboard — where you write posts, add pages, install themes and manage plugins. It is identical to the dashboard on any paid WordPress host, because it is the same WordPress. You are simply the one running it.
Step 8: Visit Your Live Site
Click your site's name in the top-left corner to see what visitors see.
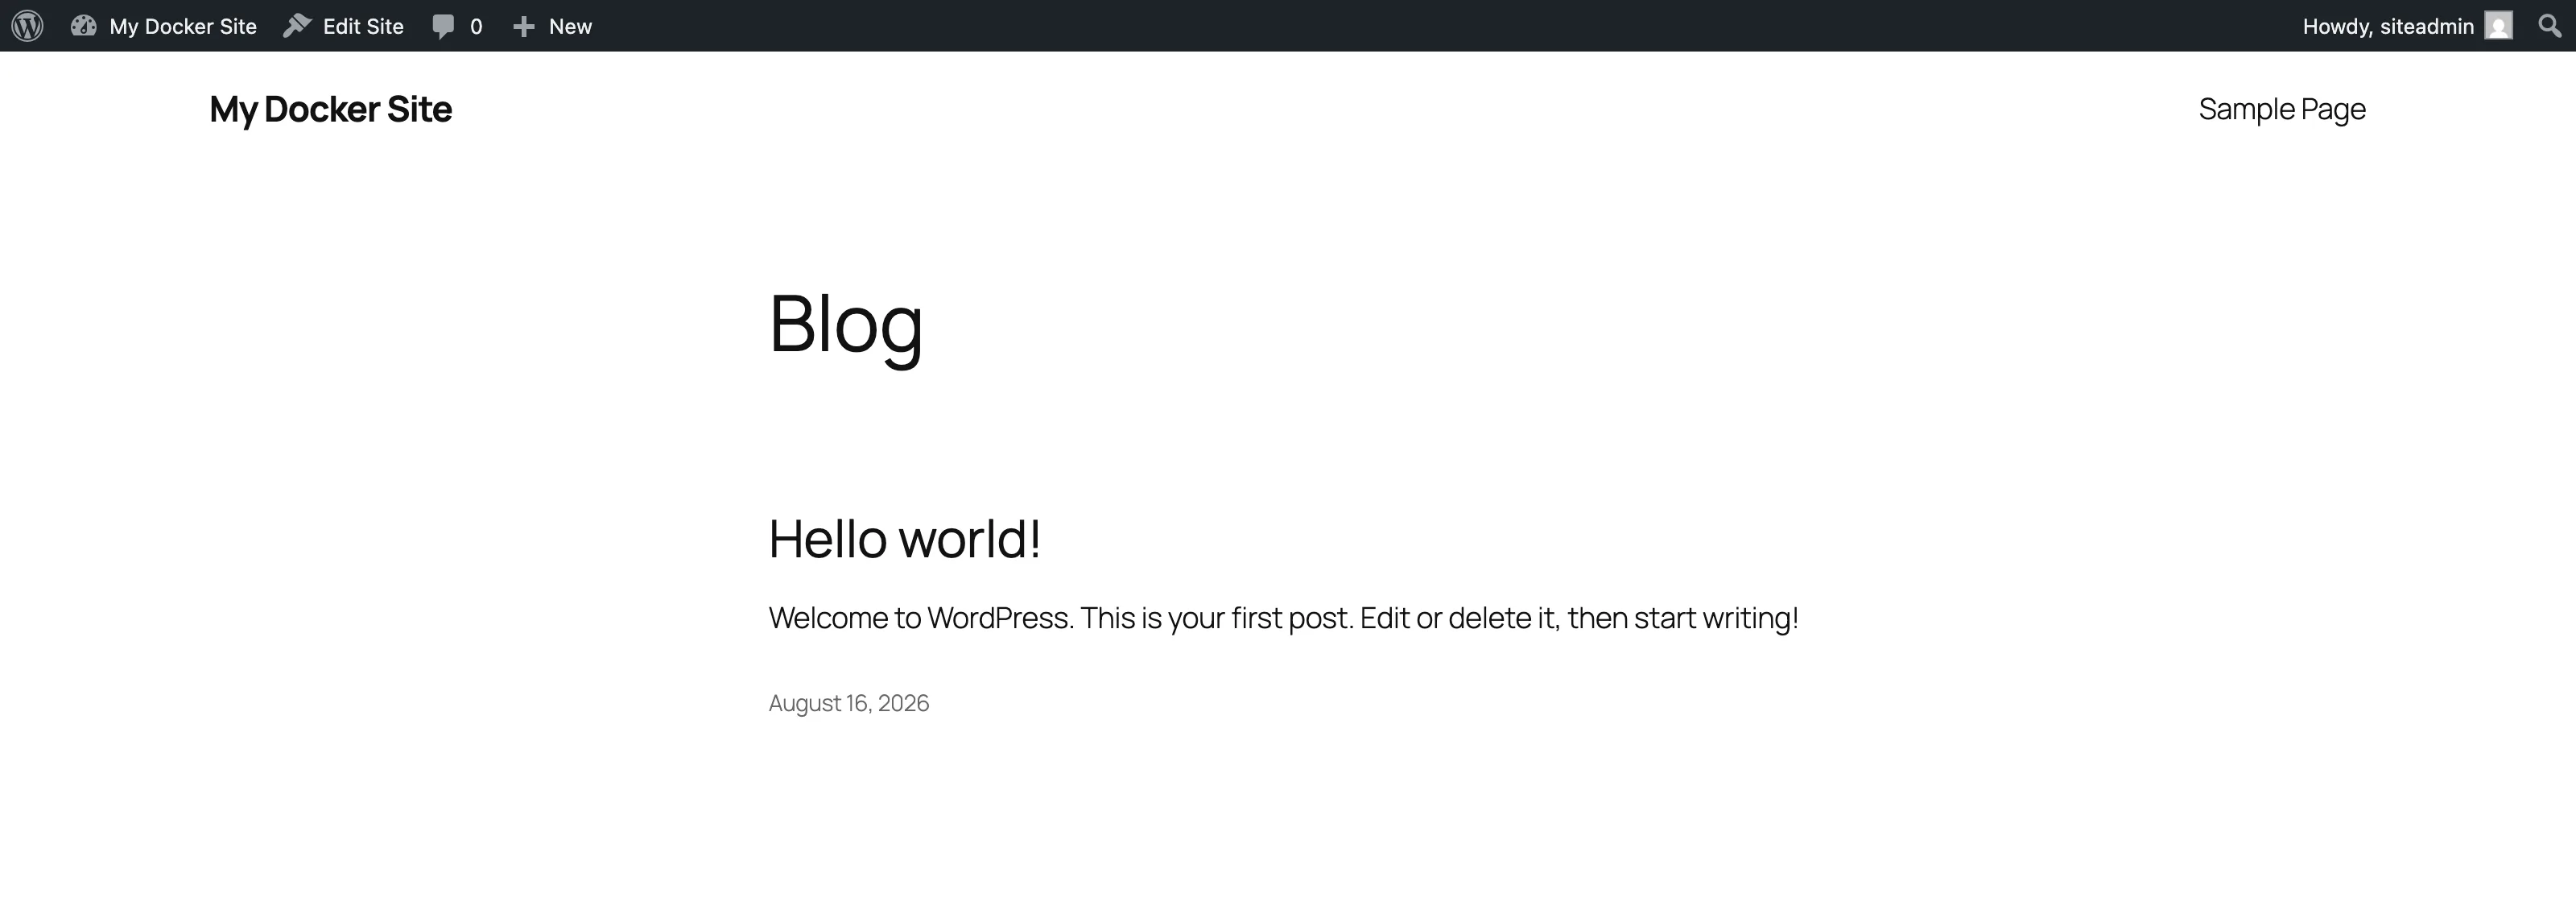
There it is — a real WordPress site, running on your own server, in two containers, from one configuration file.
Everyday Commands You Will Actually Use
Run all of these from inside ~/wordpress:
# See what is running
docker compose ps

# Watch the logs live (press Ctrl+C to stop watching)
docker compose logs -f

# Logs for just one service
docker compose logs -f wordpress

# Stop the site (your data is kept)
docker compose stop

# Start it again
docker compose start

# Restart after changing compose.yaml
docker compose up -d
docker compose stop is the one to remember. It shuts the site down without deleting anything — useful when you want the server quiet for a while.
How to Update WordPress and MariaDB
WordPress can update itself from the dashboard, and for plugins and themes that is fine. But core updates made inside the container are the wrong approach here — rebuild the container later and your update disappears, because the version comes from the image.
The correct way is to change the version in compose.yaml and pull a new image:
# 1. Edit compose.yaml and change, for example,
#    wordpress:7.0-php8.4-apache  ->  wordpress:7.1-php8.4-apache

# 2. Download the new image and recreate the container
docker compose pull
docker compose up -d
Your wp_data and db_data volumes are untouched, so every post, page, image and setting survives. Only the software is swapped underneath.
Always take a backup before a version change, especially for the database. We cover backup and restore properly in Part 2. Until then, treat this site as one you could afford to lose.
How to Remove Everything Cleanly
This is the promise Docker makes, so here is exactly how to collect on it.
To remove the containers but keep all your content:
docker compose down
To remove the containers and permanently delete your website and database:
docker compose down -v
The -v flag deletes the named volumes. After that, optionally remove the downloaded images and the folder itself:
docker rmi wordpress:7.0-php8.4-apache mariadb:11.8
cd ~ && rm -rf ~/wordpress
Your Ubuntu server is now exactly as it was before you started. No leftover Apache config, no PHP modules, no MySQL data directory, no system users. That is the whole reason we did it this way.
docker compose down -v permanently deletes your database and all uploaded files. There is no undo and no recycle bin. Run it only when you genuinely want the site gone, and take a backup first if there is any doubt.
Common Mistakes
| Mistake | What you'll see | Fix |
|---|---|---|
Running commands outside ~/wordpress | no configuration file provided: not found | cd ~/wordpress first — Compose reads compose.yaml from the current folder |
Using mariadb:latest instead of a version | Site breaks unexpectedly months later | Pin the version, as shown above |
Leaving out the depends_on healthcheck | Error establishing a database connection on first load | Add the depends_on block; it makes WordPress wait for the database |
Putting passwords directly in compose.yaml | Secrets leak the moment you share or commit the file | Keep them in .env and reference them with ${...} |
| Updating WordPress core from the dashboard | The update vanishes after a rebuild | Change the image version in compose.yaml instead |
Typing docker-compose with a hyphen | command not found | Modern Docker uses docker compose with a space |
Troubleshooting
| Problem | Cause | Fix |
|---|---|---|
| Error establishing a database connection | The database was not ready, or the password changed after first run | docker compose logs db to check. If you edited passwords after the first start, the old ones are already baked into the volume — docker compose down -v and start fresh |
| Browser shows "connection refused" | Wrong IP, or the container is not running | Run hostname -I for the correct address and docker compose ps to confirm it is up |
port is already allocated | Something else on the server uses port 8080 | Change "8080:80" to "8081:80" in compose.yaml, then docker compose up -d |
permission denied while trying to connect to the Docker daemon | Your user is not in the docker group | sudo usermod -aG docker $USER, then log out and back in |
| Site loads but has no styling | WordPress recorded the wrong address | This is normal before Part 2 sets a proper domain — visit the site by the exact address you installed it with |
docker compose ps shows db as unhealthy | The database is still starting, or is out of disk | Wait 30 seconds; if it persists, run docker compose logs db and check free space with df -h |
Frequently Asked Questions
Is running WordPress in Docker slower than installing it normally?
No, in any way you would notice. Containers share the server's own kernel rather than emulating hardware, so the overhead is roughly one to two milliseconds per request. What actually determines your site's speed is your theme, your plugins, and caching — which is why Part 2 adds Redis.
Where is my website actually stored?
In two Docker volumes named wordpress_wp_data and wordpress_db_data. On the server they physically live under /var/lib/docker/volumes/. You do not need to go in there — always work through Docker commands — but they are ordinary files on your disk, and they are what you back up.
Can I run more than one WordPress site on the same server?
Yes, and this is where Docker really pays off. Copy the folder to something like ~/site2, change the name: at the top and the port from 8080 to 8081, and start it. The two sites share nothing and can even run different PHP versions.
Why MariaDB instead of MySQL?
MariaDB was created by the original developers of MySQL and works as a drop-in replacement. It is fully open source, tends to be a little lighter, and is what most WordPress hosts run. If you prefer MySQL, swap mariadb:11.8 for mysql:8.4 and change the MARIADB_ variables to MYSQL_.
Do I still need to install PHP or Apache on my server?
No. Both are already inside the wordpress image. That is the entire point — your server stays clean and only runs Docker.
Is my database exposed to the internet?
No. The db service has no ports: entry, so it is reachable only by other containers on the project's private network. Only port 8080 is open, and Part 2 closes even that.
What happens to my site if the server reboots?
It comes back automatically. That is what restart: unless-stopped does — Docker starts your containers again when the machine boots.
Can I edit theme files directly?
You can, with docker compose exec wordpress bash to get a shell inside the container. But changes to WordPress core are lost on rebuild. Anything you want to keep belongs in wp-content, which lives in the wp_data volume and does persist.
What's Next
You have a working WordPress site, but it is only reachable on your local network, at an IP address with a port number, over plain HTTP. That is fine for building — not for launching.
In Part 2 we give it a real address and make it safe to share: a custom domain name, free automatic HTTPS so browsers show a padlock, a Redis cache to make pages load faster, and a proper backup and restore routine — plus the full cleanup checklist. It is done with a Cloudflare Tunnel, so you never open a port or touch your router, and it works even on a home connection where port forwarding is impossible.
Next: Part 2: Custom Domain, Free HTTPS, Redis Cache and Backups →
Additional Resources
- WordPress official Docker image documentation
- MariaDB official Docker image documentation
- Docker Compose file reference
- Docker volumes explained
- How to install Docker on Ubuntu Server
- WordPress.org support documentation
Video Tutorial
Coming soon!
