How to Update a SharePoint List Item in Power Automate

SharePoint's Update item changes an item in a list. It needs the site, the list and the item's ID, and a value for every required column, even the ones you aren't changing. The columns you are changing go under Advanced parameters.
Microsoft's SharePoint connector reference describes it as: Updates an item in a SharePoint list. The required columns come from a Microsoft migration article: When you use the "Update item" action, you always need to specify a value for all the mandatory fields (From SharePoint workflows to Power Automate).
The example is the approval flow of the Overtime Timesheet app. After the approver answers, Record the decision saves the decision, the comment, who decided and when, and the hours the flow worked out.
Prerequisites
- The item's ID, and its current values for the required columns. Here, from Get the entry now, a Get item after the approval (How to Get a SharePoint List Item by ID in Power Automate).
Step 1: Add Update Item
Add an action, search for Update item, and choose the SharePoint one. I named it Record the decision. Set Site Address and List Name to the same environment variables as the other SharePoint actions (How to Use Environment Variables in a Power Automate Flow), and Id to the item's ID.
Step 2: Fill Every Required Column
The action lists the list's required columns, each marked with an asterisk. Fill each one with the item's current value, from Get the entry now, so the update doesn't change them by accident:
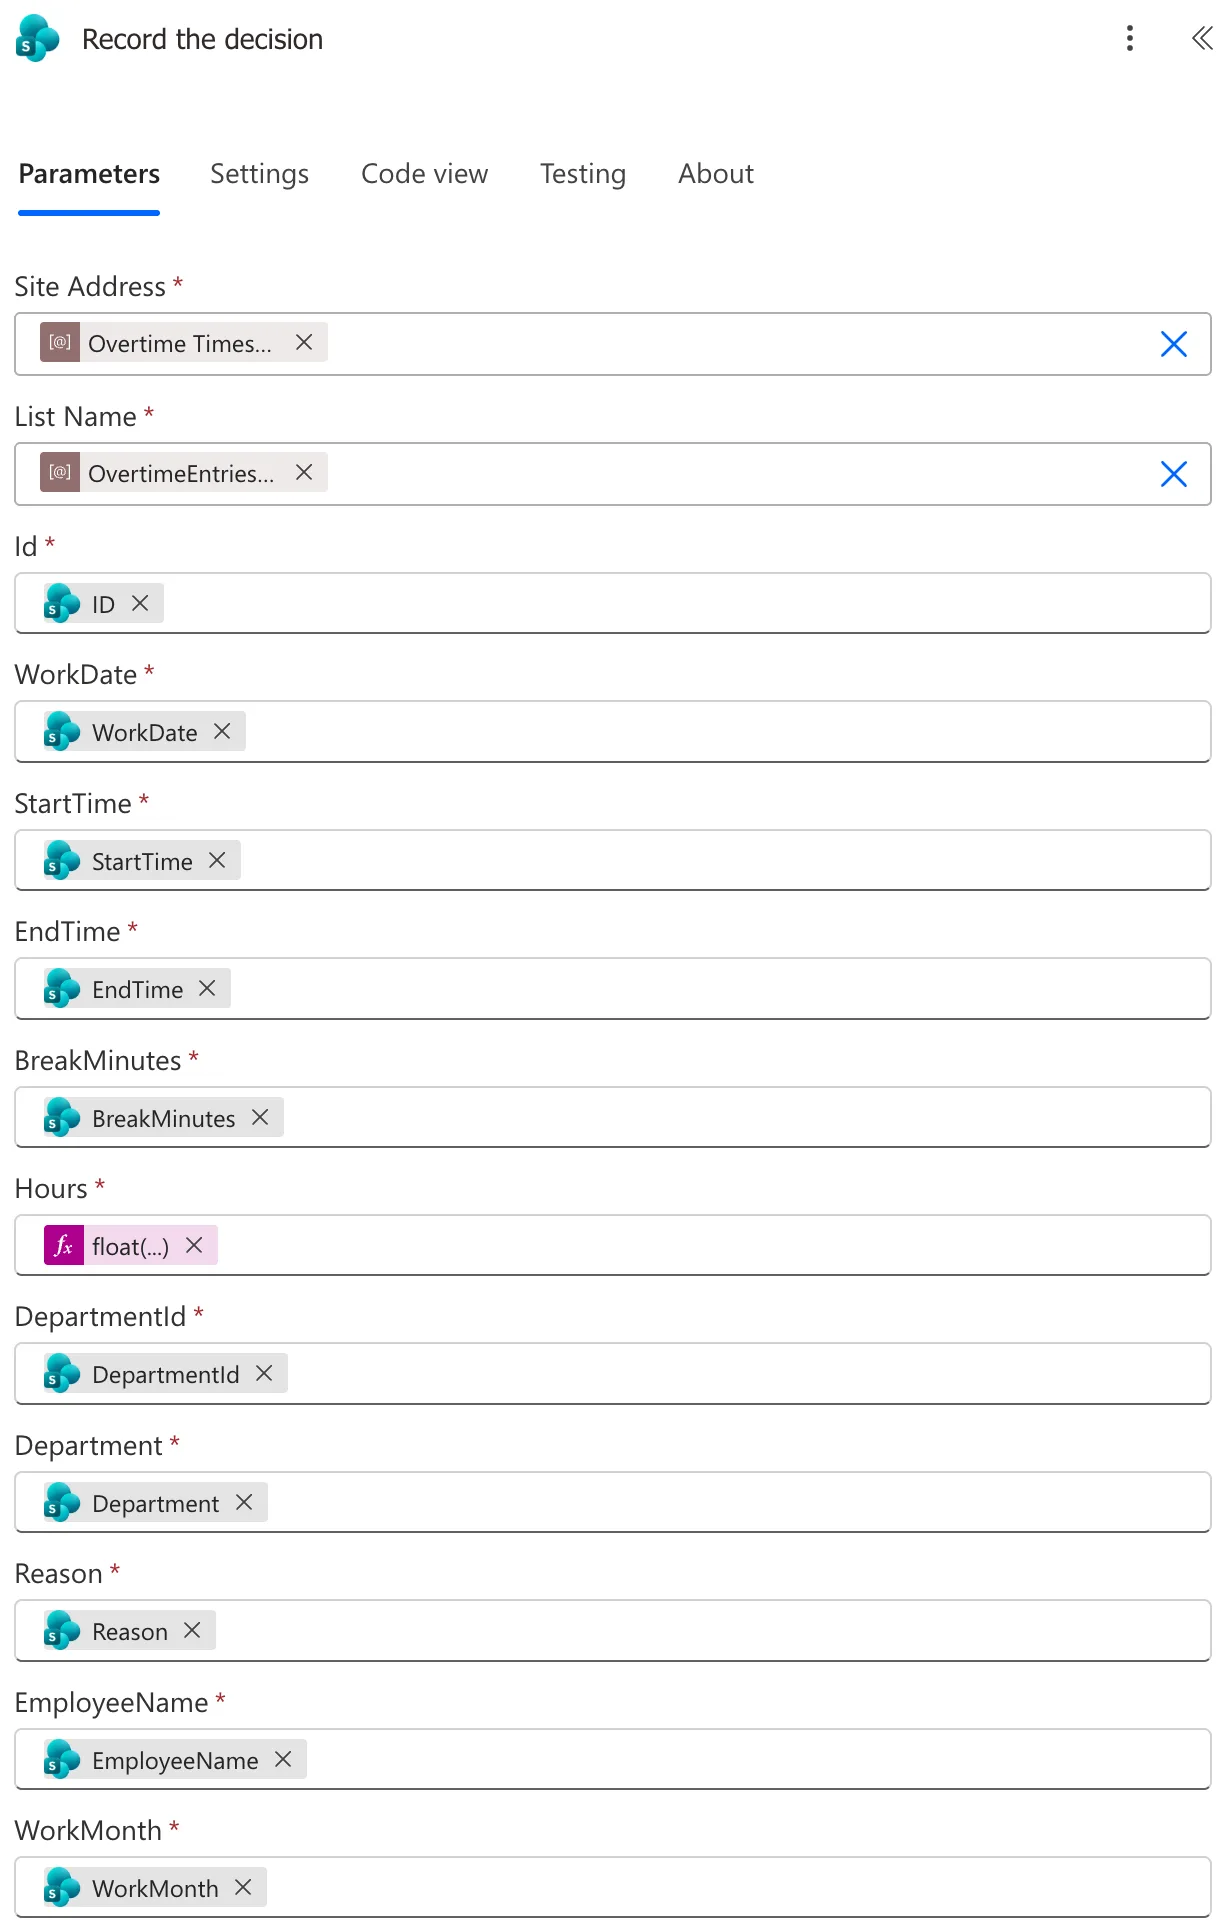
One required column gets a new value: Hours, the number the flow worked out from the shift's times (How to Work Out the Hours Between Two Times in Power Automate). It was formatted as text, so float() turns it back into a number:
float(outputs('Hours_worked_out'))
Step 3: Set the Columns You're Changing
Under Advanced parameters, add the other columns to change. Here, the decision:
| Column | Value |
|---|---|
| Status Value | if(equals(outputs('Ask_for_approval')?['body/outcome'], 'Approve'), 'Approved', 'Rejected') |
| ApproverComment | first(outputs('Ask_for_approval')?['body/responses'])?['comments'] |
| DecisionBy | first(outputs('Ask_for_approval')?['body/responses'])?['responder']?['displayName'] |
| DecisionOn | The approval's Completion date |
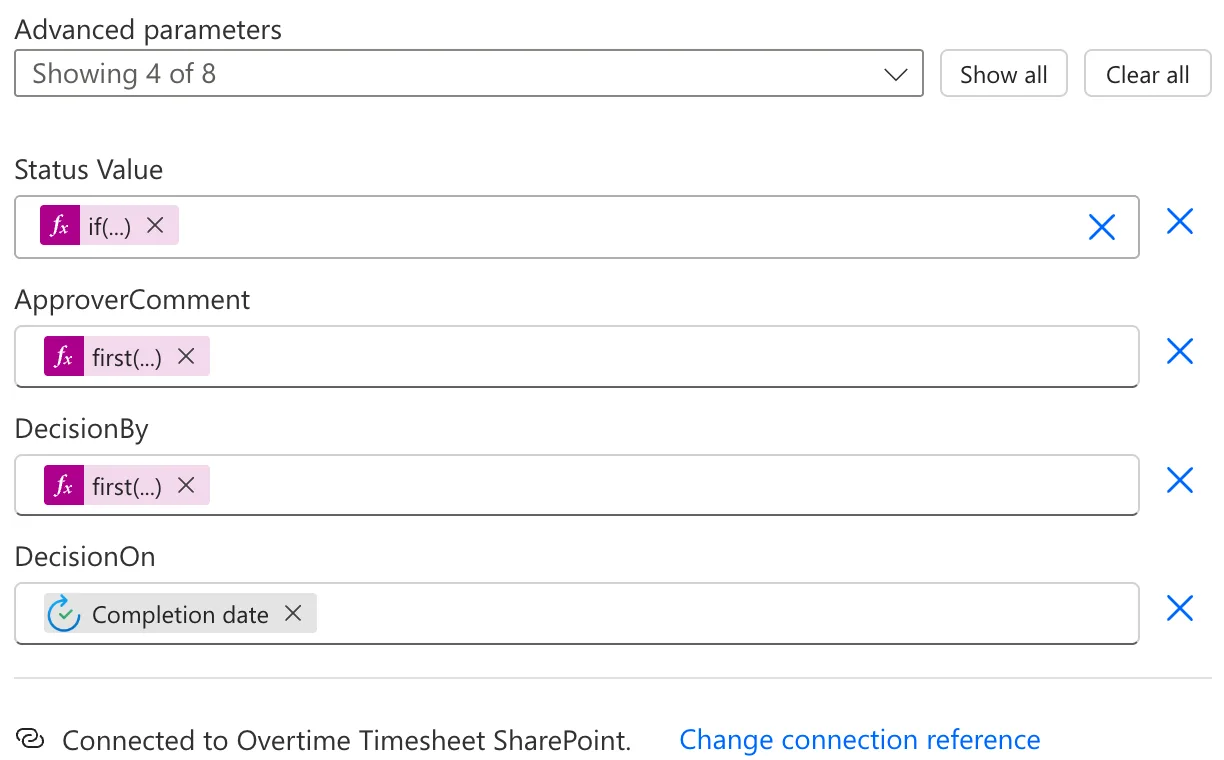
- Status Value sets a Choice column by its text; the
if()turns the approval's outcome into the column's choice (How to Use the if() Function in Power Automate). - The comment and the approver's name come from the first response (How to Get the First Item of an Array in Power Automate).
The Result
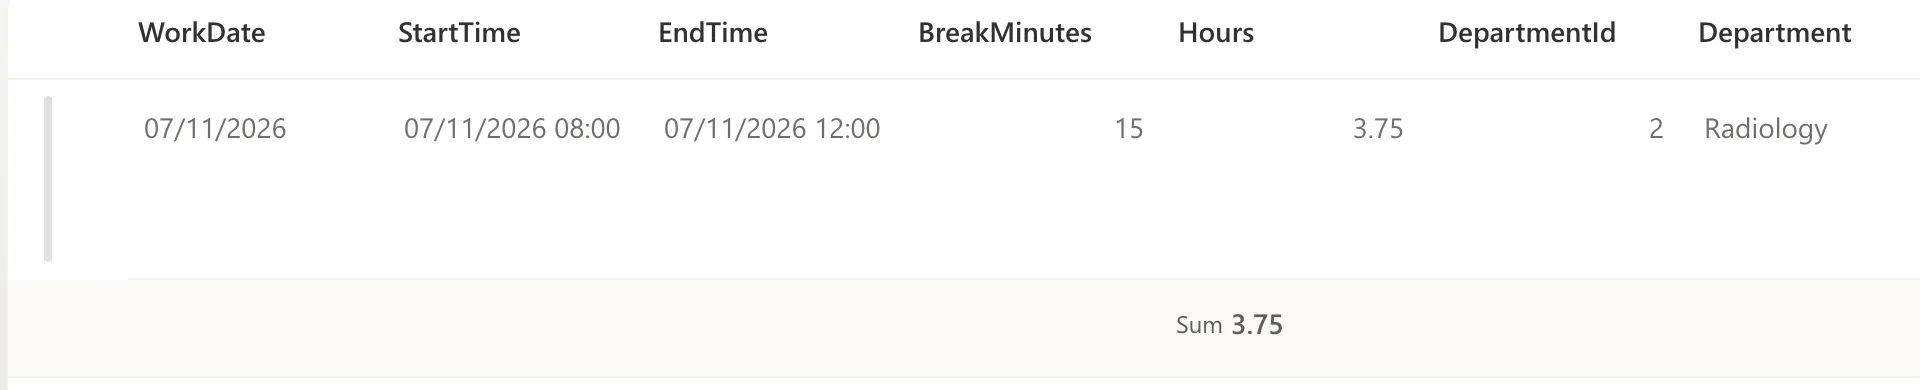
A rejection. Maya Patel had changed Hours to 4.00 for a shift from 08:00 to 12:00 with a 15-minute break. Daniel Brooks rejected it, and the update saved 3.75, the flow's number, with the decision:

An approval, after she resubmitted it:

On a List with Content Approval
The list has content approval on (How to Turn On Content Approval for a SharePoint List), and an update is an edit like any other: the action's outputs showed the item's approval status as Pending after it. The flow sets the approval status in the next action, with the update's new ETag, @odata.etag in its outputs (How to Approve or Reject a SharePoint Item in Power Automate).
The update also starts the flow's trigger again, as a change to the item. The flow's trigger condition only lets entries whose Status is Pending through, and the update sets it to Approved or Rejected, so it never started a run (How to Add a Trigger Condition in Power Automate).
Common Mistakes
| Mistake | What happens | Do this instead |
|---|---|---|
| Leaving a required column empty | The action marks it as required | Fill it with the item's current value |
| Filling required columns from the trigger after a long wait | Changes made during the wait are overwritten | Read the item again just before updating |
| Text in a Number column | The column needs a number | float() the value |
| Updating the item that triggers the flow, with no trigger condition | The update starts the flow again | Add a trigger condition |
Troubleshooting
| Symptom | Likely cause | Fix |
|---|---|---|
| Asterisked fields on the action | Required columns of the list | Give each one a value |
| The Choice column didn't change | The text doesn't match a choice | Use the choice's exact text |
| The item's approval status is Pending after the update | Content approval treats it as an edit | Set the approval status next |
FAQ
Can I update only the columns I'm changing?
Not with this action: the required columns need values too. Fill them with the item's current values.
Where does Completion date come from?
It's an output of Start and wait for an approval: when the request was answered.
Conclusion
Update item needs the site, list and ID, a value for every required column, and the columns you change under Advanced parameters. Fill the required ones with the item's current values, and on a list with content approval, set the approval status after the update.
Additional Resources
- SharePoint connector: Update item: the action.
- From SharePoint workflows to Power Automate: required fields in Update item.
