How to Store App Settings in a SharePoint List for Power Apps

Some values an app needs are different for every organization that installs it, such as the IDs of its security groups. Typed into formulas, they would have to be changed inside the app each time. A small SharePoint list of settings keeps them outside the app, where a site owner can change them and the app looks them up by name.
The example is the Overtime Timesheet app, which needs the Object IDs of two Microsoft Entra groups, Overtime Payroll and Overtime Admins, to tell payroll staff and admins apart. This guide creates the list on the app's SharePoint site, stores both IDs and reads them in the app.
Why a List and Not an Environment Variable
Environment variables are Microsoft's answer for values that change between environments: its environment variables FAQ recommends them for key-value pairs whose value is likely to differ in other environments. A canvas app, though, has two documented ways to use them:
- As a data source's site or list. Standard, and the app already uses these for its lists.
- By reading them from Dataverse with the Dataverse connector. The same FAQ, under Are premium licenses required?, names this as the one case that needs a premium connector.
A text variable holding a group ID would need the second way, and this app runs on standard licenses. So the values go in a list, and one data source environment variable points the app at that list. A list isn't part of the solution, so every organization fills in its own values after installing, and the list's permissions decide who can change them.
Prerequisites
- The app's SharePoint site, where you're a site owner: see How to Create a SharePoint Communication Site.
- The values to store. For group IDs: How to Find a Group's Object ID in Microsoft Entra.
Step 1: Create the List
Create a blank list named Settings, as in How to Create a List and Add Columns in SharePoint Online, but untick Show list in site navigation: the people who use the app never need to open it. Then select Create:
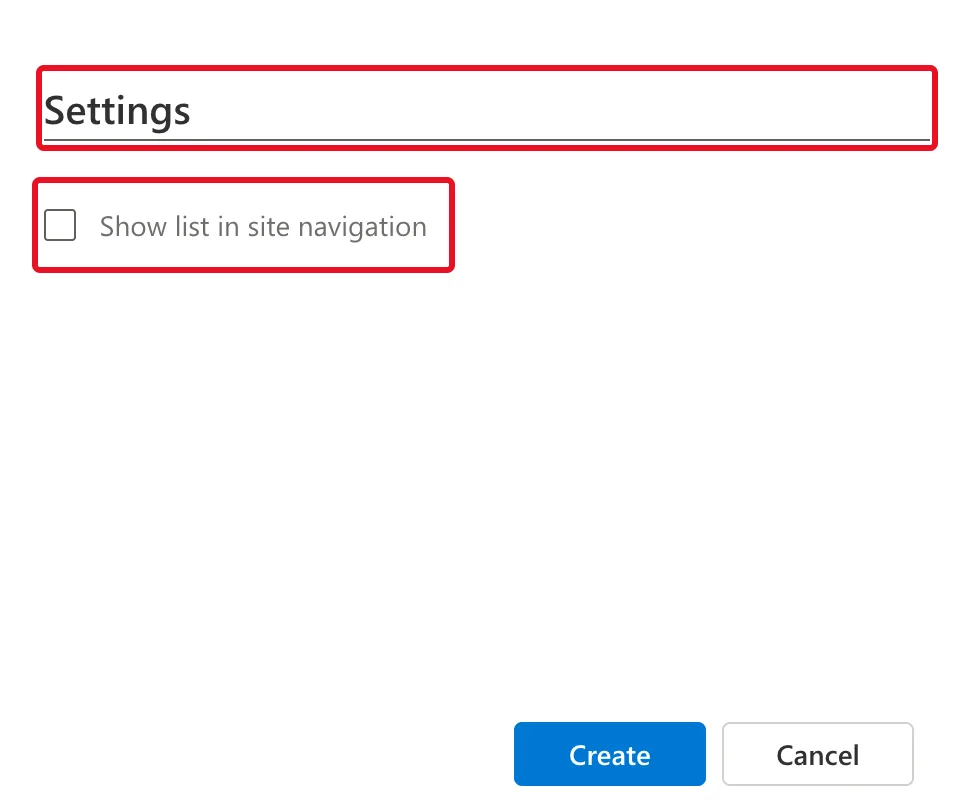
The list opens with one column, Title. Each item's Title will be a setting's name, such as PayrollGroupId.
Step 2: Add a Value Column
Select + Add column, keep Text selected and select Next. In Create a column:
- Name:
Value. - Description:
The setting's value, such as the Object ID of a Microsoft Entra group. - More options → Require that this column contains information: Yes.
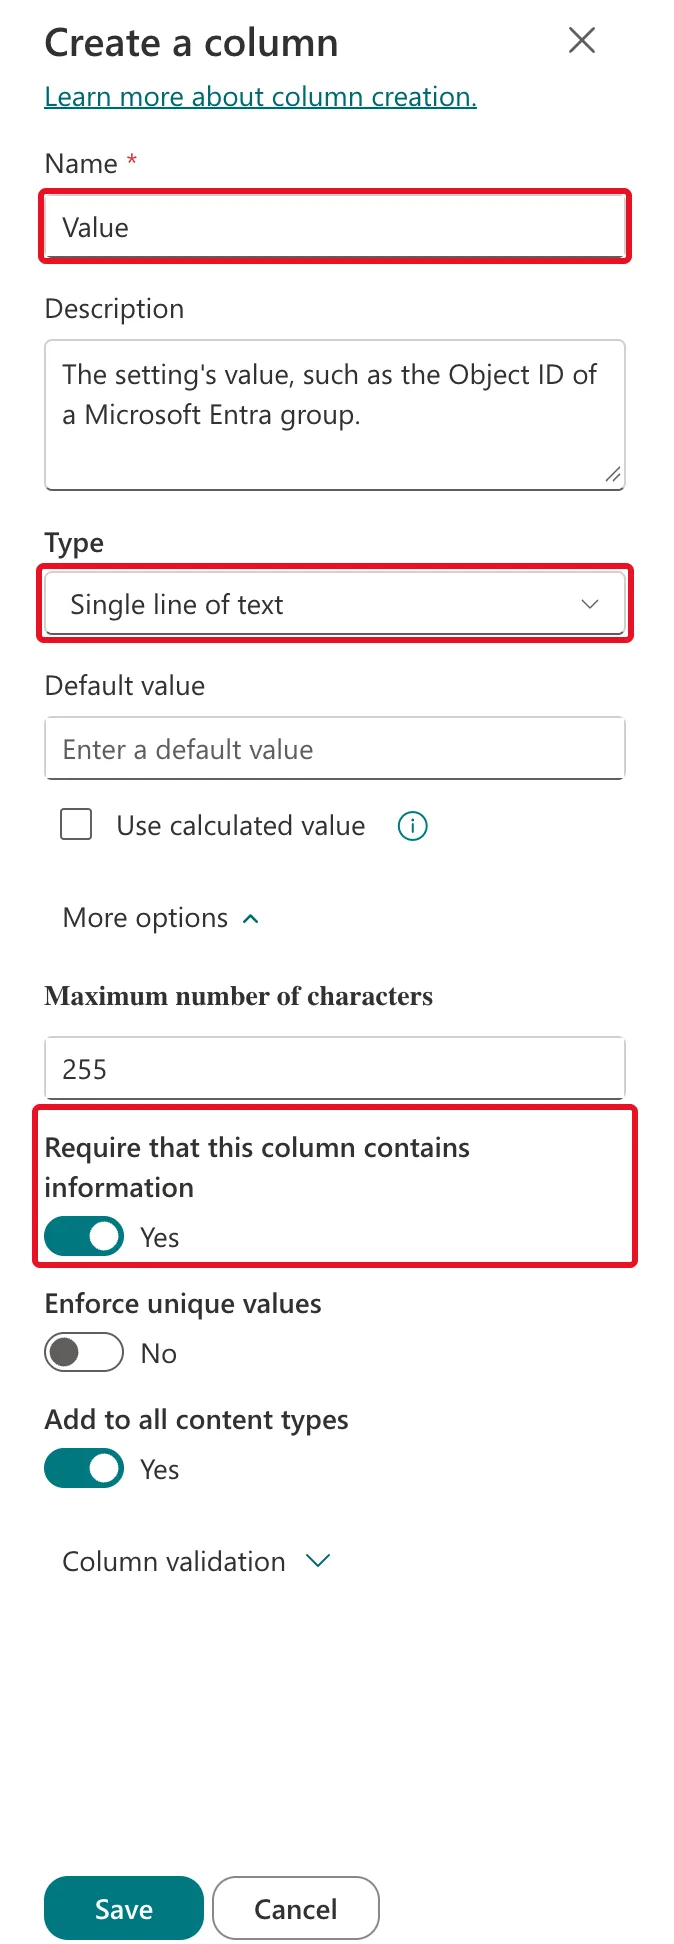
Select Save. A single line of text holds up to 255 characters, plenty for an Object ID's 36. How to Make a Column Required in a SharePoint List and How to Add a Description to a SharePoint List Column cover both settings.
Step 3: Make Title Required and Unique
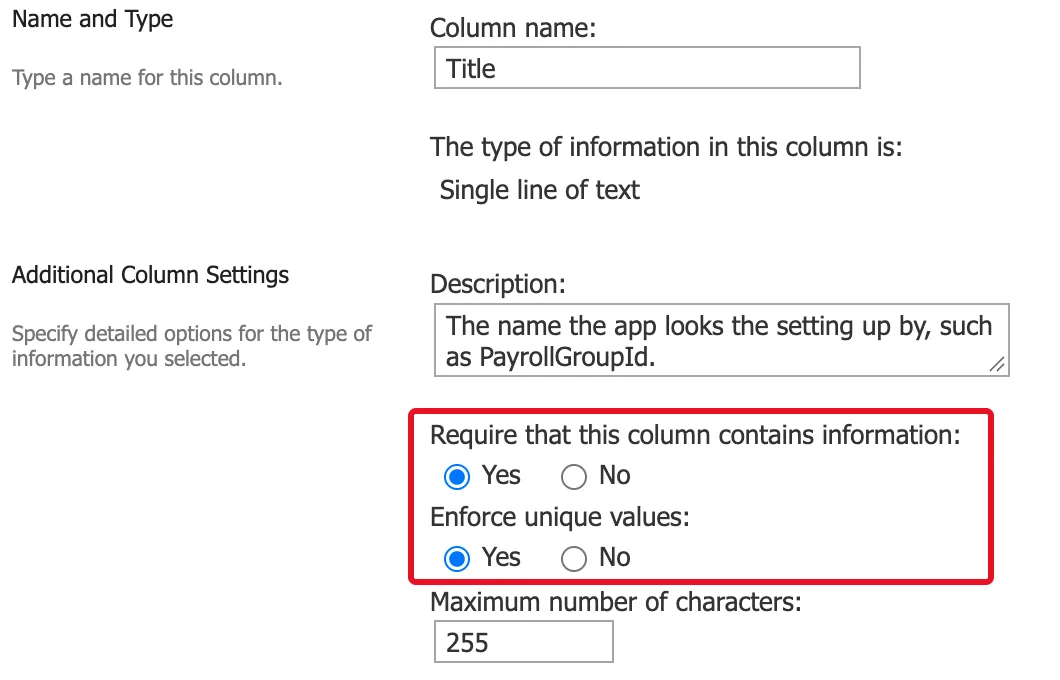
The app looks each setting up by its Title. A second item with the same name would be ignored, because LookUp returns the first match, so names must be unique. In the list, the Title column's menu offers only Rename, so this change goes through the classic settings page:
- Select Settings (the gear) → List settings.
- Under Columns, select Title.
- Add a description,
The name the app looks the setting up by, such as PayrollGroupId., and set both Require that this column contains information and Enforce unique values to Yes:
- Select OK at the bottom of the page. The browser asks:
This column must be indexed to enforce unique values. Do you want to index this column?
Select OK to index the column and save. How to Enforce Unique Values in a SharePoint List Column explains the index.
Step 4: Describe the List
On the same List settings page, select List name, description and navigation. Type a description that says what the list is for and who may change it:
Settings for the Overtime Timesheet app, such as the IDs of the payroll and admins groups. Only site owners can change them.
Select Save. Anyone who opens Site contents later sees why the list exists.
Step 5: Let Only Site Owners Change It
The list inherits the site's permissions, where the Members group can edit. Whoever can edit the settings decides which groups count as payroll and admins, so only owners should. From List settings → Permissions for this list:
- Select Stop Inheriting Permissions and confirm: How to Stop Inheriting Permissions on a SharePoint List.
- Tick the Members group and select Remove User Permissions: How to Remove a Group's Permissions from a SharePoint List.
What's left is the owners with Full Control and the visitors with Read:

Keep Read for everyone who uses the app. The app reads the list as the person using it, so without Read their app gets no settings. In the example, every member of staff gets Read through the site's Visitors group: How to Give a Group Read-Only Access to a SharePoint Site.
Step 6: Add the Settings
Back in the list, select + New. Type the setting's name in Title, PayrollGroupId, paste the Overtime Payroll group's Object ID into Value (masked here), and select Save:
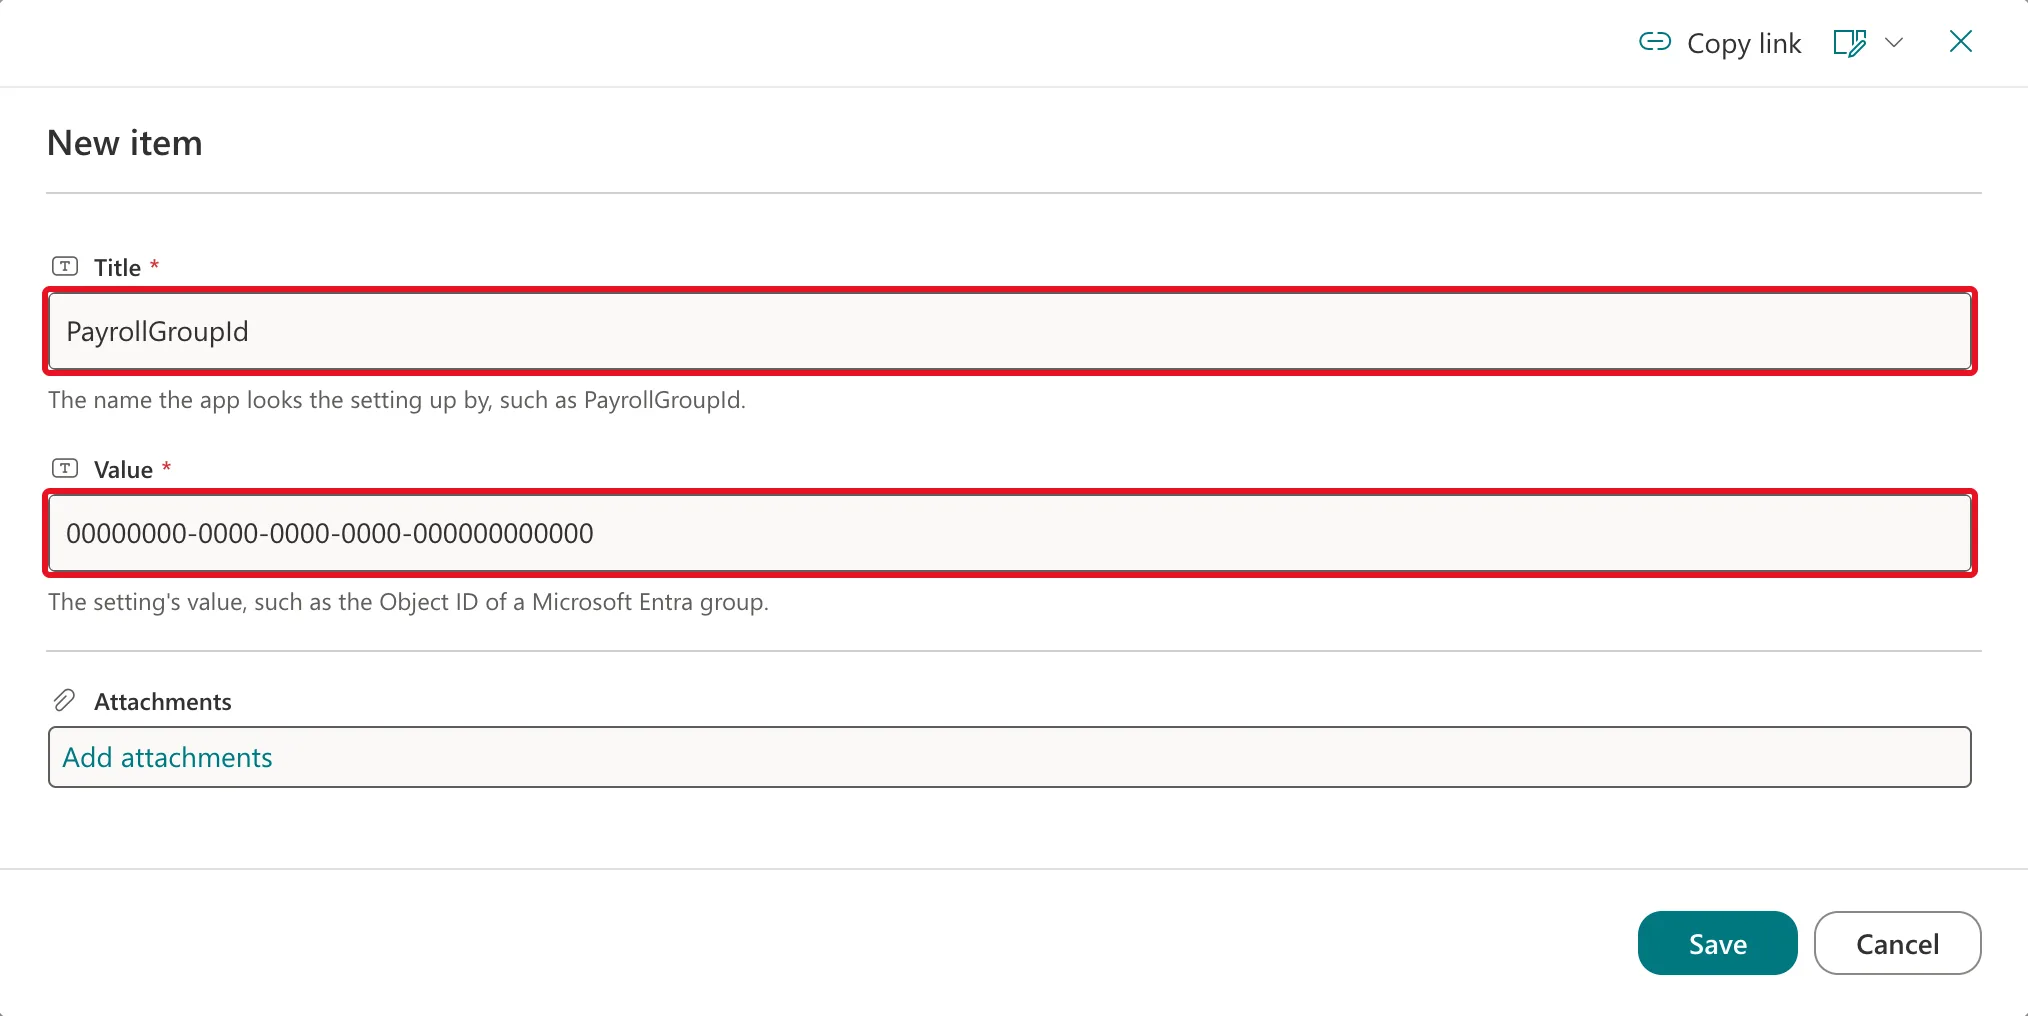
Do the same for AdminsGroupId with the Overtime Admins group's ID. The list now holds both settings:
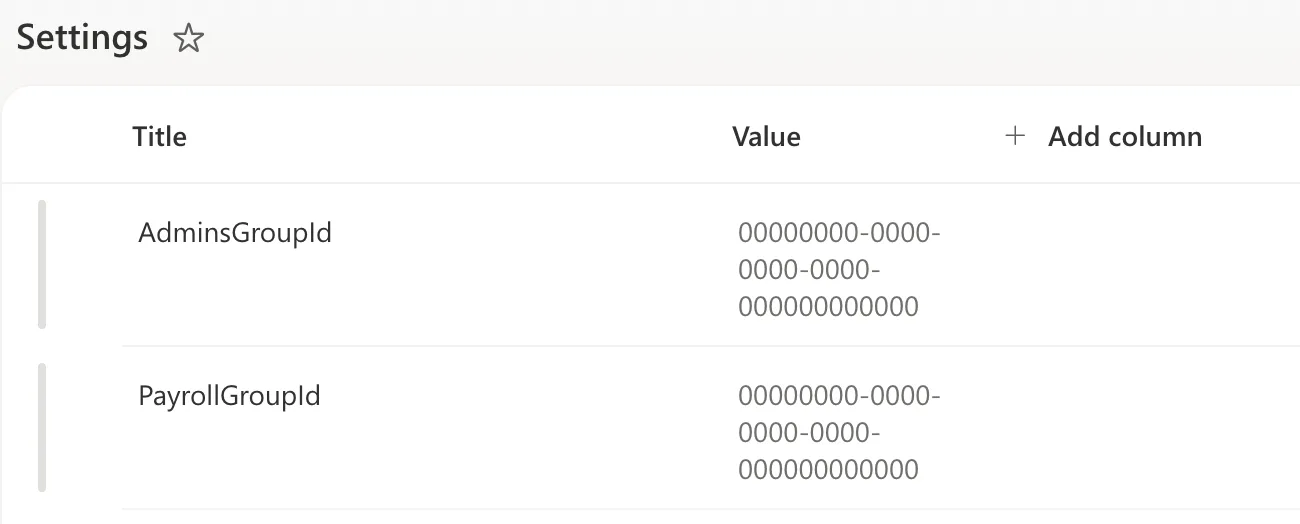
Use one word per name, with no spaces, and type it exactly as the app's formulas will. How to Add an Item to a SharePoint List covers the form.
Step 7: Read the Settings in Power Apps
Connect the app to the list through an environment variable, the same way as its other lists:
- In the app's solution, create a data source environment variable for the Settings list: How to Create Environment Variables for a SharePoint Site and List in Power Apps. In the example it's Settings,
dewiride_SettingsList. - In Studio, add the list through that variable: How to Connect a Canvas App to SharePoint Lists with Environment Variables.
Then look each setting up by name in App.Formulas:
PayrollGroupId = LookUp(Settings, Title = "PayrollGroupId").Value;
AdminsGroupId = LookUp(Settings, Title = "AdminsGroupId").Value;
- LookUp returns the first item whose Title equals the name, and
.Valuetakes its Value column.=on a text column is delegable to SharePoint, so the list is searched on the server. - If no item matches, LookUp returns blank, and so does the setting.
How to Find a Record in Power Apps with LookUp has more on LookUp. Studio's Variables pane (the {x} icon) shows both named formulas as text, here with the IDs masked:
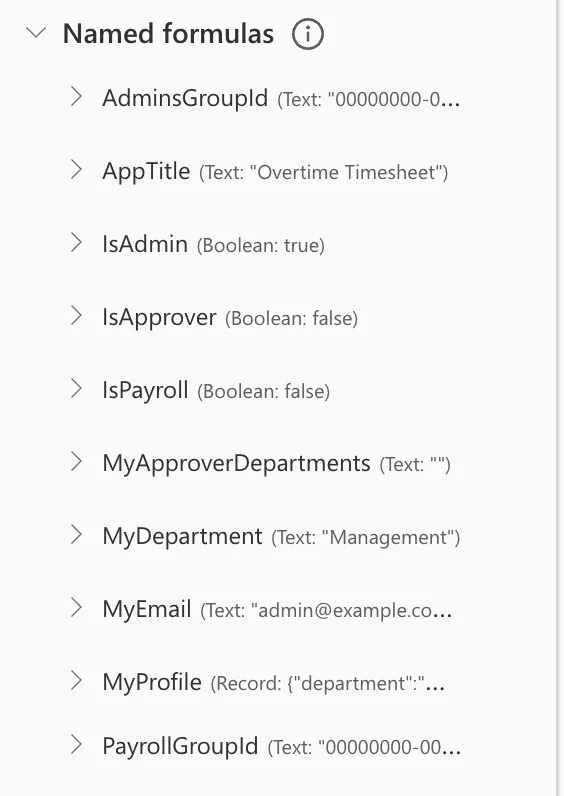
The app passes the two IDs to the Office 365 Groups connector: How to Check If the Current User Is in a Security Group in Power Apps.
Common Mistakes
| Mistake | What happens | Do this instead |
|---|---|---|
| Leaving Members with Edit on the list | Anyone in Members can change who counts as payroll or admin | Stop inheriting and remove Members |
| Removing Visitors as well | The people who use the app can't read the settings, and the app gets blanks | Keep Read for everyone who uses the app |
| A typo in a setting's name | LookUp finds nothing and returns blank | Copy the names from the formulas |
| Typing the IDs into formulas instead | Every organization has to edit the app | Keep them in the list |
Troubleshooting
| Symptom | Likely cause | Fix |
|---|---|---|
| A setting is blank in the app | No item has that exact Title, or the person can't read the list | Check the name, then check the person's permissions |
| This value already exists in the list. when saving | An item with that Title exists | Edit the existing item |
| Title's menu has no Edit | The list's column menu only renames Title | Use List settings → Title |
FAQ
Can staff see the IDs?
Yes, if they open the list, because they can read it. An Object ID isn't a secret: it identifies a group and grants nothing. What they can't do is change it.
What else could go in the list?
Any text value an organization should be able to change without editing the app. Keep one item per setting, named the way the formulas look it up.
Should I use Dataverse instead?
If your users have premium licenses, a text environment variable read through the Dataverse connector keeps the values with the solution. This app runs on standard licenses, so it doesn't.
Conclusion
A Settings list with a unique Title and a required Value, edited only by site owners and read by everyone who uses the app, keeps per-organization values out of the app's formulas. One data source environment variable connects the app to it, and LookUp(Settings, Title = "…").Value reads each value by name.
Additional Resources
- Environment variables FAQ: premium licenses and when to use environment variables.
- Use data source environment variables in canvas apps: the standard way a canvas app uses them.
- Filter, Search, and LookUp functions: the LookUp reference.
- Power Apps delegable functions and operations for SharePoint: why
=on a text column runs on SharePoint.
