How to Show Job Title, Department and Account Enabled Columns in Microsoft Entra

The All users list in the Microsoft Entra admin center shows names and sign-in names, but not people's job titles or departments, or whether they can sign in. Manage view → Edit columns adds those columns, so you can check a whole team on one screen instead of opening each person.
The example is the demo team of the Overtime Timesheet series, before their roles were changed for it.
Prerequisites
- An account that can sign in to the Microsoft Entra admin center. I used the organization's administrator. Changing anyone's details needs the User Administrator role or higher.
Step 1: Open All Users
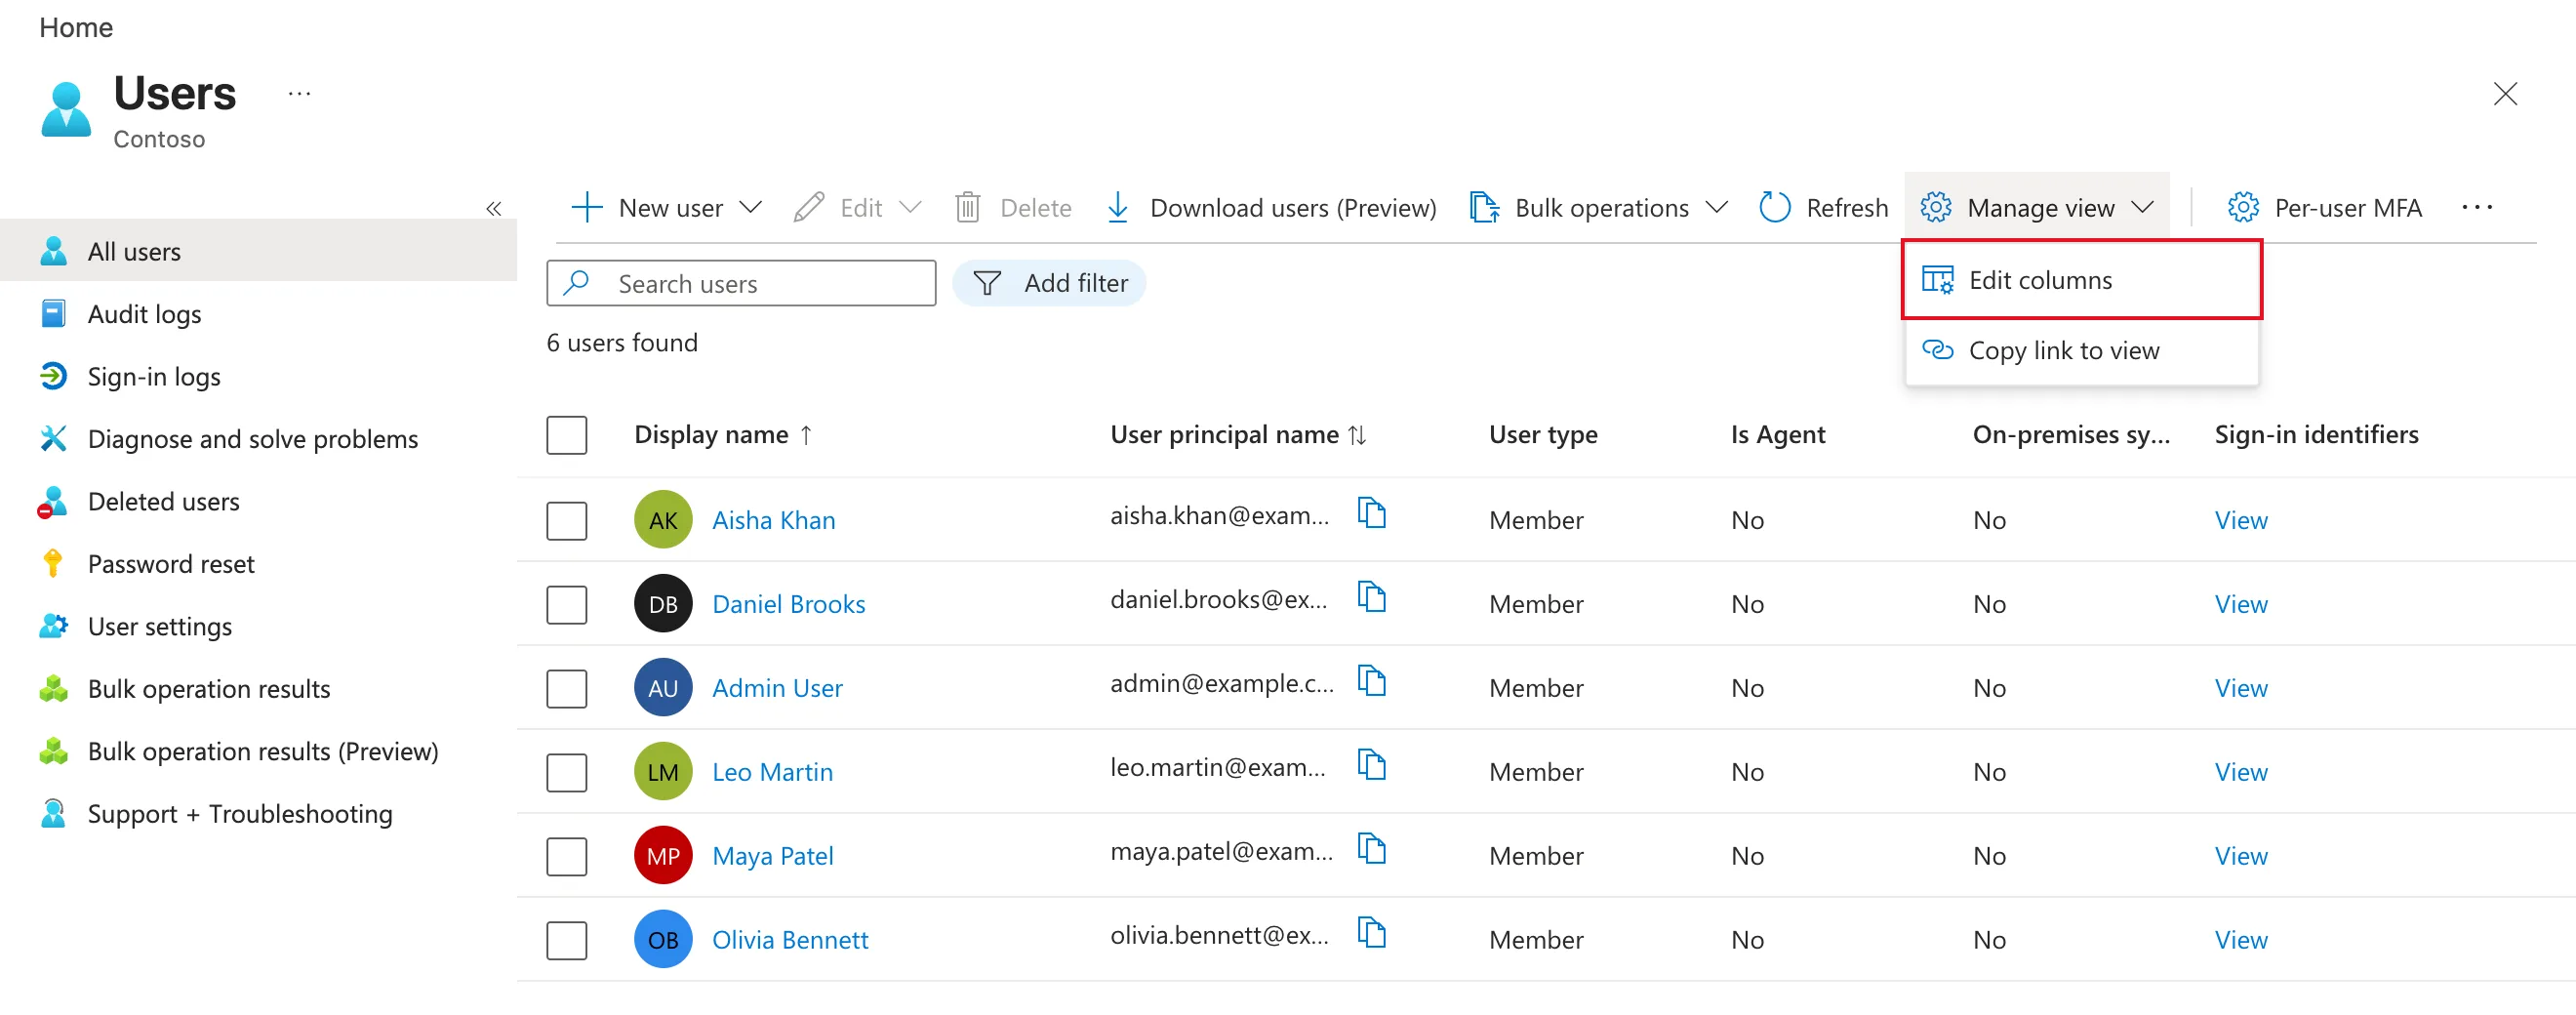
Sign in to the Microsoft Entra admin center and select Entra ID → Users. The All users page lists everyone. Its default columns include Display name, User principal name, User type, Is Agent, On-premises sync enabled and Sign-in identifiers.
Step 2: Open Edit Columns
Select Manage view in the command bar, then Edit columns:
Step 3: Choose the Columns
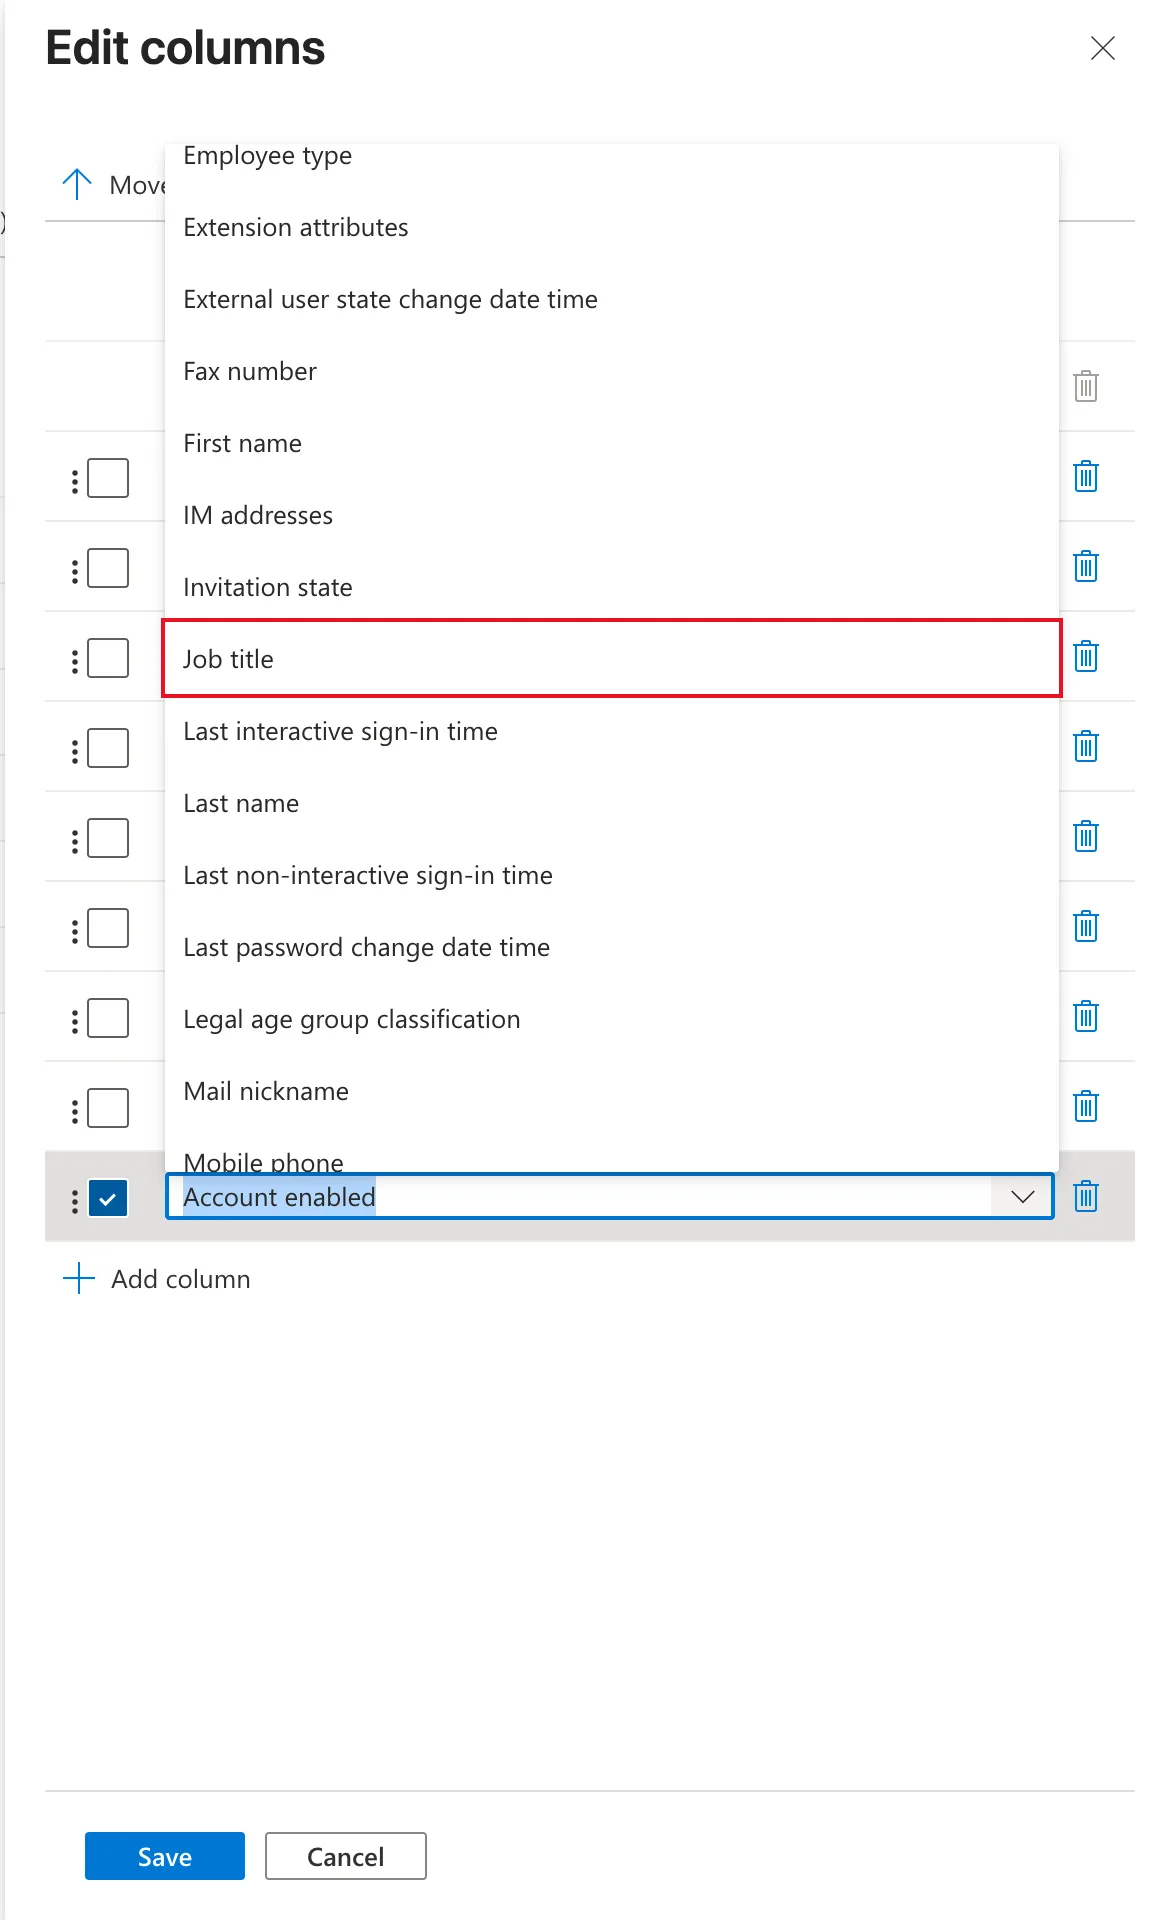
The Edit columns pane lists the current columns, one per row. Each row is a drop-down list of every column you can show.
-
To add a column, select Add column at the bottom of the list, open the new row's drop-down and pick the column. Here I picked Job title:
-
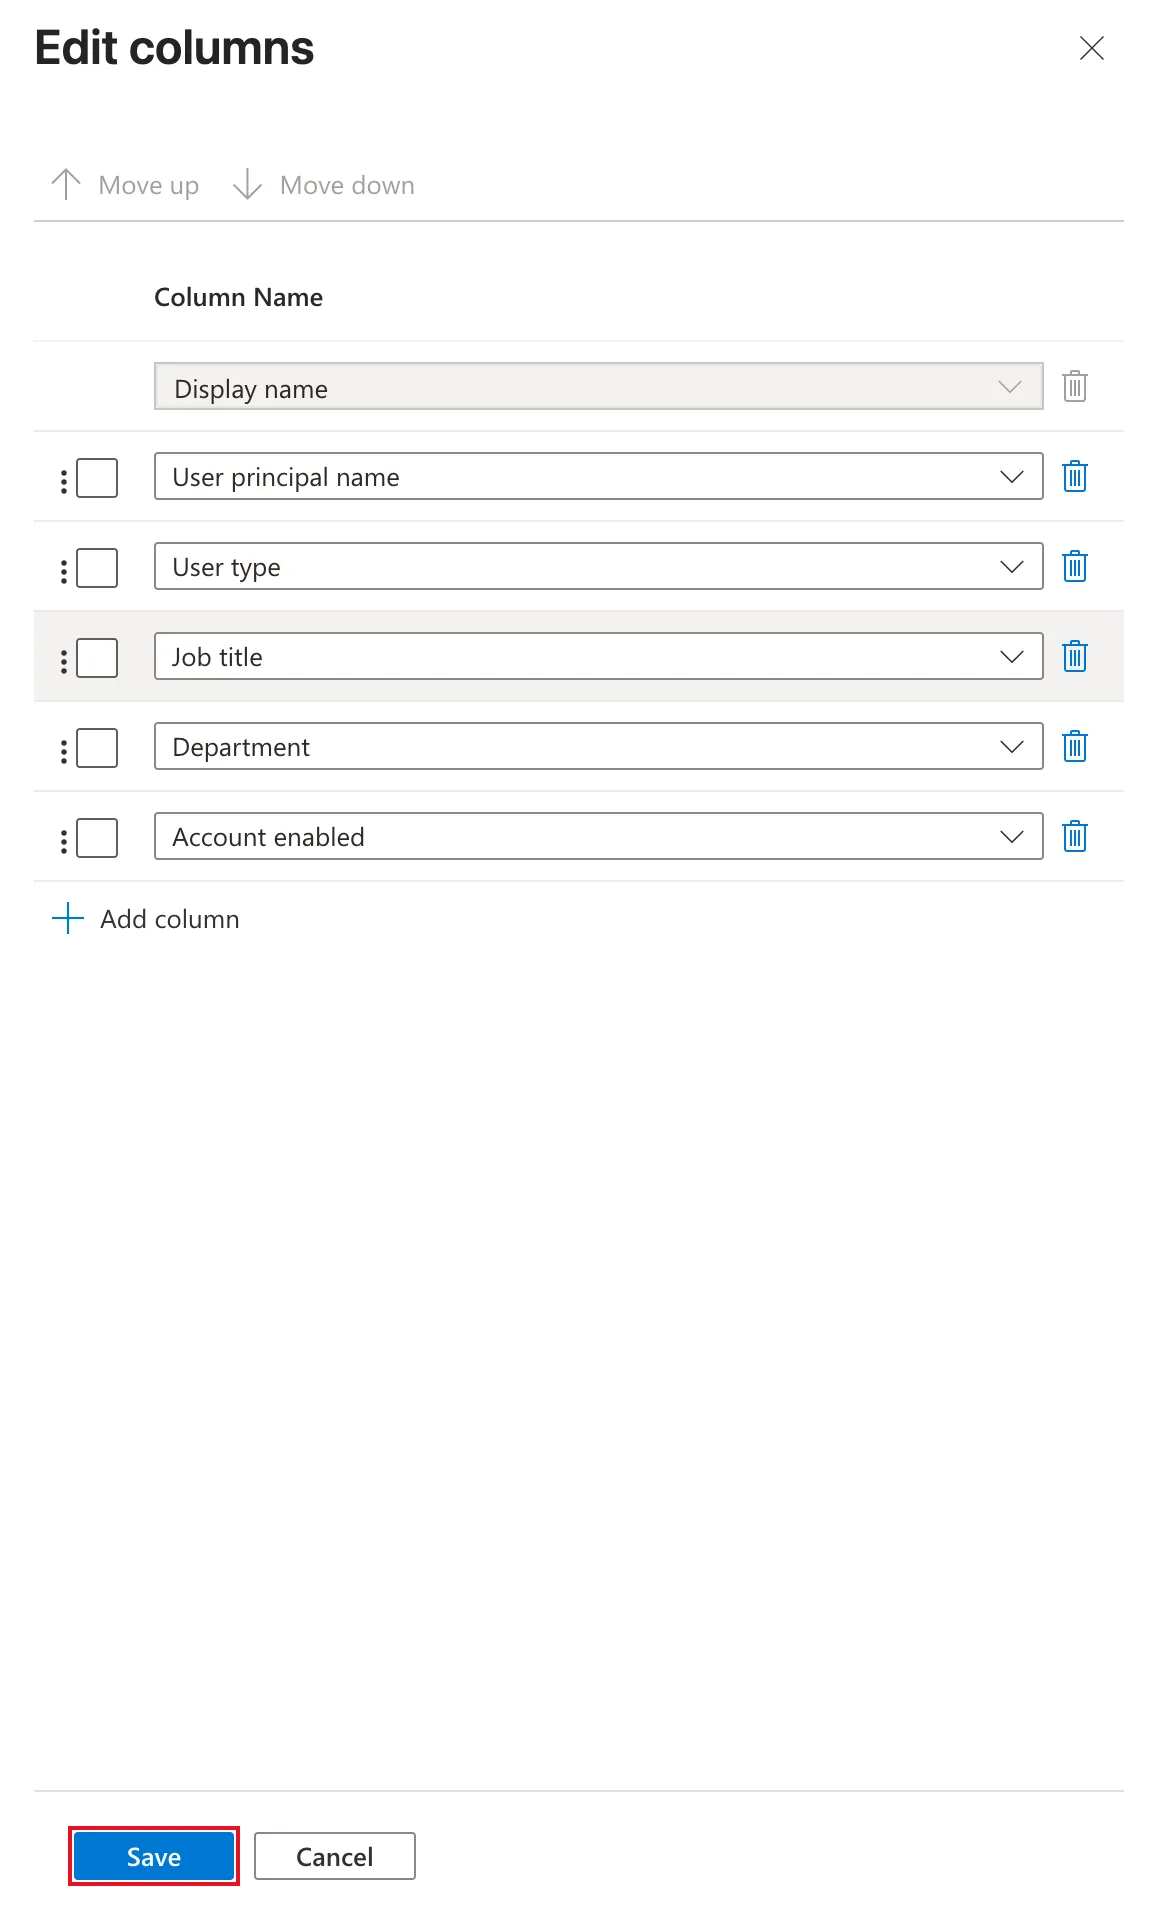
Add Department and Account enabled the same way.
-
To remove a column, select the bin icon at the end of its row. I removed Is Agent, On-premises sync enabled and Sign-in identifiers, which this organization doesn't use.
The rows are in display order, and Move up and Move down at the top of the pane change it.
Step 4: Save
Check the list, then select Save:
Step 5: Read the List
The list now shows every person's job title, department and whether their account is enabled. If the last column is cut off, select the « button at the top of the left-hand menu, labelled Hide the menu for Users, to give the list more room:
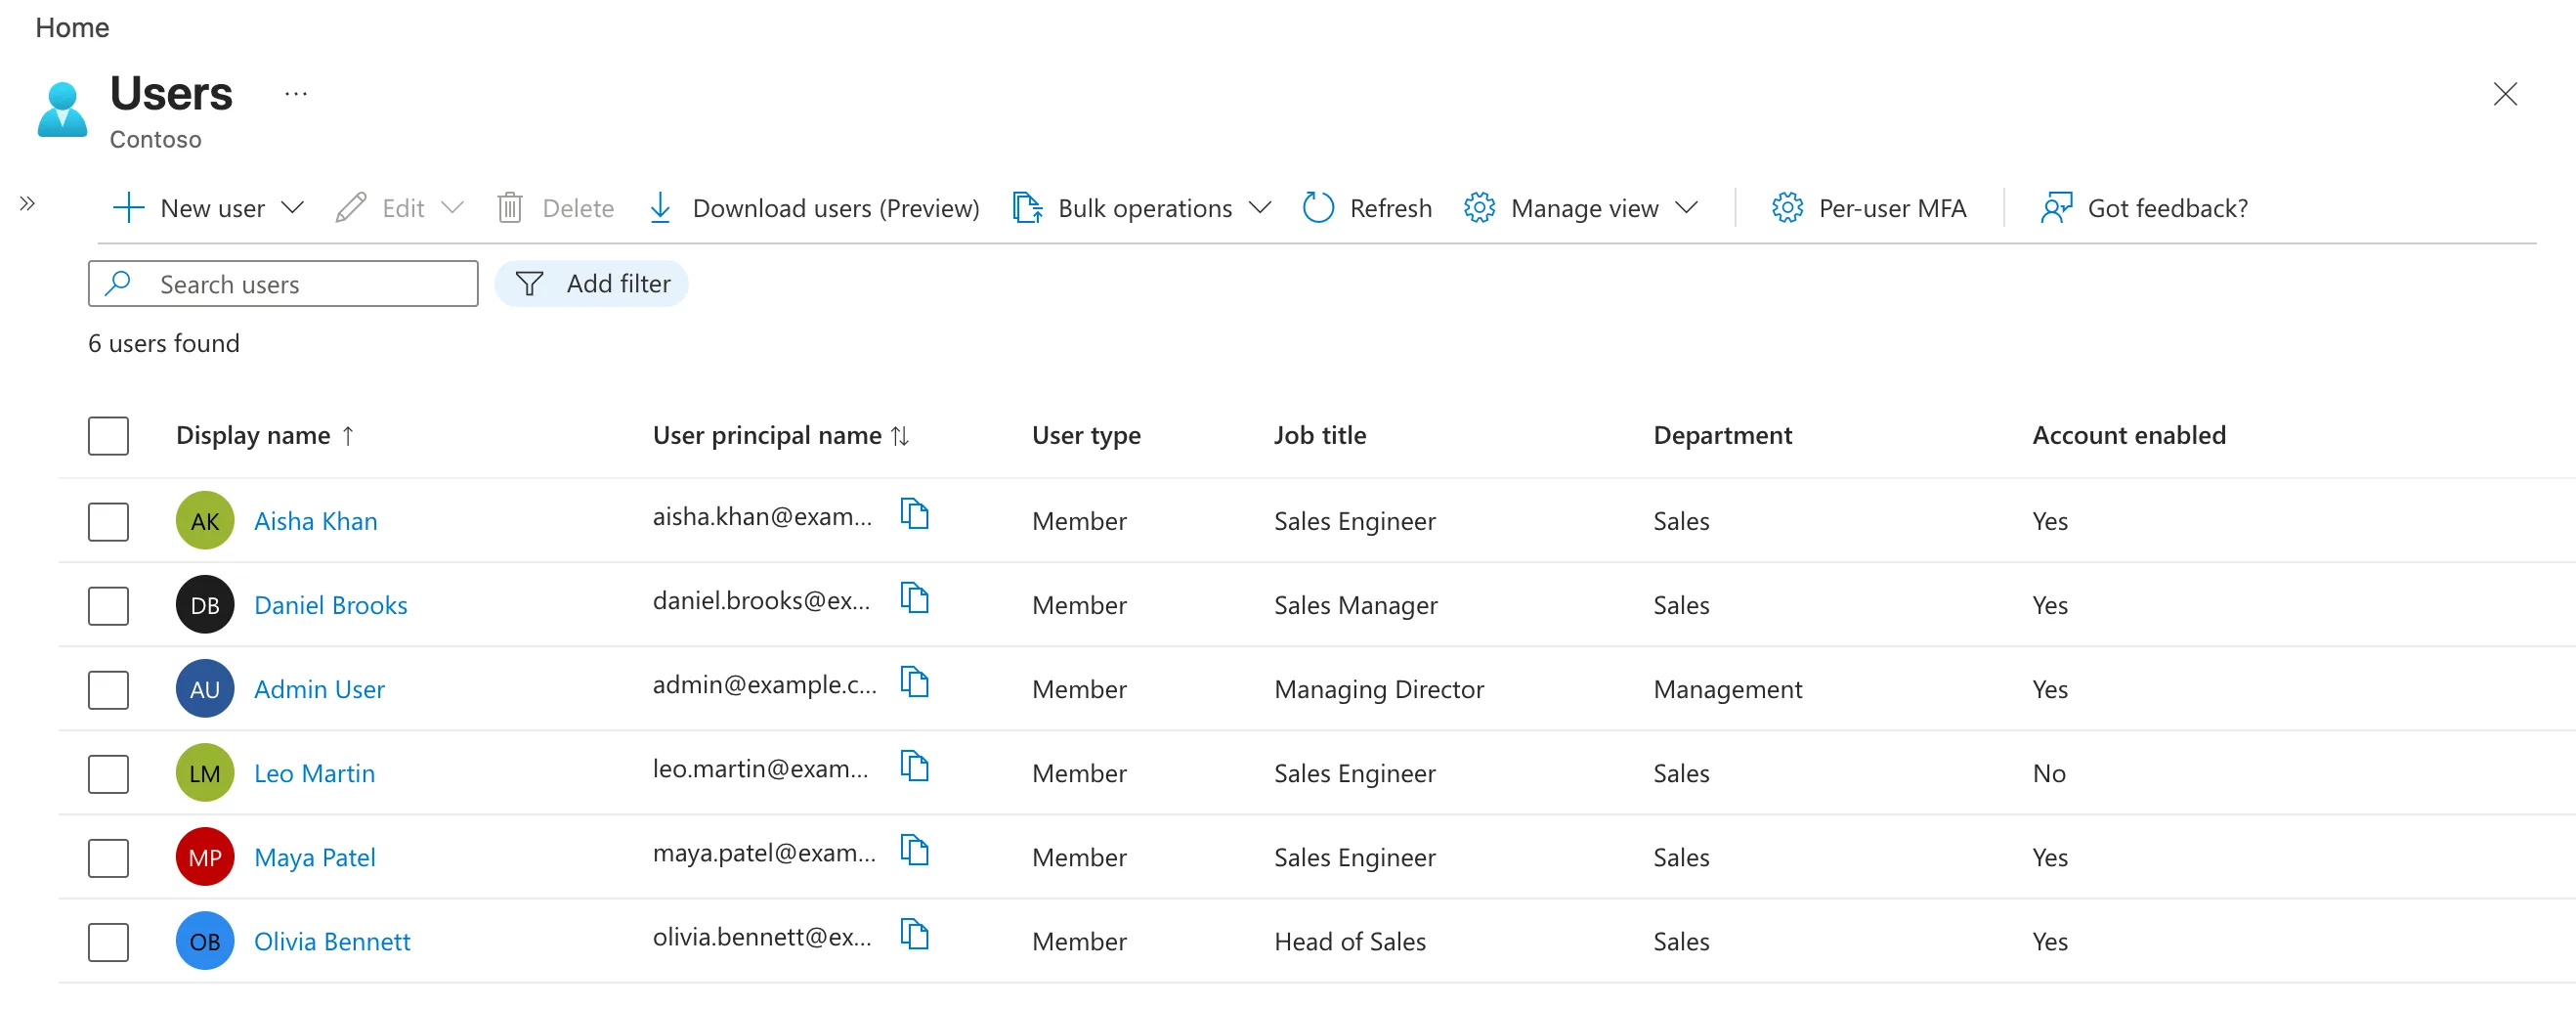
Account enabled is Yes for everyone who can sign in. Leo Martin's says No: his sign-in had been blocked, the way How to Block Sign-In for a User in Microsoft 365 shows. How to Unblock Sign-In for a User in Microsoft 365 turns it back on.
Common Mistakes
| Mistake | What happens | Do this instead |
|---|---|---|
| Opening every person to check their job title | It takes a click per person | Add Job title to the list once |
| Adding many columns | The list scrolls sideways and the last columns are hidden | Show only what you need, and hide the left-hand menu |
| Reading an empty Department as missing data | It just hasn't been filled in | Set it as in How to Change a User's Department |
Troubleshooting
| Symptom | Likely cause | Fix |
|---|---|---|
| A column you added isn't visible | The list is wider than the page | Hide the left-hand menu or scroll the list sideways |
| Account enabled says No | The person's sign-in is blocked | Unblock it in the Microsoft 365 admin center if they should sign in |
FAQ
Does this change anything for other admins?
No. Edit columns changes the view, not the users. Nobody's account changes.
What does Account enabled mean?
Whether the person can sign in. Blocking sign-in in the Microsoft 365 admin center sets it to No, and unblocking sets it back to Yes.
Conclusion
Manage view → Edit columns turns All users into a quick check of everyone's job title, department and sign-in status. Add the columns once, save, and the whole team fits on one screen.
Additional Resources
- Add or update a user's profile information and settings
- User management enhancements in Microsoft Entra ID
