How to Send an Approval Request in Power Automate

Start and wait for an approval sends someone a request to approve or reject, and pauses the flow until they answer. Choose the approval type, write a title, assign it, describe what's being approved, and the request reaches the approvers in Teams, Outlook and Power Automate.
Microsoft's approvals article says approvers can respond directly from an Outlook email, a Microsoft Teams adaptive card, or the Power Automate action center. The decision comes back to the flow as the action's outputs.
The example is the approval flow of the Overtime Timesheet app, which sends each overtime entry to its department's approvers.
Prerequisites
- A flow open in the new designer, with the details to show the approver.
- The approvers' email addresses. Here, in a variable,
ApproverEmails(How to Use Variables in Power Automate). - Approvals is a standard connector; nothing premium is needed.
Step 1: Add the Action
Add an action, search for Start and wait for an approval, and choose it under Standard approvals:
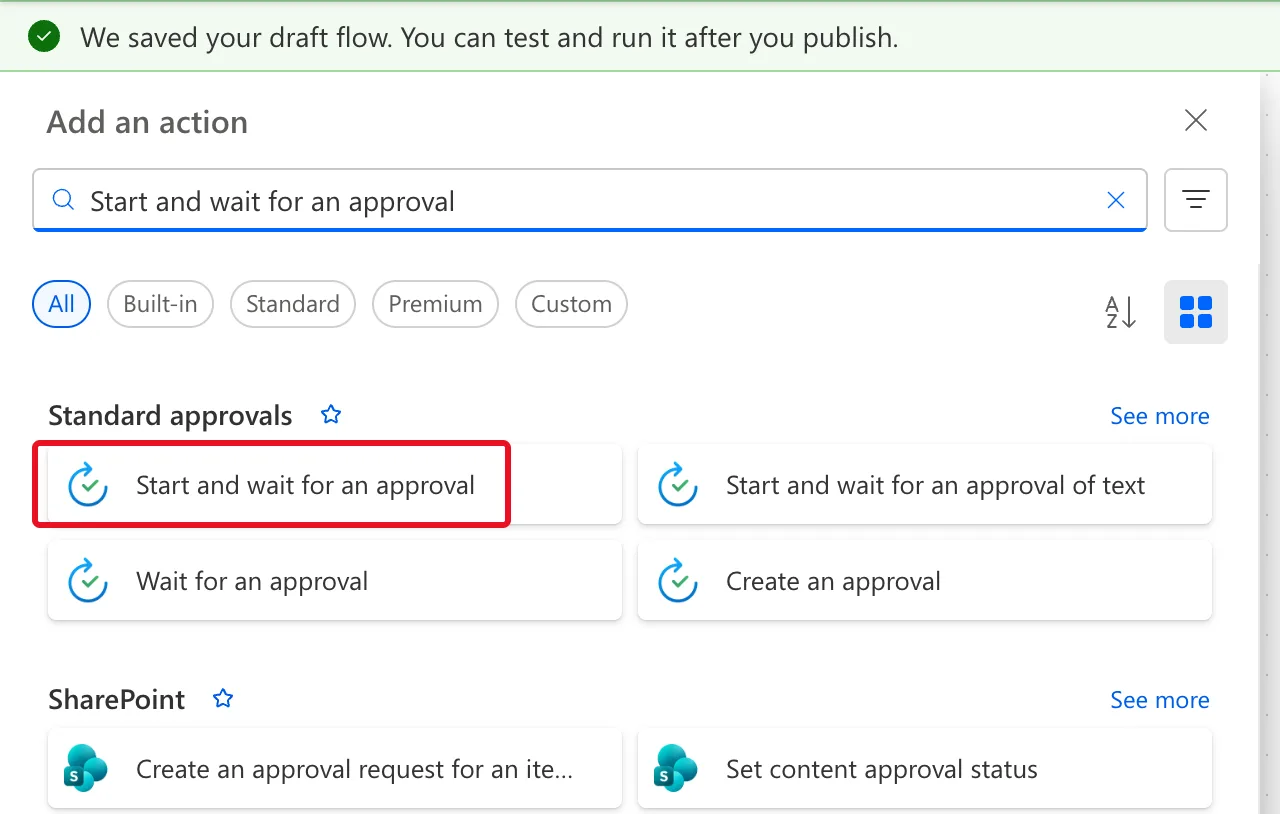
The first time, the designer asks for a connection for Standard approvals; select Create new:
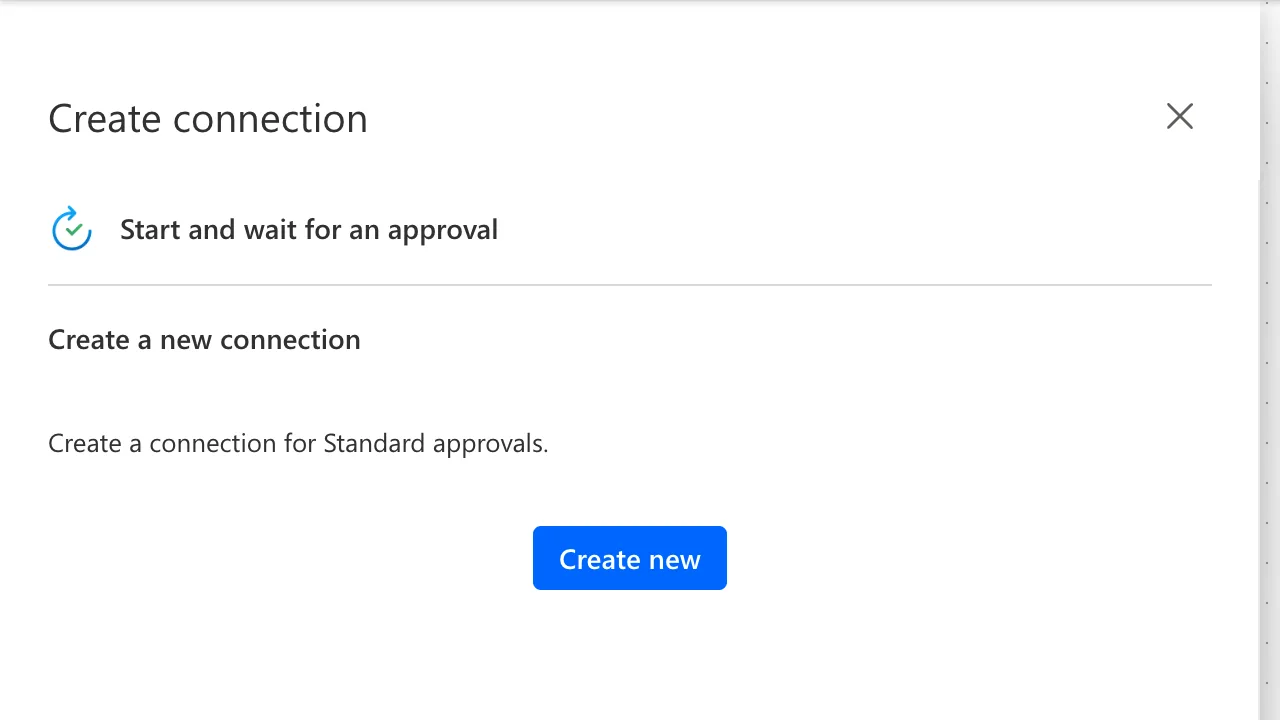
I named the action Ask for approval.
Step 2: Choose the Approval Type
Approval type lists five kinds:
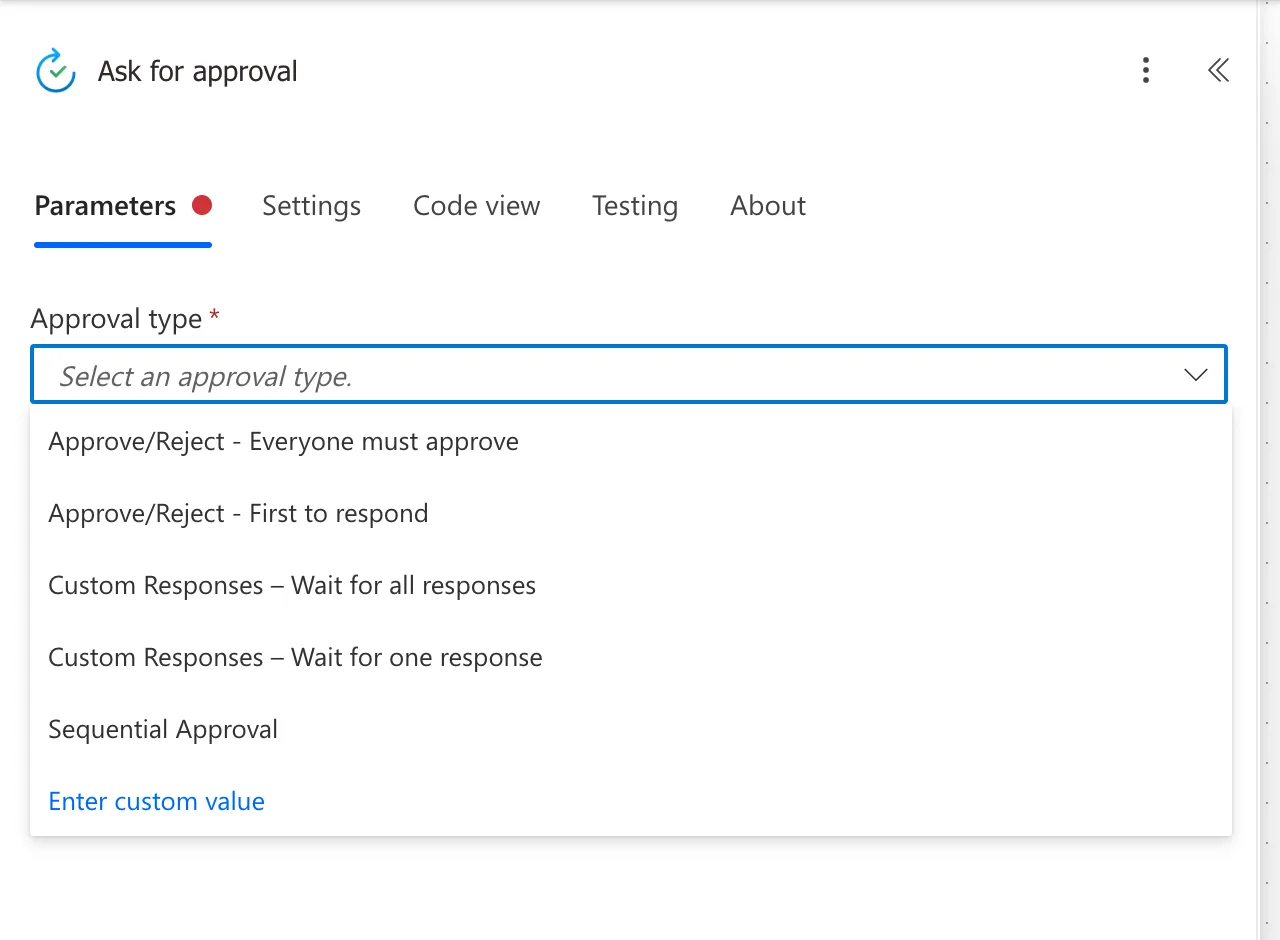
For a request that any one of several approvers can decide, choose Approve/Reject - First to respond. Microsoft's approval scenarios say: If only a response of one person from the group of people is enough to sign off the approval and continue with the flow run, use the Approve/Reject – First to respond or Custom Responses – Wait for one response action.
Step 3: Write the Title
The title is the request's headline in every app. Make it say who, what and how much. Here, the person's name from the trigger, then two Compose outputs, the shift's date and its hours:
Overtime for @{triggerBody()?['Author/DisplayName']}, @{outputs('Shift_date')}, @{outputs('Hours_worked_out')} hours
For Maya Patel's shift, it read Overtime for Maya Patel, Saturday 07/11/2026, 3.75 hours.
Step 4: Assign It
Assigned to is a people picker, which looks people up as you type. To put a variable or expression in it instead, select the gear to its right and choose Use dynamic content:
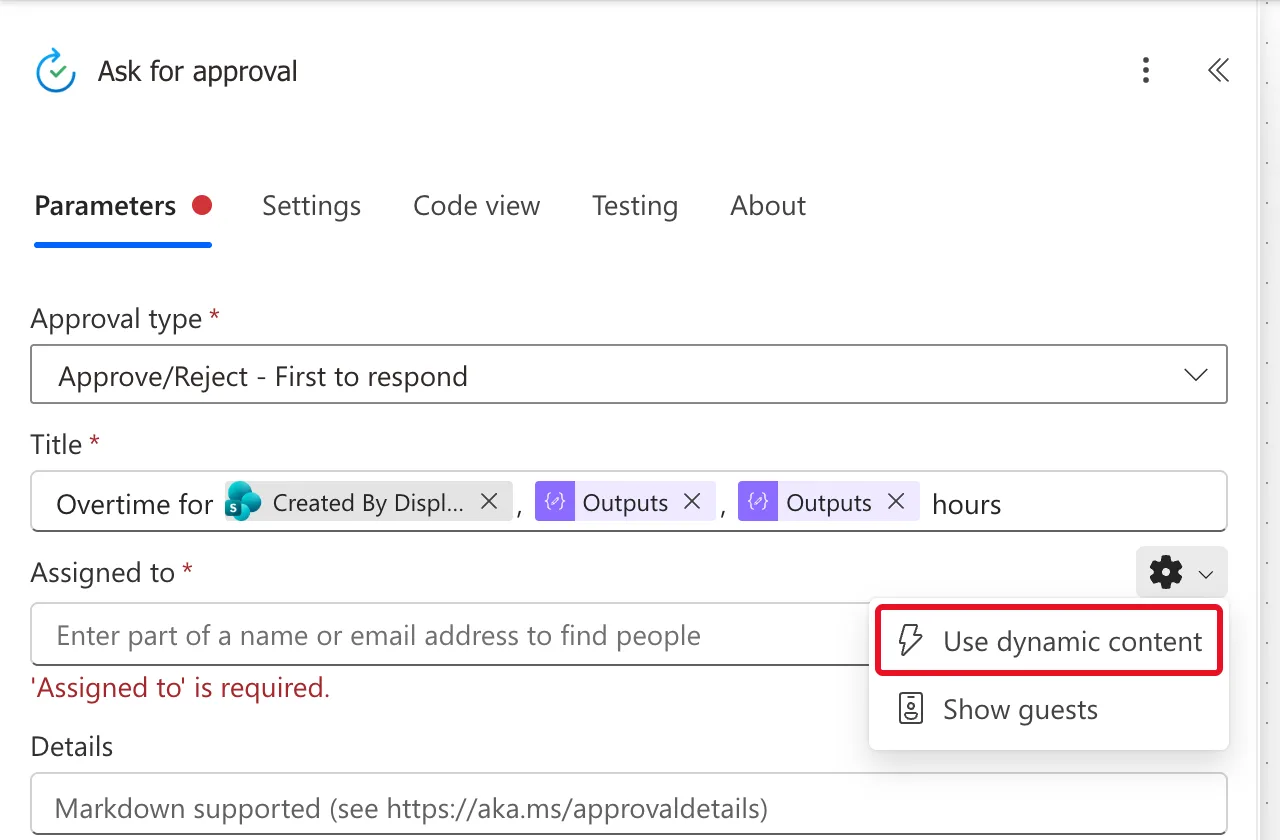
Then pick the variable, ApproverEmails. Several people go in one value, separated with a semicolon, as Microsoft's article says (How to Join an Array into Text in Power Automate).
Step 5: Describe What's Being Approved
Details is the body of the request. Put each fact on its own line, with an empty line between them:
Department: @{outputs('Get_the_department')?['body/Department']}

Date: @{outputs('Shift_date')}

Time: @{outputs('Shift_times')}

Unpaid break: @{triggerBody()?['BreakMinutes']} minutes

Hours: @{outputs('Hours_worked_out')}

Reason: @{triggerBody()?['Reason']}
The box says Markdown supported, but Microsoft's Markdown article says Markdown isn't currently supported for the Approvals app on Microsoft Teams, and for Outlook on the desktop it says to use a blank line instead of a line break. Plain lines with empty lines between them showed as separate lines in both Teams and Outlook.
Step 6: Set the Requestor and Options
Under Advanced parameters, select Show all:
| Field | Value here | Why |
|---|---|---|
| Requestor | The trigger's Created By Email | The request says who it's for |
| Enable notifications | Yes | Approvers get an email |
| Enable reassignment | No | Only the department's approvers decide |
The finished action:
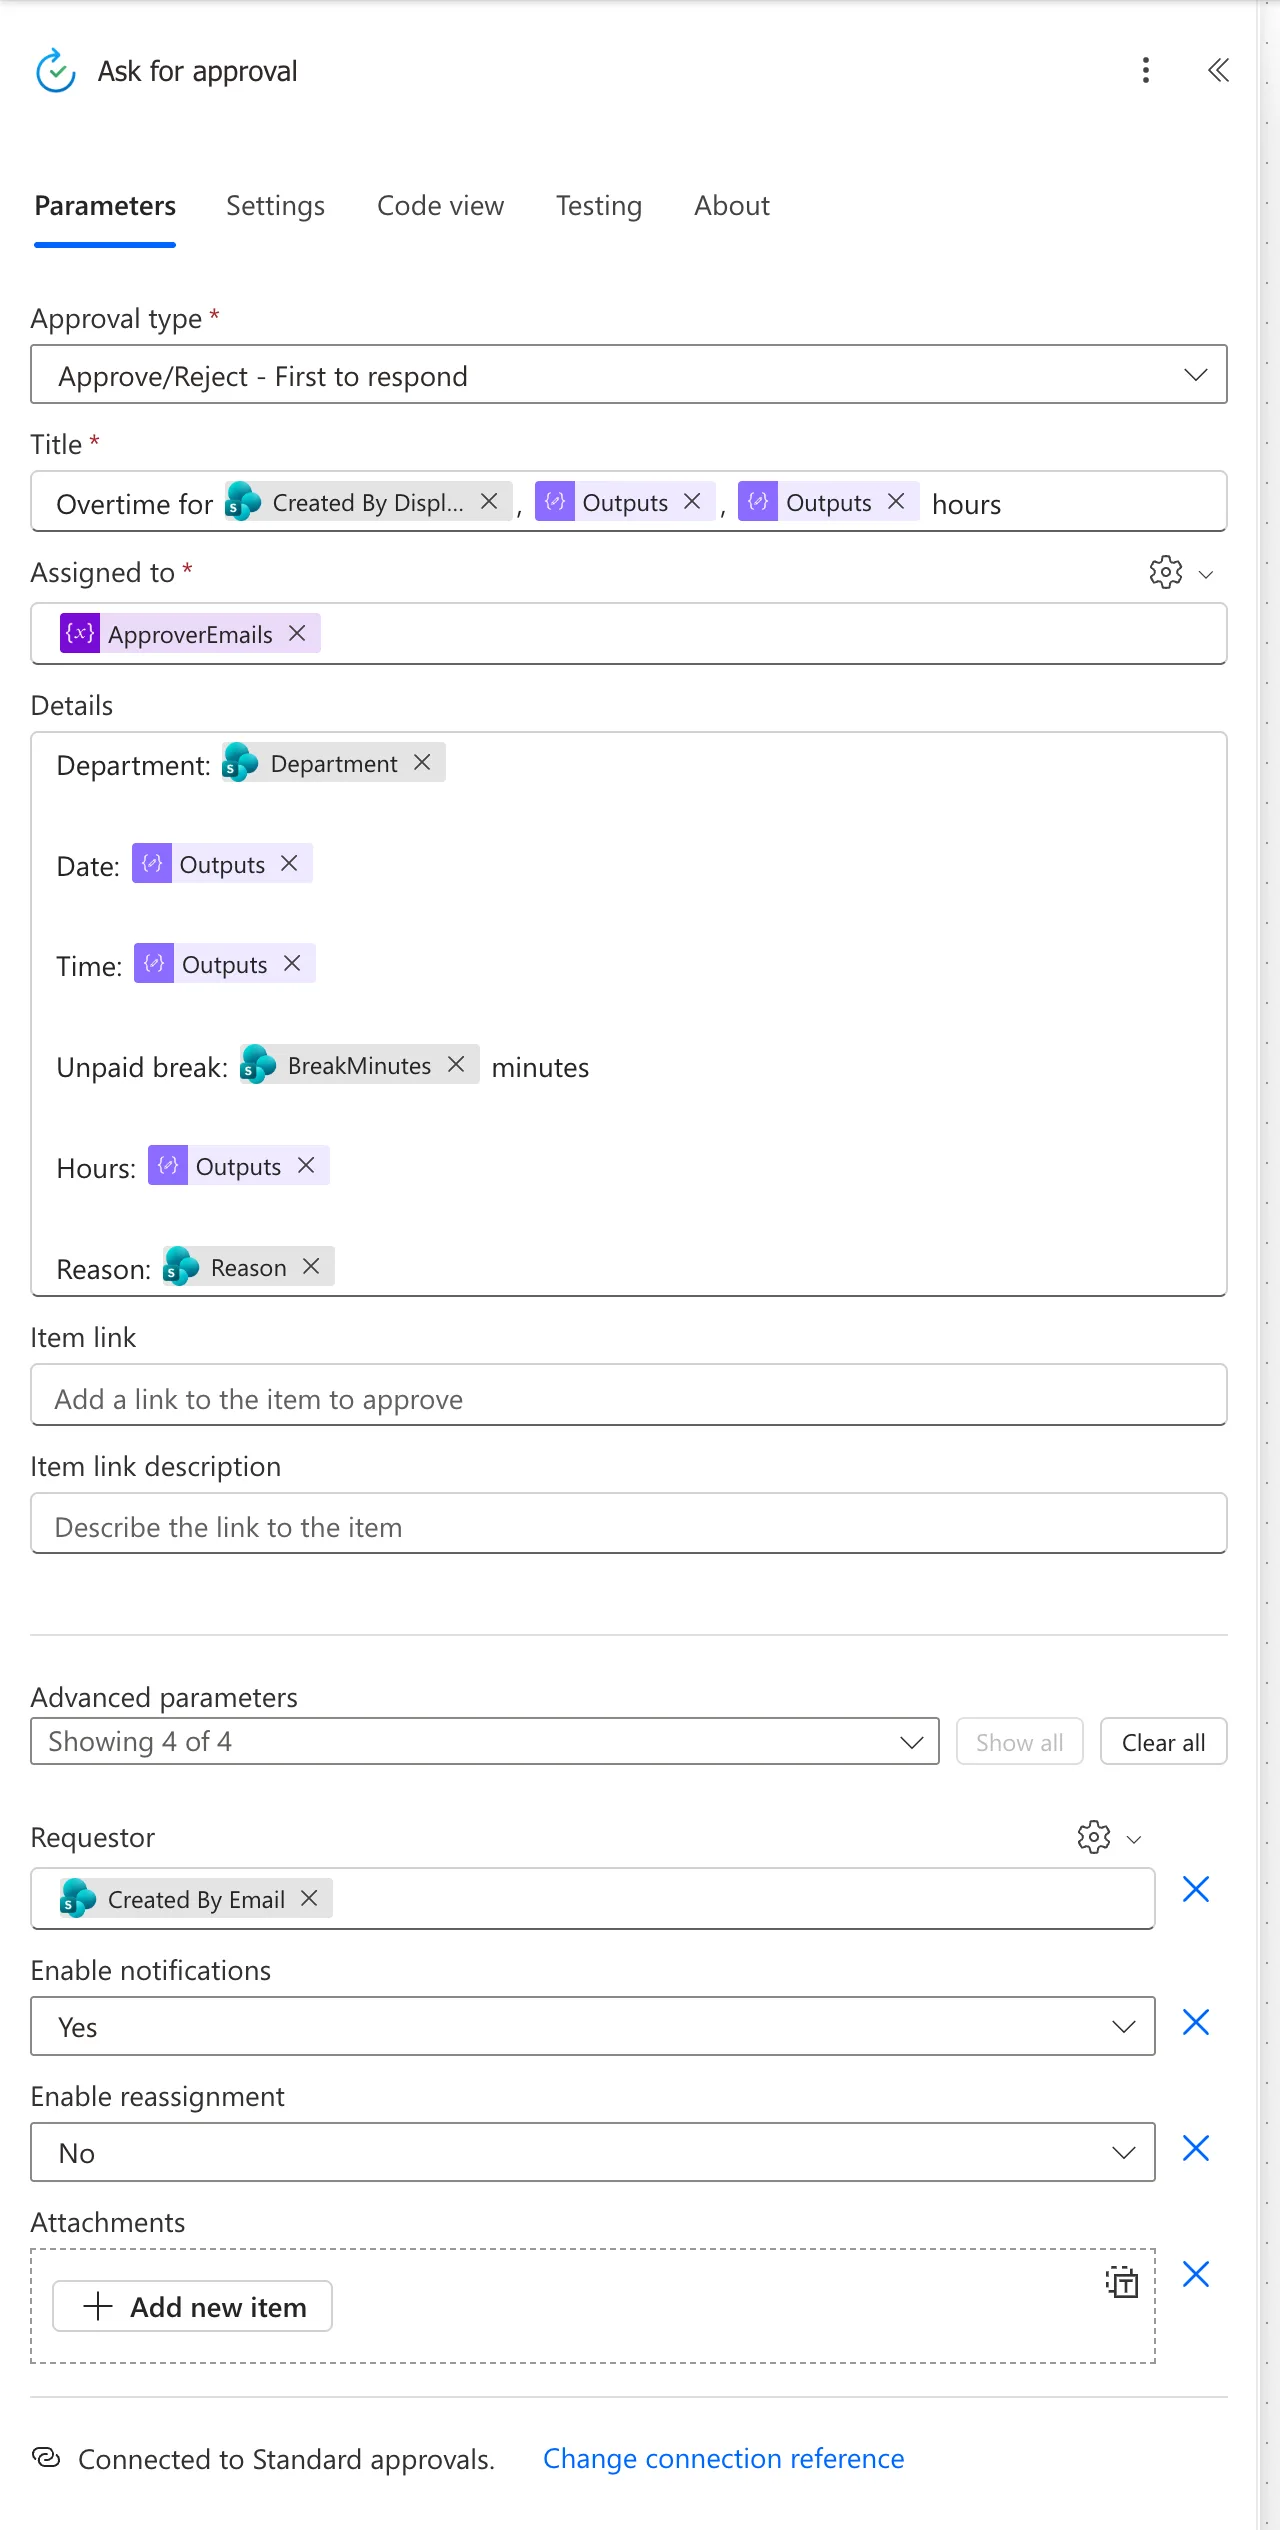
Step 7: Use the Decision
The flow continues when an approver answers. The action's outputs include Outcome, Approve or Reject, and Responses, an array with each response's approver and comments (How to Get the First Item of an Array in Power Automate):
outputs('Ask_for_approval')?['body/outcome']
first(outputs('Ask_for_approval')?['body/responses'])?['comments']
The Result
The request reached the approvers in Teams, in Outlook and in Power Automate's Approvals page (How to Approve a Request in the Microsoft Teams Approvals App, How to Approve a Request from an Outlook Email and How to Respond to Approvals in Power Automate). Two things in the request came from the action, not from my text:
- The email said Created by Admin User, the flow's maker, above Requested for Maya Patel. Microsoft's connector reference explains: The creator of the flow will always be shown in the Approval details (email content and all clients). This is to prevent spoofing of approval sender identities.
- When the requestor was the maker, the email said only Requested by Admin User.
In the tests, approvers answered within a few minutes, and the flow carried on straight after.
How Long It Waits
A run waits as long as it takes, within a limit. The limits page says: After 30 days, any pending steps time out. The approvals known issues page says An approval flow can wait for 28 days. The two pages disagree, so plan for the shorter one.
Common Mistakes
| Mistake | What happens | Do this instead |
|---|---|---|
| Typing a variable into the people picker | It looks for a person by that text | Gear, then Use dynamic content |
| Commas between several emails | Assigned to wants semicolons, Microsoft's article says | Semicolons |
| Markdown in Details | Not shown as formatting in Teams | Plain lines with empty lines between them |
| Everyone must approve when anyone may decide | The flow waits for every approver | First to respond |
Troubleshooting
| Symptom | Likely cause | Fix |
|---|---|---|
| 'Assigned to' is required. | Nothing assigned | Add the people or the variable |
| The details run together on one line | No empty lines between them | Add an empty line after each one |
| The flow never continues | Nobody has answered | Remind the approvers; it times out within 28 to 30 days |
FAQ
Why does the request say it's created by me?
The flow's maker always appears, by design, so nobody can make a request look as if it came from someone else. The Requestor field adds who it's for.
Where can approvers answer?
Microsoft lists an Outlook email, a Teams adaptive card and the Power Automate action center. I tested all three in a browser: Teams and Outlook for department approvers, and Power Automate's Approvals page for a manager.
Conclusion
Start and wait for an approval with Approve/Reject - First to respond, a clear title, Assigned to from dynamic content, details on separate lines and a requestor sends a request that approvers can answer in Teams, Outlook or Power Automate. The flow waits, then reads Outcome and Responses.
Additional Resources
- Get started with Power Automate approvals: approval types and where approvers respond.
- Top scenarios with approval flows: several approvers.
- Markdown for approval requests: what each app shows.
- Approvals connector known issues: the flow's creator in every request.
