How to Save a Report in Power BI in the Browser

A report you build in the browser lives only in the open tab until you save it. Saving gives it a name and a place in a workspace, next to its semantic model. Here's how.
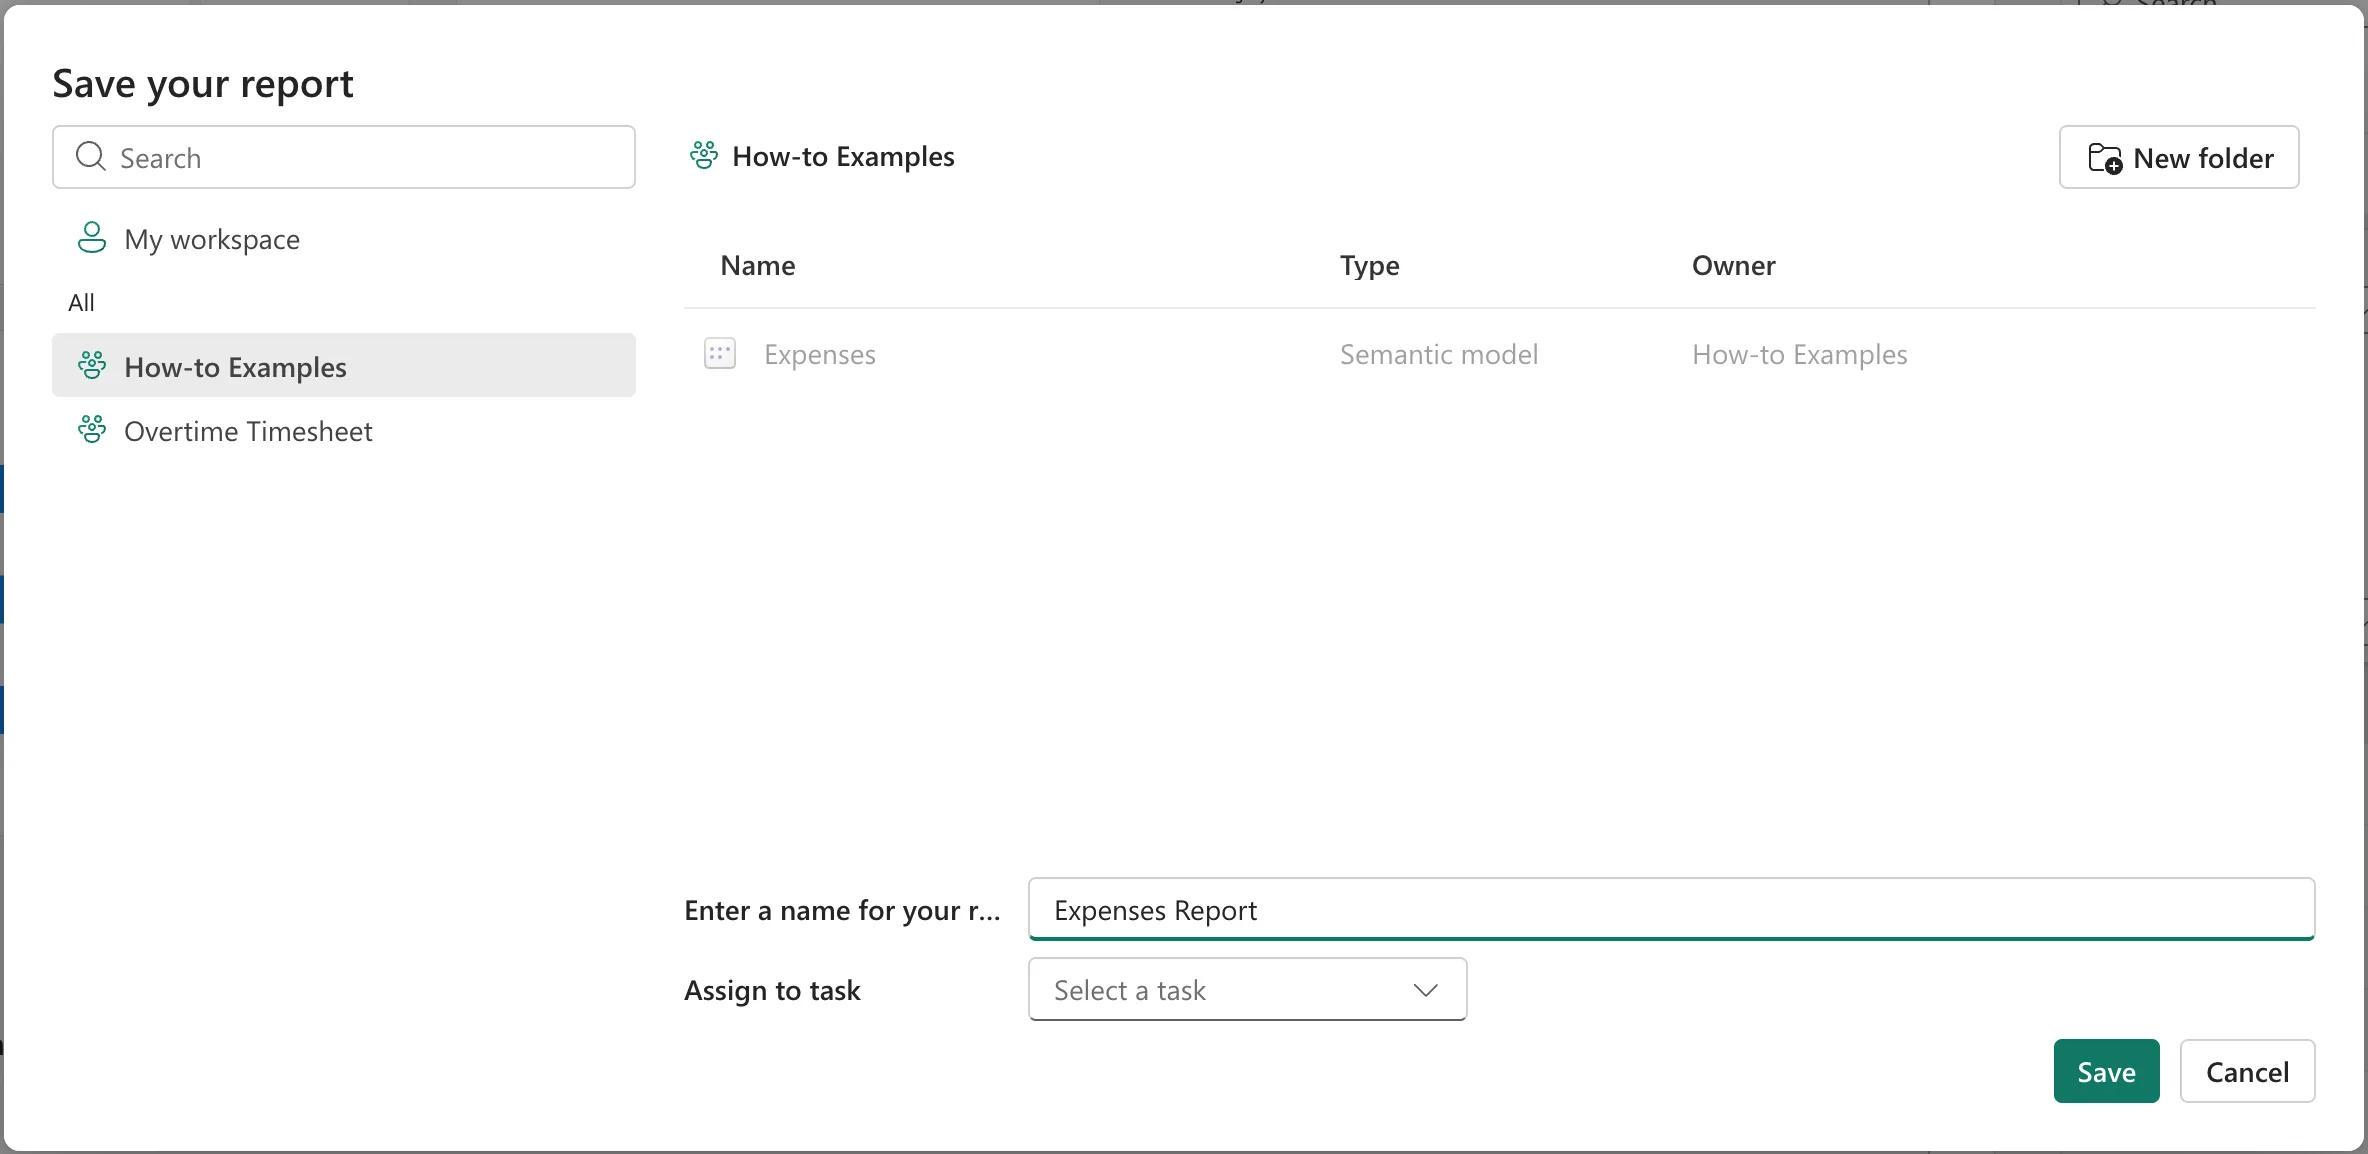
Microsoft's Edit semantic models in the Power BI service says that when you save your new report, you're prompted to choose a workspace, provided you have write permissions for that workspace. The example saves a report of expense claims as Expenses Report in the workspace How-to Examples.
Step 1: Select Save
Select Save, the disk icon in the toolbar above the report:

Step 2: Pick the Workspace and Name the Report
The Save your report dialog lists My workspace and your workspaces, with the semantic model's workspace selected; its items show on the right, here the Expenses semantic model. Type the name in Enter a name for your report, here Expenses Report, and select Save:
Step 3: Check the Message
A message confirms it: Report saved. This report has been saved.

The report now appears in the workspace. In the example, after the first save it opened in Viewing mode with the new ribbon; select Editing to continue (How to Switch Between Viewing and Editing a Power BI Report). Later saves keep the same name and place.
Common Mistakes
| Mistake | What happens | Do this instead |
|---|---|---|
| Closing the tab before the first save | The report is lost | Save as soon as it has a visual |
| Saving to My workspace | Only you can see it | The workspace of its semantic model |
| A vague name like Report | It's hard to find | Name it after what it shows |
Troubleshooting
| Symptom | Likely cause | Fix |
|---|---|---|
| The workspace isn't in the list | You can't write to it | Ask for Contributor or higher |
| The report saved to My workspace | The article says this happens without write permission on the model's workspace | Get write access, then save there |
FAQ
Does saving the report save the model too?
The model saves its own changes as you make them; saving the report saves only the report.
Conclusion
Select Save, pick the workspace, type the name and select Save. The example's report is Expenses Report in How-to Examples, next to its Expenses model.
