How to Group Items in a SharePoint List View

Grouping puts a list's items under a heading for each value of a column, such as each month, with a count of the items in each group. Select the column's heading and Group by it, then Save view as to keep the grouping. For a second level, such as month and then person, use Edit current view.
The example is the OvertimeEntries list of the Overtime Timesheet app, grouped by the month of each shift and then by person, to check each person's monthly totals.
Prerequisites
- A SharePoint list, and permission to create views in it. In the example, the site's owner creates the view.
- The column to group by. Microsoft's grouping article lists the column types you can't group by: Multiple lines of text, Choice, where multiple values are allowed, Hyperlink and Image.
Step 1: Group by a Column
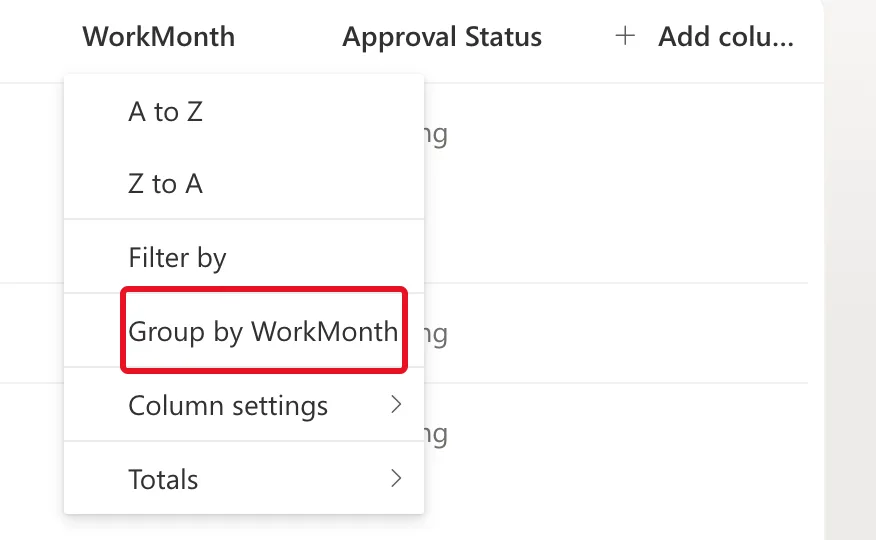
Open the list, select the heading of the column to group by, here WorkMonth, and select Group by WorkMonth:
The list now shows a heading for each month, with the number of items in it: WorkMonth: 2026-10 (2) and WorkMonth: 2026-11 (5). In the example, the view also shows a total of the Hours column under each group, added from the same column menu: How to Show Column Totals in a SharePoint List View.
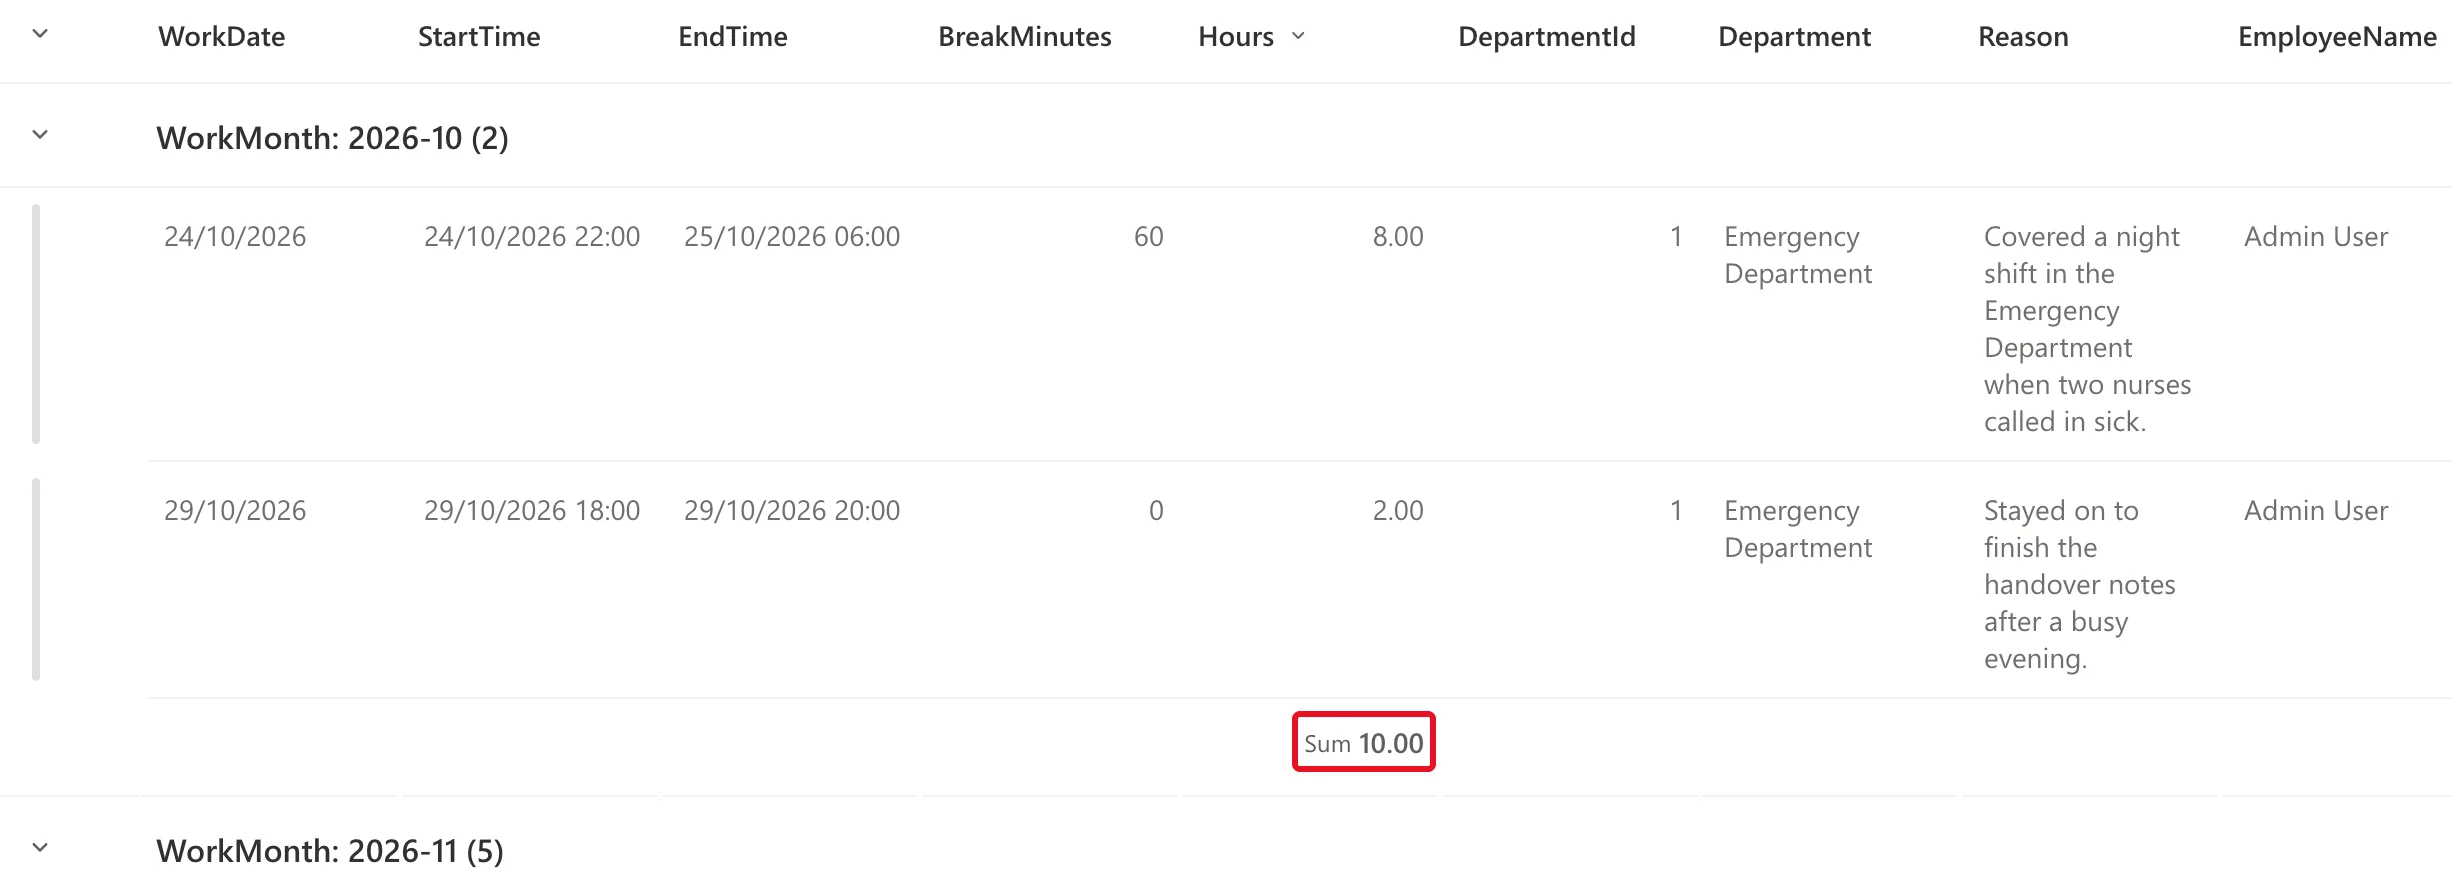
Grouping only changes how the data is displayed; it doesn't add or remove content from the view, as the grouping article puts it.
Step 2: Save the View
The grouping applies to the view you're looking at, and isn't kept until you save it. To keep All Items as it was, save a new view: open the view's menu, here All Items, and select Save view as. Type a name, here By month. Make this a public view was ticked, so everyone who can open the list sees the view; select Save:
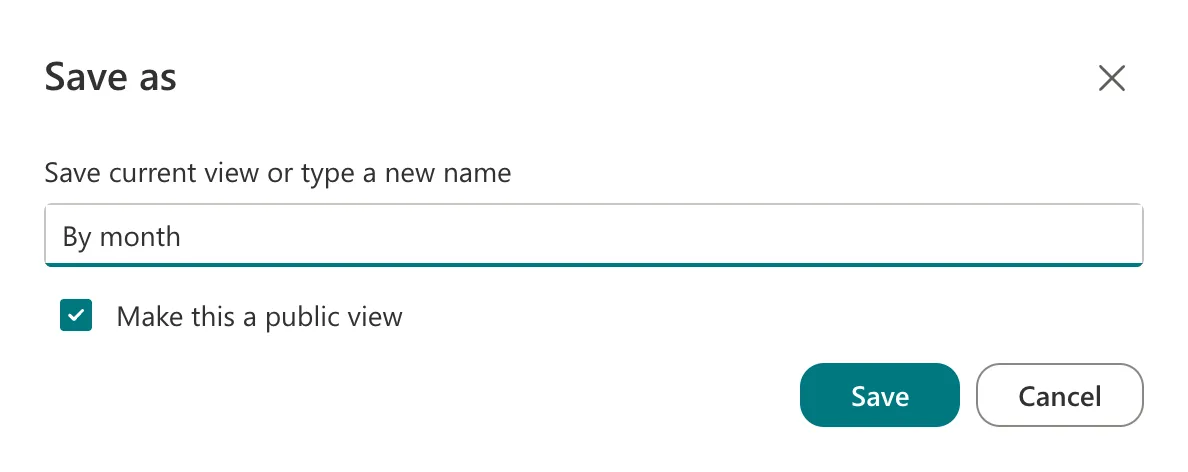
The new view opens, and its name appears beside the list's other views.
Step 3: Add a Second Level
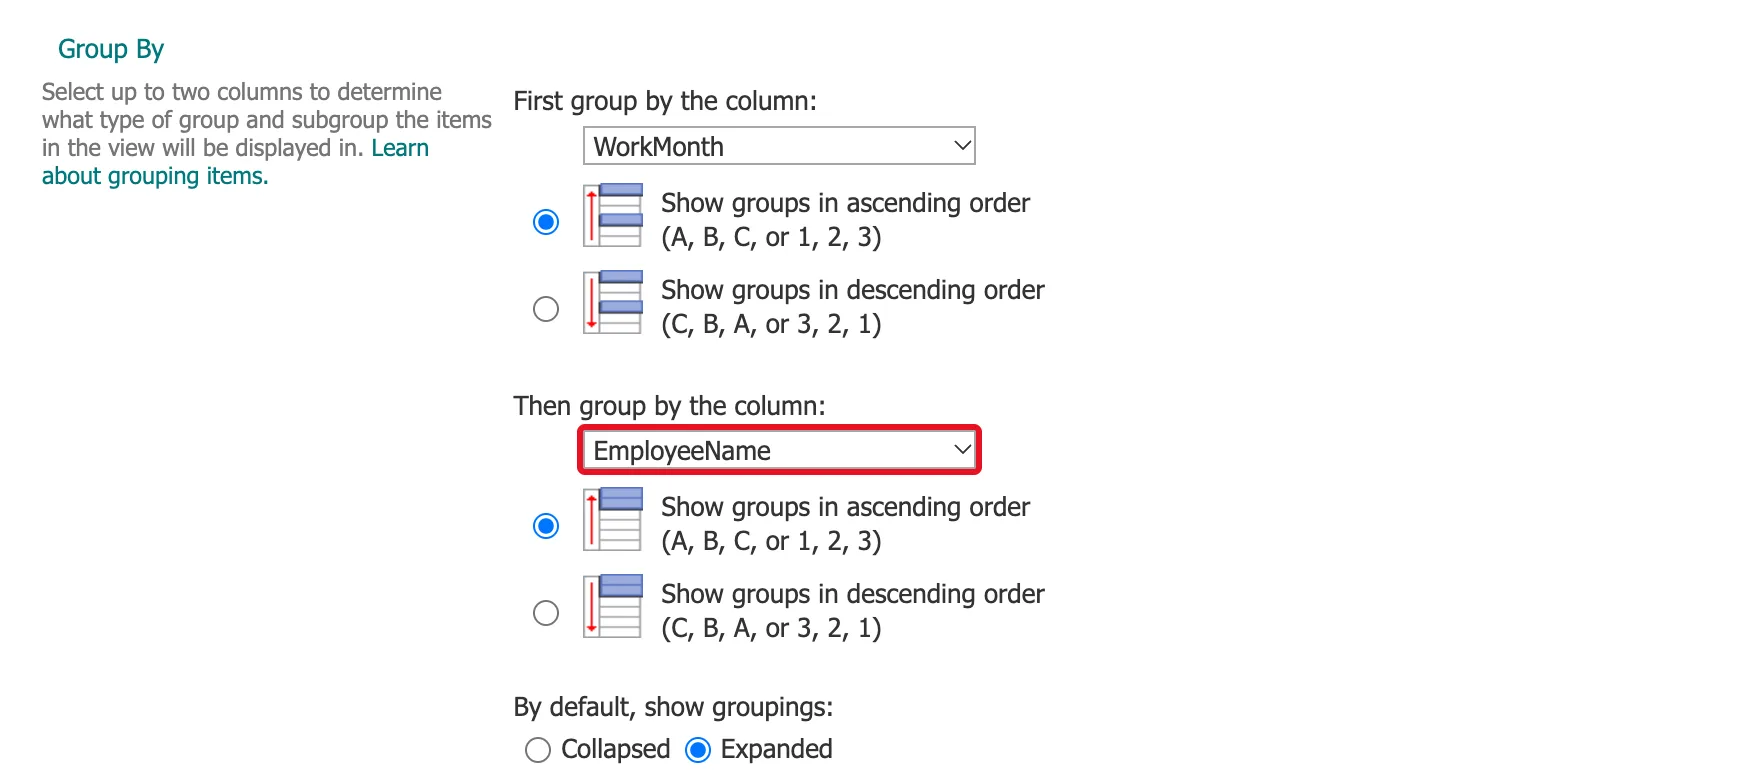
A column heading groups by one column. For two, open the view's menu, here By month, and select Edit current view. In the example, the classic Edit View page opened in a new browser tab. Under Group By:
- First group by the column already showed WorkMonth, from Step 1.
- Then group by the column: choose EmployeeName.
- By default, show groupings was set to Expanded, so the items show under their headings.
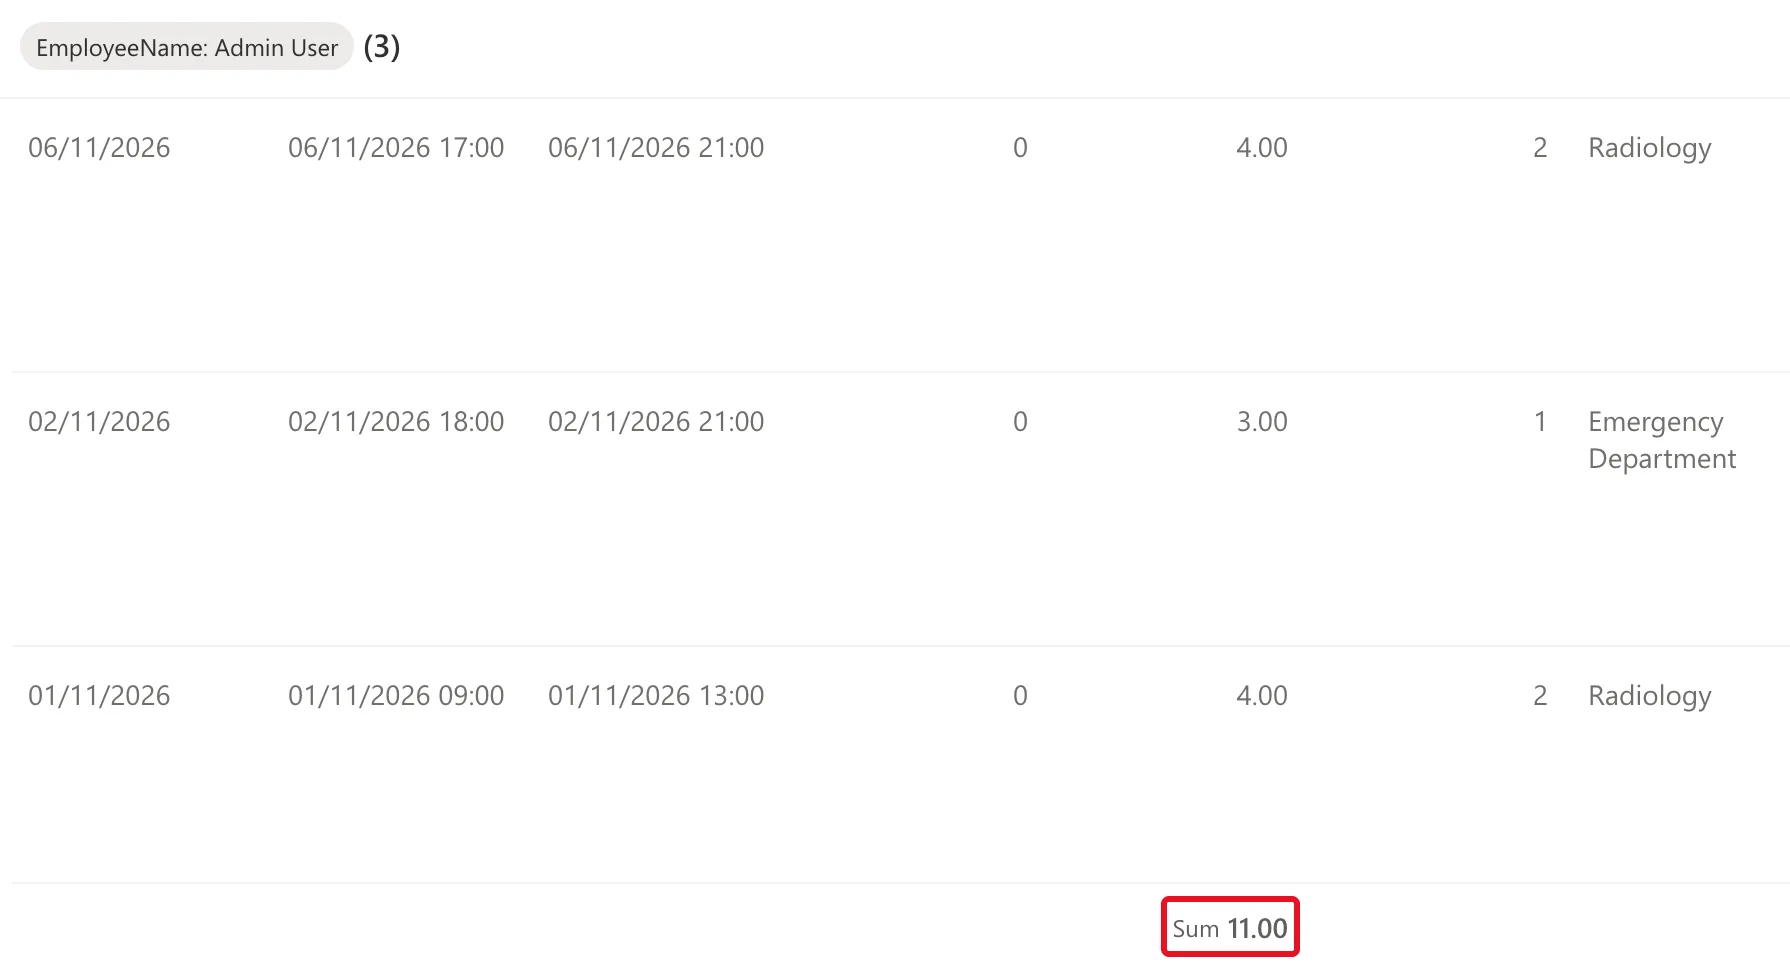
Select OK at the bottom of the page. The view now groups each month by person. The maker's group in November, with its total:
Common Mistakes
| Mistake | What happens | Do this instead |
|---|---|---|
| Grouping All Items and choosing Save view | Everyone's default view is grouped | Save view as a new view |
| Leaving Make this a public view unticked | Only you see the view | Tick it for a view others need |
| Looking for a second grouping in the column menu | The menu groups by one column | Edit current view → Then group by the column |
Troubleshooting
| Symptom | Likely cause | Fix |
|---|---|---|
| A column can't be grouped | Its type is one Microsoft lists as not groupable | Group by another column, such as a text copy |
| The grouping is gone after leaving the list | The view wasn't saved | Save view as |
| Edit in grid view isn't available | Microsoft's view article: you can't use Edit in grid view for views where items are grouped | Switch to an ungrouped view to edit in the grid |
FAQ
Can people only see their own items in a grouped view?
The view shows what each person can already see. In the example, staff can only see their own entries (Build an Overtime Timesheet App in Power Apps — Part 3), so their By month view groups only their own.
Can groups start collapsed?
Yes: By default, show groupings has Collapsed and Expanded, on the Edit View page.
Conclusion
Group by in a column's menu groups a view by one column; Save view as keeps it as a new view; Edit current view adds a second level. The list's data stays the same: only its display changes.
Additional Resources
- Use grouping to modify a list or library view: the steps and the column types.
- Create, change, or delete a view of a list or library: views and their settings.
