How to Filter Rows by Two Conditions in Power Query

Power Query's Filter rows keeps only the rows that meet your conditions. In its Advanced mode, those conditions can be on different columns, such as Status is Approved and Amount is more than 10. Here's how.
Microsoft's Filter by values in a column describes the Filter rows dialog's two modes: Basic, for conditions on one column, and Advanced, for conditions on any column. The example filters a query of an Expenses list (How to Get Data from a SharePoint List in Power BI in the Browser), with eight expense claims, down to the approved claims over 10.
Step 1: Select Filter Rows
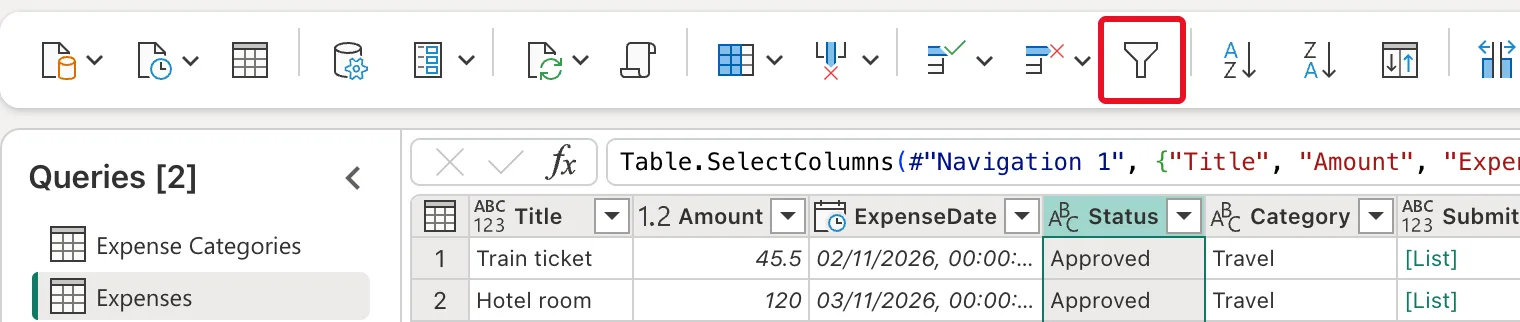
Select the column of the first condition, here Status, then Filter rows on the Home tab:
Step 2: Write the Two Conditions
The Filter rows dialog opens. Select Advanced. It shows two conditions joined with and, the first already on the column you selected. Fill them in under Keep rows where:
| Column name | Operator | Value | |
|---|---|---|---|
| Status | equals | Approved | |
| and | Amount | is greater than | 10 |
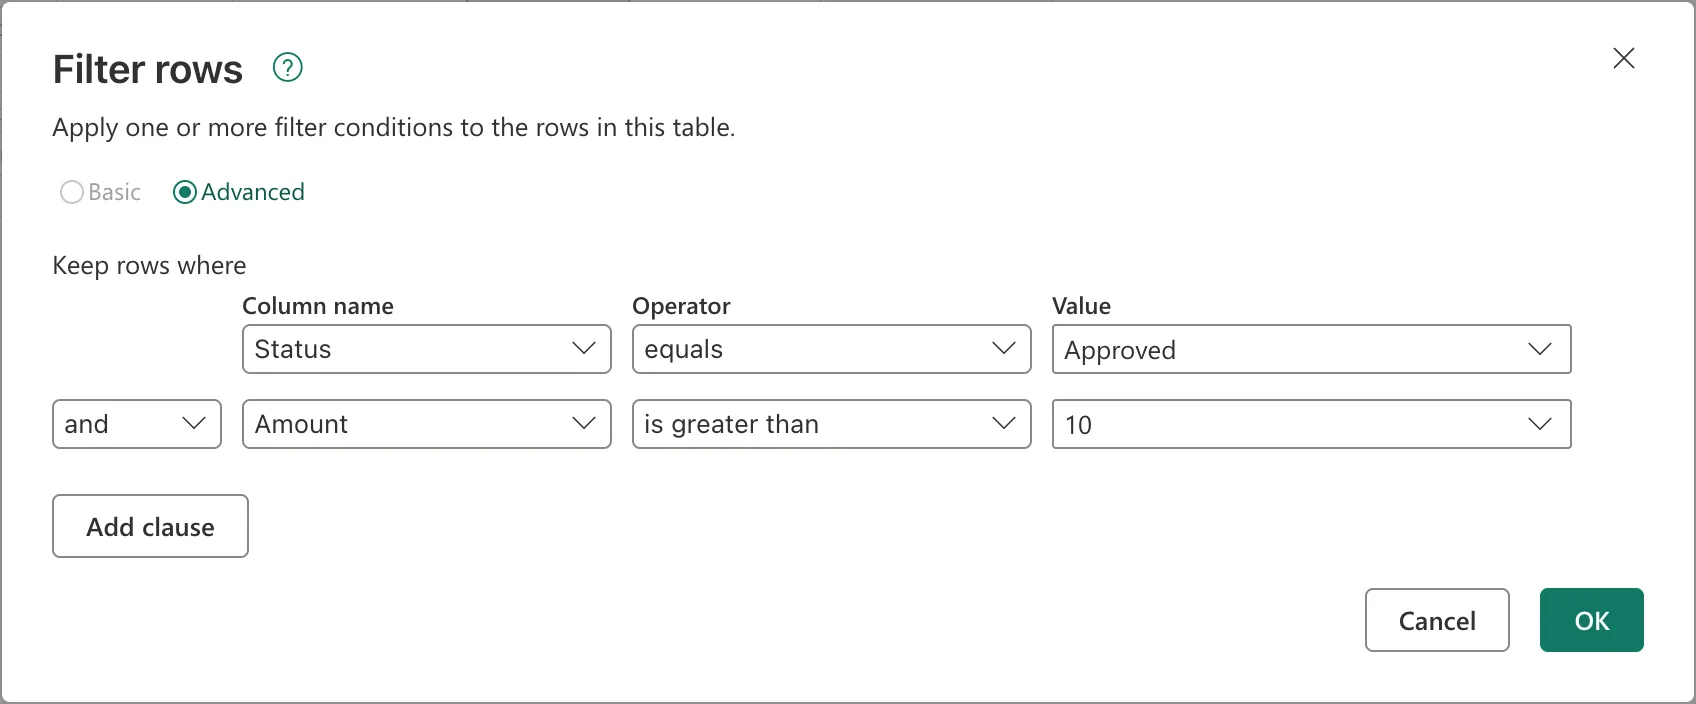
- and keeps a row only when both conditions are true. Change it to or to keep a row when either is.
- Add clause adds a third condition.
To leave a Value box, press Tab, not Esc: in the example, Esc closed the whole dialog without applying it.
Select OK.
Step 3: Check the Result
Five of the eight rows are left: the claims that are approved and more than 10. Applied steps gains Filtered rows, and the formula bar shows:
Table.SelectRows(#"Choose columns", each [Status] = "Approved" and [Amount] > 10)
#"Choose columns"is the step before.each ...is the test for every row:[Status] = "Approved" and [Amount] > 10. Rows where it's true are kept.
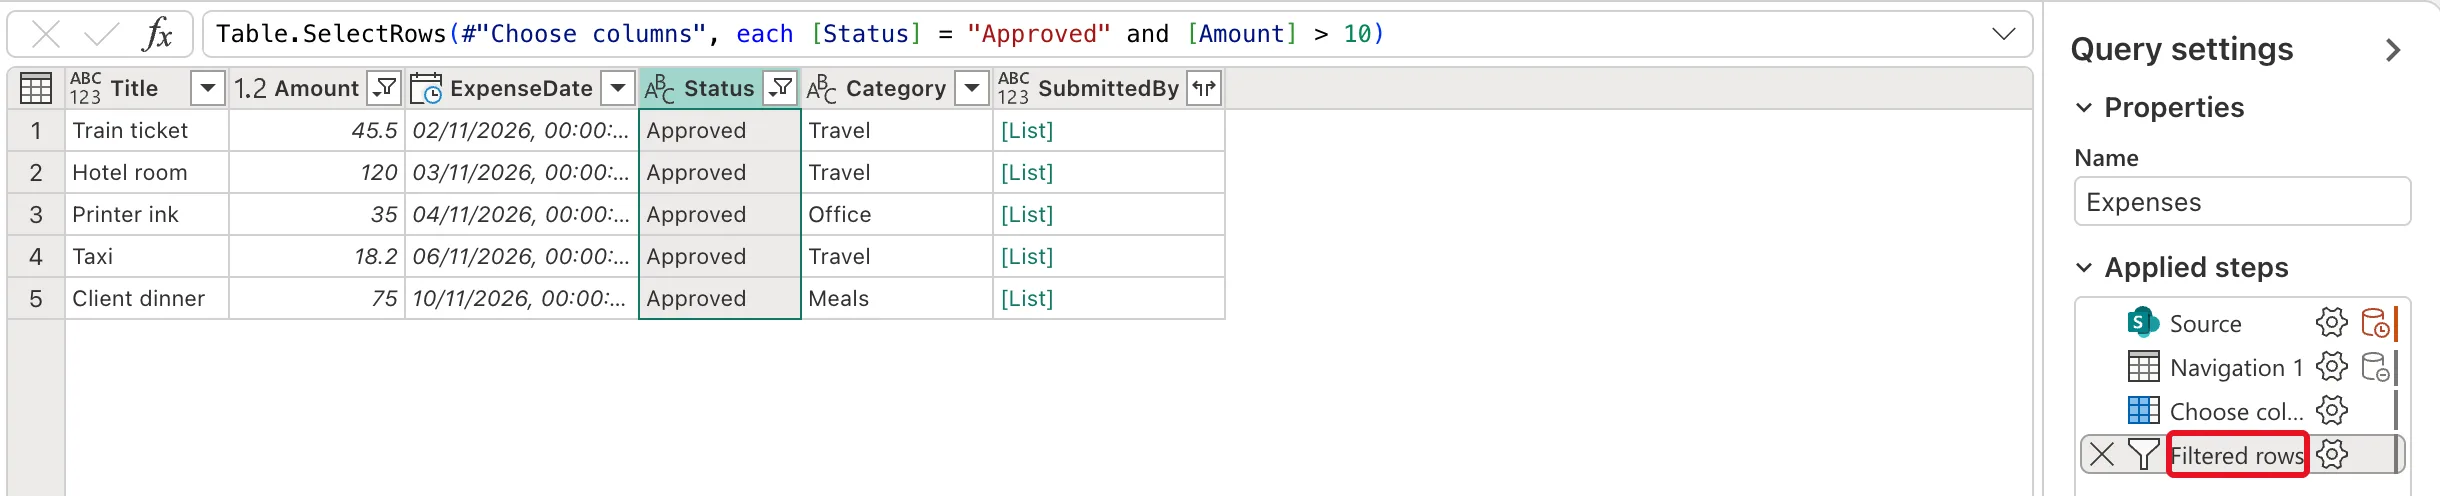
The rejected team lunch, the submitted parking claim and the 8.50 notebooks are gone.
Common Mistakes
| Mistake | What happens | Do this instead |
|---|---|---|
| Two separate filters on the same column with or in mind | Two steps always mean and | One Filter rows step with or |
| Typing the value in a different case | "approved" doesn't equal "Approved" | Pick the value from the drop-down |
| Pressing Esc to leave a box | The dialog closes without filtering | Tab |
Troubleshooting
| Symptom | Likely cause | Fix |
|---|---|---|
| No rows are left | A value doesn't match exactly | Check the value's spelling and case |
| A row you expected is missing | It fails the other condition | Check each condition on its own |
| Basic is greyed out | Basic handles conditions on one column | Stay in Advanced |
FAQ
Can I change the filter later?
Yes: select the gear icon next to Filtered rows in Applied steps to open the dialog again.
Is filtering in Power Query the same as a report filter?
No. A Power Query filter decides which rows reach the model at all; a report filter only hides rows on a visual or page.
Does the filter run in SharePoint?
Some steps can run at the data source; Microsoft's query folding article explains how to tell. Either way, only the filtered rows load into the model.
Conclusion
Select the first condition's column, Filter rows, Advanced, and fill in both conditions with and. Power Query writes one Table.SelectRows step; the example kept the five approved claims over 10.
