How to Create an AWS Account (Step-by-Step with Screenshots)

Creating an AWS account takes about 10 minutes. This is every screen you will see, in order, with exactly what to enter.
What You Need Before You Start
| Item | Detail |
|---|---|
| Email address | Must never have been used for an AWS account. Use a team alias like aws-root@yourcompany.com, not a personal inbox. |
| Phone number | You will receive an OTP on it at the last step. |
| Credit/debit card or UPI | AWS charges a small refundable amount (₹2 in India, about USD 1 elsewhere) to verify it. |
| Identity document | AWS runs a KYC check. The document you can use depends on the Ownership type you pick. In India the dropdown includes Aadhaar card and PAN card; other countries offer their local equivalents. Have a clear scan ready as .pdf, .jpg, .jpeg or .png, between 100 B and 5 MB. |
The email you enter becomes the root user of the account and can never be reused for another AWS account. Pick it carefully.
Step 1: Open the Sign-Up Page
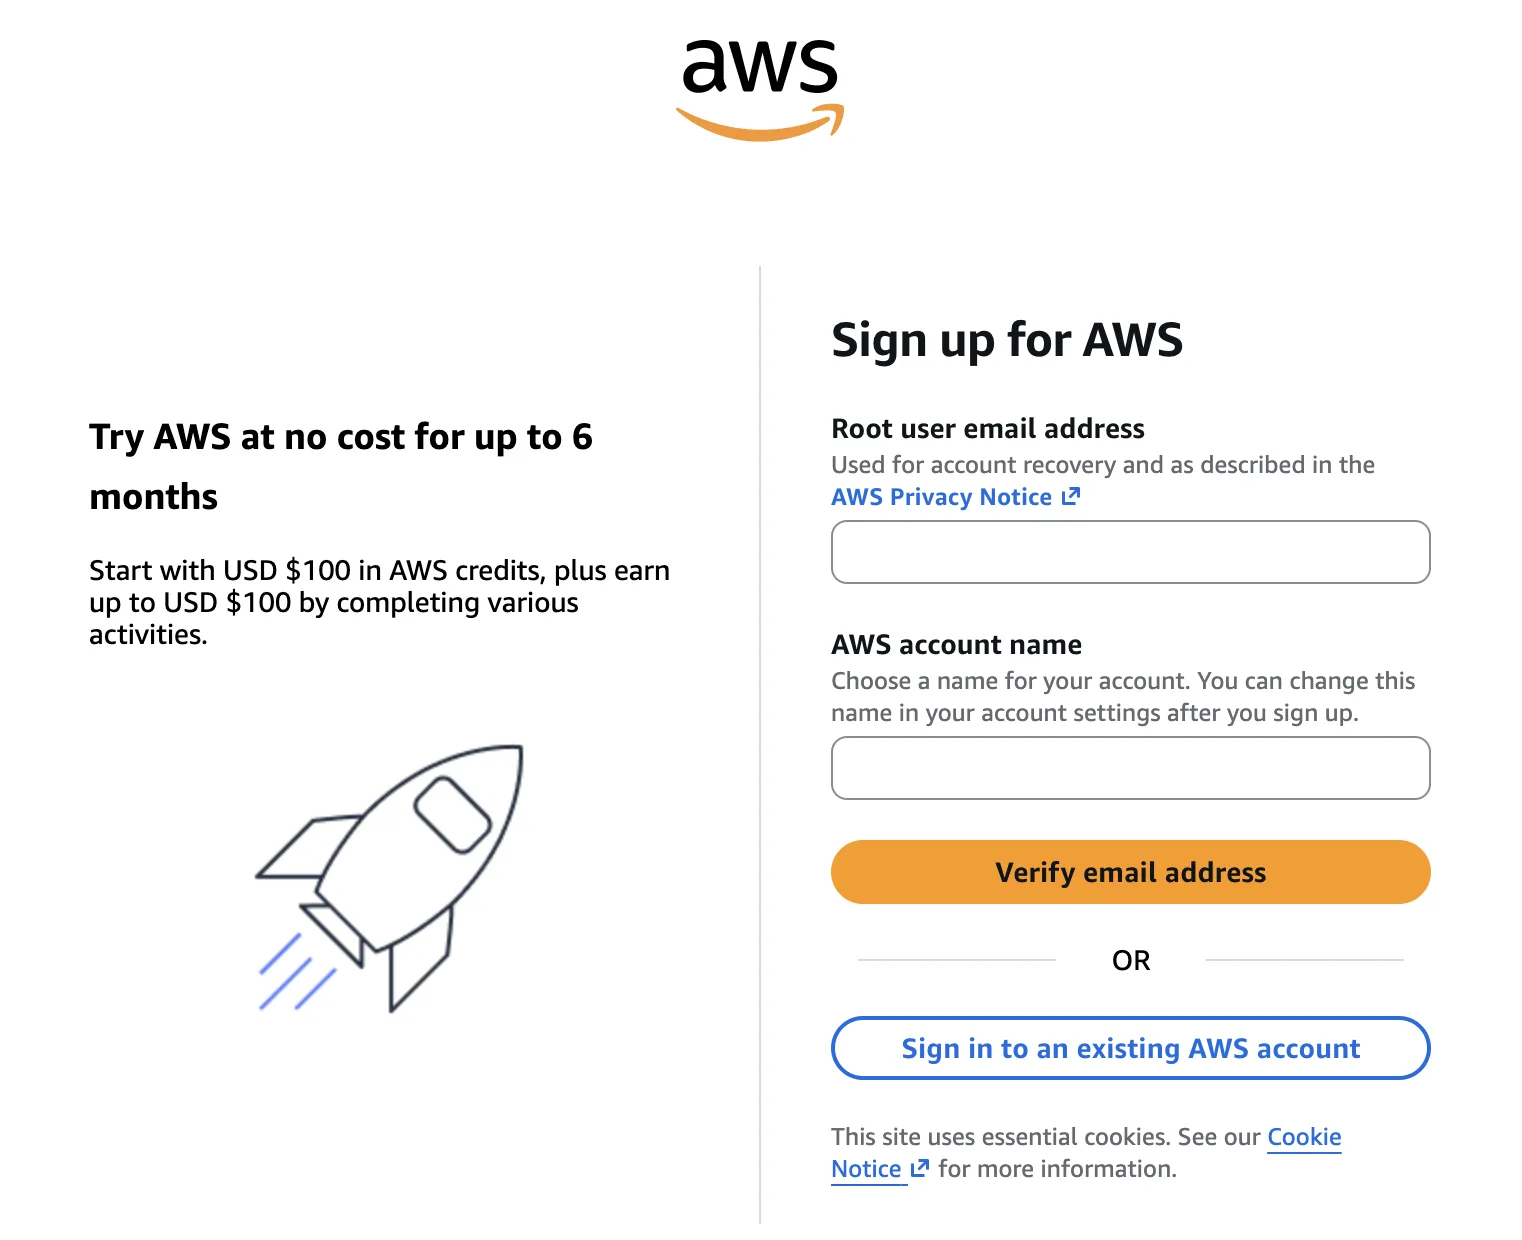
- Go to https://portal.aws.amazon.com/billing/signup.
- Root user email address: enter your email, for example
aws-root@yourcompany.com. - AWS account name: enter a name, for example
YourCompany. This is just a label and you can change it later. - Click Verify email address.
Step 2: Verify Your Email
- Open your inbox and find the email from AWS with a verification code.
- Enter the code in Verification code.
- Click Verify.
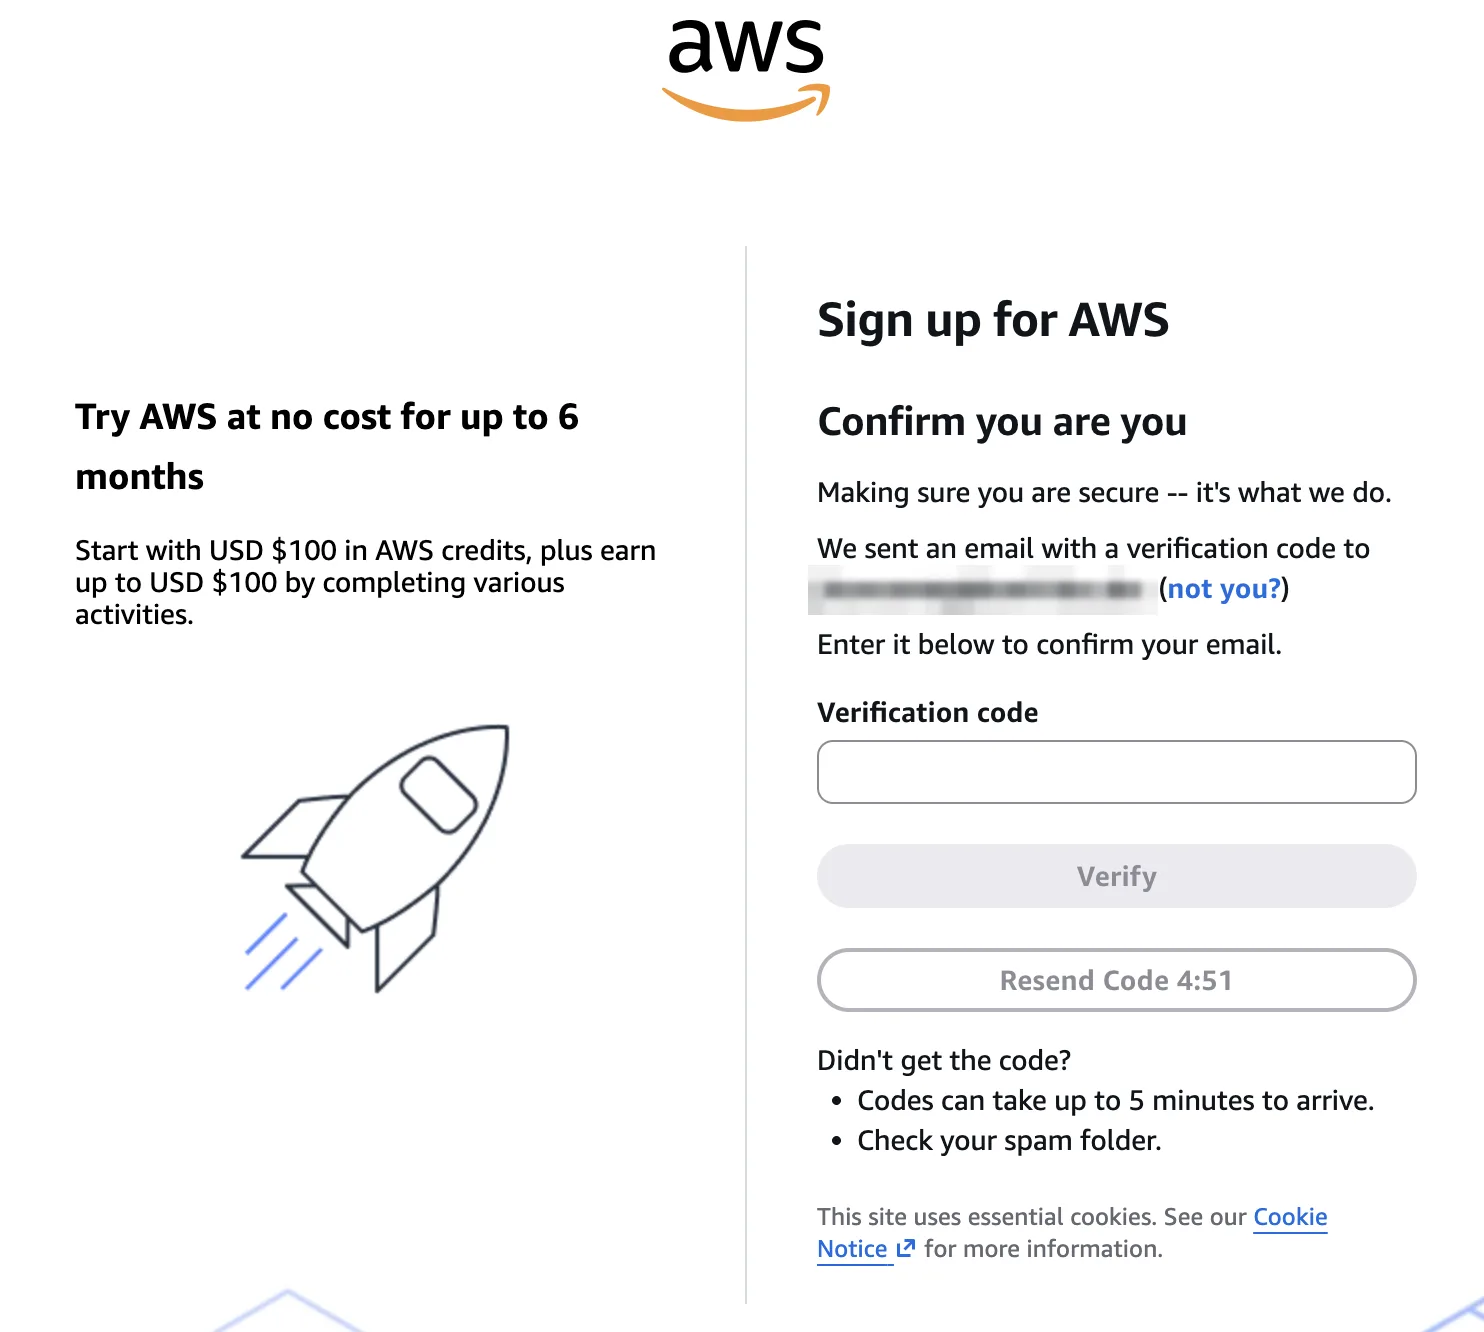
The code expires in 10 minutes. If it does not arrive, check spam and then click Resend code.
Step 3: Create Your Root Password
- Root user password: enter a strong password.
- Confirm root user password: enter it again.
- Click Continue (step 1 of 5).
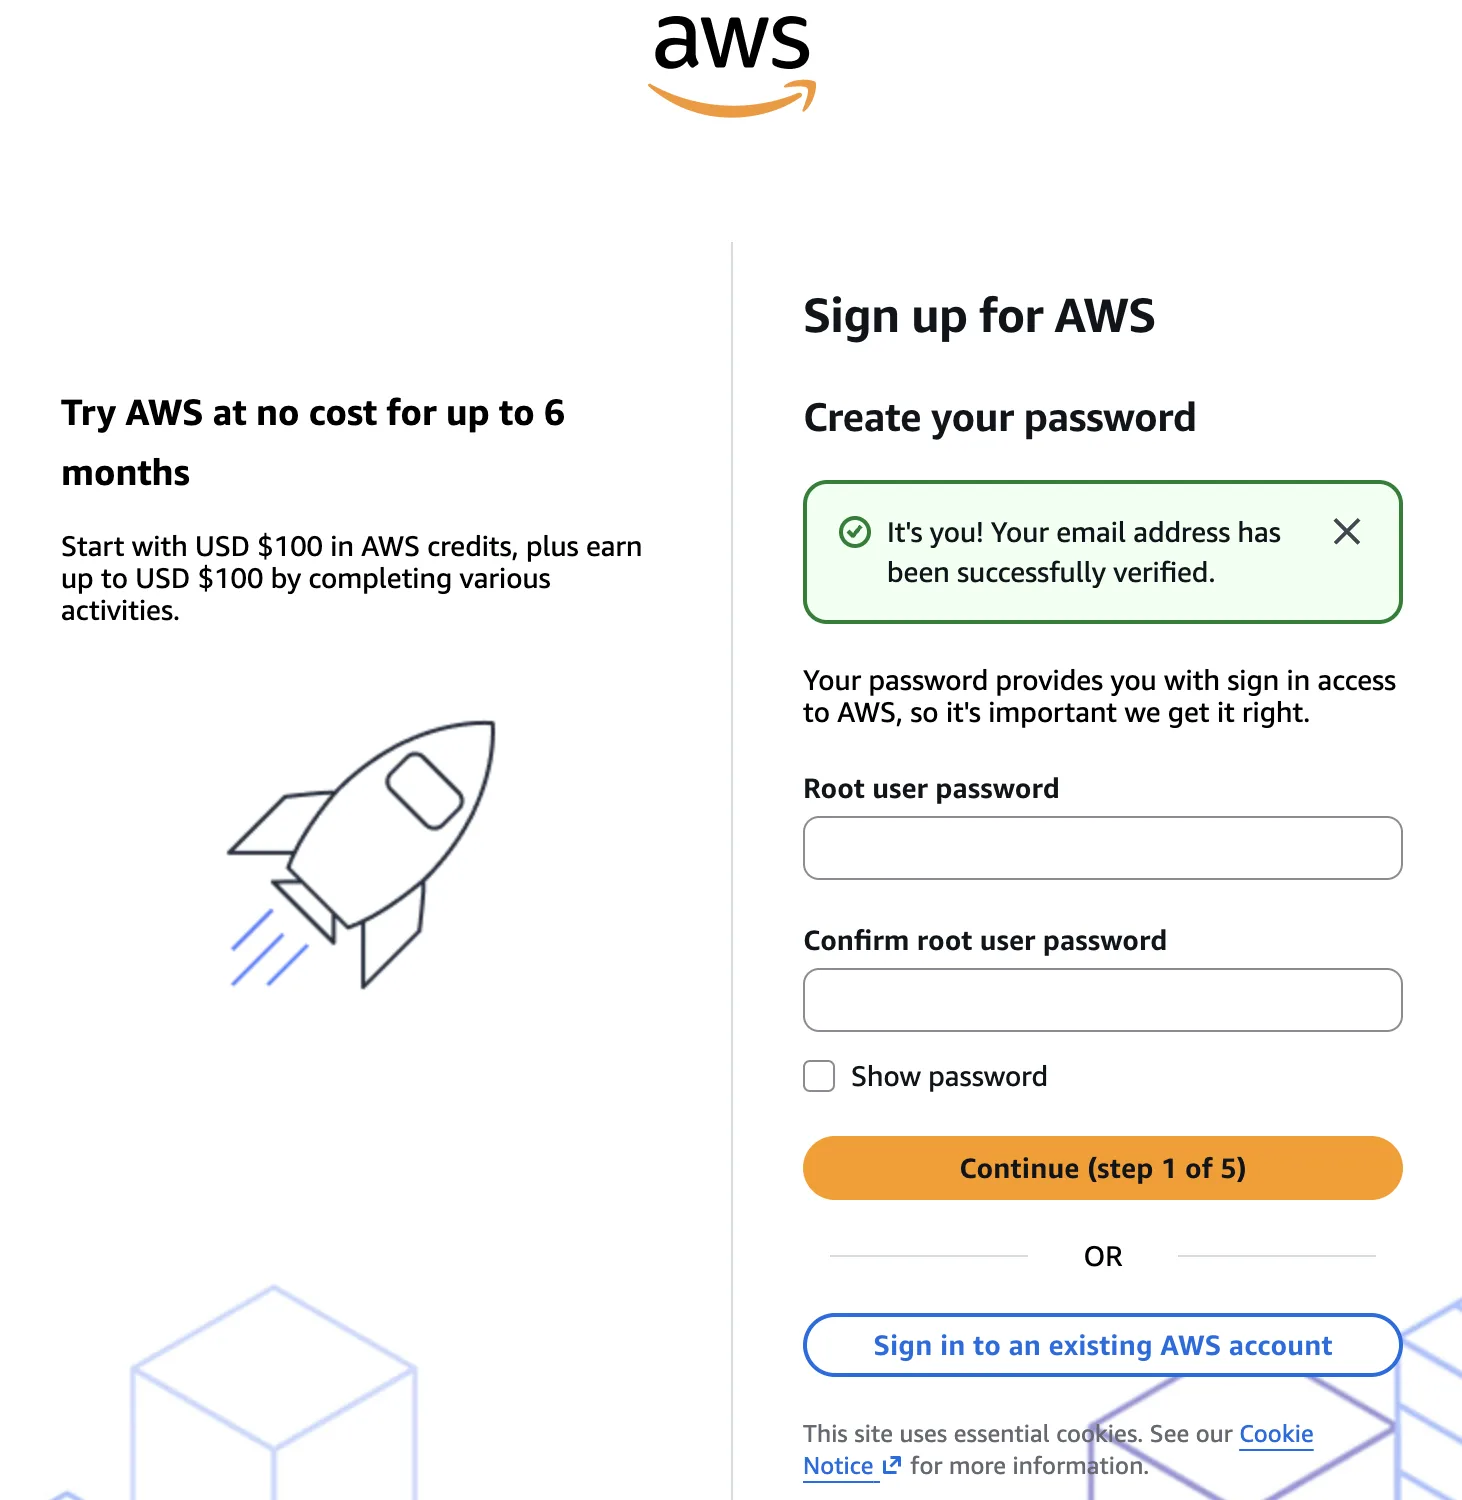
The password must have:
- At least 8 characters
- An uppercase letter
- A lowercase letter
- A number
- A non-alphanumeric character such as
! @ # $ %
Store this in a password manager. The root user can delete the entire account, and there is no admin above it to reset it for you.
Step 4: Choose Your Account Plan
AWS now asks you to pick a plan before you continue.
- Free plan — up to $200 in AWS credits and up to 6 months to explore. You get $100 on sign-up and can earn up to $100 more by completing activities. No charges while you are on this plan.
- Paid plan — pay-as-you-go with full access to every AWS service and no service restrictions.
- Click Choose free plan (recommended for a new account) or Choose paid plan.
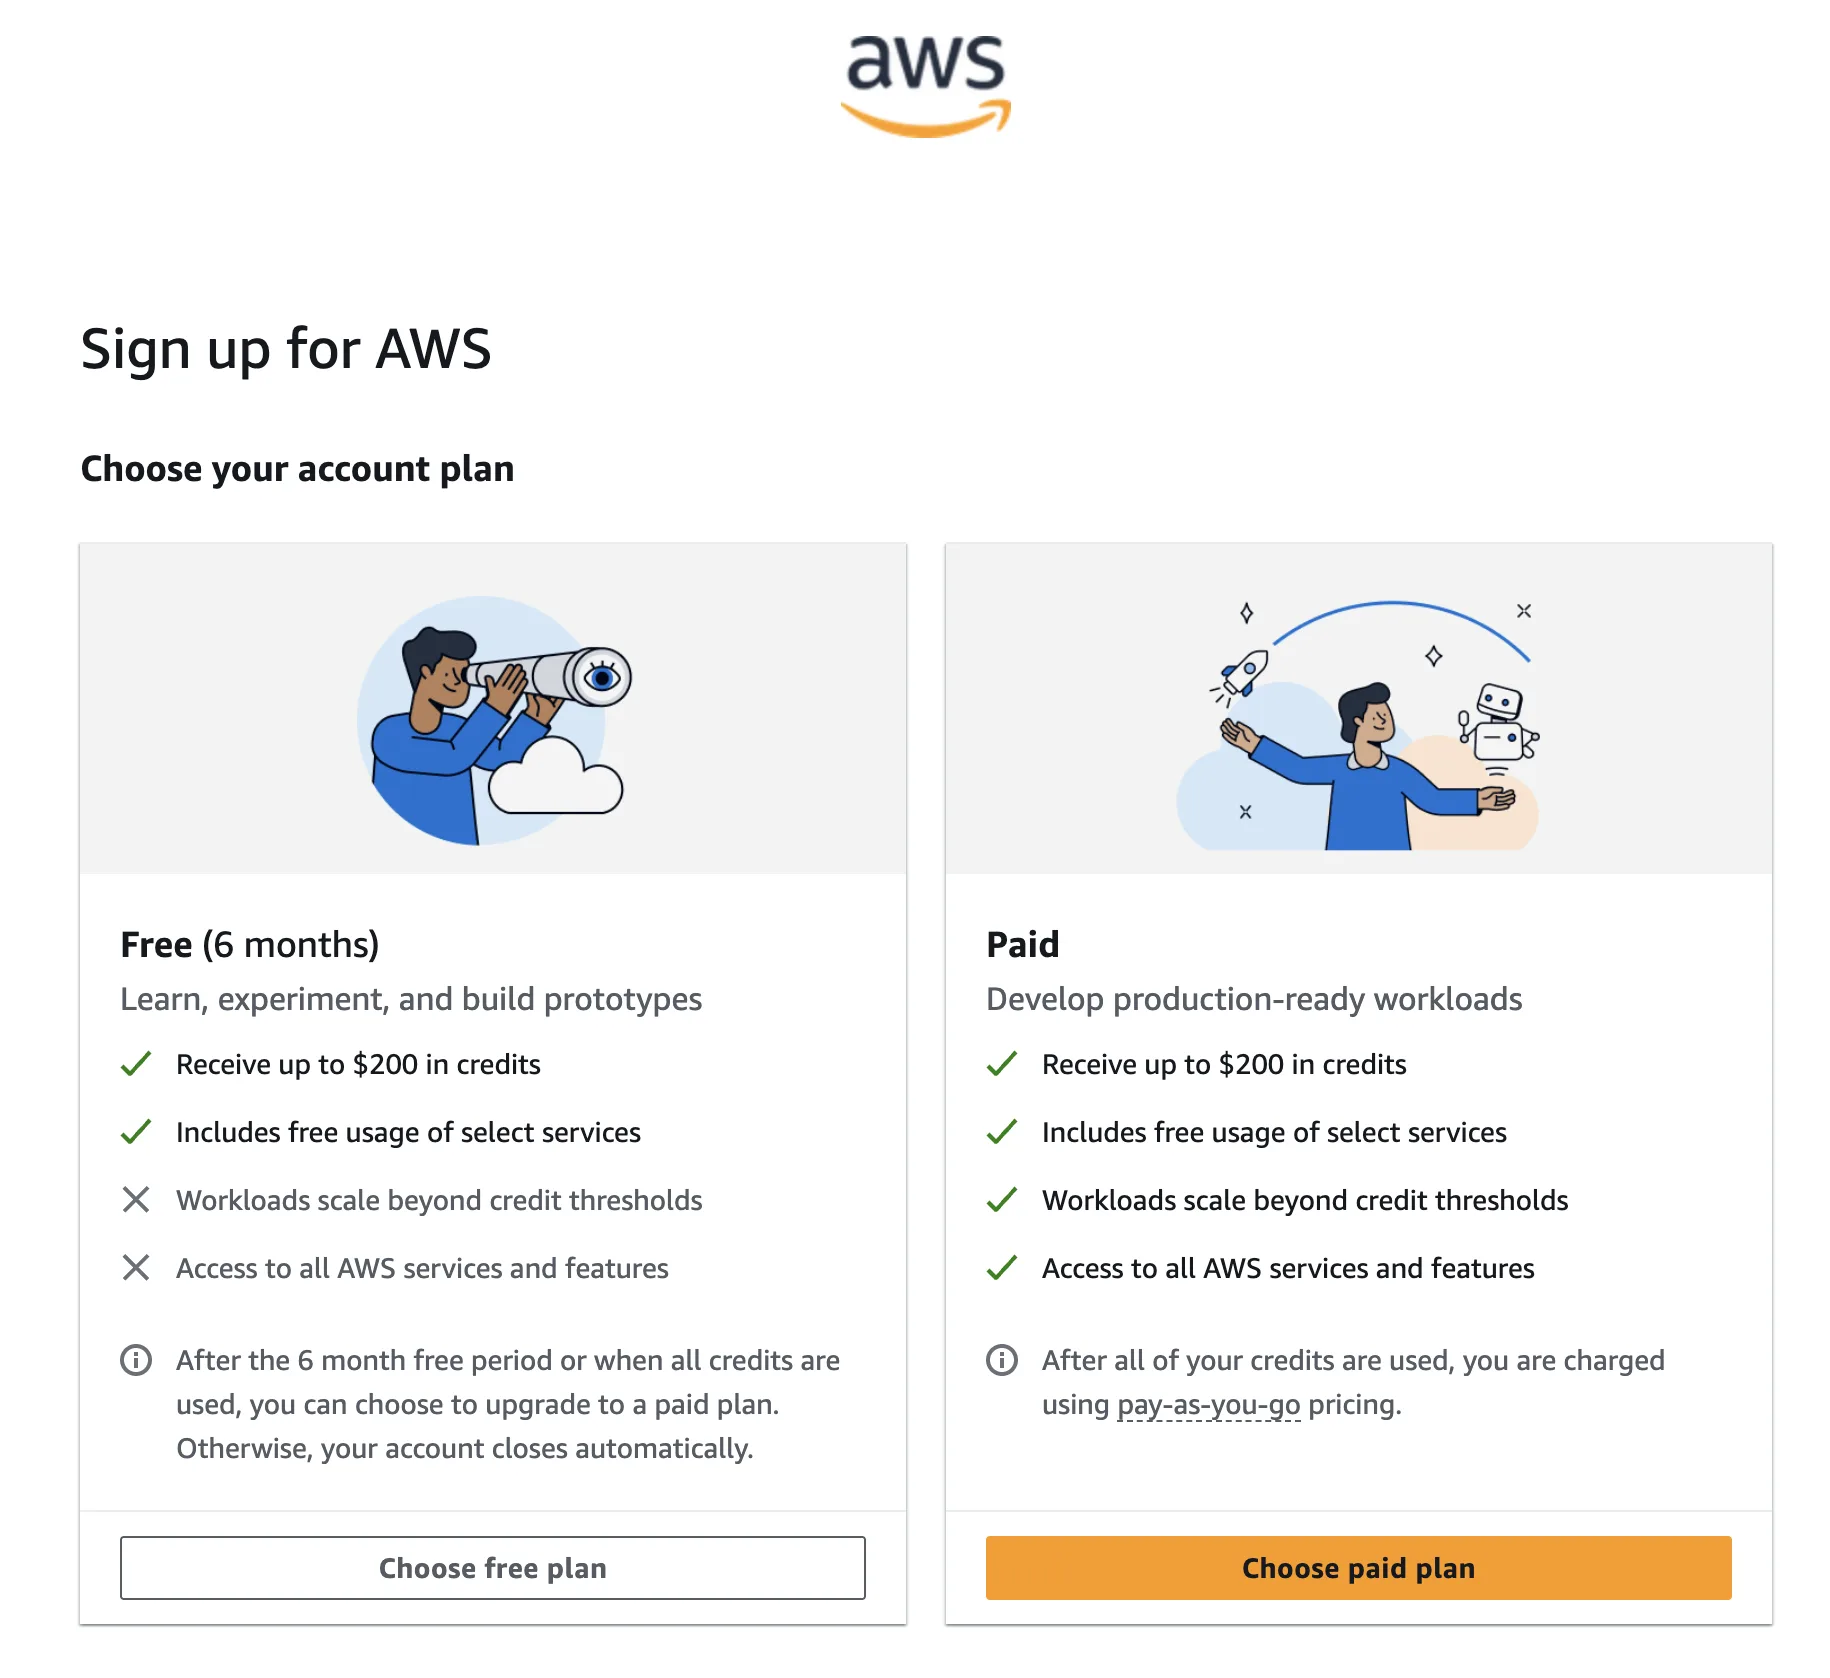
Start with the free plan. You can upgrade to paid from the console at any time, and your resources carry over.
Step 5: Enter Contact Information
- How do you plan to use AWS? — select Business if this is for a company, Personal otherwise.
- Full Name — your name.
- Organization name — your company name.
- Phone number — pick the country code and enter your number.
- Country or Region — select yours.
- Address — house/flat, street, area. Use the second line if needed.
- City, State, Province or Region, Postal Code — fill each in.
- Tick I have read and agree to the terms of the AWS Customer Agreement.
- Click Agree and Continue (step 2 of 5).
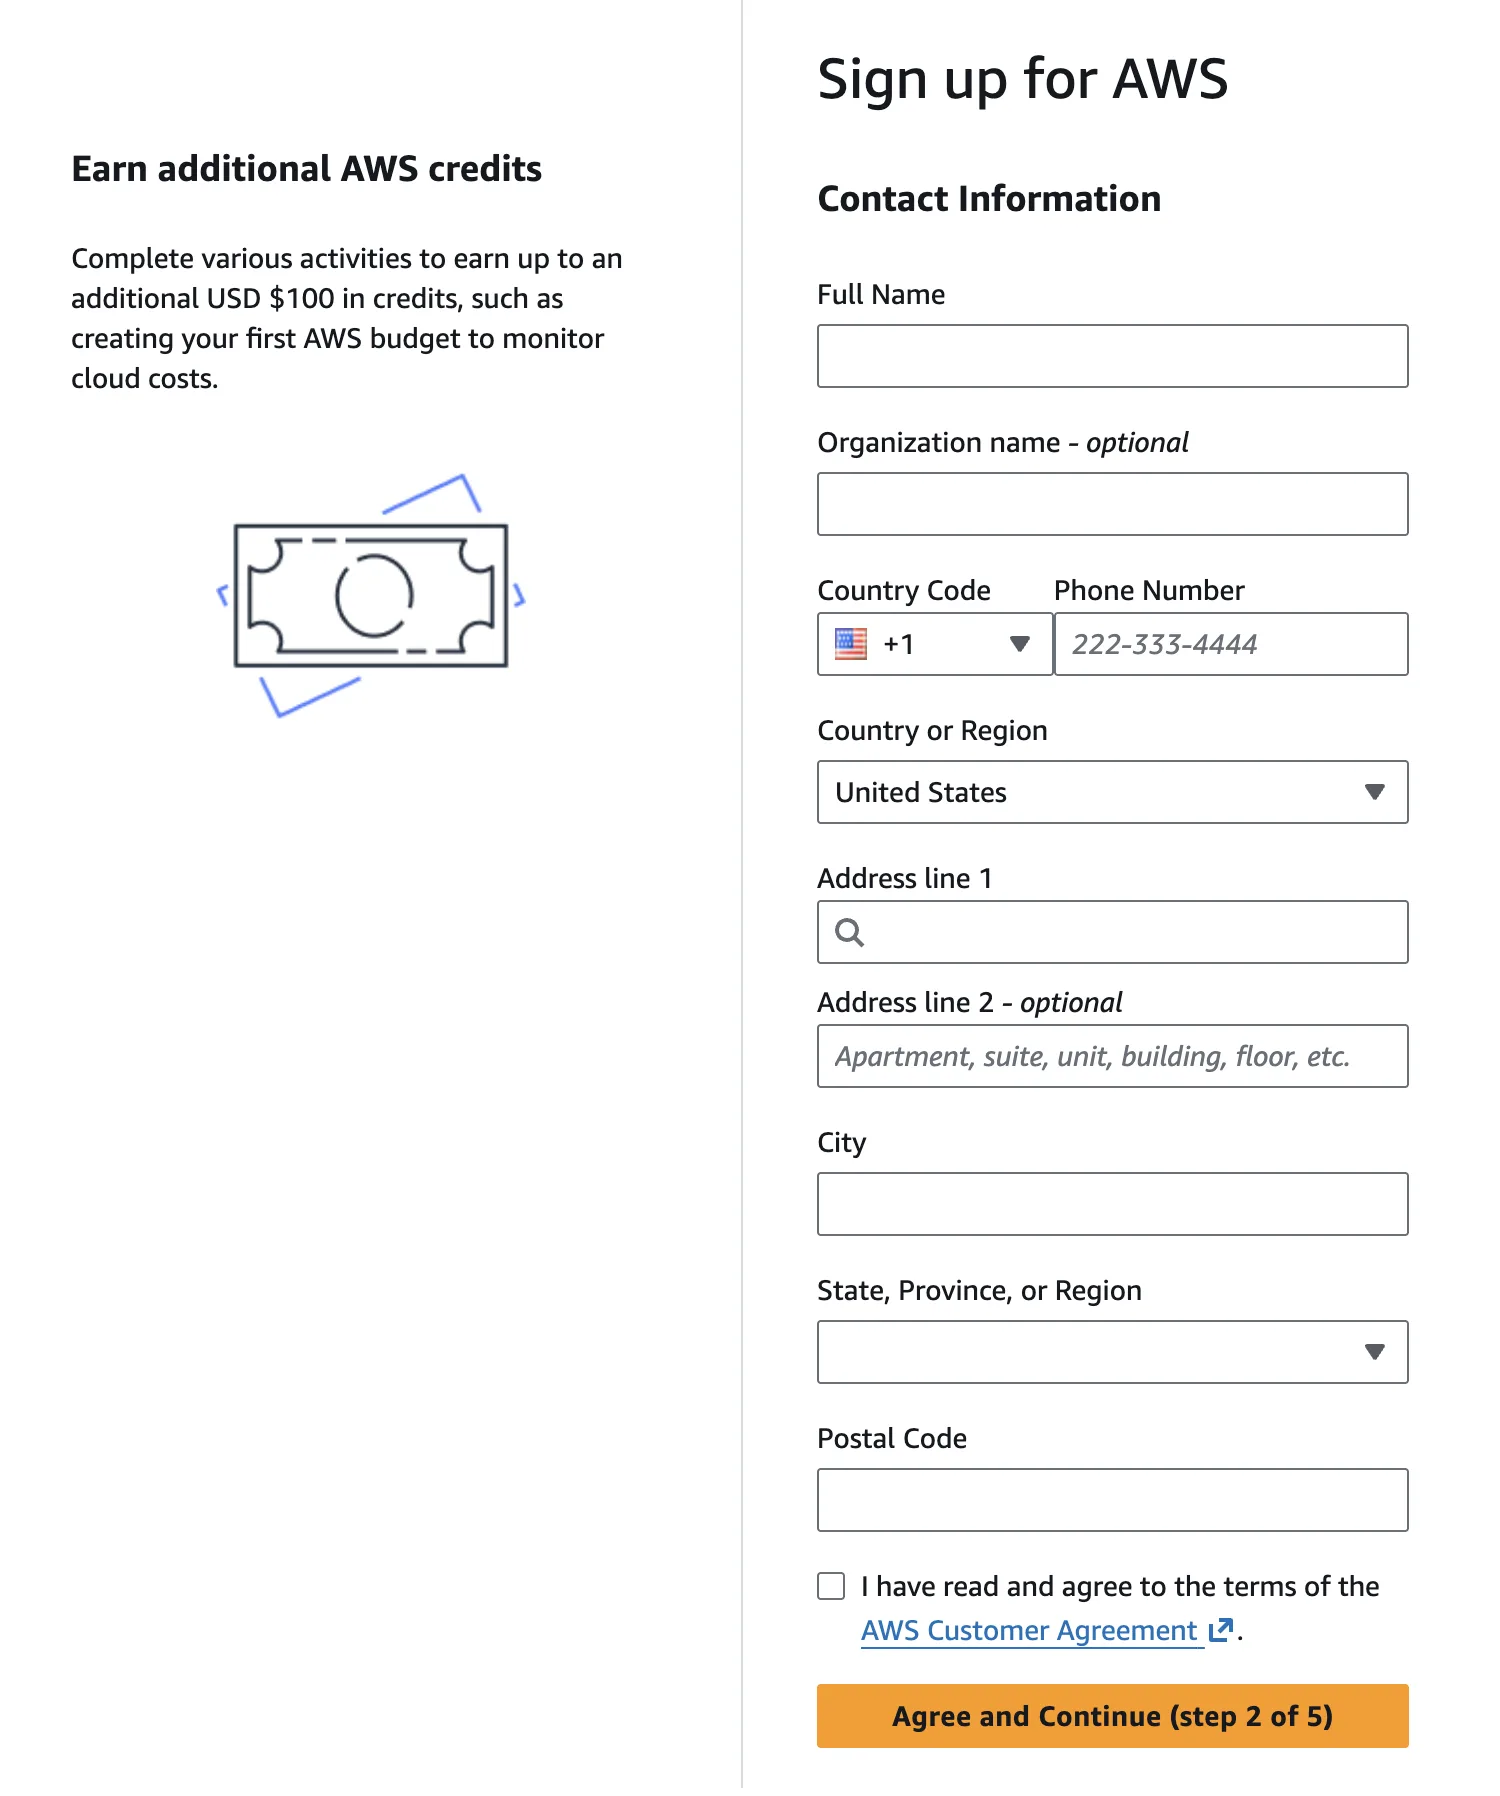
Choose Business even if you are a solo founder. It keeps GST/VAT registration, invoicing and AWS Support plans available to you later.
Step 6: Add Billing Information
- Billing country — confirm it is correct.
- Payment method type — choose UPI AutoPay or Credit or debit card.
- Enter the payment details for the method you picked.
- Billing address — select Use my contact address to reuse what you entered in Step 5, or Use a new address.
- Click Verify and Continue (step 3 of 5).
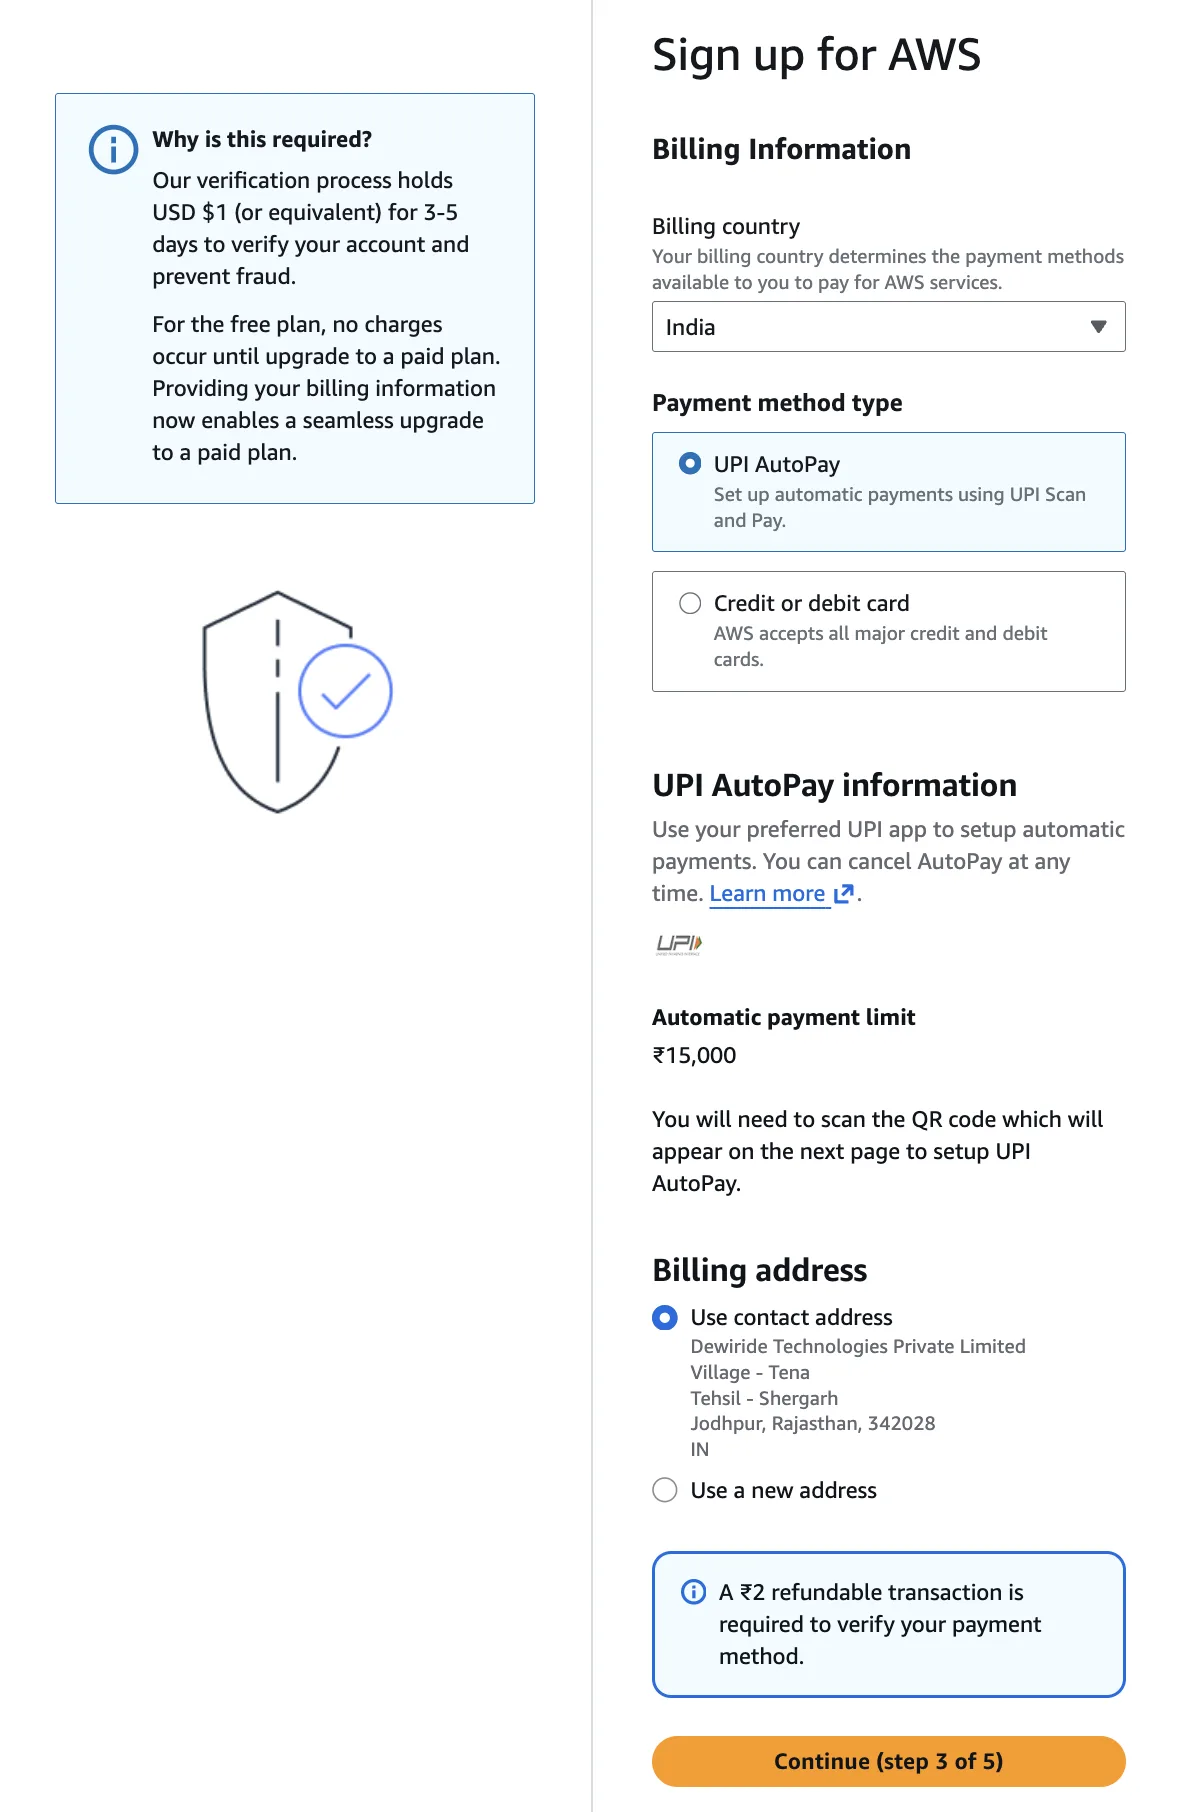
AWS charges ₹2 (or about USD 1) to confirm the payment method works. It is refunded within 3–5 business days.
Step 7: Confirm Your Identity
AWS runs a KYC check here. It is required in India and several other countries.
- Primary purpose of account registration — pick the option that best describes you, for example Business operations. If the account is tied to a business, choose the one that applies to your business.
- Ownership type — select Company or Individual. This choice decides which documents you are offered next.
- Key managerial person — the director, head of operations, or person in charge. Max 100 characters, and
& < > " %are not accepted. - India document type — open the dropdown and pick the document you actually have. Aadhaar card and PAN card are both offered, and the exact list depends on the ownership type and country you selected. This guide uses PAN card.
- Date of incorporation — the incorporation date printed on the PAN, in
YYYY/MM/DDformat, for example2022/06/28. - Name — select the name you want verified. It must match the name on the document.
- Permanent Account Number (PAN) — 10 alphanumeric characters, no spaces or tabs, for example
AAAAA1111B. - Upload front of Permanent Account Number (PAN) card — click Choose file. Accepted formats are
.pdf,.jpg,.jpegand.png, between 100 B and 5 MB. - Tick the consent checkbox. Verification will not start without it.
- Click Continue (step 4 of 5).
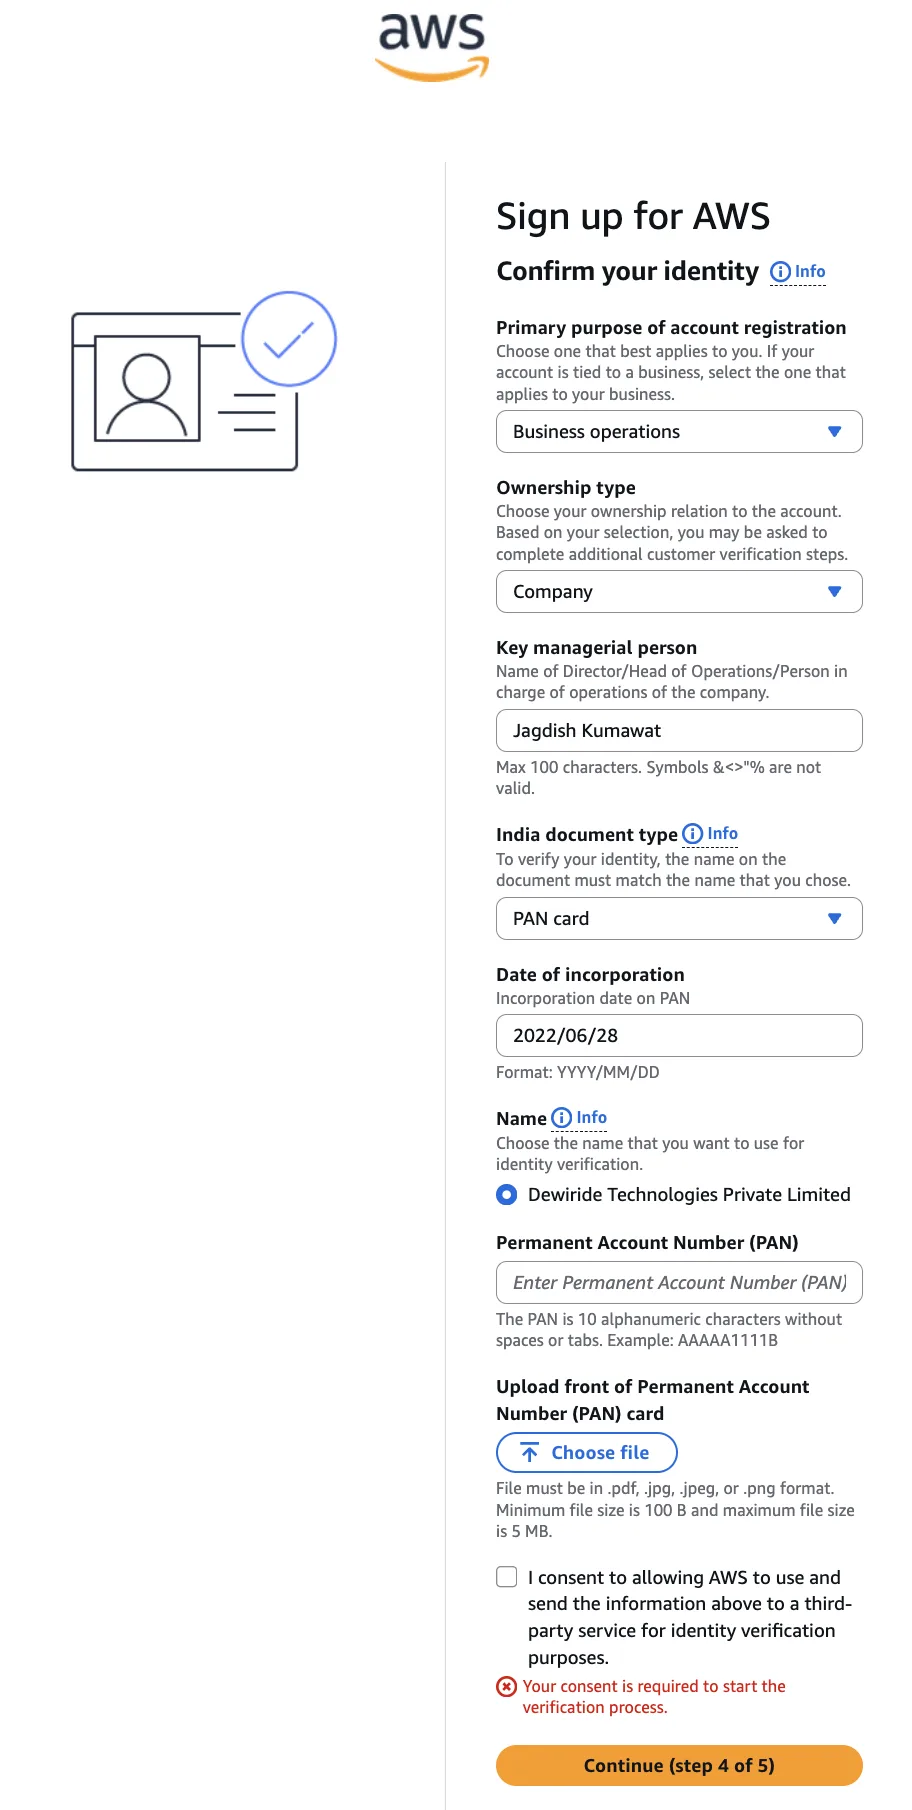
Points 5–8 are the fields for the PAN card option. Choose a different document type and the form swaps them for that document's own fields.
The name on the uploaded document must match the name you selected. A mismatch puts the account into manual review and delays activation.
Step 8: Verify Your Mobile Number
- AWS sends an OTP to the phone number you entered in Step 5.
- Enter the OTP.
- Click Continue (step 5 of 5).
If the OTP does not arrive, wait for the timer and request a new one. Check that the country code is correct.
Step 9: Wait for the Account to Be Created
You will see Setting up your AWS account. This takes a few minutes.
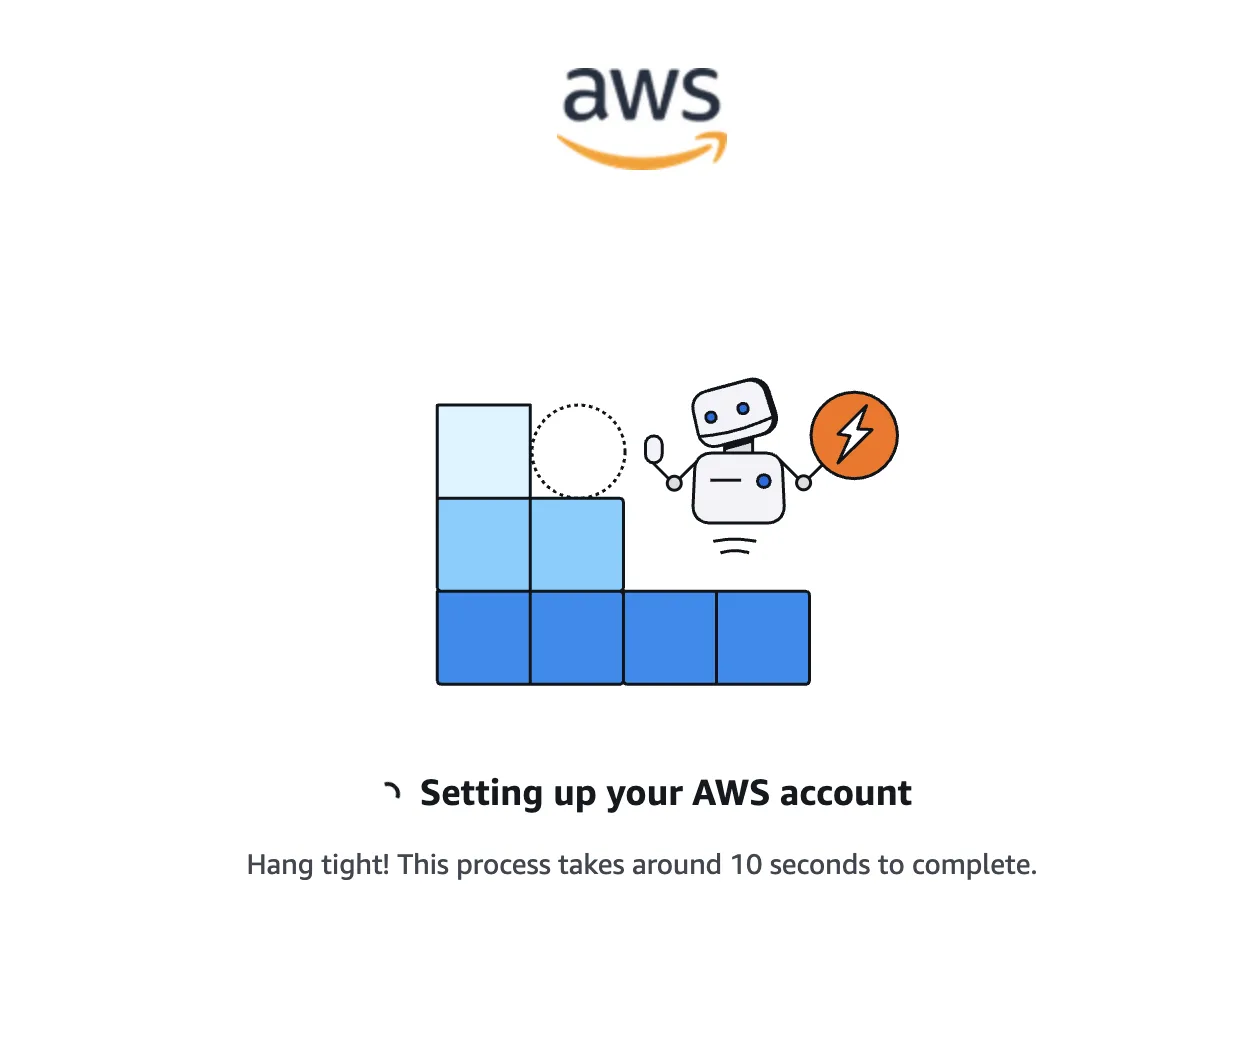
Do not refresh or close the page while this runs.
Step 10: Sign In to the Console
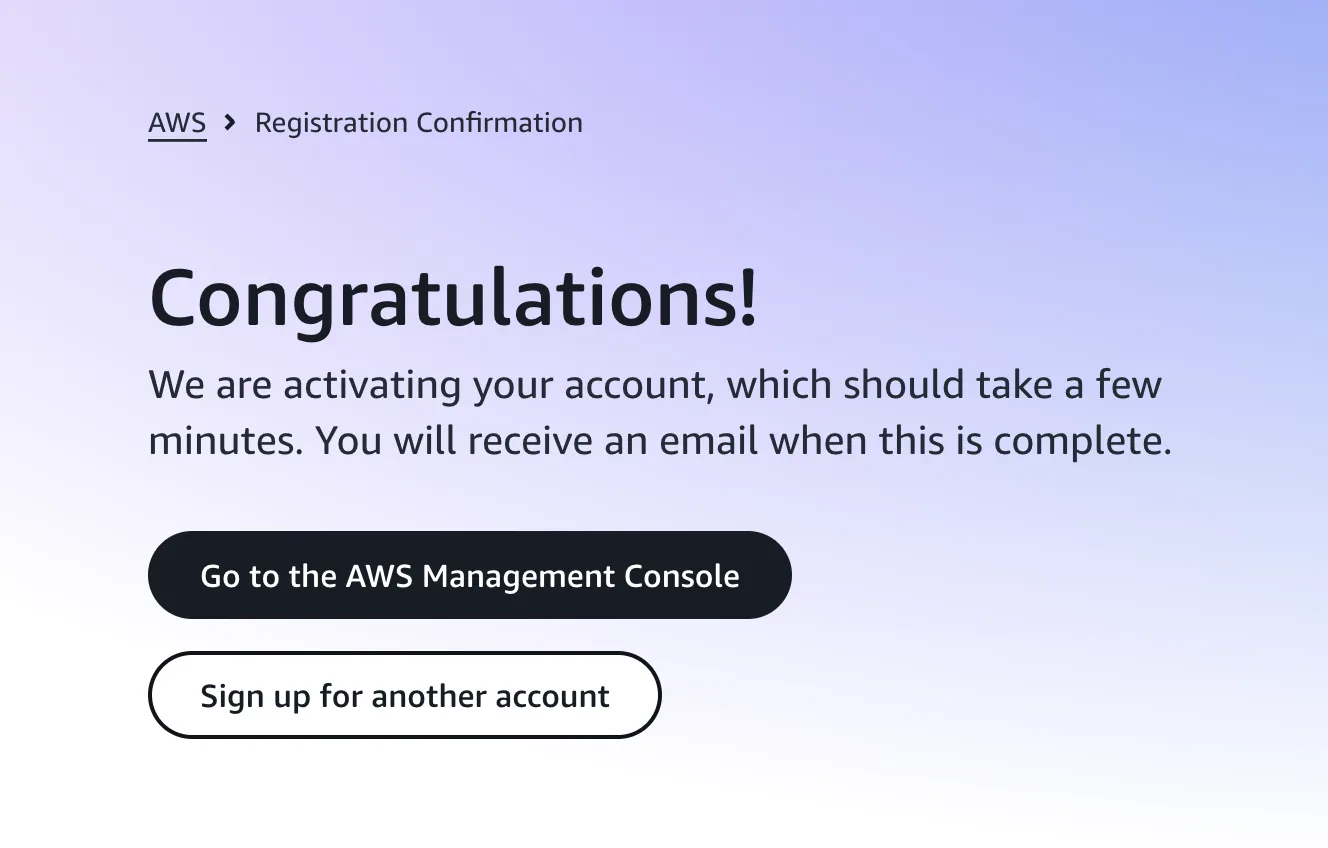
When you see Congratulations!, your account is ready.
- Click Go to the AWS Management Console.
- Sign in as Root user with the email and password from Steps 1 and 3.
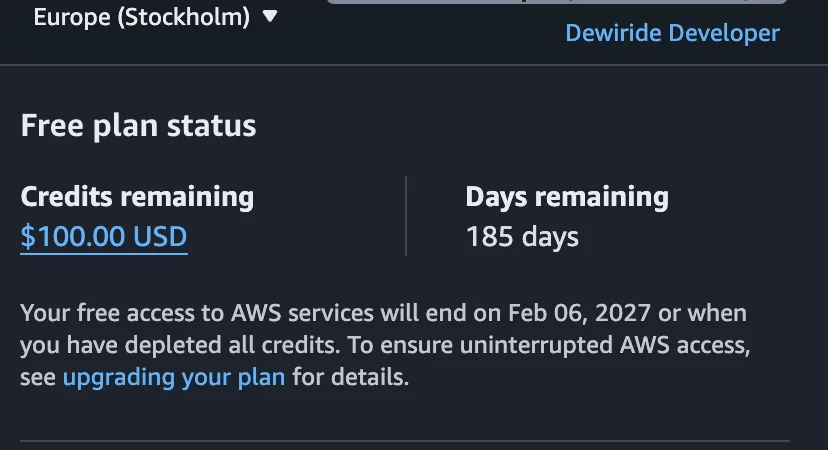
On the console home you will see your Free plan status — credits remaining and days remaining.
Activation is usually instant but can take up to 24 hours. Until then some services show "Your account is being activated".
Do These Three Things Right Now
1. Turn on MFA for the root user
- Click your account name (top-right) → Security credentials.
- Under Multi-factor authentication (MFA), click Assign MFA device.
- Device name:
root-mfa. Choose Authenticator app or Passkey or security key. - Scan the QR code and enter two consecutive codes.
While you are there, confirm there are no root access keys. If any exist, delete them.
2. Set a budget
- Search for Billing and Cost Management.
- Go to Budgets → Create budget → Use a template (simplified) → Monthly cost budget.
- Set an amount and your email, then click Create budget.
Credits run out. A budget alert is what stops a surprise bill.
3. Stop using the root user
The root user is for account-level tasks only. Create proper per-person logins with AWS IAM Identity Center and never share the root credentials.
What to Do Next
Your account is live. Two follow-up guides are coming soon:
- How to Give Your Team Access to AWS with Consolidated Billing — turn this account into a management account, create separate accounts for your team, give everyone their own login through IAM Identity Center, and get one bill for everything.
- AWS Organizational Units (OU) Explained + How to Create One — how to group those accounts so one policy governs all of them.
Troubleshooting
| Problem | Cause | Fix |
|---|---|---|
| "An AWS account already exists with this email" | The email was used before | Use a different address, or recover the existing account from the sign-in page |
| Verification code never arrives | Spam filter, or a typo in the email | Check spam, then click Resend code. Allow-list no-reply@signup.aws |
| Card declined | International transactions disabled | Enable international/online transactions with your bank, or use UPI AutoPay |
| Identity verification failed | Name or document number does not match the uploaded document | Re-upload a clear image and re-enter the details exactly as printed |
| OTP not received | Wrong country code, or carrier delay | Confirm the country code, wait for the timer, request a new OTP |
| Stuck on "Setting up your AWS account" | Manual review triggered | Wait up to 24 hours, then check your email or open a case with AWS Support |
| Console says "Your account is being activated" | Activation still running | Wait; you can sign in but some services will not launch yet |
FAQ
Is the AWS account free? The account itself is free. On the free plan you get up to $200 in credits and up to 6 months. After that, you pay only for what you use.
Will I be charged during the free plan? No. While you are on the free plan you are not charged. AWS does place a small refundable verification charge (₹2 / about USD 1) during sign-up.
What happens when the credits or 6 months run out? Your account moves to pay-as-you-go, or you can upgrade to the paid plan earlier from the console. Set a budget before that happens.
Can I change the AWS account name later? Yes. It is only a label — change it in Account settings.
Can I change the root email later? Yes, from Account settings, but it requires root access and re-verification. Getting it right the first time is easier.
Do I need a company to open an account? No. Choose Personal and the Individual ownership type, then verify with a personal document such as an Aadhaar card or PAN card, or your country's equivalent.
How many AWS accounts can I create? As many as you want, but each needs a unique email address. Rather than signing up repeatedly, create an organization with AWS Organizations and add accounts from inside it — no extra sign-up, card or phone verification per account.
Conclusion
You now have an active AWS account with root MFA, a budget, and credits to explore with. Do not build in this account with the root user. Turn it into a management account, create member accounts for your workloads, and give your team scoped logins through IAM Identity Center.
