How to Create an Automated Cloud Flow in a Solution in Power Automate

An automated cloud flow runs by itself when something happens, such as an item being added to a SharePoint list. Create it inside a solution with New > Automation > Cloud flow > Automated, give it a name and a trigger, and add one action before you save it.
A flow that belongs with an app, and has to move to other environments with it, goes inside the app's solution. Microsoft calls these solution-aware cloud flows: Cloud flows you create in a solution are known as solution-aware cloud flows or solution cloud flows (Create a cloud flow in a solution).
The example is the approval flow of the Overtime Timesheet app, which runs when an overtime entry is added or changed in a SharePoint list.
Prerequisites
- A solution to create the flow in (How to Create a Solution and Publisher in Power Apps). Here, Overtime Timesheet.
- A Power Automate license. Flows with standard connectors, such as SharePoint, are included in Microsoft 365 business licenses.
Step 1: Open the Solution and Choose Automated
In Power Automate, select Solutions on the left and open your solution. Then select New > Automation > Cloud flow > Automated:
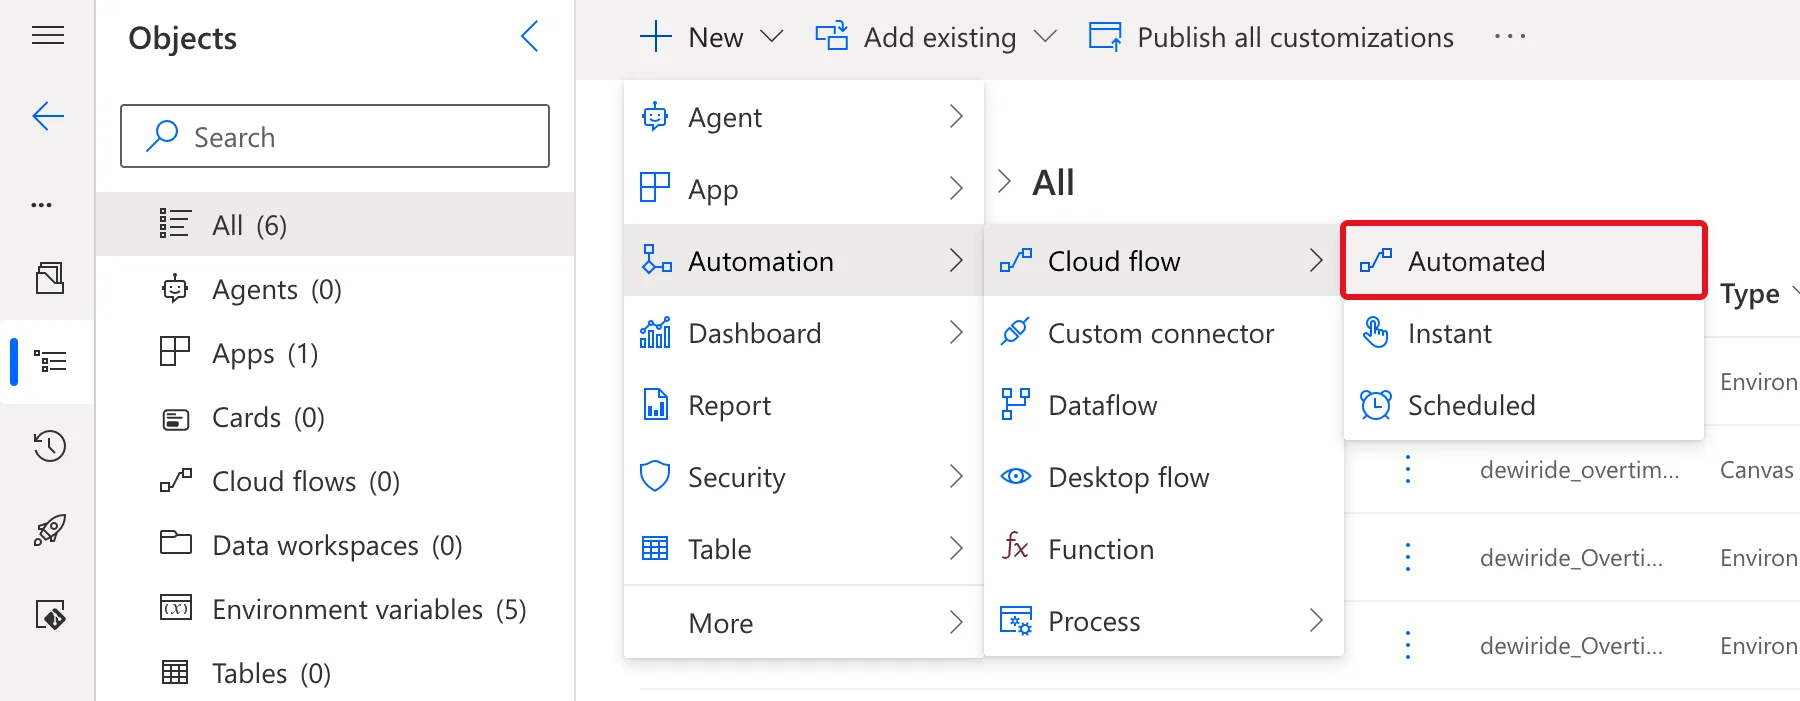
Instant flows are started by a person; How to Create an Instant Cloud Flow Inside a Solution in Power Automate covers those. Scheduled flows run on a timetable.
Step 2: Name It and Choose the Trigger
Build an automated cloud flow asks for two things:
| Field | Value here | Why |
|---|---|---|
| Flow name | Overtime Approval | Say what it does; it's how you'll find it in My flows and in the solution |
| Choose your flow's trigger | When an item is created or modified (SharePoint) | The event that starts the flow |
Type part of the trigger's name in the search box, select it in the list, and select Create:
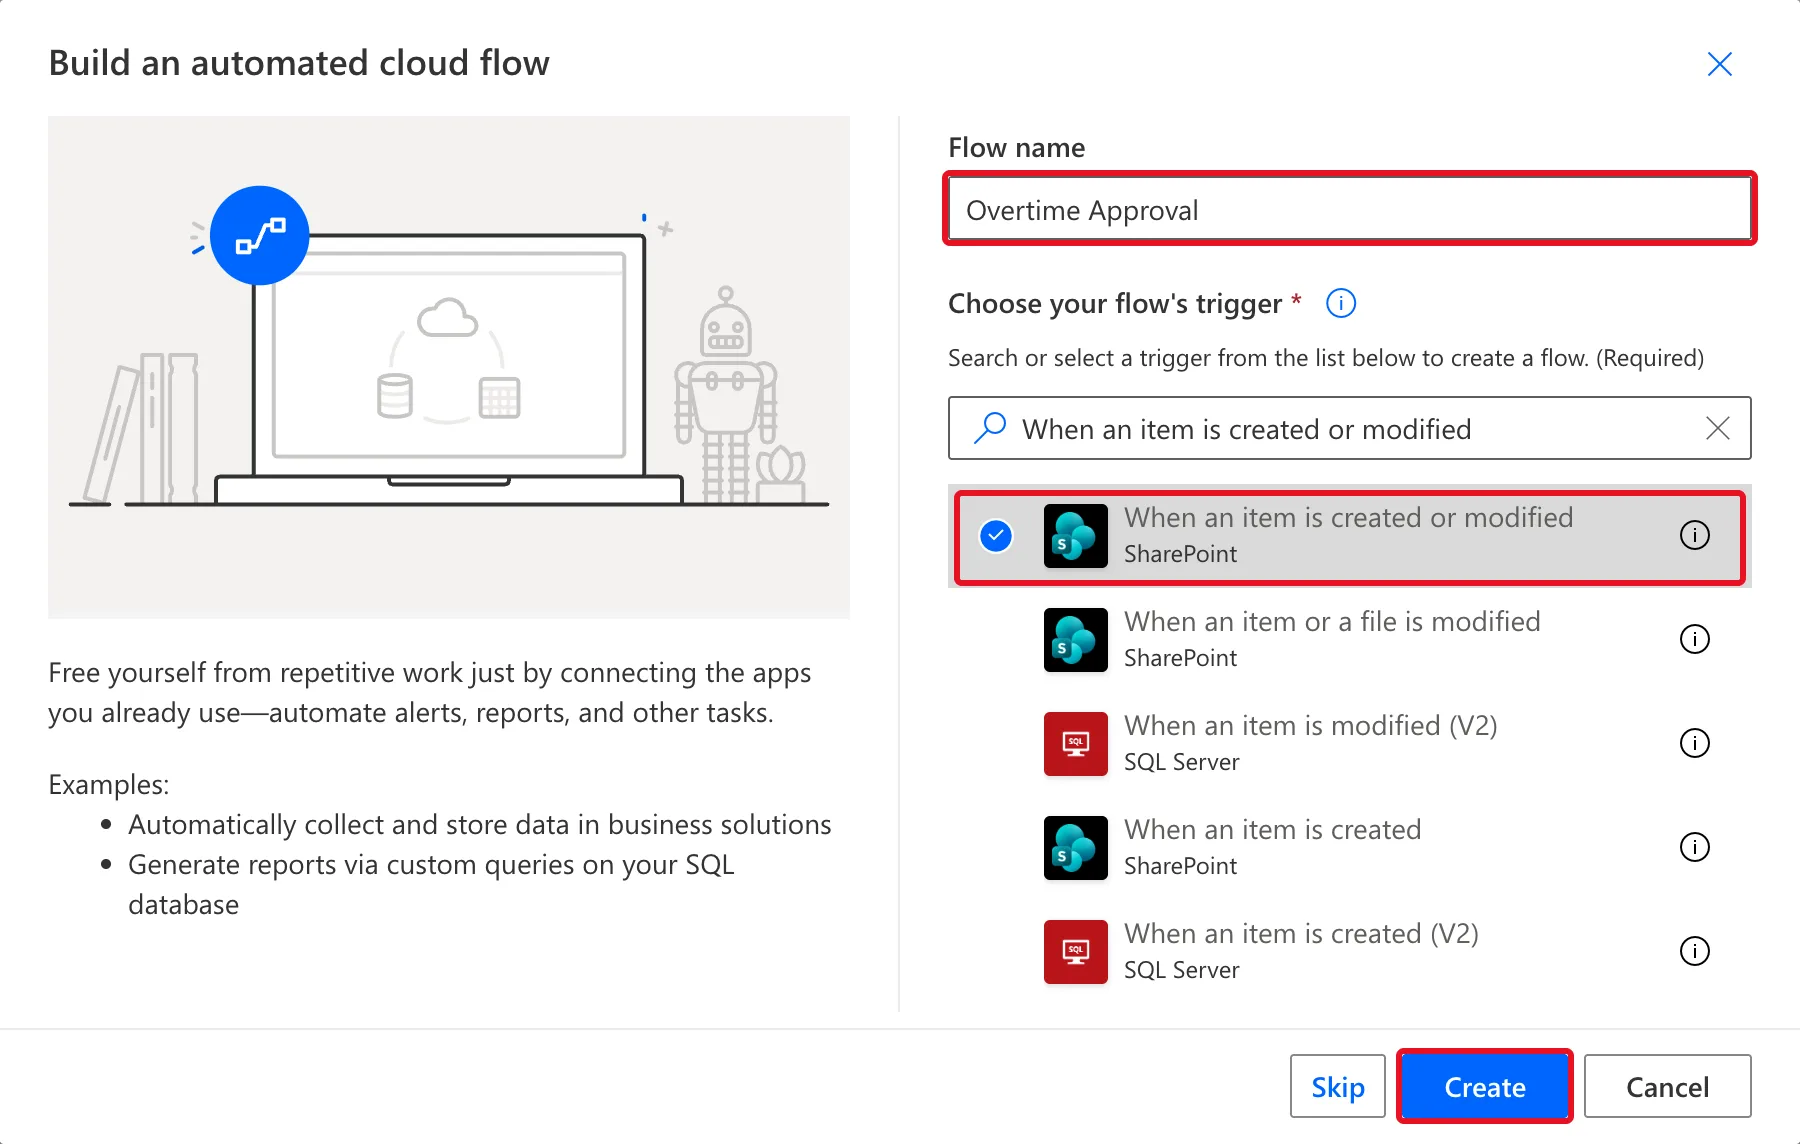
Several triggers have similar names, and the connector's name under each one tells them apart.
Step 3: Fill In the Trigger
The flow opened in the classic designer, inside the solution's page, with the trigger's card ready and no New designer toggle in its toolbar:
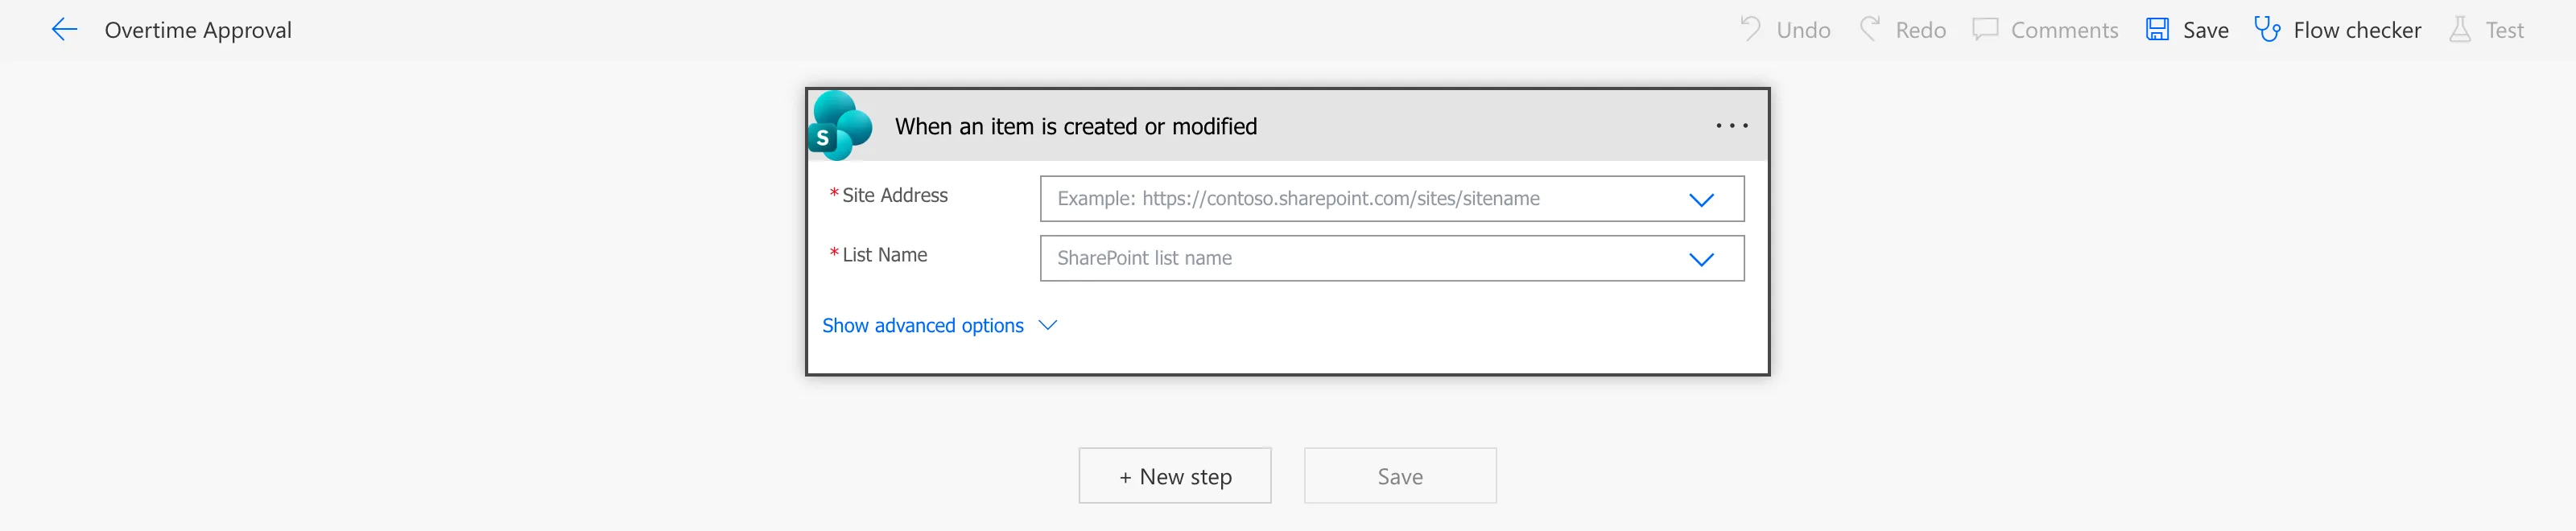
Choose the trigger's settings. For this trigger, the site and the list:
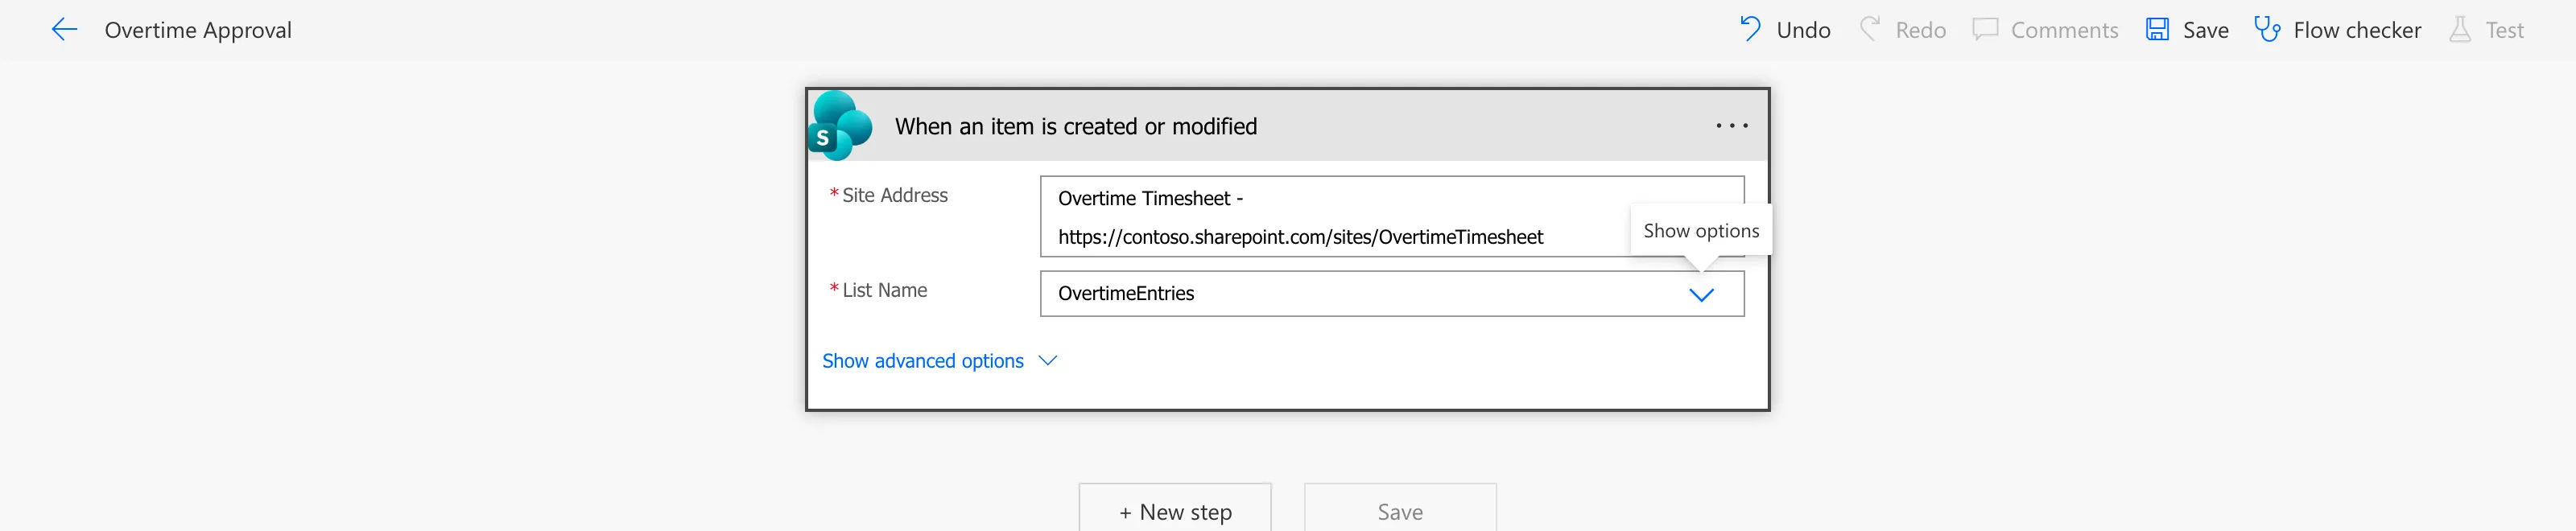
In a solution, values that change between environments, like this site, belong in environment variables; the flow switched to them later (How to Use Environment Variables in a Power Automate Flow).
Step 4: Add the First Action and Save
A flow can't be saved with only a trigger. Microsoft's Triggers and actions says: To save a cloud flow, it must have at least a trigger and one action. Selecting Save too early shows Should at least contain one trigger and one action (Fixed: "Should at least contain one trigger and one action" When Saving a Flow in Power Automate).
Select + New step, add the flow's first action, and select Save. Here it was SharePoint's Get item, which reads the entry's department (How to Get a SharePoint List Item by ID in Power Automate).
Step 5: Open It in the New Designer
The classic designer the flow opened in has no New designer toggle. Leave it, select My flows on Power Automate's left menu, and find the flow on the Cloud flows tab:
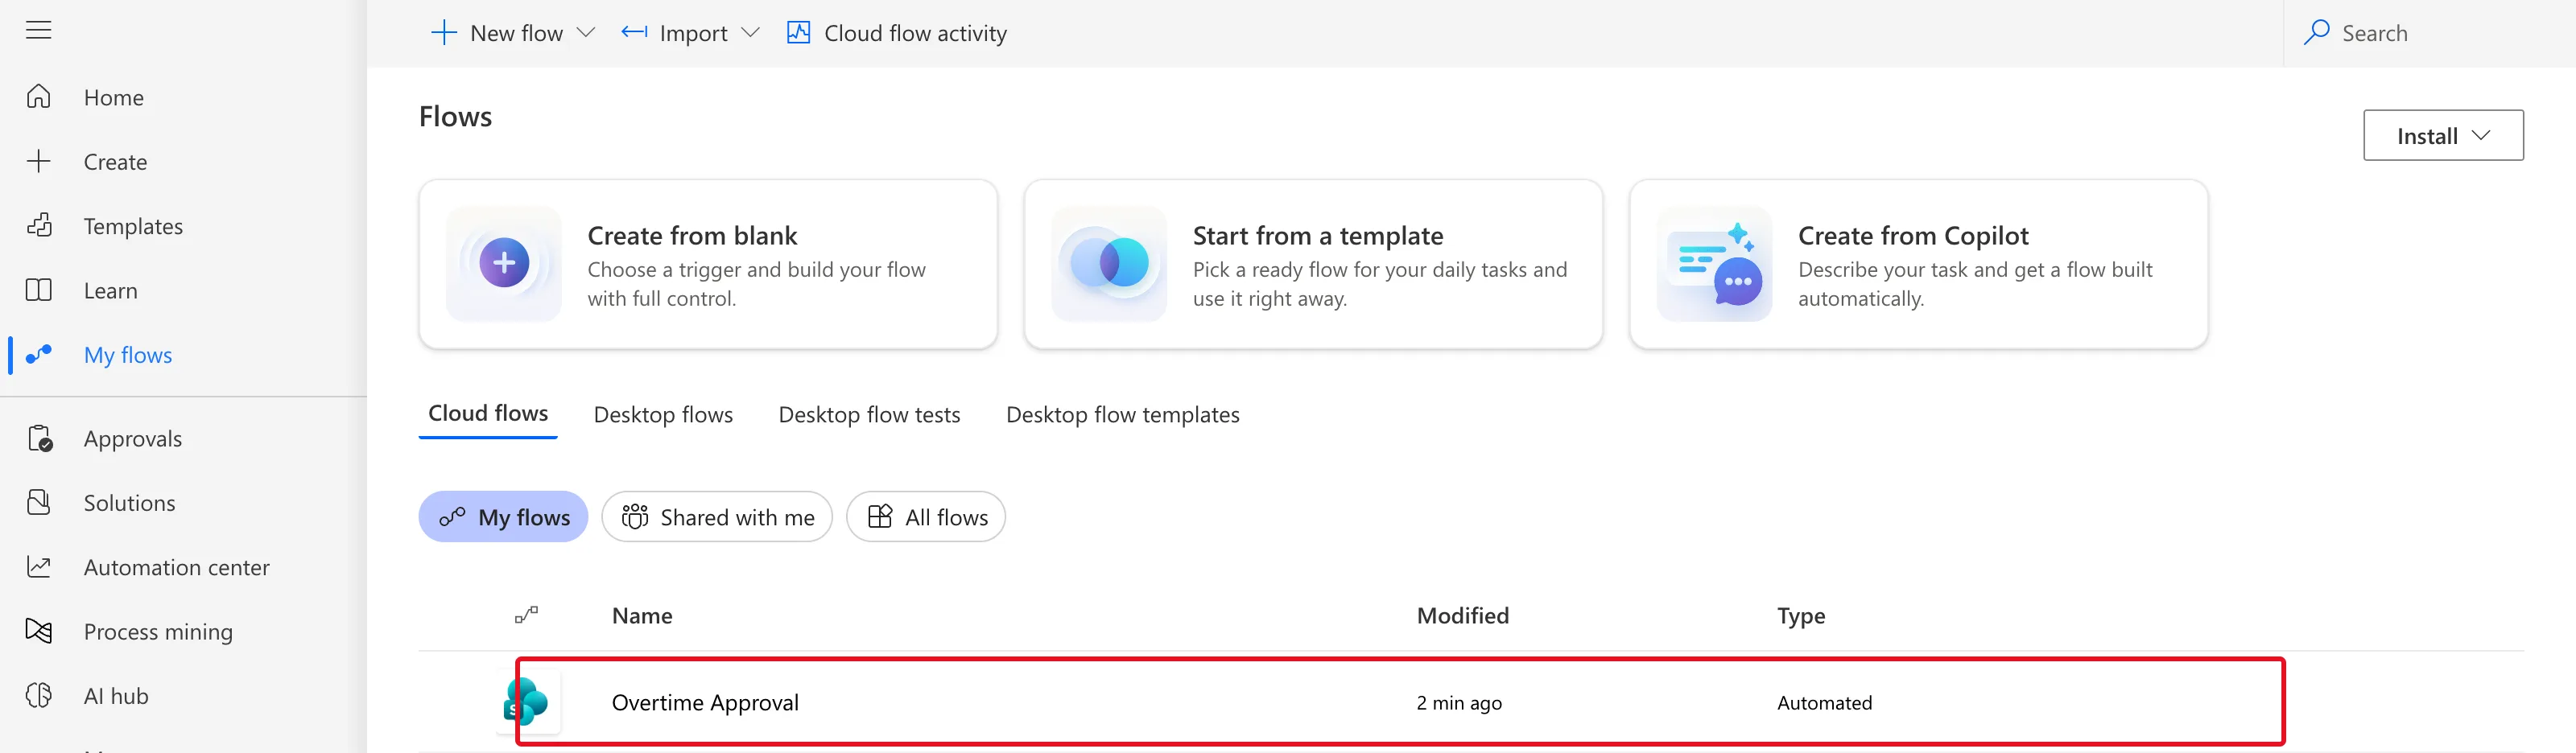
Open it and select Edit. Opened from here, the designer has the New designer toggle, switched on:

The flow is still in the solution; this is only a different way into it. The new designer saves with Save draft and makes changes live with Publish (How to Save a Draft and Publish a Flow in Power Automate).
Common Mistakes
| Mistake | What happens | Do this instead |
|---|---|---|
| Creating the flow from My flows | It isn't in the app's solution | Create it with New inside the solution |
| Picking a trigger by name alone | A SQL Server or file trigger with a similar name | Check the connector under each trigger |
| Saving with only the trigger | Should at least contain one trigger and one action | Add the first action, then save |
| Looking for the New designer toggle in the solution's designer | It isn't there | Open the flow from My flows |
Troubleshooting
| Symptom | Likely cause | Fix |
|---|---|---|
| The trigger list doesn't show your trigger | The search text doesn't match | Type part of its name, or the connector's |
| The flow isn't in the solution | It was created outside it | Create it in the solution |
| No New designer toggle | The flow was opened from the solution | Open it from My flows and select Edit |
FAQ
What's the difference between automated, instant and scheduled flows?
An automated flow starts by itself on an event, an instant flow when a person starts it, and a scheduled flow on a timetable.
Can I add an existing flow to a solution instead?
Microsoft's article has an Add existing > Automation > Cloud flow option, and says You can't add some non-solution cloud flows into a solution. Creating the flow in the solution avoids the question.
Conclusion
In the solution, New > Automation > Cloud flow > Automated, a name and a trigger create the flow. Fill in the trigger, add the first action so it can be saved, and open it from My flows to keep building in the new designer.
Additional Resources
- Create a cloud flow in a solution: solution-aware cloud flows.
- Triggers and actions: a flow needs a trigger and an action.
Related
- How to Create an Instant Cloud Flow Inside a Solution in Power Automate
- How to Run a Flow When a SharePoint Item Is Created or Modified in Power Automate
- Fixed: "Should at least contain one trigger and one action" When Saving a Flow in Power Automate
- How to Save a Draft and Publish a Flow in Power Automate
