How to Add Row-Level Security Roles in Power BI in the Browser

Row-level security (RLS) shows each person only the rows they may see. You define roles, each with a filter rule on a table, and later add people to them. In the Power BI service, you can create the roles in the browser. Here's how, with a rule that keeps each person's own rows.
Microsoft's row-level security article describes rules as DAX expressions that return true or false for each row: only rows that return TRUE are visible. Its web modeling article lists the steps in the browser: Manage roles, New, the role's name, the table, and the filter. The example model holds expense claims (How to Create a Semantic Model Without a Report in Power BI) and gets two roles:
| Role | Table | Rule | Who sees what |
|---|---|---|---|
| Own expenses | Expenses | [SubmitterEmail] = USERPRINCIPALNAME() | Each person, their own claims |
| Category managers | Category managers | [ManagerEmail] = USERPRINCIPALNAME() | Each manager, the claims of their categories |
USERPRINCIPALNAME() returns the signed-in user (How to Get the Signed-In User in Power BI with USERPRINCIPALNAME).
Step 1: Open Manage Roles
Open the model in Editing mode and select Manage roles in the Security group of the Home tab:

Step 2: Create the Role and Pick Its Table
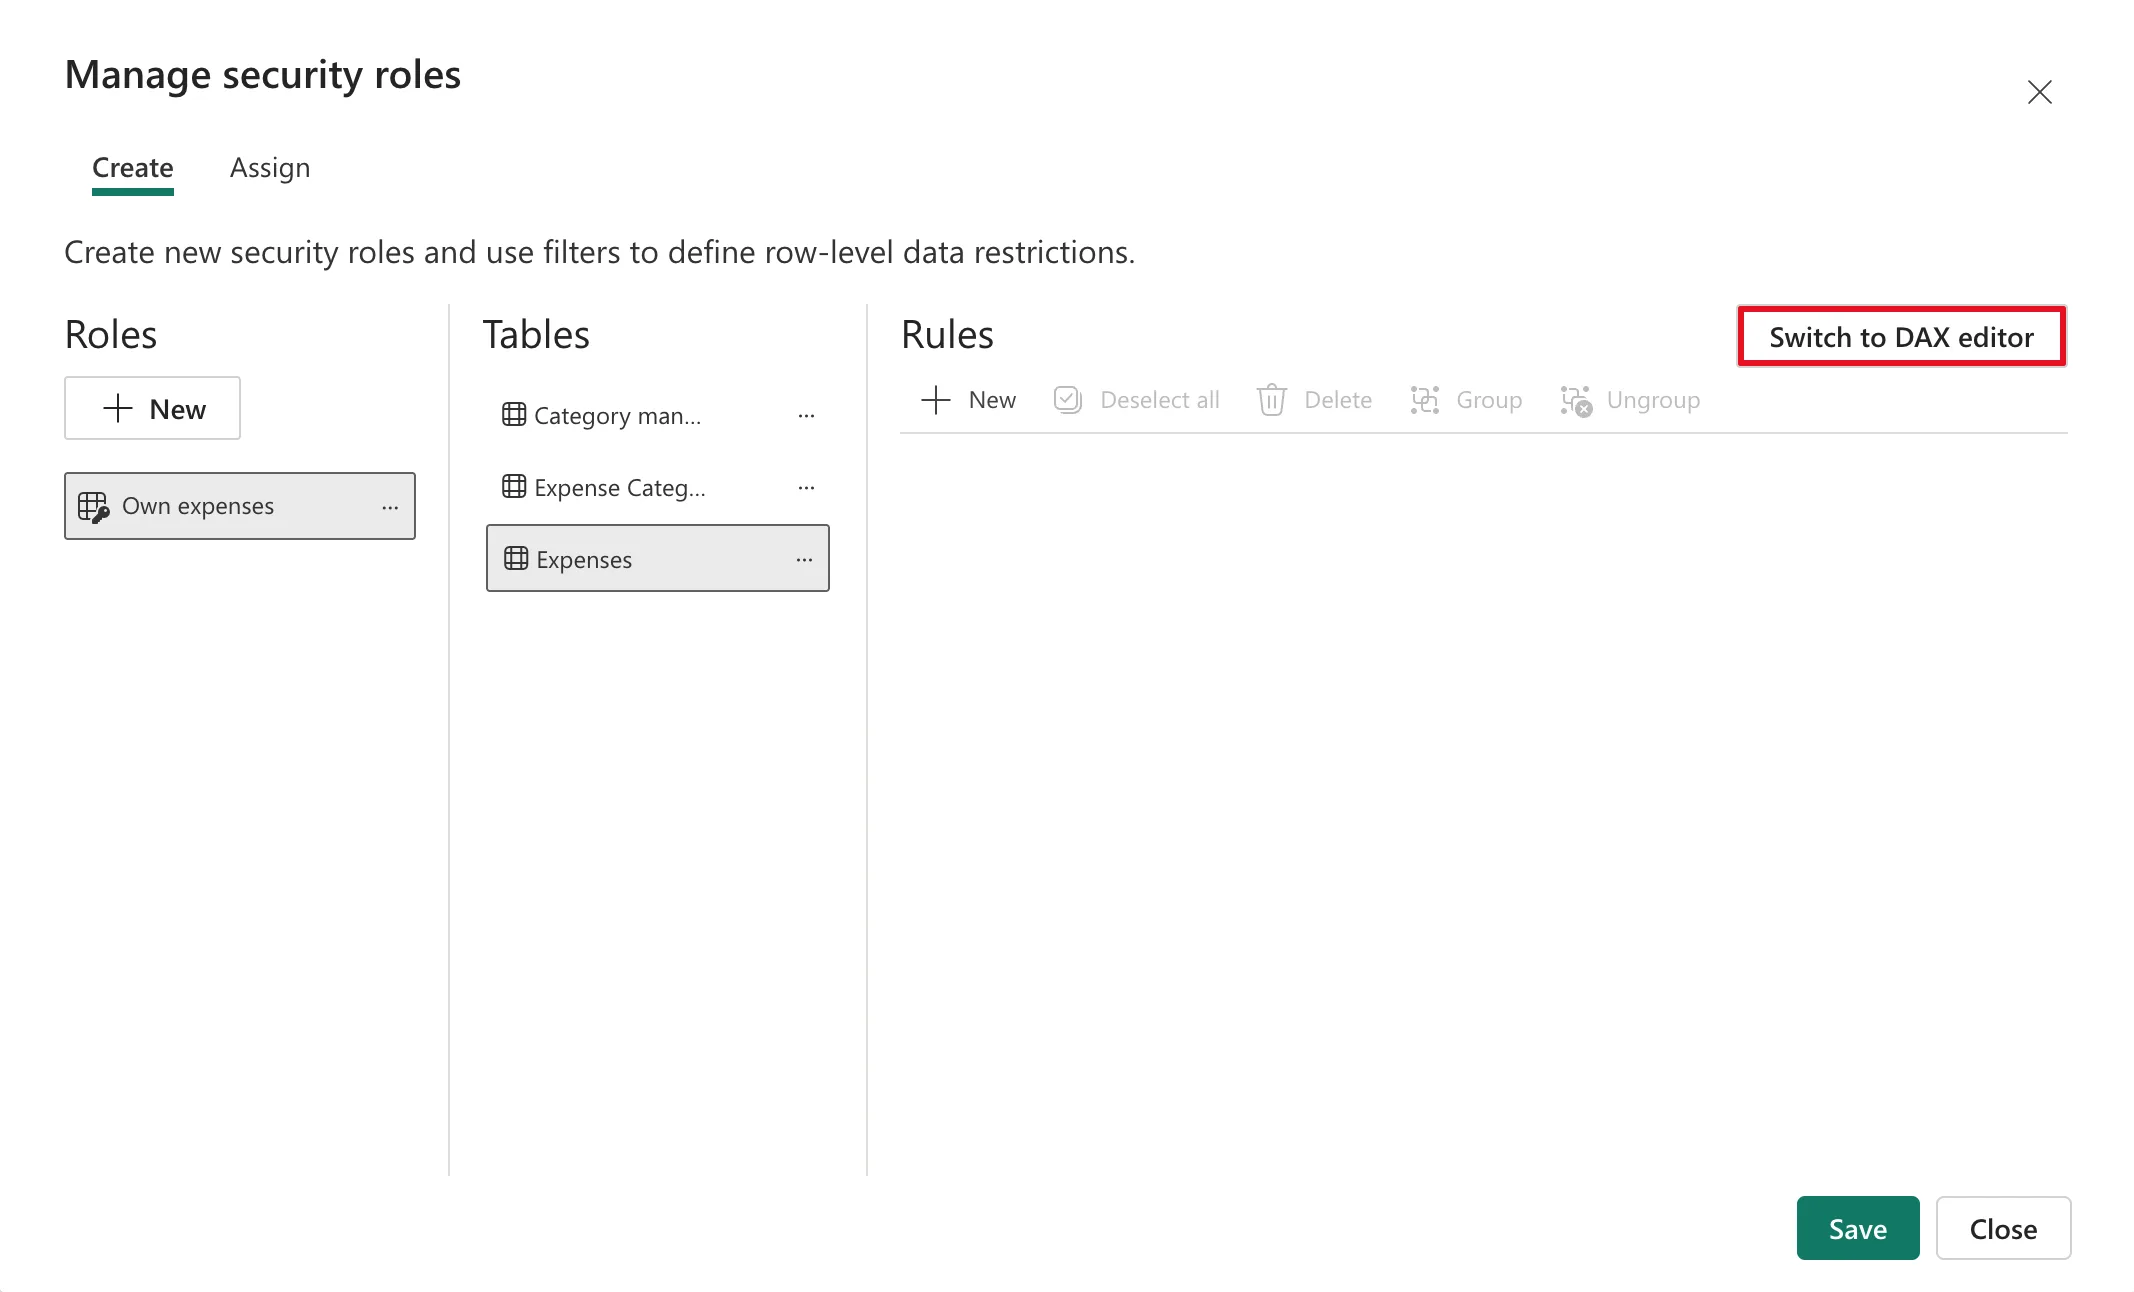
The Manage security roles dialog opens on its Create tab. Under Roles, select New. A role called Untitled appears; double-click it, type Own expenses and press Enter. Under Tables, select the table the rule filters, Expenses:
Step 3: Write the Rule in DAX
The default editor builds simple rules from drop-downs. A rule that uses USERPRINCIPALNAME() needs the DAX editor: the article says dynamic rules can only be defined using DAX. Select Switch to DAX editor and enter:
[SubmitterEmail] = USERPRINCIPALNAME()
[SubmitterEmail]is the column of Expenses with each claim's submitter.= USERPRINCIPALNAME()is true only on the signed-in person's rows.
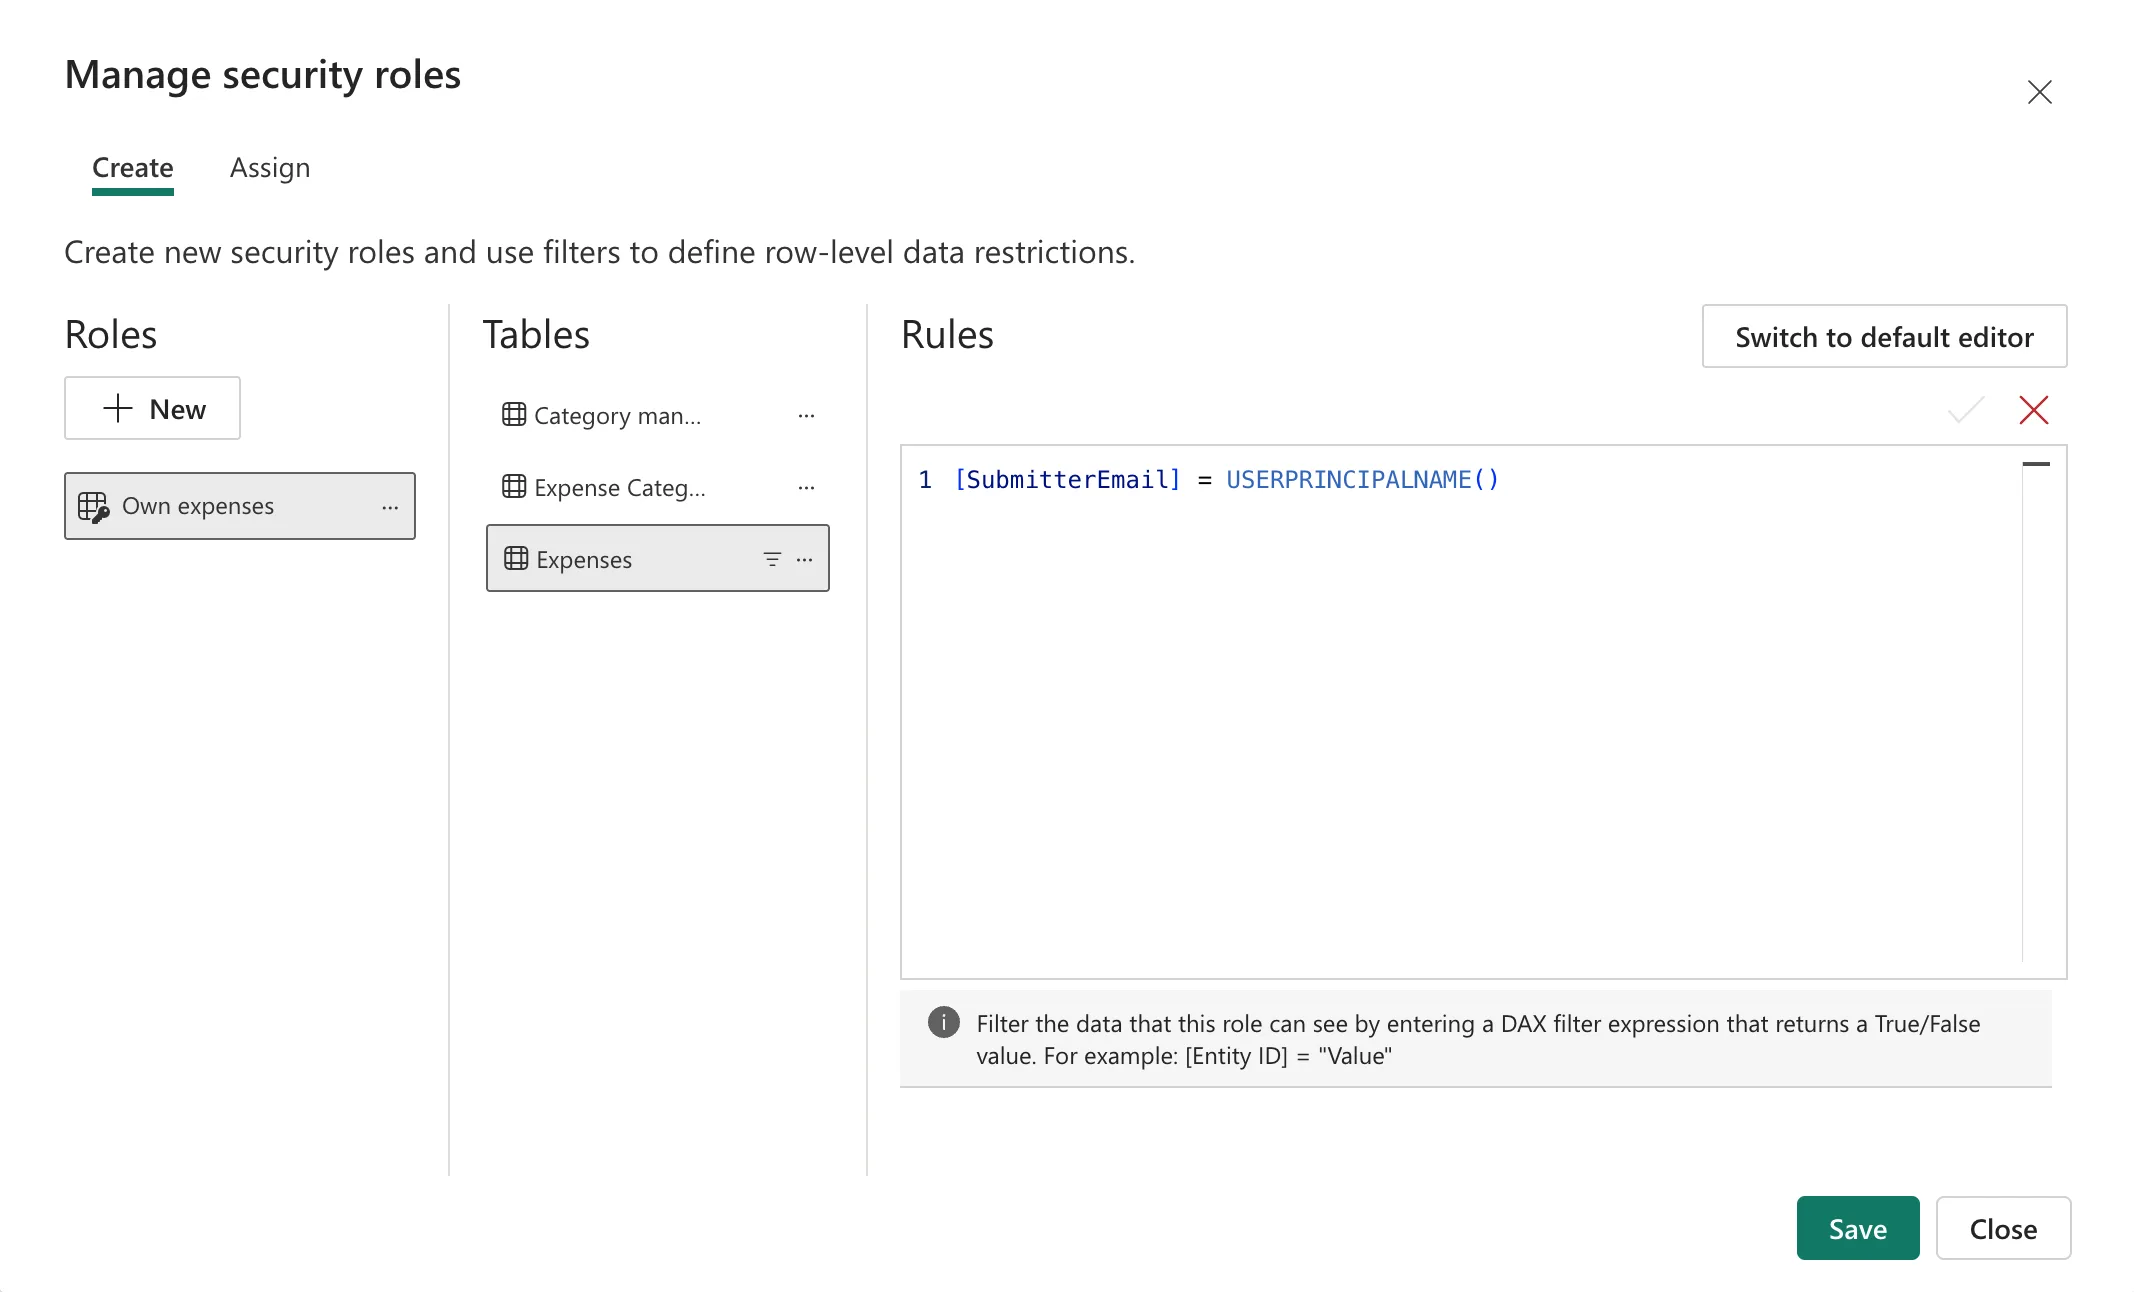
Select the tick above the editor to check the expression, then Save.
Step 4: Add the Second Role
Repeat for Category managers, on the Category managers table:
[ManagerEmail] = USERPRINCIPALNAME()
After Save, the dialog said Successfully applied role changes.:
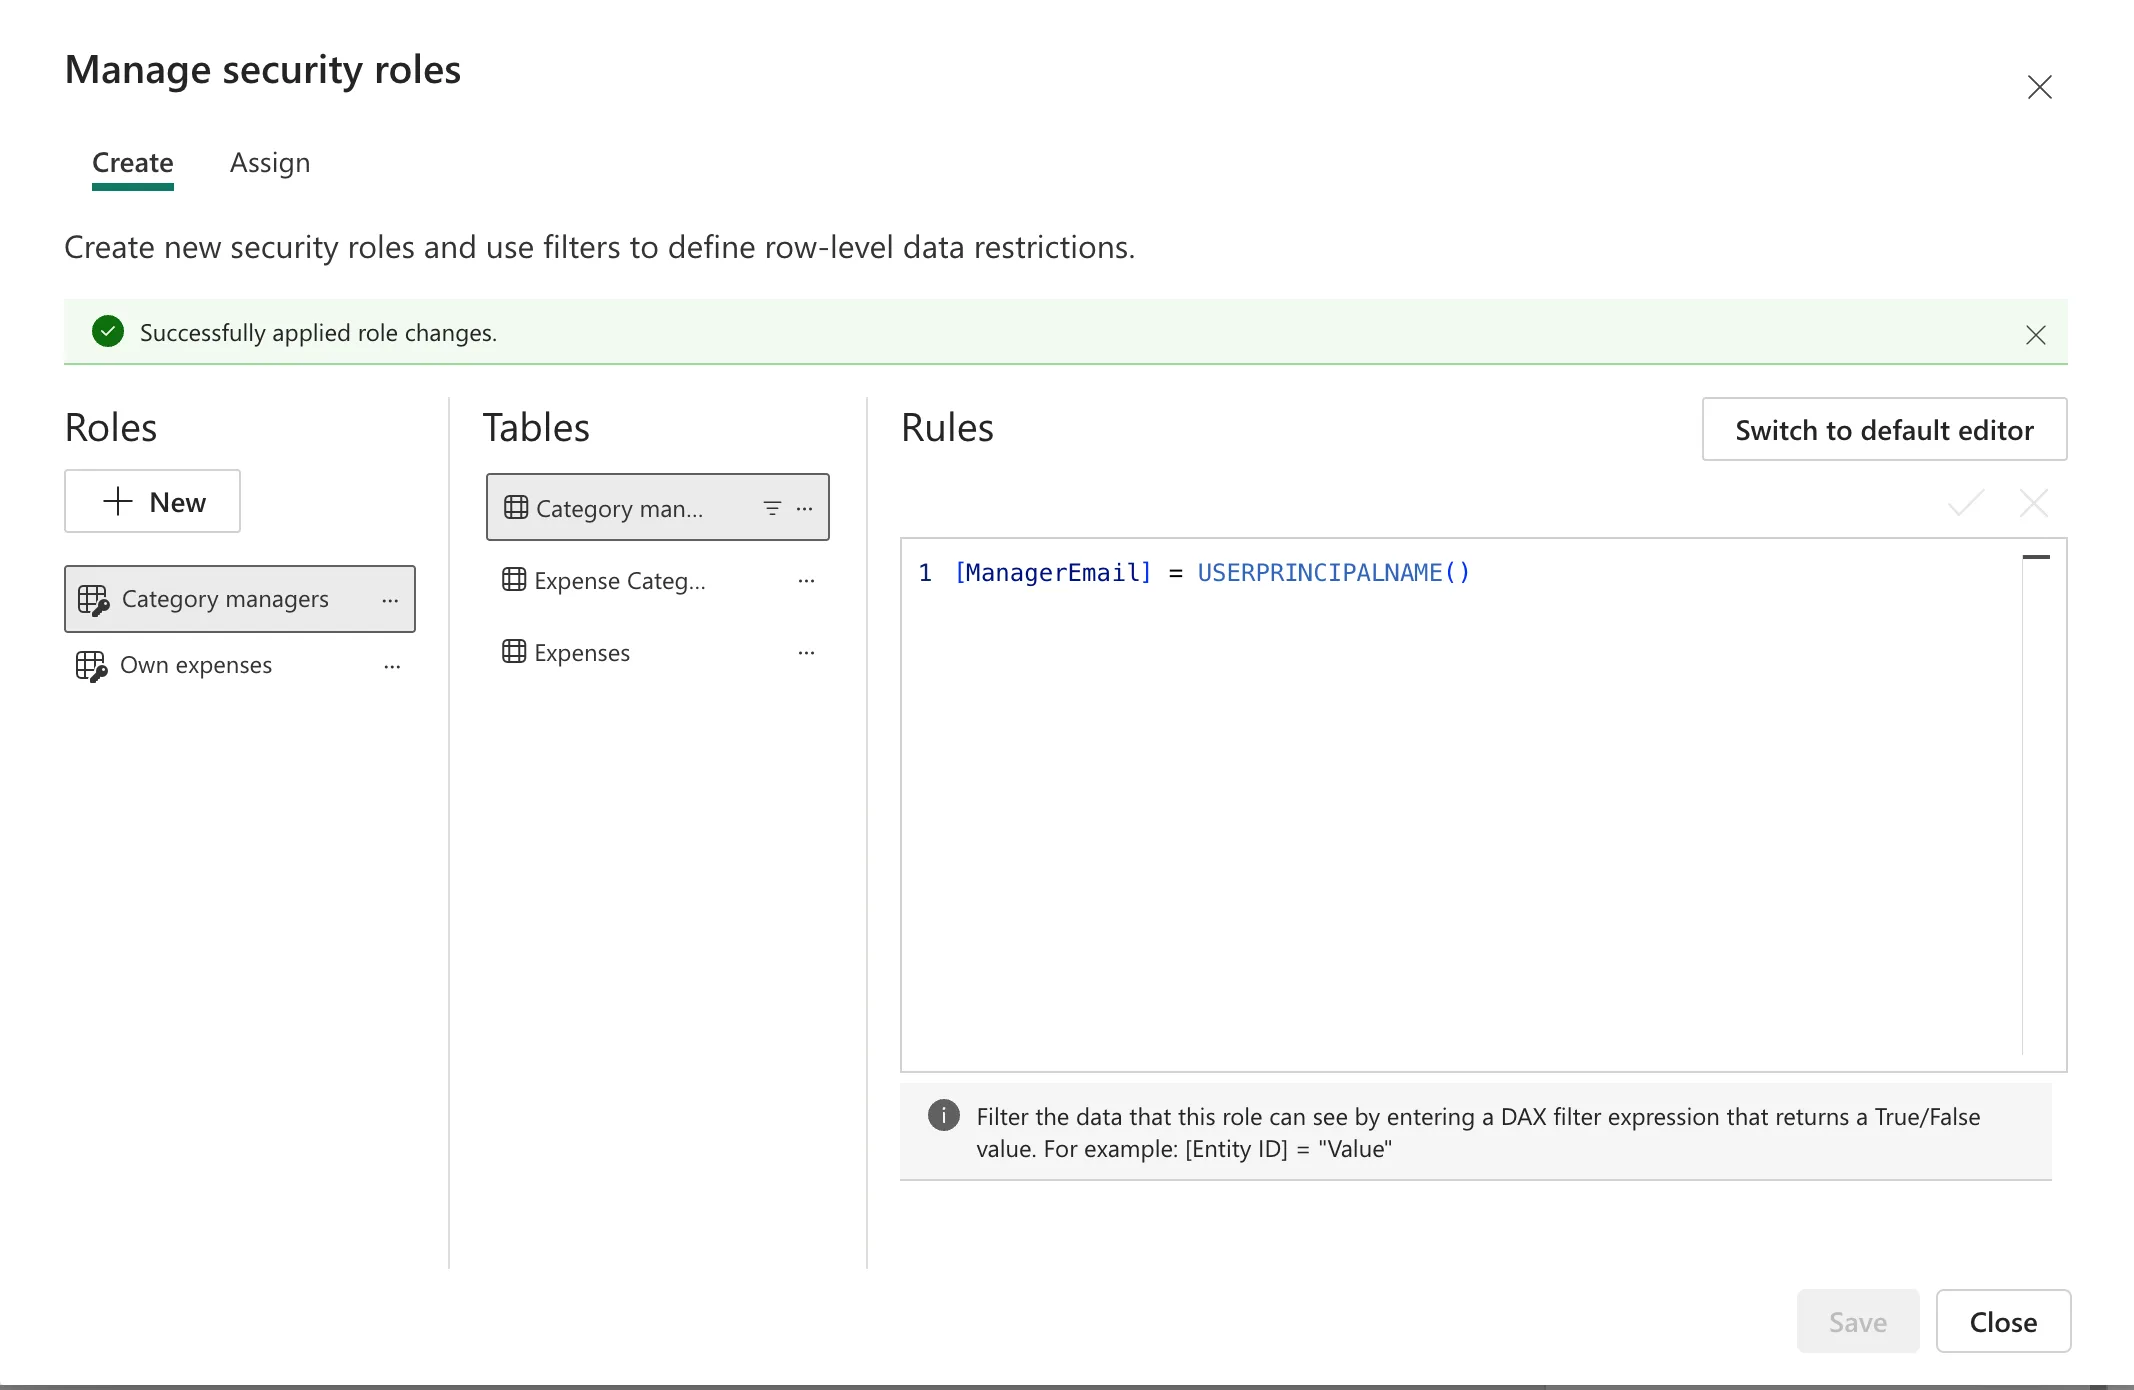
This rule filters Category managers, not Expenses. For it to reach the claims, the relationship between the tables must carry security filters both ways (How to Make a Relationship Filter in Both Directions in Power BI).
The roles have no members yet. Add people or groups next (How to Add Members to a Row-Level Security Role in Power BI), then test them (How to Test Row-Level Security in Power BI).
Common Mistakes
| Mistake | What happens | Do this instead |
|---|---|---|
| Putting the rule on the wrong table | The filter never reaches the rows you meant | Put it on the table that holds the emails |
| Comparing with names instead of emails | Nothing matches the signed-in user | Compare with an email column |
| Expecting the role to apply to workspace members | Admins, Members and Contributors see everything | RLS applies to Viewers |
| A role with no rule by mistake | The article says a role with no rules gives access to all rows | Check every role has its rule, unless that's the point |
Troubleshooting
| Symptom | Likely cause | Fix |
|---|---|---|
| Manage roles is greyed out | The model is in Viewing mode | Switch to Editing |
| The tick shows an error | A column name doesn't exist on that table | Check the name in brackets |
| A tester sees all rows | They're an Admin, Member or Contributor | Test with Test as role, or as a Viewer |
FAQ
Can a role have no rule at all?
Yes, and that's useful. Microsoft's security planning article says it's possible to define a role that has no rules, and that the role provides access to all rows of all model tables: right for people allowed to see everything.
Are roles combined?
Yes: someone in two roles sees the rows of both.
Conclusion
Manage roles > New, name the role, pick its table, Switch to DAX editor, write the rule, and Save. The example's Own expenses and Category managers compare an email column with USERPRINCIPALNAME().
Additional Resources
- Row-level security (RLS) with Power BI
- Edit semantic models in the Power BI service: define row-level security roles and rules
