How to Add a Container Control in Power Apps

A Container keeps related controls together, with its own size, fill and border, and lets you place each control inside it wherever you want. In a responsive screen built from vertical and horizontal containers, it's also the place for controls those layout containers don't support, such as charts.
How It Works
From Microsoft's Container reference:
- It holds a set of controls and has its own properties: BorderColor, BorderStyle, BorderThickness, Fill, Height, Width, Visible, X and Y.
- The controls inside are placed with X and Y from the container's top-left corner. Inside it,
Parentis the container, so formulas such asParent.Widthfollow its size (Create responsive layouts). - It has limits. It can't hold a Data table, a PDF viewer or a Web barcode scanner, and containers don't work within forms.
- It isn't a group. A group only helps you select several controls while editing. A container is a control: it affects the layout, and helps screen reader users understand the app's structure.
Vertical container and Horizontal container are layout containers: they place their controls themselves. Microsoft's responsive apps guide lists a known issue: the Data table, Charts, and Add Picture controls are currently not supported in the layout containers. A plain Container isn't a layout container, so it can sit in the layout and hold a chart.
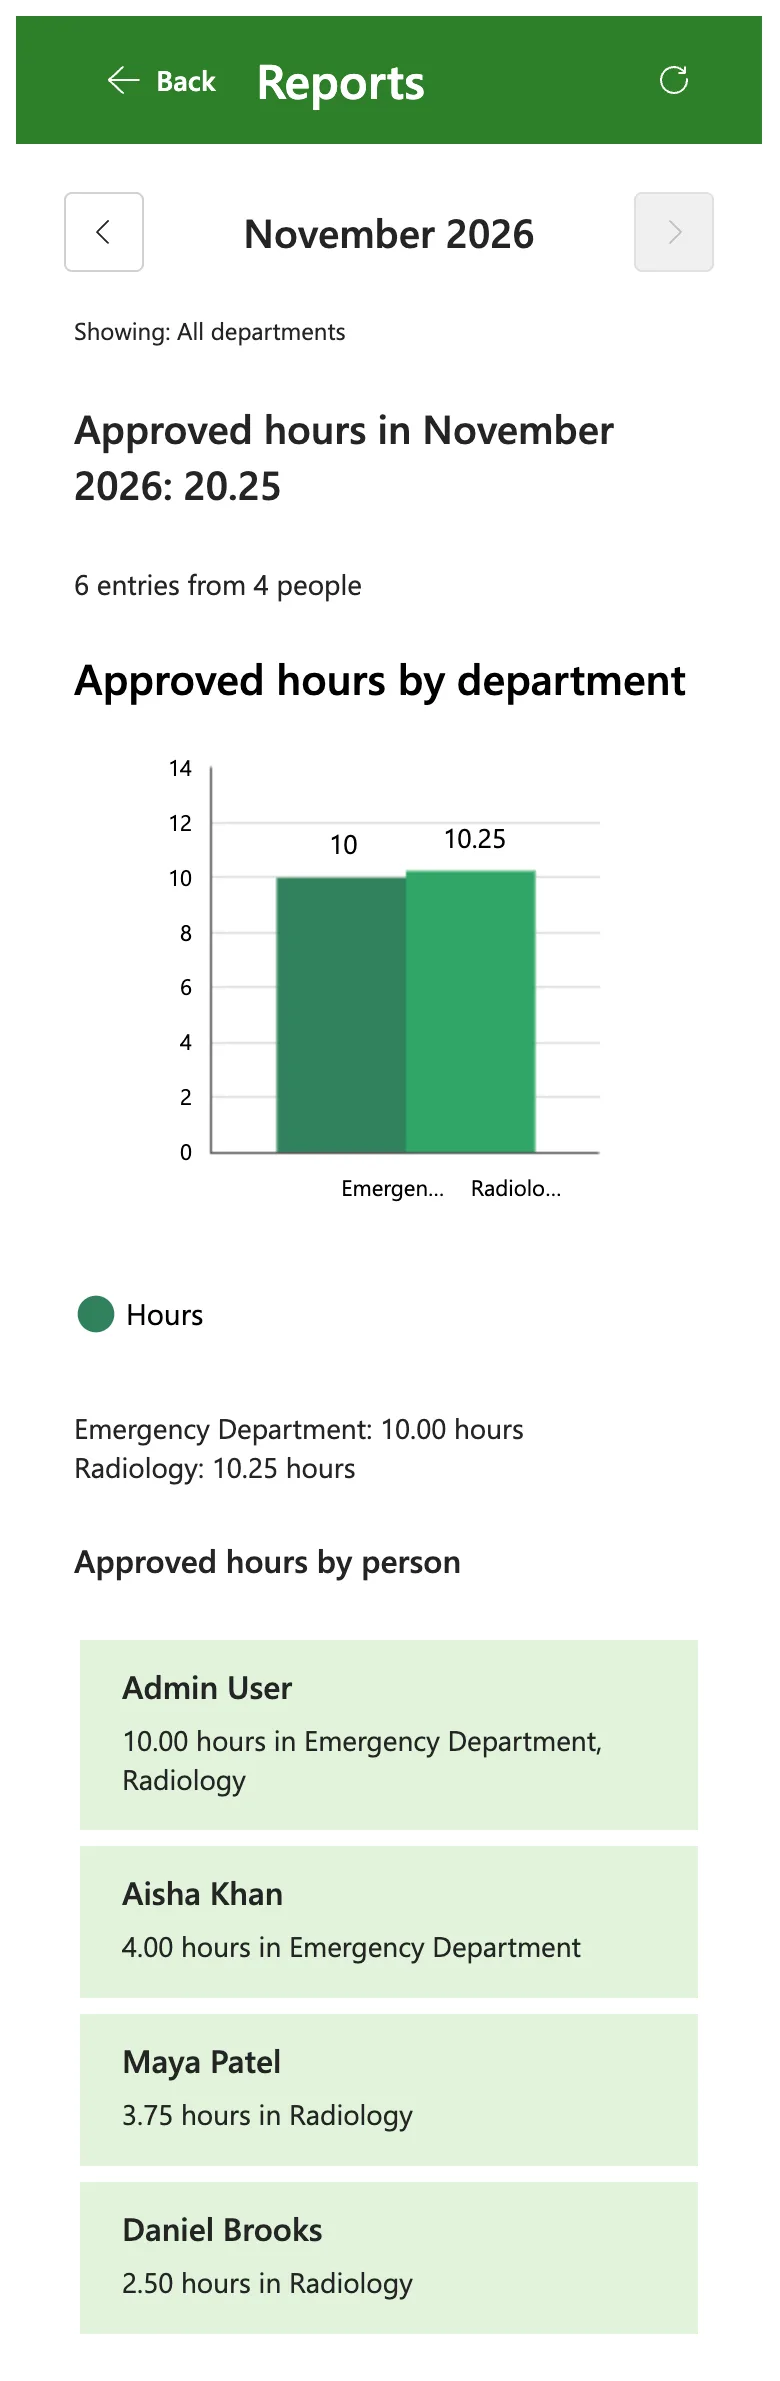
The example is the Reports screen of the Overtime Timesheet app, a responsive screen built from vertical containers, with a column chart of each department's approved overtime.
Step 1: Insert a Container
Select the control that should hold the new container, here the screen's scrolling vertical container, conBodyRS. Open Insert and search for Container. Under Layout, it lists Container, Horizontal container, Vertical container and Grid container:
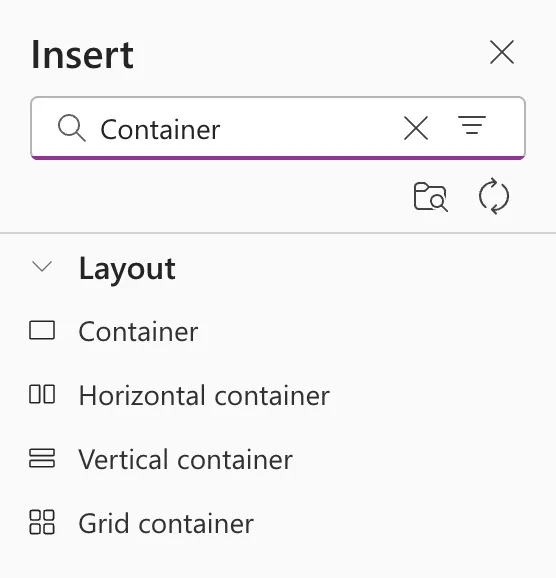
Select Container. It goes into the selected vertical container. I renamed it conChartRS (How to Rename a Screen or Control in Power Apps).
Step 2: Give It a Size
Inside a vertical container, the layout places the container, and these settings decide its size:
| Property | Value | Why |
|---|---|---|
| Width | Min(640, Parent.Width - 48) | The same width as the screen's other controls, narrower on phones |
| Align in container | Start | Keeps that width instead of stretching |
| Flexible height | Off (FillPortions 0) | Below |
| Height | 360 | Room for the chart's title, chart and legend |
| Drop shadow | None |

The new container started with Flexible height on, and it ignored its Height until I turned that off. In the formula bar, Flexible height off is FillPortions 0:


Step 3: Put Controls Inside
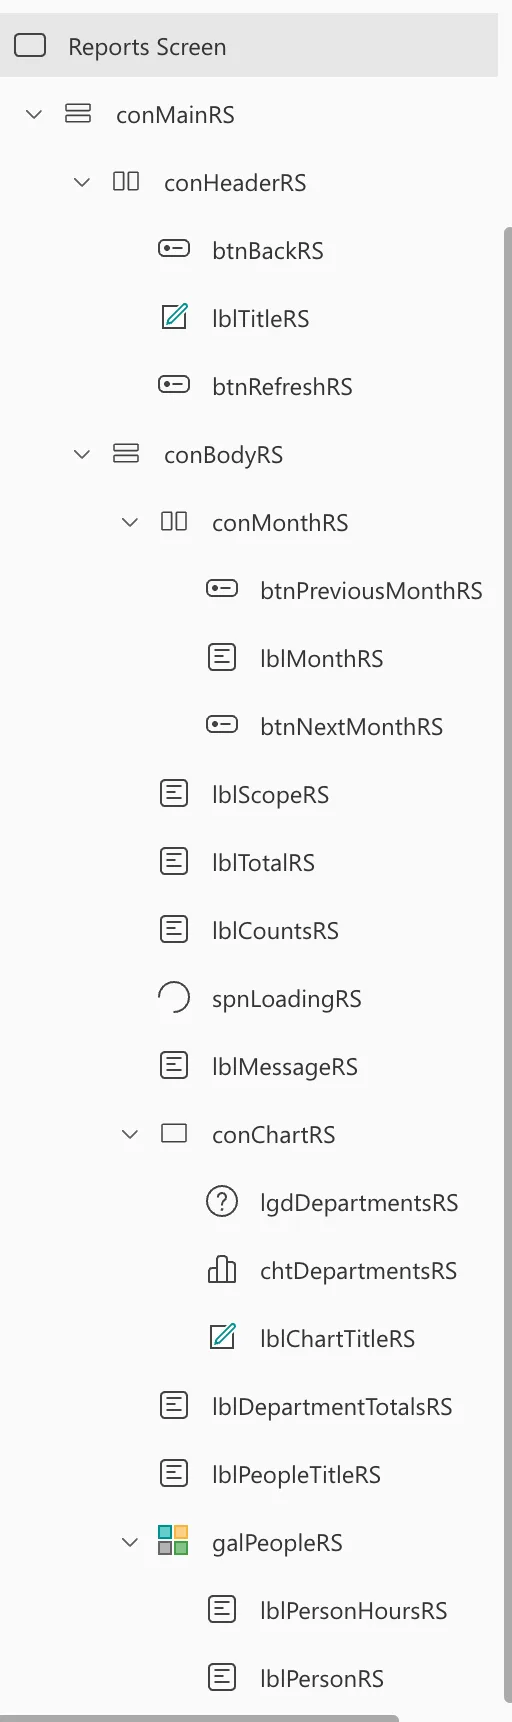
Insert the controls with the container selected, or cut them in the tree view and paste them onto the container (How to Copy and Paste Controls Between Screens in Power Apps). Then place each one from the container's size. Here, the chart's title, the chart and its legend:
| Control | X | Y | Width | Height |
|---|---|---|---|---|
lblChartTitleRS | 0 | 0 | Parent.Width | 32 |
chtDepartmentsRS | 0 | 40 | Parent.Width | Parent.Height - 80 |
lgdDepartmentsRS | 0 | Parent.Height - 40 | Parent.Width | 40 |
The tree view shows the three controls inside conChartRS:
The Result
On a phone 390 pixels wide, the container took the narrower width, and the chart inside it followed:
Common Mistakes
| Mistake | What happens | Do this instead |
|---|---|---|
| A chart straight in a vertical or horizontal container | Microsoft lists charts as not supported in layout containers | A plain Container around it |
| Flexible height left on | The container ignores its Height | Turn it off: FillPortions 0 |
| Fixed numbers for the controls inside | They don't follow the container's size | Formulas from Parent.Width and Parent.Height |
| A Data table in a container | The reference lists it as not supported | Put it outside containers |
Troubleshooting
| Symptom | Likely cause | Fix |
|---|---|---|
| The container is taller or shorter than its Height | Flexible height is on | Turn it off |
| A control you pasted isn't in the container | It was pasted with something else selected | Cut it and paste it onto the container in the tree view |
| The container doesn't show | Its Visible is false, or it's empty with no fill or border | Check Visible; give it a control or a fill |
FAQ
Container or group?
Microsoft's reference answers it: a group is an aid while editing, with no properties of its own. A container is a control with its own properties that affects the layout, and it should hold controls that belong together.
Can a container hold other containers?
Yes. The vertical and horizontal containers on this screen hold each other, and the plain container sits inside one of them.
Do controls inside a plain container move with the layout?
The container moves with the layout. The controls inside it keep their X and Y from its top-left corner, so they move with it.
Conclusion
Insert a Container from Insert > Layout, size it like the other controls on the screen, and place the controls inside it with formulas from Parent.Width and Parent.Height. In a responsive screen, it's the way to include a chart, which layout containers don't support.
Additional Resources
- Container control in Power Apps
- Building responsive canvas apps: layout containers and their known issues
- Create responsive layouts in canvas apps: placing controls inside a container
