Deploy a .NET App to Azure Container Apps — Part 4: Push Your Image to the Registry

This is the shortest part of the series and the one most likely to save you an afternoon. Pushing an image is three commands — but if you're on an Apple Silicon Mac, one missing flag produces a container that builds perfectly, pushes perfectly, and then refuses to start on Azure.
This is Part 4 of a 6-part series.
- Part 1: Build the App
- Part 2: Containerize It with Docker
- Part 3: Resource Group and Container Registry
- Part 4: Push Your Image to the Registry (you are here)
- Part 5: Deploy to Azure Container Apps
- Part 6: Logs, Scaling, Cost and Cleanup
What you need before starting
The registry from Part 3, Docker Desktop running, and the Azure CLI.
Install the CLI from Microsoft's install guide, then check it:
az version
{
  "azure-cli": "2.89.0",
  "azure-cli-core": "2.89.0",
  "azure-cli-telemetry": "1.1.0",
  "extensions": {}
}
Step 1: Sign in to Azure
az login
A browser window opens. Sign in with the same account you used for the portal. The terminal then lists your subscriptions.
If you have more than one subscription, set the right one as active:
az account set --subscription "Your Subscription Name"
Confirm which one is active:
az account show --query "{name:name, id:id}" -o table
Name              Id
----------------  ------------------------------------
My Subscription   00000000-0000-0000-0000-000000000000
Step 2: Sign in to your registry
az acr login --name acrdotnetdemo2026
Use your own registry name.
Login Succeeded
This hands Docker a short-lived token based on your Azure identity. No password is stored, and nothing had to be enabled on the registry — this is why the admin user from Part 3 stays switched off.
Step 3: The trap — check your chip
Before pushing, run this:
uname -m
If it says x86_64, you're on Intel or AMD and can skip ahead.
If it says arm64 — every Apple Silicon Mac, M1 through M4 — read this section carefully.
Look at the image you built in Part 2:
docker inspect hello-container-app:1.0.0 --format 'Architecture={{.Architecture}}'
Architecture=arm64
Your image is built for ARM, because your laptop is ARM. Azure Container Apps runs on x86-64 servers. An ARM image on an x86 host doesn't produce a helpful error — it produces this, buried in the logs, after everything else appeared to work:
exec /usr/bin/dotnet: exec format error
The image built. The push succeeded. The portal showed no errors. The container just refuses to start, because the CPU instructions inside it are for a different processor family.
This bites people constantly, and the symptom appears far away from the cause. Never rely on your laptop's architecture matching your server's.
Build with an explicit --platform whenever the image is going somewhere other than your own machine. It costs nothing to be explicit and it removes an entire class of confusing failure.
Step 4: Build for Azure and push
One command builds for the correct architecture and pushes it:
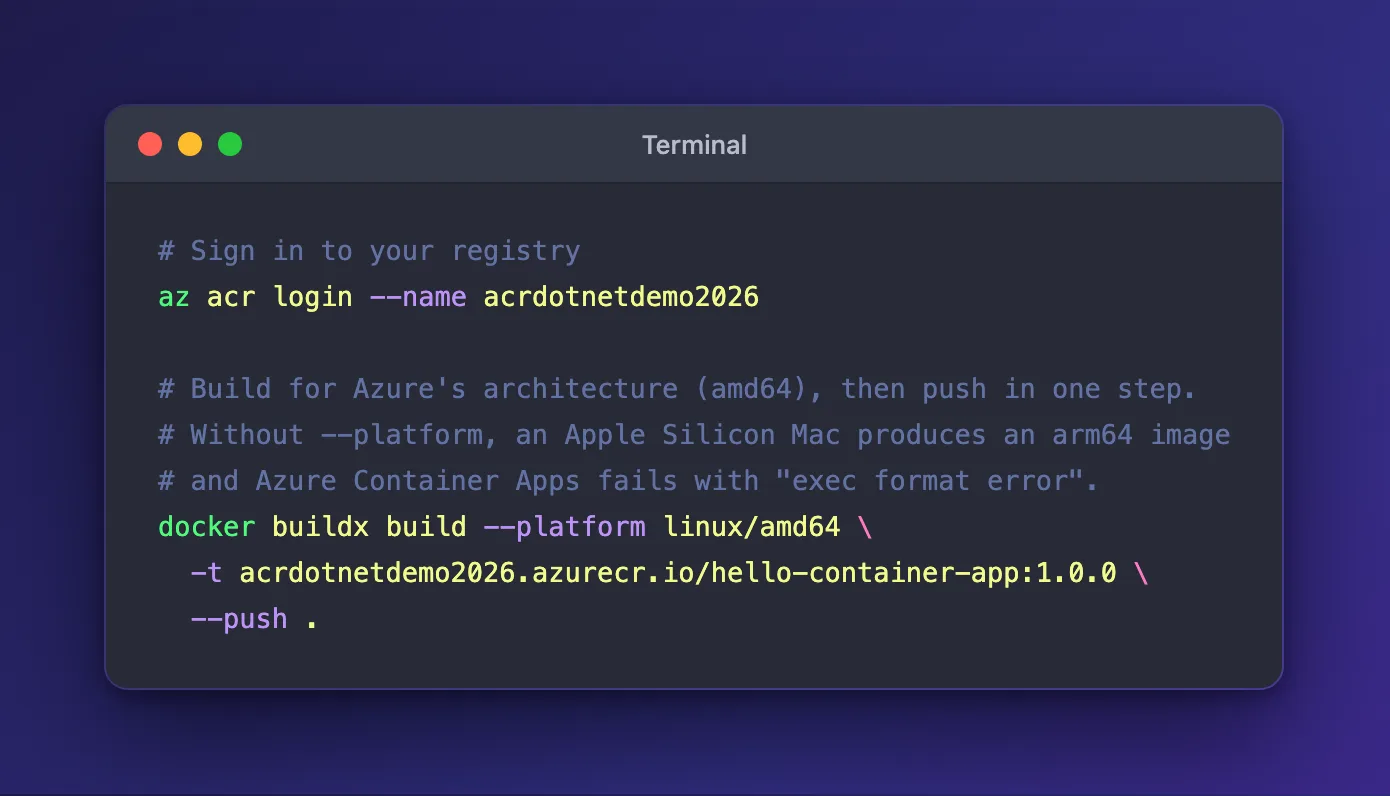
docker buildx build --platform linux/amd64 \
  -t acrdotnetdemo2026.azurecr.io/hello-container-app:1.0.0 \
  --push .
What changed from Part 2:
buildxinstead of plainbuild— Docker's builder that can target other architectures.--platform linux/amd64— build for Azure's CPU family, not your laptop's.- The image name now starts with your registry address. That prefix is what tells Docker where to send it.
--pushuploads it as part of the build.
On an ARM Mac this is slower than a native build, because Docker emulates an x86 CPU to compile. A minute or two is normal.
 => pushing layer 296c0858796d  82.71MB
 => pushing layer 42724e448bf4  78.16MB
 => pushing manifest for acrdotnetdemo2026.azurecr.io/hello-container-app:1.0.0
 => DONE 38.1s
:latestThe tag here is 1.0.0, not latest.
latest is not a version — it's a moving pointer. If you deploy it, you can't tell which build is actually running, you can't roll back to "the one from Tuesday", and two servers pulling latest an hour apart can end up on different code.
Azure Container Apps builds revisions around image tags. Give each build a real version and rollback becomes a click. Deploy latest and you've thrown that away.
Step 5: Confirm it arrived
From the terminal:
az acr repository show-tags \
  --name acrdotnetdemo2026 \
  --repository hello-container-app \
  -o table
Result
--------
1.0.0
And confirm the architecture is now correct:
az acr manifest list-metadata \
  --registry acrdotnetdemo2026 \
  --name hello-container-app \
  --query "[].{tag:tags[0], arch:architecture, os:operatingSystem}" -o table
Tag    Arch    Os
-----  ------  -----
1.0.0  amd64   linux
amd64 — that's what you want. If it says arm64, the --platform flag didn't take effect; rebuild with it.
You can also see it in the portal. Open your registry and choose Repositories in the left menu, then click hello-container-app:
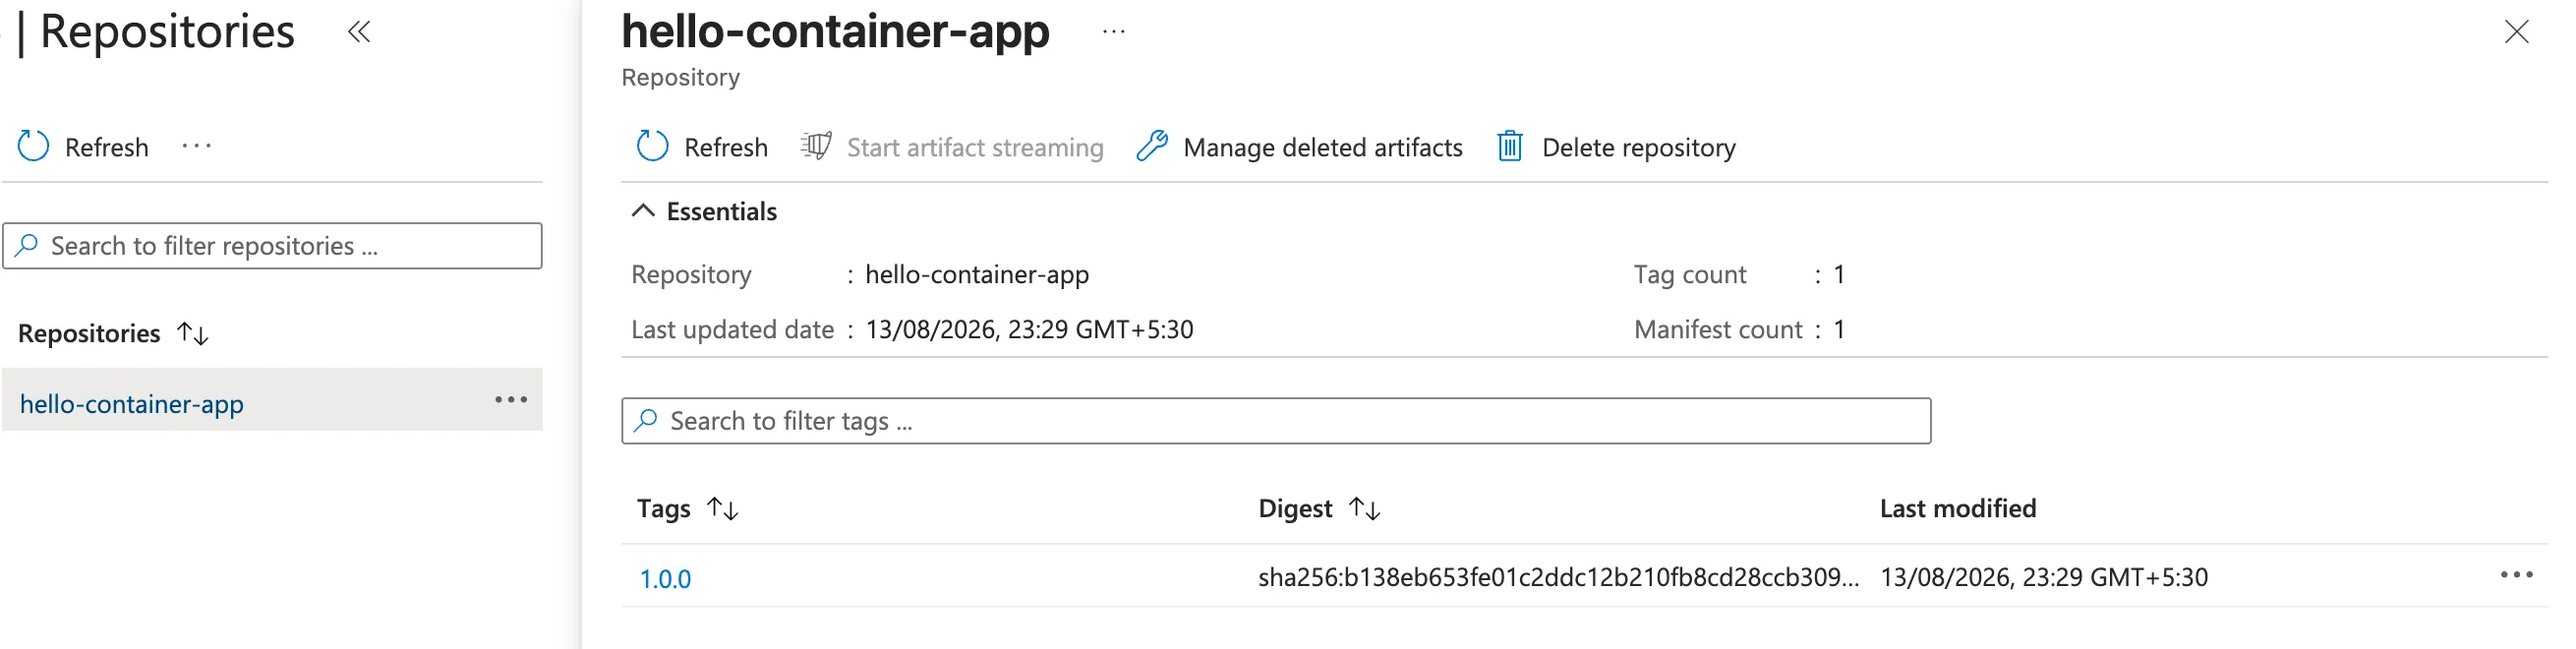
One repository, one tag, one manifest. Your image is in Azure.
Common Mistakes
| Mistake | What you'll see | Fix |
|---|---|---|
Omitting --platform on an ARM Mac | exec format error on Azure; nothing wrong locally | Rebuild with --platform linux/amd64 |
| Forgetting the registry prefix on the tag | Docker tries to push to Docker Hub and gets denied | Tag as <registry>.azurecr.io/<image>:<tag> |
| Uppercase in the image name | invalid reference format | Image names must be lowercase |
Pushing :latest | No way to identify or roll back a deploy | Use real version numbers |
docker push without az acr login first | unauthorized: authentication required | Sign in to the registry first |
Troubleshooting
| Problem | Cause | Fix |
|---|---|---|
unauthorized: authentication required | Token expired (they're short-lived) | Run az acr login again |
denied: requested access to the resource is denied | Wrong registry name, or no permission | Check the name; you need AcrPush or Contributor |
Cannot connect to the Docker daemon | Docker Desktop not running | Start it |
buildx: command not found | Very old Docker | Update Docker Desktop; buildx is included |
| Push is extremely slow | First push uploads every layer | Later pushes only send changed layers |
FAQ
Why not just docker push?
You can — docker tag then docker push works. But that pushes whatever architecture you built, which on an ARM Mac is the wrong one. buildx --platform ... --push does the right thing in a single step.
Can I build for both architectures?
Yes: --platform linux/amd64,linux/arm64 produces a multi-architecture image and each host pulls the right variant. It roughly doubles build time; for this series one architecture is enough.
Do I need Docker at all?
Not strictly. az acr build uploads your source and builds it inside Azure, which sidesteps the architecture issue entirely and needs no local Docker. This series builds locally so you can test before you deploy.
How do I update the app later?
Change the code, build and push with a new tag (1.0.1), then point the container app at the new tag. Part 6 covers revisions.
Is my image public now? No. ACR is private. Only identities you authorise can pull it — which is exactly what Part 5 sets up.
What's Next
Your image is sitting in Azure, built for the right architecture, waiting. In Part 5 you'll give it somewhere to run and get your public HTTPS URL.
Previous: ← Part 3: Resource Group and Container Registry Next: Part 5: Deploy to Azure Container Apps →
