Deploy a .NET App to Azure Container Apps — Part 2: Containerize It with Docker

Your app works on your machine because your machine happens to have .NET 10 installed. A container removes that "happens to" — it packages the app and the runtime into one box that behaves identically everywhere.
This is Part 2 of a 6-part series.
- Part 1: Build the App
- Part 2: Containerize It with Docker (you are here)
- Part 3: Resource Group and Container Registry
- Part 4: Push Your Image to the Registry
- Part 5: Deploy to Azure Container Apps
- Part 6: Logs, Scaling, Cost and Cleanup
What you need before starting
The sample-container-app project from Part 1, and Docker Desktop.
Download Docker Desktop from docker.com, install it, and start it. Docker only works while the Desktop app is running — the whale icon should be in your menu bar or system tray.
Check it's alive:
docker --version
Docker version 29.7.2, build a7dcaa6
If that errors, Docker Desktop isn't running yet. Open it and wait for the whale to stop animating.
What a container actually is
A container image is a snapshot of a tiny Linux machine with everything your app needs baked in: the operating system files, the .NET runtime, and your compiled code. A container is that snapshot, running.
The value is that the box is identical everywhere. Azure doesn't need .NET installed, doesn't need to know it's a .NET app, and doesn't care what your laptop has. It just runs the box.
Step 1: Add a .dockerignore
Before building anything, create a file named exactly .dockerignore (with the leading dot, no extension) next to Program.cs:
# Keep build junk and secrets out of the image build context.
# Anything listed here is never sent to Docker, so builds are faster
# and you cannot accidentally bake a secret into a published image.
bin/
obj/
.vs/
.vscode/
.idea/
**/.git
**/.gitignore
**/.DS_Store
**/node_modules
**/*.user
**/appsettings.Development.json
**/*.env
**/.env
Dockerfile
.dockerignore
README.md
When you run a build, Docker first copies your whole folder somewhere else — the "build context". Everything in that copy is available to be baked into the image. .dockerignore is the list of things to leave behind.
It's tempting to skip .dockerignore because the build works without it. But without it your .git history, local settings files, and any stray .env get copied into the build context — and a careless COPY . . bakes them into an image you then push to a registry.
Published images get pulled by people and systems you didn't anticipate. Treat everything inside one as public. The two lines that matter most here are **/.env and **/appsettings.Development.json.
Step 2: Write the Dockerfile
Create a file named exactly Dockerfile — no extension — in the same folder:
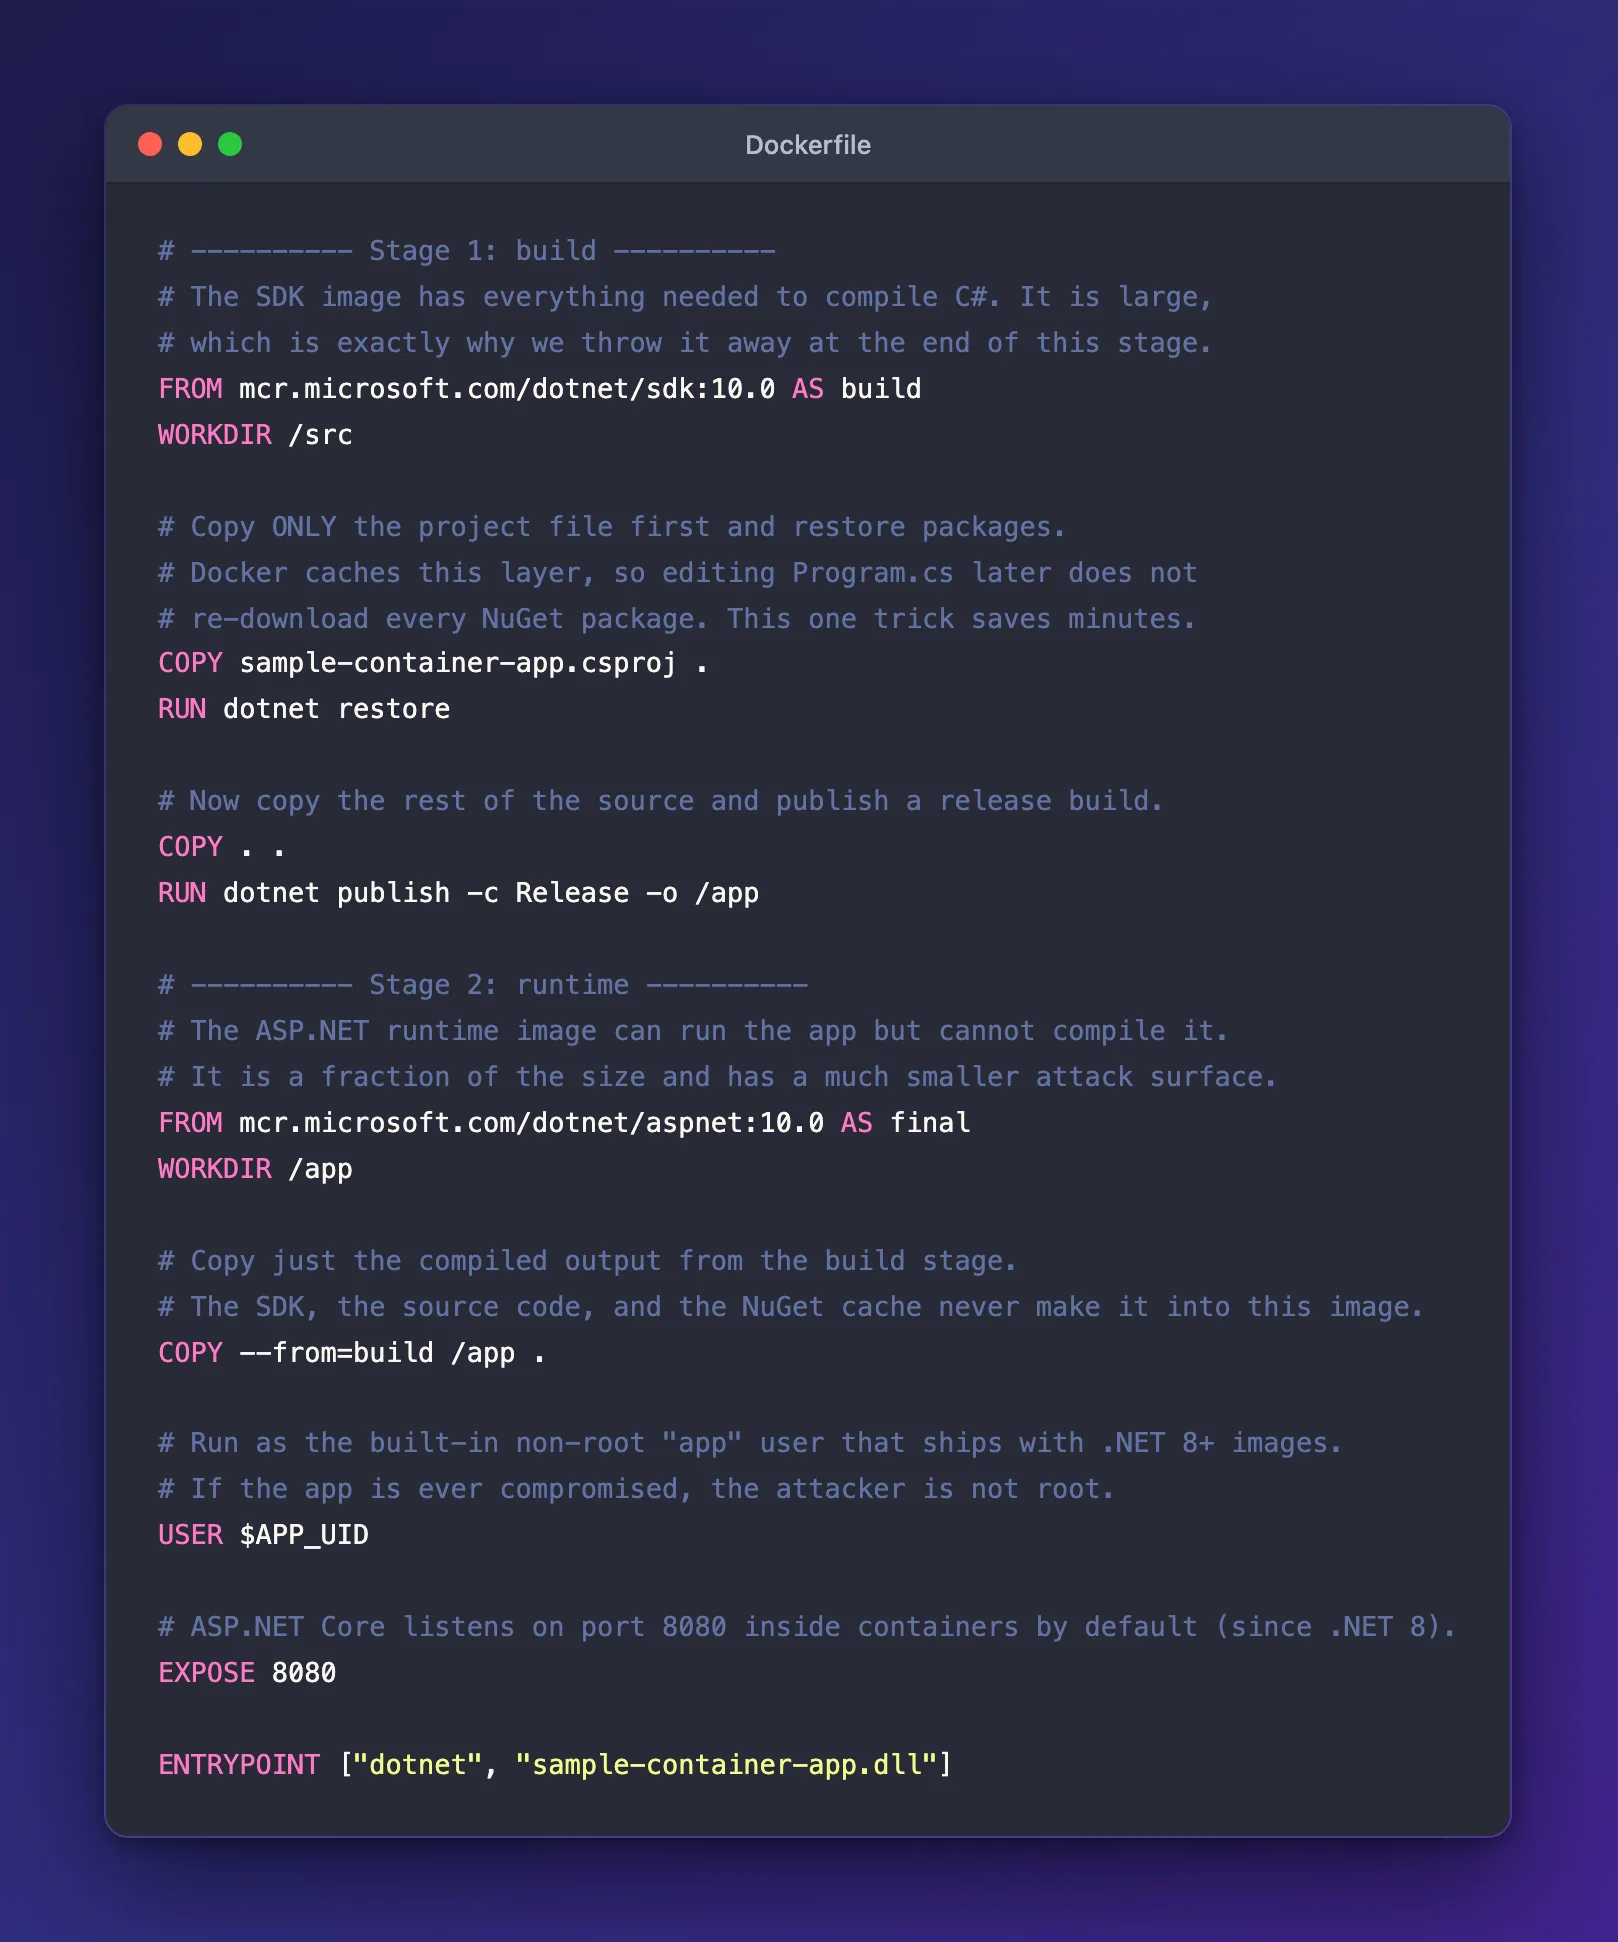
# ---------- Stage 1: build ----------
# The SDK image has everything needed to compile C#. It is large,
# which is exactly why we throw it away at the end of this stage.
FROM mcr.microsoft.com/dotnet/sdk:10.0 AS build
WORKDIR /src

# Copy ONLY the project file first and restore packages.
# Docker caches this layer, so editing Program.cs later does not
# re-download every NuGet package. This one trick saves minutes.
COPY sample-container-app.csproj .
RUN dotnet restore

# Now copy the rest of the source and publish a release build.
COPY . .
RUN dotnet publish -c Release -o /app

# ---------- Stage 2: runtime ----------
# The ASP.NET runtime image can run the app but cannot compile it.
# It is a fraction of the size and has a much smaller attack surface.
FROM mcr.microsoft.com/dotnet/aspnet:10.0 AS final
WORKDIR /app

# Copy just the compiled output from the build stage.
# The SDK, the source code, and the NuGet cache never make it into this image.
COPY --from=build /app .

# Run as the built-in non-root "app" user that ships with .NET 8+ images.
# If the app is ever compromised, the attacker is not root.
USER $APP_UID

# ASP.NET Core listens on port 8080 inside containers by default (since .NET 8).
EXPOSE 8080

ENTRYPOINT ["dotnet", "sample-container-app.dll"]
Reading it line by line
FROM ... AS build starts from Microsoft's SDK image — a Linux system with the full .NET toolchain. It can compile code. It's also big.
COPY sample-container-app.csproj . then RUN dotnet restore is deliberate ordering. Docker caches each step, and reuses the cache as long as the inputs haven't changed. By copying only the project file before restoring packages, editing Program.cs doesn't invalidate the restore. On a real project that's the difference between a 3-second rebuild and a 3-minute one.
FROM ... AS final starts a second, fresh image from the ASP.NET runtime — which can run .NET apps but not compile them.
COPY --from=build /app . reaches into the first stage and takes only the compiled output. The SDK, your source code, and the package cache are all left behind.
USER $APP_UID switches to the non-root app user that Microsoft ships in .NET 8+ images.
EXPOSE 8080 documents the port. Since .NET 8, containerised ASP.NET Core listens on 8080 by default, not 80. Remember this number — Part 5 asks for it.
Note the tags are :10.0, not :latest. latest means "whatever is newest right now", so a build that worked today can silently break tomorrow when a new major version lands. Pin to a version.
For production, go further and pin to a digest (mcr.microsoft.com/dotnet/aspnet:10.0@sha256:...), which guarantees the exact same bytes every time.
Step 3: Build the image
docker build -t hello-container-app:1.0.0 .
The -t gives it a name and version tag. The . at the end means "build using this folder".
The first run downloads both base images, so expect a minute or two. You'll see the stages go by:
 => [build 3/6] COPY sample-container-app.csproj .
 => [build 4/6] RUN dotnet restore
 => [build 5/6] COPY . .
 => [build 6/6] RUN dotnet publish -c Release -o /app
 => [final 3/3] COPY --from=build /app .
 => exporting to image
 => naming to docker.io/library/hello-container-app:1.0.0
Check the result:
docker images hello-container-app
IMAGE                       ID             DISK USAGE   CONTENT SIZE
hello-container-app:1.0.0   f6980f962c92        262MB             0B
Was multi-stage worth it?
Here's the same app built the naive way — one stage, keeping the SDK — compared with the multi-stage version above:
| Build style | Image size |
|---|---|
| Single stage (SDK kept in the final image) | 945 MB |
| Multi-stage (runtime only) | 262 MB |
A 72% reduction, from the same source code. Smaller images push faster, pull faster, cold-start faster, and contain far less software that could have a vulnerability. A compiler in a production image is pure liability.
Step 4: Run the container
docker run -d -p 8080:8080 --name status-page hello-container-app:1.0.0
Breaking that down:
-druns it in the background so you get your terminal back.-p 8080:8080connects port 8080 on your machine to port 8080 inside the container. Without this the app is sealed inside and unreachable.--name status-pagegives it a friendly name.
Confirm it's running:
docker ps
CONTAINER ID   IMAGE                       STATUS         PORTS                    NAMES
b6a8ddec4d46   hello-container-app:1.0.0   Up 6 seconds   0.0.0.0:8080->8080/tcp   status-page
Note that CONTAINER ID: b6a8ddec4d46.
Step 5: The proof
Open http://localhost:8080 in your browser.
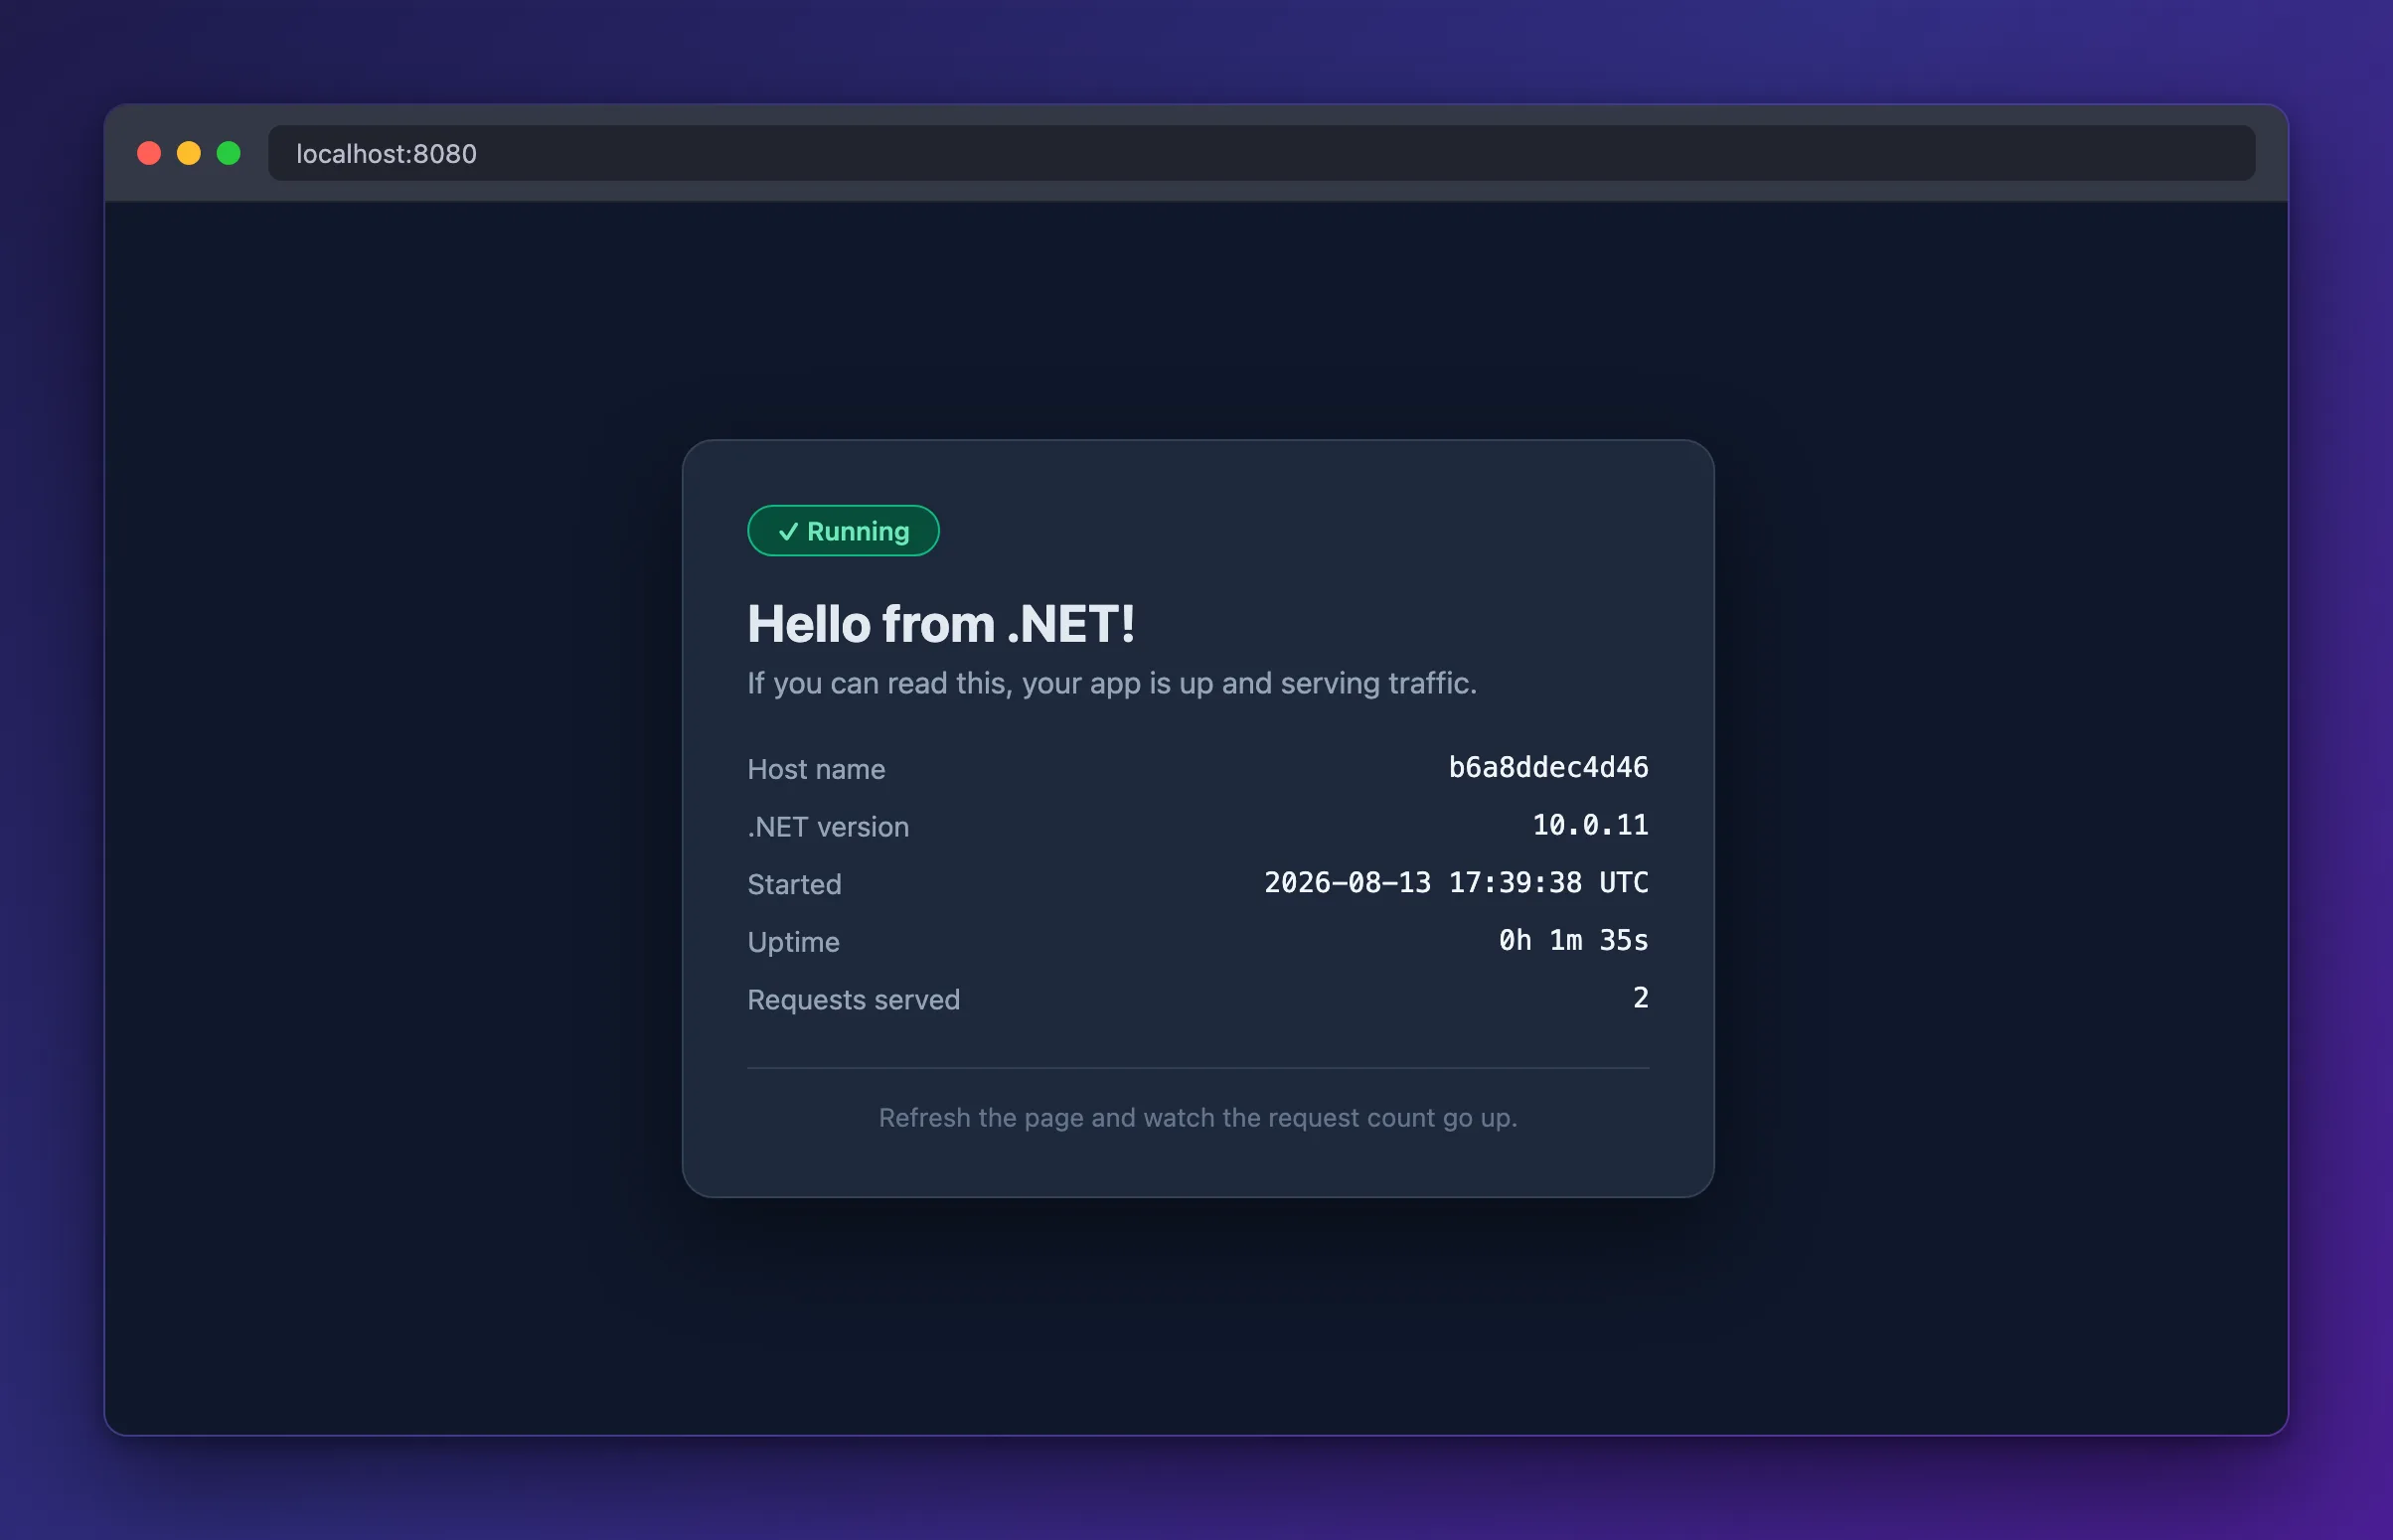
Same page — but look at Host name. In Part 1 it said MacBookPro. Now it says b6a8ddec4d46, exactly matching the container ID from docker ps.
That's your proof. The app is no longer running on your laptop; it's running inside a small Linux machine that only exists because Docker made it.
You may also notice the .NET version ticked up slightly — 10.0.9 locally versus 10.0.11 in the container. Your laptop has whatever patch you installed; the container has whatever shipped in the base image. That's the point of containers: the runtime travels with the app.
Confirm it's not running as root
docker exec status-page whoami
app
Not root. That's USER $APP_UID doing its job.
Step 6: Stop it (when you're ready)
Leave it running if you want to keep poking at it. When you're finished:
docker stop status-page
Common Mistakes
| Mistake | What you'll see | Fix |
|---|---|---|
Forgetting -p 8080:8080 | Container runs, browser can't connect | Include the port mapping |
| Mapping to port 80 | Blank page or connection refused | ASP.NET Core containers listen on 8080 since .NET 8 |
Naming the file Dockerfile.txt | failed to read dockerfile | It must be exactly Dockerfile, no extension |
Deploying :latest | Can't tell which build is live; no rollback | Tag versions like 1.0.0 |
Skipping .dockerignore | Bloated builds, secrets in the image | Add it before your first build |
Troubleshooting
| Problem | Cause | Fix |
|---|---|---|
Cannot connect to the Docker daemon | Docker Desktop isn't running | Start it and wait for the whale to settle |
port is already allocated | Something else uses 8080 | Use -p 8081:8080 and browse to localhost:8081 |
name is already in use | A container called status-page exists | docker rm -f status-page then run again |
Build fails at dotnet restore | Wrong .csproj filename in the Dockerfile | The COPY line must match your actual project filename |
| Very slow first build | Downloading base images | Normal once; later builds use the cache |
FAQ
What's the difference between an image and a container? An image is the saved template. A container is a running instance of it. One image, many containers.
Why two FROM lines?
That's the multi-stage build. The first stage compiles; the second stage runs. Only the second becomes your final image.
Do I need Docker on the Azure side? No. Azure Container Apps runs your image for you. Docker is only needed locally to build and test it.
Is EXPOSE 8080 what makes the port work?
No — it's documentation. -p 8080:8080 on docker run is what actually connects the port. EXPOSE tells humans and tools which port to expect.
What's Next
You have a container image on your laptop. Azure can't reach your laptop, so the image needs somewhere shared to live.
In Part 3 you'll create your first Azure resources: a resource group and a container registry.
Previous: ← Part 1: Build the App Next: Part 3: Resource Group and Container Registry →
