Part 5: Create a Next.js Chat App for Your Agent
So far you have talked to the Dewiride Service Desk agent from an .http file. Your colleagues won't. Over the next three parts you build them a chat page: this part creates the web app and its settings, Part 6 connects it to the agent through a trusted server route, and Part 7 builds the chat itself.
This is Part 5 of a 22-part series.
- Part 1: Overview, Architecture and Azure Setup
- Part 2: Create a Production-Grade .NET Solution
- Part 3: Your First Agent API with Microsoft Foundry
- Part 4: Multi-Turn Conversations with Sessions
- Part 5: Create a Next.js Chat App for Your Agent (you are here)
- Part 6: Stream the Agent Through a Trusted Next.js Route Handler
- Part 7: Build a Streaming Chat Page with the AG-UI Client
- Part 8: Secure the API with Microsoft Entra ID (coming soon)
- Part 9: Give the Agent Enterprise Tools (coming soon)
- Part 10: Create Tickets and Test Your Tools (coming soon)
- Part 11: Connect an MCP Server (coming soon)
- Part 12: Human Approval for Sensitive Actions (coming soon)
- Part 13: Approval Cards in the Chat UI (coming soon)
- Part 14: Persistent Conversations (coming soon)
- Part 15: Memory That Knows the Employee (coming soon)
- Part 16: Guardrails — Keep Secrets Out of the Model (coming soon)
- Part 17: Audit Logs and Observability (coming soon)
- Part 18: Ticket Triage Workflow (coming soon)
- Part 19: Manager Approvals and Checkpoints (coming soon)
- Part 20: Agent Harness — Weekly Problem Report (coming soon)
- Part 21: Deploy to Azure Container Apps (coming soon)
- Part 22: Bring It to Microsoft Teams (coming soon)
By the end of this part you will have a Next.js app in the solution's new web folder. It knows which agent it belongs to — its address, its name and its welcome message — from three settings that live outside the code, it reads them on every request, and it refuses to start when one of them is wrong. Every step works in VS Code and in Visual Studio, and every command works in bash, zsh and PowerShell; where they differ, the page shows a tab for each. Every output on this page is real, captured while building the project.
What You Will Build
The chat app is a second, separate application next to the .NET API. A browser talks only to the chat app. The chat app's server talks to the agent's API, which talks to Microsoft Foundry:
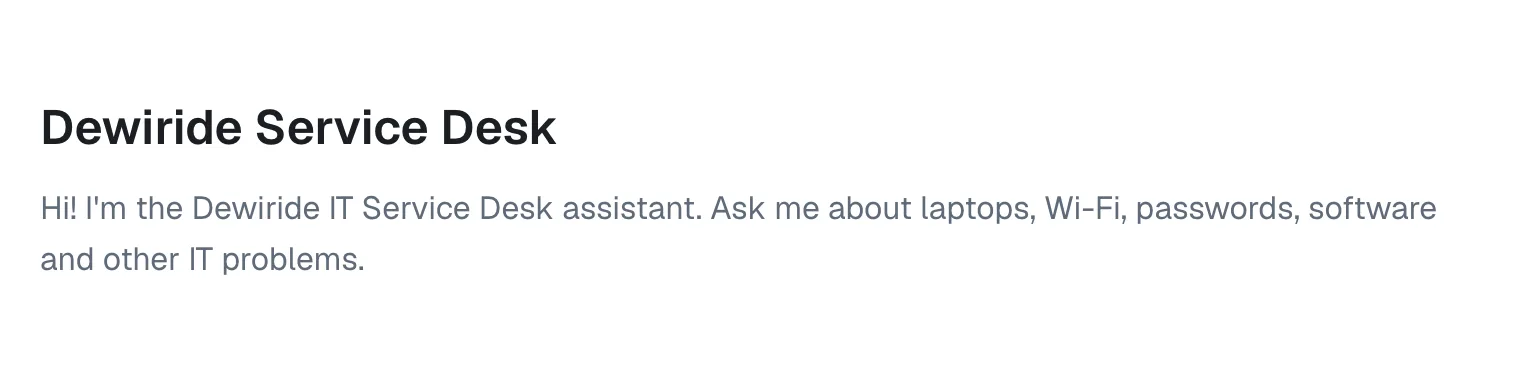
This part builds the box in the middle and its settings. At the end, the app shows the agent's name and welcome message, both read from the settings while the app runs:
Why a Separate Chat App
Why Next.js
A chat page needs two things: a page in the browser, and a small server it can trust. Next.js gives you both in one project. It renders React pages, and the same project can hold route handlers — small server endpoints that run on your machine (and later in Azure), never in the browser. Part 6 uses one as the only way to reach the agent, which is exactly what Microsoft's AG-UI security guidance asks for. Next.js 16, the newest release, runs on Node.js, the JavaScript runtime this series uses at its newest long-term support release, Node.js 26.
Settings that live outside the code
The chat app is meant to be plug-and-play: the same code should work for the Dewiride Service Desk agent today and for another AG-UI agent tomorrow. So nothing about the agent is written into the code. Three settings say everything the app needs to know:
| Setting | What it holds | Example |
|---|---|---|
AGENT_URL | The address of the agent's AG-UI endpoint | http://localhost:5180/api/agents/service-desk |
AGENT_NAME | The name the page shows | Dewiride Service Desk |
AGENT_WELCOME | The first thing the page says | Hi! I'm the Dewiride IT Service Desk assistant… |
They are environment variables, read on the server while the app runs — not baked into the app when it is built. Build the app once, and you can point it at any agent by changing three values. Part 7 shows exactly that.
Checked before anyone opens the app
A missing or mistyped setting is the most common reason a deployed app fails. In Part 3, the .NET API checks its Foundry settings when it starts and refuses to run without them. The chat app does the same: when the server starts, it checks all three settings, and a wrong one fails the start with a message that names the setting. npm run dev stops right there; a production server logs the message and answers every request with an error until the setting is fixed. Either way, nobody sees a page built on a wrong setting.
What This Part Costs
Nothing. This part creates no Azure resources and doesn't call the model. Everything runs on your machine.
Prerequisites
- The solution from Part 4. If you skipped it, follow Part 4 first. This part adds a folder to it and changes nothing in the .NET projects.
- Node.js 26 LTS and npm 12. Install Node.js from nodejs.org; npm comes with it. Step 1 checks both versions, and How to Update npm to the Newest Version shows how to move npm to the newest release.
- VS Code or Visual Studio, set up as in Part 2.
Step 1: Check Node.js and npm
Open a terminal in the solution folder, DewirideServiceDesk:
- VS Code
- Visual Studio
Open the DewirideServiceDesk folder in VS Code, then open Terminal → New Terminal. The terminal starts in the solution folder.
With the solution open, select View → Terminal. The terminal opens in the solution folder.
Check the Node.js version:
node --version
v26.13.0
And npm's:
npm --version
12.2.2
Any Node.js 26 release works. Next.js 16 needs at least Node.js 20.9, but this series uses the newest long-term support release.
Step 2: Create the Next.js App
The chat app gets its own folder, web, next to src. Create the folder first:
mkdir web
create-next-app checks that the folder it creates the app in can be written to. If web doesn't exist yet, that check fails, and it stops with The application path is not writable, please check folder permissions and try again — even though nothing is wrong with your permissions (Fixed: create-next-app The Application Path Is Not Writable).
Now create the app with create-next-app, Next.js's official project generator. One command, with every choice spelled out, so nothing depends on preferences saved on your machine:
npx create-next-app@16.4.6 web/agent-chat-ui --ts --biome --app --cache-components --no-tailwind --no-src-dir --no-react-compiler --import-alias "@/*" --use-npm --no-agents-md --no-agent-feedback --disable-git
The command works unchanged in bash, zsh and PowerShell. npx downloads create-next-app the first time and asks before it does; answer y:
Need to install the following packages:
create-next-app@16.4.6
Ok to proceed? (y) y
npm notice run npx
npm notice run 'create-next-app' web/agent-chat-ui --ts --biome --app --cache-components --no-tailwind --no-src-dir --no-react-compiler --import-alias @/* --use-npm --no-agents-md --no-agent-feedback --disable-git
Creating a new Next.js app in /Users/you/source/DewirideServiceDesk/web/agent-chat-ui.

Using npm.

Initializing project with template: app


Installing dependencies:
- next
- react
- react-dom

Installing devDependencies:
- @biomejs/biome
- @types/node
- @types/react
- @types/react-dom
- typescript


added 30 packages, and audited 31 packages in 19s

7 packages are looking for funding
  run `npm fund` for details

found 0 vulnerabilities

npm notice run agent-chat-ui@0.1.0 npx
npm notice run 'next' typegen
Generating route types...
✓ Types generated successfully

Skipping git initialization.

Success! Created agent-chat-ui at /Users/you/source/DewirideServiceDesk/web/agent-chat-ui
The npm notice run lines are npm 12 telling you which command it runs. Here is what each part of the command chose:
| Part of the command | What it does |
|---|---|
npx create-next-app@16.4.6 | Runs create-next-app, pinned to the version that matches Next.js 16.4.6 |
web/agent-chat-ui | Creates the app in this folder and names it agent-chat-ui |
--ts | TypeScript, so mistakes show up before the code runs |
--biome | Biome checks and formats the code (more on this below) |
--app | The App Router, Next.js's current way to build pages |
--cache-components | Turns on Cache Components, which decides what can be prepared ahead and what must wait for a request |
--no-tailwind | Plain CSS instead of the Tailwind CSS framework: a chat page needs little styling, and plain CSS is easy to restyle |
--no-src-dir | Keeps the app folder at the top of the project |
--no-react-compiler | Leaves out the React Compiler, which this small app doesn't need |
--import-alias "@/*" | Lets code import @/lib/… instead of counting ../ folders |
--use-npm | Installs packages with npm |
--no-agents-md | Leaves out the instructions file for AI coding assistants |
--no-agent-feedback | Doesn't set the app up to prepare feedback for the Next.js team |
--disable-git | Doesn't create a separate Git repository inside your solution |
Why Biome instead of ESLint? create-next-app offers both. On the day I built this, the ESLint setup installed ESLint 9, which npm reports as no longer supported, and arrived with seven moderate security advisories that npm audit fix can't fix. Its TypeScript rules also refuse to run with TypeScript 7, the newest release. Biome is a single tool that checks and formats the code, has none of these problems, and installs in 30 packages instead of 345. If you prefer ESLint, the problems and their fixes are in Fixed: npm warn deprecated eslint@9.39.5, Fixed: npm audit Reports 7 Moderate Severity Vulnerabilities in a New Next.js App and Fixed: typescript-eslint Does Not Support TS 7.0.
Why Cache Components? It is create-next-app's default, and Next.js's own documentation says it will be enabled everywhere in the next major release. Turning it on now keeps the app ready for Next.js 17. It matters in Step 10, where the page reads its settings.
Step 3: Pin Exact Versions
Move into the app's folder. Every command from here on runs there:
cd web/agent-chat-ui
The series pins exact versions, so your project matches this page. npm, however, writes ranges such as ^19 into package.json unless you tell it otherwise. Tell it once, for this project:
npm config set save-exact=true --location=project
The command prints nothing. It creates a file named .npmrc in the app's folder with one line:
save-exact=true
From now on, every npm install in this folder records the exact version it installed. How to Pin Exact npm Package Versions covers .npmrc and --save-exact in detail.
Step 4: Update the Packages to the Newest Versions
create-next-app 16.4.6 starts from a template that is a little behind: React 19.3.0, Biome 2.4.2, TypeScript 5 and the type definitions for Node.js 20. The series uses the newest release of everything, so update them. First the two runtime packages:
npm install react@19.3.1 react-dom@19.3.1
changed 2 packages, and audited 31 packages in 1s

7 packages are looking for funding
  run `npm fund` for details

found 0 vulnerabilities
Then the development tools:
npm install --save-dev typescript@7.0.2 @types/node@26.6.6 @types/react@19.3.0 @types/react-dom@19.3.0 @biomejs/biome@2.6.6
added 1 package, changed 5 packages, and audited 32 packages in 4s

7 packages are looking for funding
  run `npm fund` for details

found 0 vulnerabilities
--save-dev records them as development dependencies: tools you need while building the app, not while it runs. @types/node@26.6.6 matches the Node.js 26 you run. Open package.json — every version is now exact:
{
  "name": "agent-chat-ui",
  "version": "0.1.0",
  "private": true,
  "scripts": {
    "dev": "next dev",
    "build": "next build",
    "start": "next start",
    "lint": "biome check",
    "format": "biome format --write"
  },
  "dependencies": {
    "next": "16.4.6",
    "react": "19.3.1",
    "react-dom": "19.3.1"
  },
  "devDependencies": {
    "@biomejs/biome": "2.6.6",
    "@types/node": "26.6.6",
    "@types/react": "19.3.0",
    "@types/react-dom": "19.3.0",
    "typescript": "7.0.2"
  }
}
About TypeScript 7. TypeScript 7 is the new, much faster version of the TypeScript compiler. Next.js documents it directly: TypeScript 7 doesn't provide the JavaScript compiler API yet, so next build checks your code with the project's own tsc command instead — no setting needed.
Step 5: Update Biome's Settings File
The template wrote biome.json for Biome 2.4.2. Biome 2.6.6 still reads it, but it reports that the file's schema version doesn't match and that one field is deprecated, and it asks you to migrate the file (Fixed: Biome The Configuration Schema Version Does Not Match the CLI Version). Biome does the migration itself:
npx biome migrate --write
npm notice run agent-chat-ui@0.1.0 npx
npm notice run 'biome' migrate --write
configuration ━━━━━━━━━━━━━━━━━━━━━━━━━━━━━━━━━━━━━━━━━━━━━━━━━━━━━━━━━━━━━━━━━━━━━━━━━━━━━━
  ℹ Migration results:

  - /Users/you/source/DewirideServiceDesk/web/agent-chat-ui/biome.json: configuration successfully migrated.
Two lines changed. The schema now names version 2.6.6, and "recommended": true became "preset": "recommended", the newer way to switch on Biome's recommended rules:
{
  "$schema": "https://biomejs.dev/schemas/2.6.6/schema.json",
  "vcs": {
    "enabled": true,
    "clientKind": "git",
    "useIgnoreFile": true
  },
  "files": {
    "ignoreUnknown": true,
    "includes": ["**", "!node_modules", "!.next", "!dist", "!build"]
  },
  "formatter": {
    "enabled": true,
    "indentStyle": "space",
    "indentWidth": 2
  },
  "linter": {
    "enabled": true,
    "rules": {
      "preset": "recommended"
    },
    "domains": {
      "next": "recommended",
      "react": "recommended"
    }
  },
  "assist": {
    "actions": {
      "source": {
        "organizeImports": "on"
      }
    }
  }
}
domains switches on Biome's rules for Next.js and React code, and useIgnoreFile makes Biome skip everything .gitignore lists.
Step 6: Remove the Sample Images
The template's welcome page used five sample images from the public folder. Your page won't, and Biome's accessibility rules flag all five, because none of them has a title (Fixed: Biome Alternative Text Title Element Cannot Be Empty). Delete the folder:
- macOS / Linux
- Windows (PowerShell)
rm -r public
Remove-Item -Recurse public
Now let Biome check the project. npm run lint runs the lint script from package.json, which is biome check:
npm run lint
npm notice run agent-chat-ui@0.1.0 lint
npm notice run biome check
Checked 9 files in 3ms. No fixes applied.
No problems. One more check, for known security problems in the installed packages:
npm audit
found 0 vulnerabilities
Step 7: Add the Agent's Settings
Next.js reads environment variables from .env files in the app's folder. Two files work together:
.env.examplelists every setting the app needs, with safe example values. It goes into source control, so the next developer knows what to set..env.localholds the values for your machine. It never goes into source control.
Create web/agent-chat-ui/.env.example:
# The AG-UI endpoint of the agent this chat talks to.
AGENT_URL=http://localhost:5180/api/agents/service-desk

# The name the chat shows for the agent, and the first thing it says.
AGENT_NAME="Dewiride Service Desk"
AGENT_WELCOME="Hi! I'm the Dewiride IT Service Desk assistant. Ask me about laptops, Wi-Fi, passwords, software and other IT problems."
AGENT_URL is the endpoint the API maps in Part 3, on the port from Part 2. The quotes around the name and the welcome keep the spaces and the apostrophe in one value.
The template's .gitignore keeps every .env file out of source control, which would also hide your example. Open web/agent-chat-ui/.gitignore, find the env files section and add one line below .env*:
# env files (can opt-in for committing if needed)
.env*
!.env.example
The ! makes an exception: .env.example is committed, every other .env file stays private. How to Commit a .env.example File in a Next.js Project explains the pattern.
Now make your own copy, .env.local:
- macOS / Linux
- Windows (PowerShell)
cp .env.example .env.local
Copy-Item .env.example .env.local
The example values are exactly right for this series, so .env.local needs no changes. None of the three settings is a secret. If the app ever needs one, it goes into .env.local and never into .env.example.
Why not NEXT_PUBLIC_? Next.js copies variables whose names start with NEXT_PUBLIC_ into the JavaScript it sends to browsers, and fixes their values when the app is built. Without the prefix, environment variables are only available on the server, in Next.js's own words. That is what you want: the agent's address stays on the server, and the values can change without a new build.
Step 8: Read and Check the Settings
The app needs one function that reads the three settings, checks them and returns them. It checks them with zod, a library that describes what valid data looks like and reports exactly what isn't. Install it:
npm install zod@4.6.7
added 1 package, and audited 33 packages in 843ms

8 packages are looking for funding
  run `npm fund` for details

found 0 vulnerabilities
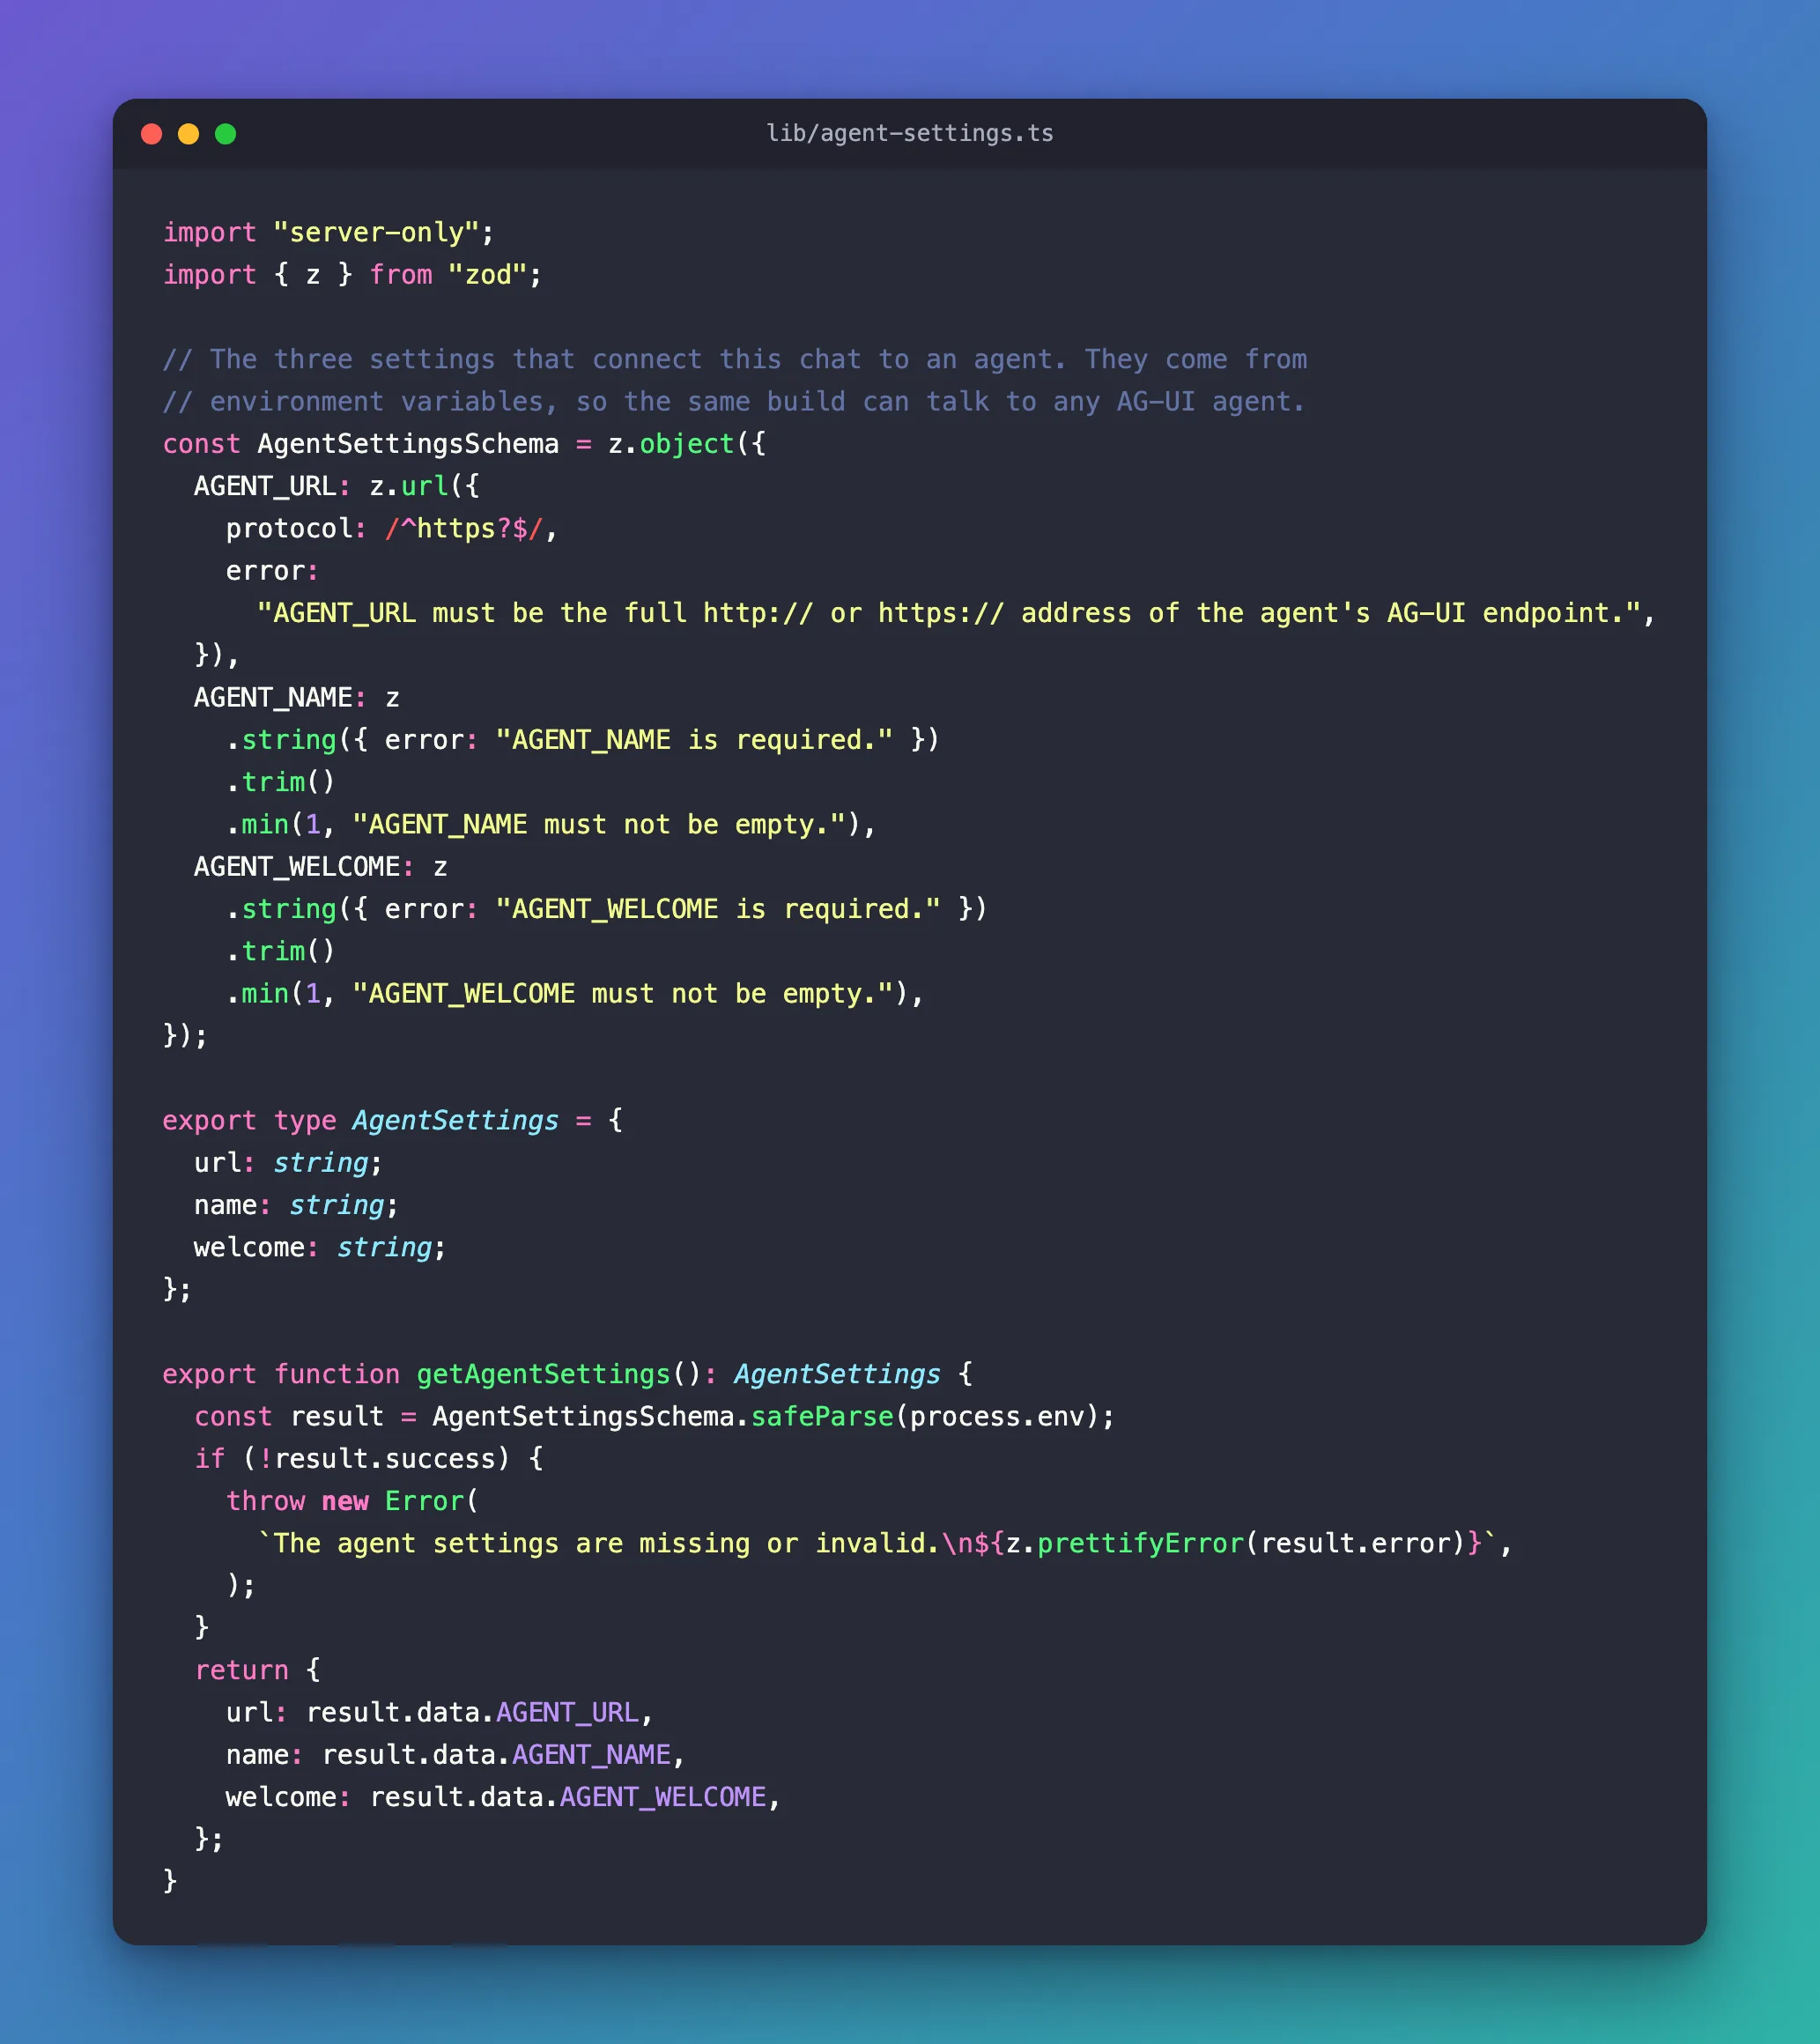
Create a folder named lib in web/agent-chat-ui, and in it a file named agent-settings.ts. It starts with two imports:
import "server-only";
import { z } from "zod";
import "server-only" marks the file as server code. If anyone ever imports it into a component that runs in the browser, next build fails instead of quietly sending server code to the browser. Next.js understands the import without installing anything (How to Keep Server-Only Code Out of the Browser in Next.js).
Next, a description of valid settings:
// The three settings that connect this chat to an agent. They come from
// environment variables, so the same build can talk to any AG-UI agent.
const AgentSettingsSchema = z.object({
  AGENT_URL: z.url({
    protocol: /^https?$/,
    error:
      "AGENT_URL must be the full http:// or https:// address of the agent's AG-UI endpoint.",
  }),
  AGENT_NAME: z
    .string({ error: "AGENT_NAME is required." })
    .trim()
    .min(1, "AGENT_NAME must not be empty."),
  AGENT_WELCOME: z
    .string({ error: "AGENT_WELCOME is required." })
    .trim()
    .min(1, "AGENT_WELCOME must not be empty."),
});
| Rule | What it checks |
|---|---|
z.url({ protocol: /^https?$/ }) | AGENT_URL is a complete web address that starts with http:// or https:// |
z.string({ error: … }) | The setting exists. The error text is what you see when it doesn't |
.trim().min(1, …) | After removing spaces at either end, the value isn't empty |
Each rule carries its own message, so a mistake explains itself in plain words. Then the function the rest of the app calls:
export type AgentSettings = {
  url: string;
  name: string;
  welcome: string;
};

export function getAgentSettings(): AgentSettings {
  const result = AgentSettingsSchema.safeParse(process.env);
  if (!result.success) {
    throw new Error(
      `The agent settings are missing or invalid.\n${z.prettifyError(result.error)}`,
    );
  }
  return {
    url: result.data.AGENT_URL,
    name: result.data.AGENT_NAME,
    welcome: result.data.AGENT_WELCOME,
  };
}
safeParse(process.env) checks all environment variables against the description, without throwing. If anything is wrong, z.prettifyError turns zod's findings into one readable message per setting, and the function throws. Otherwise it returns the three values under friendlier names. The complete file:
import "server-only";
import { z } from "zod";

// The three settings that connect this chat to an agent. They come from
// environment variables, so the same build can talk to any AG-UI agent.
const AgentSettingsSchema = z.object({
  AGENT_URL: z.url({
    protocol: /^https?$/,
    error:
      "AGENT_URL must be the full http:// or https:// address of the agent's AG-UI endpoint.",
  }),
  AGENT_NAME: z
    .string({ error: "AGENT_NAME is required." })
    .trim()
    .min(1, "AGENT_NAME must not be empty."),
  AGENT_WELCOME: z
    .string({ error: "AGENT_WELCOME is required." })
    .trim()
    .min(1, "AGENT_WELCOME must not be empty."),
});

export type AgentSettings = {
  url: string;
  name: string;
  welcome: string;
};

export function getAgentSettings(): AgentSettings {
  const result = AgentSettingsSchema.safeParse(process.env);
  if (!result.success) {
    throw new Error(
      `The agent settings are missing or invalid.\n${z.prettifyError(result.error)}`,
    );
  }
  return {
    url: result.data.AGENT_URL,
    name: result.data.AGENT_NAME,
    welcome: result.data.AGENT_WELCOME,
  };
}
Step 9: Check the Settings When the App Starts
Next.js has one file for code that runs when the server starts: instrumentation.ts, at the top of the project. Its register function is, in Next.js's documentation, called once when a new Next.js server instance is initiated, and must complete before the server is ready to handle requests. That is the moment to check the settings. Create web/agent-chat-ui/instrumentation.ts:
// Next.js calls register() once, when the server starts. Checking the
// settings here stops a misconfigured chat before anyone opens it.
export async function register() {
  if (process.env.NEXT_RUNTIME === "nodejs") {
    const { getAgentSettings } = await import("./lib/agent-settings");
    getAgentSettings();
  }
}
| Code | What it does |
|---|---|
export async function register() | The function Next.js calls when the server starts |
process.env.NEXT_RUNTIME === "nodejs" | Next.js has two server runtimes, Node.js and Edge. This app runs on Node.js, so the check runs only there |
await import("./lib/agent-settings") | Loads the settings file only inside that check |
getAgentSettings() | Throws when a setting is wrong — and an error in register fails the server's start |
The result is ignored: the call is there only to throw. If a setting is wrong, npm run dev stops at once with a message such as AGENT_URL must be the full http:// or https:// address of the agent's AG-UI endpoint — see Troubleshooting for what that looks like. A production server started with npm start logs the same message and answers every request with an error until the setting is fixed. How to Validate Environment Variables When a Next.js App Starts covers the pattern on its own.
Step 10: Show the Settings on the Page
Now the page itself. Four files change, all in web/agent-chat-ui/app.
The colors
Replace the whole of app/globals.css. It defines the app's colors once, as CSS variables, and a second set for dark mode, which the browser picks when your system uses a dark theme (How to Support Light and Dark Mode with CSS Variables):
:root {
  --background: #ffffff;
  --foreground: #1b1f24;
  --muted: #5f6b7a;
  --border: #dde2e8;
  --surface: #f1f4f7;
  --accent: #2f6fd6;
  --on-accent: #ffffff;
  --link: #2f6fd6;
  --error: #b42318;
  --error-surface: #fdecea;
}

@media (prefers-color-scheme: dark) {
  :root {
    --background: #0f1216;
    --foreground: #e8ebef;
    --muted: #98a3b1;
    --border: #2a313a;
    --surface: #1a2028;
    --accent: #4d8af0;
    --on-accent: #ffffff;
    --link: #7fb0ff;
    --error: #ffb4a8;
    --error-surface: #3a1714;
  }

  html {
    color-scheme: dark;
  }
}

* {
  box-sizing: border-box;
  padding: 0;
  margin: 0;
}

body {
  color: var(--foreground);
  background: var(--background);
  font-family: var(--font-geist-sans), Arial, Helvetica, sans-serif;
  -webkit-font-smoothing: antialiased;
  -moz-osx-font-smoothing: grayscale;
}
This part uses only a few of these colors. The chat page in Part 7 uses the rest, so this file won't need to change again.
The page's frame
app/layout.tsx wraps every page. Change only its metadata — the template's says Create Next App:
export const metadata: Metadata = {
  title: "Agent chat",
  description: "Chat with an AI agent over AG-UI.",
};
The complete file:
import type { Metadata } from "next";
import { Geist, Geist_Mono } from "next/font/google";
import "./globals.css";

const geistSans = Geist({
  variable: "--font-geist-sans",
  subsets: ["latin"],
});

const geistMono = Geist_Mono({
  variable: "--font-geist-mono",
  subsets: ["latin"],
});

export const metadata: Metadata = {
  title: "Agent chat",
  description: "Chat with an AI agent over AG-UI.",
};

export default function RootLayout({ children }: LayoutProps<"/">) {
  return (
    <html lang="en" className={`${geistSans.variable} ${geistMono.variable}`}>
      <body>{children}</body>
    </html>
  );
}
Agent chat is only a fallback: the page itself sets the browser tab's title to the agent's name.
The page
Replace the whole of app/page.tsx. The important part is how it reads the settings:
// Reads the settings on every request, so one build can talk to any agent.
async function AgentWelcome() {
  await connection();
  const { name, welcome } = getAgentSettings();
  return (
    <main className={styles.welcome}>
      <h1>{name}</h1>
      <p>{welcome}</p>
    </main>
  );
}
await connection() is the key line. With Cache Components on, Next.js prepares as much of every page as it can when the app is built. Without that line, it could read the settings once, during the build, and keep those values forever. connection() tells Next.js to wait for a real request before running the rest of the component, so the settings are read from the running server every time. Next.js's guide on environment variables shows exactly this: you can safely read environment variables on the server during dynamic rendering (How to Read Environment Variables at Runtime in Next.js).
The component that waits is wrapped in a Suspense boundary:
export default function Home() {
  return (
    <Suspense>
      <AgentWelcome />
    </Suspense>
  );
}
With Cache Components, Next.js's documentation asks you to put the component that calls connection() inside a Suspense boundary. The page's frame is then sent at once, and the part that needs the request streams in after it. The tab title gets the same treatment:
export async function generateMetadata(): Promise<Metadata> {
  await connection();
  return { title: getAgentSettings().name };
}
The complete file:
import type { Metadata } from "next";
import { connection } from "next/server";
import { Suspense } from "react";
import { getAgentSettings } from "@/lib/agent-settings";
import styles from "./page.module.css";

export async function generateMetadata(): Promise<Metadata> {
  await connection();
  return { title: getAgentSettings().name };
}

export default function Home() {
  return (
    <Suspense>
      <AgentWelcome />
    </Suspense>
  );
}

// Reads the settings on every request, so one build can talk to any agent.
async function AgentWelcome() {
  await connection();
  const { name, welcome } = getAgentSettings();
  return (
    <main className={styles.welcome}>
      <h1>{name}</h1>
      <p>{welcome}</p>
    </main>
  );
}
The page's styles
Replace the whole of app/page.module.css — the template's styles belong to its sample page:
.welcome {
  display: grid;
  gap: 12px;
  max-width: 760px;
  margin: 0 auto;
  padding: 48px 20px;
}

.welcome h1 {
  font-size: 1.5rem;
  font-weight: 600;
}

.welcome p {
  color: var(--muted);
  line-height: 1.6;
}
A .module.css file is a CSS module: its class names belong to the component that imports it, so .welcome here can't clash with a .welcome anywhere else.
Let Biome check the new files:
npm run lint
npm notice run agent-chat-ui@0.1.0 lint
npm notice run biome check
Checked 11 files in 4ms. No fixes applied.
Step 11: Run the App
Start the development server:
npm run dev
npm notice run agent-chat-ui@0.1.0 dev
npm notice run next dev
▲ Next.js 16.4.6 (Turbopack)
- Local:         http://localhost:3000
- Network:       http://192.168.1.10:3000
- Environments: .env.local
✓ Ready in 265ms
✓ Running next.config.ts took 67ms
- Cache Components enabled
- Partial Prefetching enabled
| Line | What it tells you |
|---|---|
Local: http://localhost:3000 | The address of the app on your machine |
Network: … | The same app for other devices on your network. Your address will differ |
Environments: .env.local | Next.js loaded your settings file |
Ready in 265ms | The server started. register runs right after this line: had it found a problem, its error would appear below and the server would stop |
Cache Components enabled | The choice from Step 2 is on |
Open http://localhost:3000 in your browser. The page shows the agent's name and welcome message — both read from .env.local by the server — and the browser tab reads Dewiride Service Desk:
The terminal logs the request, GET / 200. Stop the server with Ctrl+C. You don't need the .NET API running yet: this page doesn't talk to the agent. Part 6 connects the two.
If you run npm run dev from an AI coding assistant, such as Claude Code, GitHub Copilot or Cursor, Next.js adds a file named AGENTS.md that points the assistant to the documentation inside the next package, and says so in the terminal. It is harmless. Fixed: next dev Generated AGENTS.md for AI Agents shows how to turn it off.
Your Solution Now Looks Like This
DewirideServiceDesk/
├── .gitignore
├── DewirideServiceDesk.slnx
├── Directory.Build.props
├── Directory.Packages.props
├── global.json
├── src/
│   ├── Dewiride.ServiceDesk.Agent/         unchanged
│   └── Dewiride.ServiceDesk.Api/           unchanged
└── web/
    └── agent-chat-ui/                      new: the chat app
        ├── .env.example                    the settings it needs (committed)
        ├── .env.local                      your values (never committed)
        ├── .gitignore                      + !.env.example
        ├── .npmrc                          save-exact=true
        ├── README.md
        ├── app/
        │   ├── favicon.ico
        │   ├── globals.css                 the colors, light and dark
        │   ├── layout.tsx                  new metadata
        │   ├── page.module.css             the welcome page's styles
        │   └── page.tsx                    reads the settings on every request
        ├── biome.json                      migrated to Biome 2.6.6
        ├── instrumentation.ts              checks the settings at startup
        ├── lib/
        │   └── agent-settings.ts           reads and validates the settings
        ├── next-env.d.ts
        ├── next.config.ts
        ├── package-lock.json
        ├── package.json                    exact versions
        └── tsconfig.json
node_modules and .next are left out: they are created by npm and Next.js, and .gitignore keeps them out of source control. In VS Code the new folder shows up in the Explorer. In Visual Studio, Solution Explorer shows the solution's projects; to see the web folder, select the Switch Views button at the top of Solution Explorer and switch to the folder view.
Common Mistakes
| Mistake | What happens | Do this instead |
|---|---|---|
Running create-next-app before mkdir web | The application path is not writable | Create the web folder first |
| Running npm commands in the solution folder | npm creates a package.json in the wrong place, or can't find one | cd web/agent-chat-ui first |
Naming the settings NEXT_PUBLIC_AGENT_URL | The agent's address is copied into the browser's JavaScript and fixed at build time | Keep the names without the prefix |
Reading process.env without await connection() | The values can be read once, while building, and never change | Read settings after await connection() |
Putting real values in .env.example | They end up in source control | Example values in .env.example, your values in .env.local |
Leaving out !.env.example | .env.example never reaches source control, and the next developer doesn't know what to set | Add the line from Step 7 |
Troubleshooting
| Symptom | Likely cause | Fix |
|---|---|---|
| The application path is not writable, please check folder permissions and try again | The web folder doesn't exist | mkdir web, then run create-next-app again (Fixed) |
npm run dev stops with An error occurred while loading instrumentation hook: The agent settings are missing or invalid. and ✖ AGENT_URL must be the full http:// or https:// address of the agent's AG-UI endpoint. | AGENT_URL is missing or isn't a complete http:// address — for example localhost:5180 | Use the full address from .env.example |
| The same message, followed by ✖ AGENT_NAME is required. and ✖ AGENT_WELCOME is required. | There is no .env.local | Copy .env.example to .env.local (Step 7) |
| Biome: The configuration schema version does not match the CLI version | biome.json was written for an older Biome | npx biome migrate --write (Fixed) |
Biome: lint/a11y/noSvgWithoutTitle on public/*.svg | The template's sample images are still there | Delete the public folder (Fixed) |
| ✓ Generated AGENTS.md for AI agents | npm run dev ran inside an AI coding assistant | Keep the file, or set agentRules: false (Fixed) |
npm notice New major version of npm available! | Your npm is older than the newest release | Update npm |
Frequently Asked Questions
Why is the chat app a separate project instead of part of the .NET API?
Because they do different jobs and grow differently. The API hosts the agent; the chat app renders a page and acts as the trusted server in front of the agent. Keeping them apart means either can change, scale or be replaced without the other — and other front ends, such as the Teams app in Part 22, use the same API.
Do I need Node.js 26?
Next.js 16 needs Node.js 20.9 or later. The series uses Node.js 26 because it is the newest long-term support release, and the type definitions you installed match it.
Can I use Tailwind CSS instead of plain CSS?
Yes — run create-next-app with --tailwind instead of --no-tailwind. The series uses plain CSS because the chat page needs only a few styles, and CSS variables make it easy to restyle.
Where do secrets go?
Into .env.local on your machine, and into the hosting platform's settings in Azure — never into .env.example and never into names that start with NEXT_PUBLIC_. None of this part's three settings is secret.
Why does the page wait for a request instead of being built ahead?
Because its content depends on settings that can change after the build. Everything that doesn't — the page's frame — is still prepared ahead and sent at once. That mix is what Cache Components is for.
Conclusion
The Dewiride Service Desk now has a chat app next to its API: a Next.js 16 project with TypeScript 7 and Biome, pinned to the newest versions, with zero known vulnerabilities. It knows its agent only through three settings that are read on every request and checked the moment the server starts, so the same build can serve any AG-UI agent.
Next: Part 6: Stream the Agent Through a Trusted Next.js Route Handler — connect the chat app to the agent, through a server route that decides exactly what reaches the agent and what comes back.
Additional Resources
- Next.js: Installation — create-next-app and what it sets up.
- Next.js: Environment variables —
.envfiles, load order and runtime environment variables. - Next.js: connection — waiting for a request before rendering.
- Next.js: cacheComponents — what Cache Components changes.
- Next.js: instrumentation.js — the
registerfunction. - Biome: Getting started — checking and formatting with Biome.
- Zod: Basic usage — describing and checking data.
