Part 1: Overview, Architecture and Azure Setup
Most agent tutorials stop at a chatbot that tells you the weather. This series builds the kind of agent a company actually pays for: an IT Service Desk agent that answers employees' questions, looks up their tickets and devices, asks a human before doing anything risky, and runs in Microsoft Teams — built step by step with Microsoft Agent Framework and C#.
This is Part 1 of a 14-part series.
- Part 1: Overview, Architecture and Azure Setup (you are here)
- Part 2: Your First Service Desk Agent (coming soon)
- Part 3: Give the Agent Enterprise Tools (coming soon)
- Part 4: Connect an MCP Server (coming soon)
- Part 5: Human Approval for Sensitive Actions (coming soon)
- Part 6: Memory and Persistent Conversations (coming soon)
- Part 7: Guardrails, Audit Logs and Observability (coming soon)
- Part 8: Ticket Triage Workflow (coming soon)
- Part 9: Manager Approval and Checkpoints (coming soon)
- Part 10: Agent Harness — Weekly Problem Report (coming soon)
- Part 11: Host It as an API (AG-UI and Entra ID) (coming soon)
- Part 12: A Plug-and-Play Next.js Chat UI (coming soon)
- Part 13: Deploy to Azure Container Apps (coming soon)
- Part 14: Bring It to Microsoft Teams (coming soon)
You do not need to be an expert to follow along. Every command is explained, every file is shown in full, and every output on this page is real — captured while building the project. In this first part you will not write any code yet. You will understand what you are building and why, then prepare Azure so that Part 2 can start coding straight away.
What You Will Build
The finished agent works for a fictional company called Contoso. Here is what an employee can do with it, and the part of the series where each ability is added:
| An employee says… | The agent… | Added in |
|---|---|---|
| "Hi, what can you help me with?" | Answers as Contoso's service desk assistant, and stays on topic | Part 2 |
| "My laptop is really slow." | Looks up that employee's devices and the knowledge base, suggests fixes, and raises a ticket if needed | Part 3 |
| "What's the status of my tickets?" | Lists the employee's own open tickets — never anyone else's | Part 3 |
| "How do I set up Outlook on my phone?" | Searches Microsoft's official documentation through an MCP server and answers with sources | Part 4 |
| "I'm locked out, please reset my password." | Prepares the reset, then waits for a human to approve it before anything happens | Part 5 |
| Comes back the next day | Remembers who they are and what was already discussed | Part 6 |
| Pastes a password into the chat by mistake | Has it redacted before it reaches the AI model, and every action is written to an audit log | Part 7 |
Behind the chat window, two more pieces run for the IT team:
- An intake workflow (Parts 8–9) turns emails sent to the service desk into categorized, routed tickets. Access requests pause until a manager approves — even if that happens the next day.
- A weekly problem report (Part 10) uses the framework's Agent Harness. That is an agent that plans its own work, keeps a to-do list, and reads last week's ticket exports to find recurring problems. It then writes a report plus draft knowledge-base articles.
Finally, the same agent is put behind a secure API (Part 11), given a simple web chat page (Part 12), deployed to Azure (Part 13) and published to Microsoft Teams (Part 14).
Why Companies Pay for This
An IT service desk is something every company already runs, so the business case is easy to explain:
- Always-on first line. Common questions get an answer at any hour, without waiting in a queue.
- Consistent triage. Every request is categorized and routed the same way, every time.
- Safe by design. Risky actions such as password resets always wait for a human, and the approval is enforced in code, not just requested in a prompt.
- An audit trail. Every action the agent takes is logged: who asked, what ran, what came back.
- It lives where people already work. Employees sign in with their existing Microsoft 365 accounts and chat in Teams or a web page.
- It runs in the company's own Azure subscription. The model, the data and the identities stay in the customer's tenant, and there are no API keys to leak.
How This Series Builds on "Get Started"
Microsoft Learn's Get started with Agent Framework tutorial has seven short steps. This series assumes you have seen the first five, then goes much further. It also covers steps 6 and 7 in depth:
| Get Started step | What it teaches | Where this series takes it |
|---|---|---|
| 1. Your First Agent | Create an agent and stream a reply | Part 2 — a real persona, settings from configuration, a chat loop |
| 2. Add Tools | Give the agent a function to call | Parts 3–4 — enterprise tools with least privilege, plus MCP |
| 3. Multi-Turn Conversations | Keep context with a session | Parts 2 and 6 — sessions saved and restored across restarts |
| 4. Memory and Persistence | Inject context with providers | Part 6 — memory that knows which employee is asking |
| 5. Workflows | Connect steps into a workflow | Parts 8–9 — triage, routing, approvals and checkpoints |
| 6. Agent Harness | Planning, to-dos, file access | Part 10 — a full Harness agent with approvals |
| 7. Host Your Agent | Expose the agent to other apps | Parts 11–14 — API, web UI, Azure and Teams |
If you have not done Get Started yet, do not worry — Part 2 explains everything it uses from scratch.
Architecture
The most important idea in this series is one brain, many hosts. All of the agent's behavior lives in a single class library. Every way of running it — a console window, a web API, a Teams bot — is a thin "host" that reuses that library:
Read it from left to right:
- People use whichever channel suits them — a browser, Teams, or (for the IT team) the back-office tools.
- Hosts receive the request. They contain almost no logic: they only connect a channel to the brain.
- The brain (
ServiceDesk.Agent) holds the agent's instructions, its tools, the approval rules, its memory and its guardrails. It is written once and reused everywhere. - Azure provides the AI model (through Microsoft Foundry), sign-in and identities (Microsoft Entra ID), and a safe place for the few real secrets (Key Vault).
This is also how you would sell it: the brain is the product, and each host is a delivery channel you can add for a customer.
Tech Stack and Versions
Microsoft Agent Framework ships updates almost every week, and some of them change APIs. So this series pins exact versions and tells you which ones each part uses. These are the versions for the foundation:
| Piece | Version used | Notes |
|---|---|---|
Microsoft Agent Framework (Microsoft.Agents.AI) | 1.23.0 | Generally available (GA) |
Foundry connector (Microsoft.Agents.AI.Foundry) | 1.23.0-preview.260928.1 | Preview, because it depends on a preview Azure SDK package |
Azure.Identity | 1.21.0 | Signs your code in with Microsoft Entra ID |
| AI model | gpt-5.6-luna (version 2026-07-09) | Global Standard deployment in Microsoft Foundry |
| .NET SDK | 10.0 | Needed from Part 2 |
| Azure CLI | 2.90.0 | Used in this part |
Later parts add the Workflows and Harness packages (also 1.23.0), the hosting packages (preview), Next.js 16 for the web page and the Microsoft 365 Agents SDK for Teams. Each part lists its exact versions.
Where Settings, Secrets and Identities Live
Enterprise customers will ask how the agent handles credentials, so the rules are set on day one:
| Kind of value | Examples | Where it lives | Why |
|---|---|---|---|
| Settings | Foundry project endpoint, model name, Key Vault address | appsettings.json | They are not secret. Microsoft's guidance is not to store configuration in Key Vault |
| Secrets | The web sign-in client secret (Part 13), a Teams bot secret for local testing (Part 14) | Azure Key Vault | Encrypted, access-controlled and audited |
| Identities | You (az login) on your laptop; managed identities in Azure | Microsoft Entra ID | Nothing to leak and nothing to rotate |
The headline: this project uses no API keys at all. Your code signs in to Azure as you while you develop, and as the app's own managed identity once it is deployed. The Key Vault you create today stays empty until a real secret appears later in the series — that is deliberate, not an oversight.
What This Part Costs
| Resource | Price | Cost of this part |
|---|---|---|
| Resource group | Free | $0 |
| Key Vault (Standard) | $0.03 per 10,000 operations, no monthly fee | A fraction of a cent |
gpt-5.6-luna (Global Standard, short context) | $0.20 per 1M input tokens, $1.20 per 1M output tokens | The smoke test used about 50 tokens — roughly $0.00004 |
Prices are Azure list prices for East US 2 at the time of writing. Check the Azure OpenAI pricing page for your region. A Microsoft Foundry resource with pay-as-you-go deployments has no standing charge — you pay only for the tokens you use.
Prerequisites
- An Azure subscription where you are Owner or User Access Administrator — you will assign yourself a role in Step 5.
- A Microsoft Foundry project with a deployed chat model. If you do not have one yet, follow How to Create a Microsoft Foundry Resource and Deploy a Model and come back. This series uses a deployment called
gpt-5.6-luna; any recent GPT model works. - The Azure CLI (version 2.90 or newer recommended). Install it from Microsoft's guide: How to install the Azure CLI. Check it with
az version. - A terminal. Terminal on macOS, Windows Terminal or PowerShell on Windows, or any Linux shell.
- For Part 2 onwards: the .NET SDK 10 and a code editor such as Visual Studio Code. The development environment guide walks through installing them.
Every command in this part is an Azure CLI command, so it works the same in PowerShell. The one difference: commands split over several lines end each line with \ here. In PowerShell, replace each trailing \ with a backtick (`), or put the whole command on one line.
Step 1: Sign In with the Azure CLI
Open your terminal and sign in. Your code will later borrow this same sign-in to talk to Azure, which is why no API keys are needed:
az login
A browser window opens. Sign in with your work account. Back in the terminal, if you have more than one subscription, the CLI asks you to pick one. The resource group guide shows this sign-in step in detail.
Now confirm which subscription and account the CLI is using:
az account show --query "{Subscription:name, User:user.name, State:state}" --output table
Subscription     User              State
---------------  ----------------  -------
My Subscription  user@example.com  Enabled
If it shows the wrong subscription, switch with az account set --subscription "<subscription name or ID>".
Step 2: Create the Resource Group
A resource group is a folder for Azure resources. Everything this series creates goes into one group, so you can see its cost in one place and delete it all with one command at the end.
az group create --name rg-maf-servicedesk --location eastus2 --tags project=maf-servicedesk
| Part of the command | What it does |
|---|---|
az group create | Creates a resource group |
--name rg-maf-servicedesk | Its name. rg- is a common prefix for resource groups |
--location eastus2 | The Azure region. Use the same region as your Foundry resource |
--tags project=maf-servicedesk | A label for cost reports and for finding everything later |
{
  "id": "/subscriptions/00000000-0000-0000-0000-000000000000/resourceGroups/rg-maf-servicedesk",
  "location": "eastus2",
  "managedBy": null,
  "name": "rg-maf-servicedesk",
  "properties": {
    "provisioningState": "Succeeded"
  },
  "tags": {
    "project": "maf-servicedesk"
  },
  "type": "Microsoft.Resources/resourceGroups"
}
"provisioningState": "Succeeded" means it worked. For more on resource groups, see How to Create a Resource Group in Microsoft Azure using Azure CLI.
Step 3: Create the Key Vault
Azure Key Vault is a locked box for secrets such as passwords and client secrets. Apps read secrets from it at runtime, so secrets never sit in your code or your config files.
First, choose a name. It must be globally unique across all of Azure, 3–24 characters long, and use only letters, numbers and hyphens. Add four random characters to the end, like kv-maf-servicedesk-4224 (that is the name used throughout this series — yours will be different).
az keyvault create \
  --name kv-maf-servicedesk-4224 \
  --resource-group rg-maf-servicedesk \
  --location eastus2 \
  --enable-rbac-authorization true \
  --enable-purge-protection true \
  --retention-days 7 \
  --tags project=maf-servicedesk
| Flag | What it does |
|---|---|
--enable-rbac-authorization true | Uses Azure RBAC to control who can read secrets — the modern permission model and the default for new vaults. Stated explicitly so you know it is on |
--enable-purge-protection true | Prevents anyone from permanently destroying the vault or its secrets before the retention period ends. Microsoft recommends it |
--retention-days 7 | How long a deleted vault stays recoverable. 7 is the minimum, and it can only be set when the vault is created |
The command prints a long block of JSON. To check just the settings that matter, ask for them by name:
az keyvault show --name kv-maf-servicedesk-4224 --query "{name:name, location:location, vaultUri:properties.vaultUri, rbacAuthorization:properties.enableRbacAuthorization, purgeProtection:properties.enablePurgeProtection, softDeleteRetentionDays:properties.softDeleteRetentionInDays}" --output json
{
  "location": "eastus2",
  "name": "kv-maf-servicedesk-4224",
  "purgeProtection": true,
  "rbacAuthorization": true,
  "softDeleteRetentionDays": 7,
  "vaultUri": "https://kv-maf-servicedesk-4224.vault.azure.net/"
}
Note the vaultUri — later parts use it to find the vault.
Purge protection cannot be turned off. If you delete this vault, its name stays reserved for 7 days and the vault cannot be purged sooner. That is the point of the protection — and with a random suffix in the name, it never gets in your way.
Prefer clicking through the Azure portal? Creating Key Vault in Microsoft Azure Portal for Secret Management shows every screen. Choose Azure role-based access control as the permission model.
Step 4: Try to Read the Vault (It Will Fail)
You created the vault, and you probably own the subscription. Surely you can list its secrets? Try it:
az keyvault secret list --vault-name kv-maf-servicedesk-4224
ERROR: (Forbidden) Caller is not authorized to perform action on resource.
If role assignments, deny assignments or role definitions were changed recently, please observe propagation time.
Caller: appid=04b07795-8ddb-461a-bbee-02f9e1bf7b46;oid=22222222-2222-2222-2222-222222222222;iss=https://sts.windows.net/11111111-1111-1111-1111-111111111111/
Action: 'Microsoft.KeyVault/vaults/secrets/readMetadata/action'
Resource: '/subscriptions/00000000-0000-0000-0000-000000000000/resourcegroups/rg-maf-servicedesk/providers/microsoft.keyvault/vaults/kv-maf-servicedesk-4224'
Assignment: (not found)
DenyAssignmentId: null
DecisionReason: null
Vault: kv-maf-servicedesk-4224;location=eastus2
...
Inner error: {
    "code": "ForbiddenByRbac"
}
This is not a mistake — it is the security model working. Azure separates two kinds of permission:
- Managing a resource (create, configure, delete) — this is what Owner gives you.
- Using the data inside it (read a secret, call an AI model) — this needs a separate data role.
The error says exactly what is missing: the action secrets/readMetadata and Assignment: (not found). The same rule will apply to your app later, which is why this series grants every identity only the data roles it needs.
Step 5: Give Yourself the Key Vault Secrets Officer Role
Key Vault Secrets Officer lets you create, read and delete secrets in one vault. You will assign it to yourself, scoped to this vault only.
Assigning a role is a skill you will use again and again, so it has its own step-by-step guide with every portal screen: How to Assign an Azure RBAC Role in the Portal and Azure CLI. Here is the CLI version.
First, get the vault's resource ID. This long path tells Azure exactly where the role applies:
az keyvault show --name kv-maf-servicedesk-4224 --query id --output tsv
/subscriptions/00000000-0000-0000-0000-000000000000/resourceGroups/rg-maf-servicedesk/providers/Microsoft.KeyVault/vaults/kv-maf-servicedesk-4224
Now assign the role. Replace user@example.com with the email you signed in with, and the scope with your resource ID from the previous command:
az role assignment create \
  --assignee "user@example.com" \
  --role "Key Vault Secrets Officer" \
  --scope "/subscriptions/00000000-0000-0000-0000-000000000000/resourceGroups/rg-maf-servicedesk/providers/Microsoft.KeyVault/vaults/kv-maf-servicedesk-4224"
{
  "createdBy": "22222222-2222-2222-2222-222222222222",
  "createdOn": "2026-10-03T15:54:44.737877+00:00",
  "id": "/subscriptions/00000000-0000-0000-0000-000000000000/resourceGroups/rg-maf-servicedesk/providers/Microsoft.KeyVault/vaults/kv-maf-servicedesk-4224/providers/Microsoft.Authorization/roleAssignments/33333333-3333-3333-3333-333333333333",
  "name": "33333333-3333-3333-3333-333333333333",
  "principalId": "22222222-2222-2222-2222-222222222222",
  "principalName": "user@example.com",
  "principalType": "User",
  "resourceGroup": "rg-maf-servicedesk",
  "roleDefinitionId": "/subscriptions/00000000-0000-0000-0000-000000000000/providers/Microsoft.Authorization/roleDefinitions/b86a8fe4-44ce-4948-aee5-eccb2c155cd7",
  "roleDefinitionName": "Key Vault Secrets Officer",
  "scope": "/subscriptions/00000000-0000-0000-0000-000000000000/resourceGroups/rg-maf-servicedesk/providers/Microsoft.KeyVault/vaults/kv-maf-servicedesk-4224",
  "type": "Microsoft.Authorization/roleAssignments",
  "updatedBy": "22222222-2222-2222-2222-222222222222",
  "updatedOn": "2026-10-03T15:54:44.737877+00:00"
}
While writing this series I made this assignment in the portal first — that is where the screenshots in the RBAC guide come from. Running the CLI command afterwards simply returned the same assignment, because Azure never creates a duplicate. It is safe to run twice.
Now run the command that failed in Step 4 again:
az keyvault secret list --vault-name kv-maf-servicedesk-4224
[]
An empty list is the right answer: the vault has no secrets yet, but you are now allowed to ask. If you still see ForbiddenByRbac, wait a minute or two — new role assignments can take up to 10 minutes to reach every Azure region — and try again.
Step 6: Check Your Access to the Foundry Model
The agent's "thinking" happens in an AI model hosted in Microsoft Foundry. A quick reminder of how Foundry is organized:
- A Foundry resource is the Azure resource that owns billing and access.
- A project inside it is where your work lives. It has an endpoint — the web address your code calls.
- A deployment is a named, running copy of a model. Your code asks for it by deployment name.
This series reuses the resource from the Foundry guide: resource foundry-devblogs-exp in resource group rg-devblogs-exp, project proj-devblogs-exp. Replace these names with yours in the commands below.
1. List the model deployments:
az cognitiveservices account deployment list --name foundry-devblogs-exp --resource-group rg-devblogs-exp --query "[].{Deployment:name, Model:properties.model.name, Version:properties.model.version, Sku:sku.name}" --output table
Deployment    Model         Version     Sku
------------  ------------  ----------  --------------
gpt-5.6-sol   gpt-5.6-sol   2026-07-09  GlobalStandard
gpt-5.6-luna  gpt-5.6-luna  2026-07-09  GlobalStandard
This series uses gpt-5.6-luna. It is the lowest-priced model in the GPT-5.6 family, and it handles everything a service desk agent needs.
2. Get the project endpoint:
az cognitiveservices account project show --name foundry-devblogs-exp --resource-group rg-devblogs-exp --project-name proj-devblogs-exp --query "properties.endpoints" --output json
{
  "AI Foundry API": "https://foundry-devblogs-exp.services.ai.azure.com/api/projects/proj-devblogs-exp"
}
3. Check you have the Foundry User role. Just like the Key Vault, being Owner is not enough to call a model. You need the Foundry User data role (it used to be called Azure AI User). First get the Foundry resource's ID:
az cognitiveservices account show --name foundry-devblogs-exp --resource-group rg-devblogs-exp --query id --output tsv
/subscriptions/00000000-0000-0000-0000-000000000000/resourceGroups/rg-devblogs-exp/providers/Microsoft.CognitiveServices/accounts/foundry-devblogs-exp
Then list your Foundry User assignments that apply to it. --include-inherited also shows roles given higher up, such as on the whole subscription:
az role assignment list \
  --assignee "user@example.com" \
  --scope "/subscriptions/00000000-0000-0000-0000-000000000000/resourceGroups/rg-devblogs-exp/providers/Microsoft.CognitiveServices/accounts/foundry-devblogs-exp" \
  --include-inherited \
  --query "[?roleDefinitionName=='Foundry User'].{Role:roleDefinitionName, Scope:scope}" \
  --output table
Role          Scope
------------  ---------------------------------------------------
Foundry User  /subscriptions/00000000-0000-0000-0000-000000000000
In my case the role was already granted on the whole subscription, so it applies to this Foundry resource too. If your list is empty, assign the role exactly like Step 5, but with --role "Foundry User" and the Foundry resource ID as the --scope.
Step 7: Run a Keyless Smoke Test
Before writing any code, prove the whole chain works: your sign-in → Microsoft Entra ID → Foundry → the model. A "smoke test" is a tiny check that something switches on at all.
1. Make a folder for this test and move into it:
mkdir maf-setup-check
cd maf-setup-check
2. Create a file named smoke-test.json in that folder, using any text editor (in VS Code: File → New File, then save it as smoke-test.json). Paste this into it:
{
  "model": "gpt-5.6-luna",
  "input": "In one sentence, what does an IT service desk do?"
}
modelis your deployment name from Step 6.inputis the question for the model.
3. Send it to the model. Run this from the same folder, replacing the project endpoint with yours:
az rest --method post \
  --url "https://foundry-devblogs-exp.services.ai.azure.com/api/projects/proj-devblogs-exp/openai/v1/responses" \
  --resource "https://ai.azure.com" \
  --body @smoke-test.json \
  --query "output[?type=='message'].content[0].text" -o tsv
An IT service desk provides a central point of contact for reporting technical issues, requesting IT services, and receiving support to keep users and systems productive.
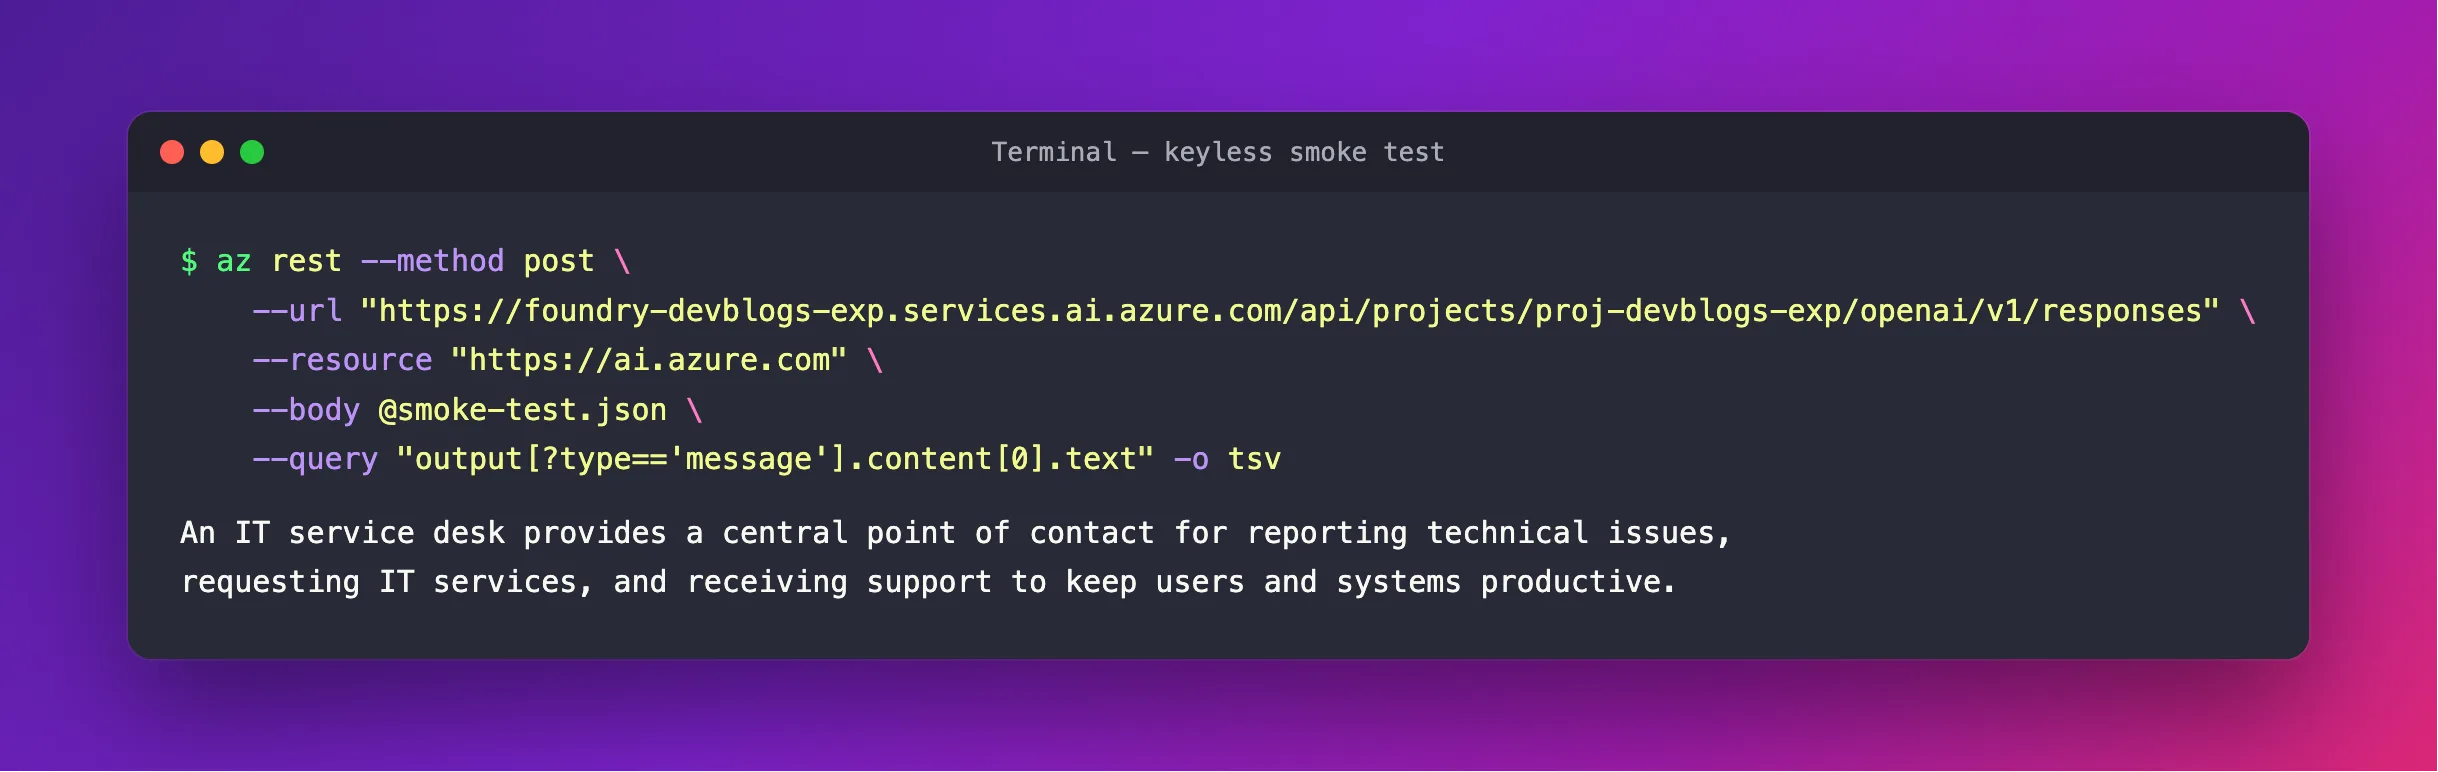
Your model answered — and you never copied an API key. Here is what each part of the command does:
| Part | What it does |
|---|---|
az rest --method post | Sends a web request, signed in as you |
--url ".../openai/v1/responses" | Your project endpoint plus /openai/v1/responses — the Responses API, which the agent framework also uses |
--resource "https://ai.azure.com" | Tells the CLI which service to get a sign-in token for |
--body @smoke-test.json | The @ means "read the request body from this file" |
--query "output[?type=='message'].content[0].text" | Picks just the answer text out of the reply |
-o tsv | Prints it as plain text instead of JSON |
Want to see more than the answer? This version also shows the status, the model and how many tokens the call used:
az rest --method post \
  --url "https://foundry-devblogs-exp.services.ai.azure.com/api/projects/proj-devblogs-exp/openai/v1/responses" \
  --resource "https://ai.azure.com" \
  --body @smoke-test.json \
  --query "{status: status, model: model, answer: output[?type=='message'].content[0].text | [0], totalTokens: usage.total_tokens}" -o json
{
  "answer": "An IT service desk provides technical support by resolving users’ hardware, software, network, and access issues.",
  "model": "gpt-5.6-luna",
  "status": "completed",
  "totalTokens": 43
}
The answer is worded differently each time — AI models are not deterministic — but "status": "completed" is what matters.
What Just Happened
- The Azure CLI asked Microsoft Entra ID for a short-lived access token for
https://ai.azure.com, using youraz loginsession. - It sent your request to the Foundry project with that token attached.
- Foundry checked that you hold the Foundry User role, then passed the request to the
gpt-5.6-lunadeployment. - The model's answer came back, and
--querypicked out the text.
In Part 2, the C# code does exactly the same thing through DefaultAzureCredential — the same sign-in, the same endpoint, the same deployment name.
Write Down These Values
Part 2 needs three values. Copy yours somewhere handy:
| Value | Example from this series | Where it came from |
|---|---|---|
| Foundry project endpoint | https://foundry-devblogs-exp.services.ai.azure.com/api/projects/proj-devblogs-exp | Step 6 |
| Model deployment name | gpt-5.6-luna | Step 6 |
| Key Vault URI | https://kv-maf-servicedesk-4224.vault.azure.net/ | Step 3 |
None of these is a secret, so they will go into a normal settings file. The values that are secret go into the vault.
Your Azure Setup Now Looks Like This
Your subscription
├── rg-devblogs-exp                  (from the Foundry guide)
│   └── foundry-devblogs-exp         Microsoft Foundry resource
│       └── proj-devblogs-exp        project
│           └── gpt-5.6-luna         model deployment
└── rg-maf-servicedesk               (new - this series)
    └── kv-maf-servicedesk-4224      Key Vault (RBAC, purge protection)
        └── Key Vault Secrets Officer  →  you
Cleanup (Only If You Stop Here)
Continuing to Part 2? Keep everything. The whole series builds on this setup.
If you are stopping, remove what this part created. First remove your role assignment on the vault, then delete the resource group (which deletes the vault inside it):
az role assignment delete --assignee "user@example.com" --role "Key Vault Secrets Officer" --scope "<your Key Vault resource ID>"
az group delete --name rg-maf-servicedesk
az group delete asks you to confirm before it deletes anything. Because of purge protection, the deleted vault is kept in a recoverable state for 7 days and then disappears permanently on its own. This does not touch your Foundry resource, which lives in its own resource group.
Common Mistakes
| Mistake | What happens | Fix |
|---|---|---|
| Signed in to the wrong subscription | Resources appear in an unexpected place, or commands cannot find them | Run az account show first; switch with az account set |
Copying the vault name kv-maf-servicedesk-4224 exactly | az keyvault create fails because the name is taken | Use your own random suffix |
| Assuming Owner can read secrets or call models | ForbiddenByRbac from Key Vault, or a refusal from Foundry | Assign the data roles: Key Vault Secrets Officer and Foundry User |
| Using the model name instead of the deployment name | DeploymentNotFound | Use the name in the Deployment column of Step 6 |
| Calling the resource endpoint instead of the project endpoint | The request is rejected or not found | Use the project endpoint ending in /api/projects/<project> |
Running the az rest command from another folder | @smoke-test.json cannot be found | cd into maf-setup-check first |
Leaving trailing \ in PowerShell | PowerShell treats each line as a separate command | Use backticks, or one long line |
Troubleshooting
| Symptom | Cause | Fix |
|---|---|---|
az login opens the wrong account | Your browser is signed in to another account | Run az login again and pick the right account, or use az login --tenant <your tenant> |
ForbiddenByRbac right after Step 5 | The new role has not propagated yet | Wait a few minutes, then az logout and az login |
ForbiddenByRbac even after waiting | The role was assigned to another account or at another scope | Check with az role assignment list as in the RBAC guide; see Fix - Azure Key Vault Secrets - The operation is not allowed by RBAC |
DeploymentNotFound — "The API deployment for this resource does not exist" | The model value in smoke-test.json does not match a deployment | Copy the exact deployment name from Step 6 |
The az rest call is refused as unauthorized | You lack the Foundry User role on the Foundry resource | Assign it as described at the end of Step 6, then wait a few minutes |
az: command not found | The Azure CLI is not installed, or the terminal was opened before installing it | Install it, then open a new terminal |
Frequently Asked Questions
Do I need to know C# for this series?
Basic familiarity helps, but every line of code from Part 2 onwards is explained. If you can follow instructions and copy code into the right file, you can finish the series.
Is Microsoft Agent Framework free?
Yes. It is an open-source library from Microsoft. You pay only for the Azure services your agent uses — mainly the AI model, which is billed per token.
Can I use a different AI model?
Yes. Any recent GPT model deployed in your Foundry project works — put its deployment name in place of gpt-5.6-luna. This series talks to the model through the Responses API, which the newest GPT models need when they call tools.
Why not just use an API key? It would be quicker.
A key is a password that never expires unless you rotate it, and it ends up copied into config files, chat messages and screenshots. Signing in with Microsoft Entra ID means there is nothing to leak. Your access is tied to your identity, and every call is attributed to it. Enterprise customers expect this — and once it is set up, it is no extra work.
Why is the Key Vault empty?
Because the project does not have any secrets yet. Thanks to Entra ID sign-in, the AI model needs no key. The first genuine secrets appear in Part 13 (web sign-in) and Part 14 (Teams bot testing), and they go straight into this vault.
Why a separate resource group?
It keeps everything for this series together. You can see its total cost in one place, give it its own permissions, and delete the whole thing with one command when you are done.
Can I do these steps in the Azure portal instead?
Yes. Use Creating Key Vault in Microsoft Azure Portal for Secret Management for the vault, How to Assign an Azure RBAC Role in the Portal and Azure CLI for the role, and How to Create a Microsoft Foundry Resource and Deploy a Model for Foundry. The CLI is used here because it gives you real output you can compare against.
Conclusion
You now know what you are building and why companies want it: a service desk agent that is safe, auditable and lives where employees already work. You also have a clean, keyless Azure foundation:
- a dedicated resource group,
- a Key Vault with RBAC and purge protection, plus your data access to it,
- confirmed access to a
gpt-5.6-lunadeployment — proven by a real answer from the model, without a single API key.
Next: Part 2: Your First Service Desk Agent (coming soon) — you will create the .NET solution, connect it to Foundry with DefaultAzureCredential, and chat with your agent for the first time.
Additional Resources
- Microsoft Agent Framework overview — what the framework is and how its pieces fit together.
- Get started with Agent Framework — the seven-step tutorial this series builds on.
- Agent Harness — the long-running agent you will build in Part 10.
- Azure Key Vault RBAC guide — the Key Vault data roles in detail.
- az rest reference — calling any Azure REST API with your Azure CLI sign-in.
- How to Create a Microsoft Foundry Resource and Deploy a Model — set up the model this series uses.
- How to Assign an Azure RBAC Role in the Portal and Azure CLI — the role assignment from Step 5, screen by screen.
